Viz World User Guide
Version 17.0 | Published January 24, 2018 ©
Shape to Spline
![]()
This plugin is in the folder: Viz Artist 3: Built Ins -> Geom Plugins -> Maps.
ShapeToSpline is used for creating and rendering curves in 3D space. Curves may be represented as simple lines or have volume. The shape of the volume along the curve (shape of slice) is defined by a 2D geometry that has to be located in a child container (example geometries: Rectangle, Circle, Noggi).
This plugin uses the Shape to Spline Shader plugin for visualization. The shader will be added automatically to the container.
This plugin has three main tabs: General Tab, Curves Tab and Debug Tab.
If using curves from a KML file also see the section on Building Lines from a KML File.
This plugin also works together with plugins such as: Trace It

General Tab

-
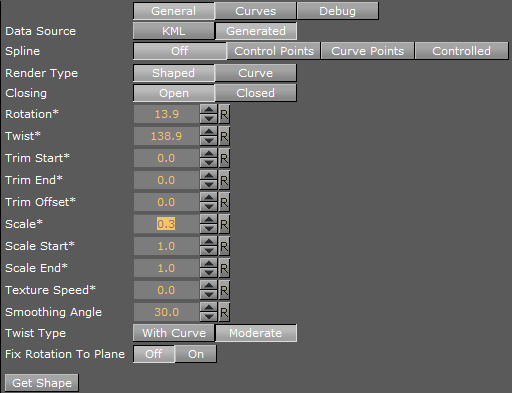
Data Source: The curve shape may come from a KML file or may be generated by the plugin itself (using the settings in the Curves Tab)
-
Spline: The original curve may be smoothed to produce a nicer look.
-
Control Points: The original points serve as control points and a smooth curve will come between them.
-
Curve Points: The curve will pass through the original points.
-
Controlled: The spline option smoothness can be controlled by the Spline Smoothness parameter.
The resolution of all three spline options is controlled by the Spline Tessellation parameter and its value defines the number of additional points between each pair of original ones.
-
-
Render Type:
-
Shaped: The volume is defined by a shape.
-
Curve: The curve is represented by a simple line with dots positioned at the original points.
-
-
Closing: Defines whether the curve is Open or Closed. In closed curves there should be no gap between the start and the end point.
-
Rotation*: Rotates volume shape along the curve.
Note: All parameters marked with *(asterix) are not required for the curve to be rebuilt, so can be animated without any performance impact!
-
Twist*: Rotates the volume shape from the end of the curve.
-
Trim Start*: Trims the curve from the start point.
-
Trim End*: Trims the curve from the end point.
-
Trim Offset*: Offsets the trimmed chunk along the curve.
-
Scale*: Scales the volume shape along the curve.
-
Scale Start*: Scales the volume curve from the start point only.
-
Scale End*: Scales the volume curve from the end point.
-
Texture Speed*: Moves a texture along the curve with defined speed.
-
Smoothing Angle: Defines the maximum angle between the normals of adjacent faces of the 2D shape to be smoothed. For example if the shape is a circle tessellated by 20 corners, the angle between them is smaller than the default 30 degrees and so it will be seen as a smooth cylinder. If the parameter was lowered to say 17 the shape will be rendered faceted. The parameter is mainly used to be able to smooth the curve but be able to preserve sharp corners.
-
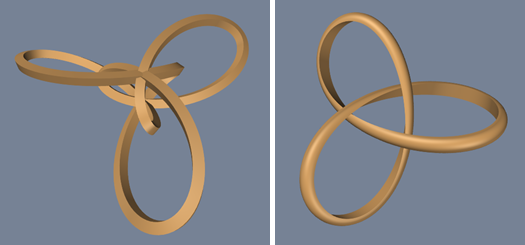
Twist Type: The shape can behave differently while going along the curve. It may twist with the curve or behave in a more moderate way. The Moderate behavior may result in a more pleasant visual result. The image below shows a curve that performs spiral twist (left); the same curve with a shape going along the curve and twisting with it (center); and finally, the same curve with moderate behavior (right).

-
Fix Rotation To Plane: Used for the cases when curve is positioned on a 2D plane and the desired behavior for the rotation of a volume shape is to be stuck to that plane (the upper side will always be positioned 'up' relative to the curve). In such a case, the plane normal should be specified. Note that if the specified normal is parallel to the curve, the result is undefined.
-
Get Shape: Click this button to get the 2D shape from the child container that will define the volume profile of the curve.
Curves Tab

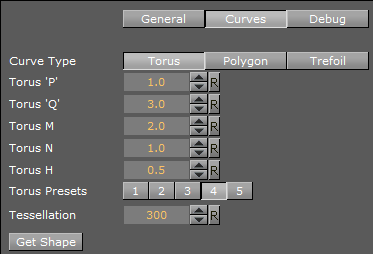
The generated curves are defined in this tab.
-
Curve Type: The curves can be created from three groups of mathematic equations: Torus, Polygon or Trefoil (which is actually a special case of torus).
-
Parameters: The parameters under each Curve Type are the parameters for the mathematical equation defining the curve. Adjust these values to see which effect they have on the curve.
-
Torus Presets: These presets can be used to obtain some nice curves without individually tweaking the parameters.
-
Tessellation: Defines how many points the curve will have.
Debug Tab
This tab contains tools that allow you to better understand the shape, like displaying it in wireframe mode or showing the normal.
Building Lines from a KML File
When the source for the curves is a KML file the KMLReader plugin is used to get the information from the file and dispatch it to the plugin. KMLReader should be placed under valid georeferenced (as KML is a geographic format using lat/long coordinates).
To set up the KMLReader, define the design and holder containers by using the Line Designs & Holder button, set 'Line Split' to 'On', and specify the KML file.
Also consider the following:
-
If the KML file uses Design name, the container with the corresponding design must prefix this name with hash (for example #LineStyle_00). If the default design is used, the container must be named 'Default_Design'.
-
The KML style can define the following properties: width (meters), shape, curvature and textures.
-
To be able to match the shapes to the curves, the name of the container containing the 2D shape geometry under each design has to correspond.
-
Three options can be used to define curvature: Linear, Control Vertex, Curve Point. This will set the spline parameter in the plugin for the appropriate setting.
-
Texture can be used once for the whole curve or as an array to texture each chunk of the curve. In such a case number of textures must correspond to the number of line chunks.