
Viz World User Guide
Version 17.0 | Published January 24, 2018 ©
Region to Texture
![]()
The plugin can be found in the folder: Viz Artist 3: Built Ins -> Container Plugins -> Maps.
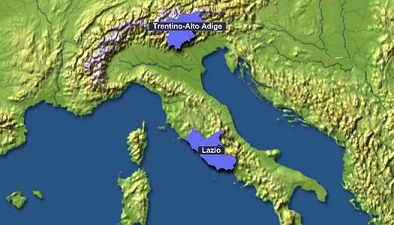
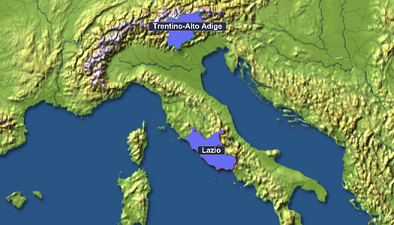
The plugin is used to simulate shadow effects for 3D regions. This is achieved by creating a texture of a region’s contour. The plugin works in two modes: by creating a single texture that applies to all regions in the scene or by creating multiple textures that applies to each individual region.
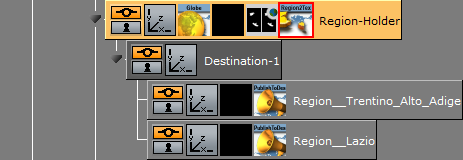
In order to work with a single texture the plugin must be placed on the Region Holder container.
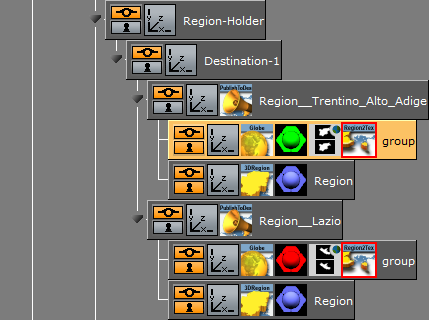
In order to work with multiple textures the plugin must be placed on a container above the 3D Region container.
This section contains information on the following topics:
Properties
-
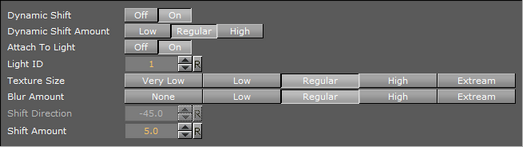
Dynamic Shift: Shifts shadow texture more when Navigator is farther away. This could be used to better see the shadow from farther distances.
-
Dynamic Shift Amount: Sets the extent of the Dynamic Shift.
-
Attach to Light: When enabled, light direction will be considered according to the positioning of the shadow texture. When disabled, Shift Direction allows you to manually set the direction of the shadow.
-
Light ID: Sets the ID of the light to be considered.
-
Texture Size: Sets the size of the shadow texture. The larger the texture, the better is the visible quality; however, it also requires more rendering time.
-
Blur Amount: The extent to which the texture will be blurred to resemble the appearance of a shadow.
-
Shift Direction: Sets the shift direction of the shadow manually and according to the region. This setting can only be used if the Attached To Light setting is disabled (Off).
-
Shift Amount: Sets the amount of shift.
Working with Region to Texture
To create a simple Region to Texture scene
-
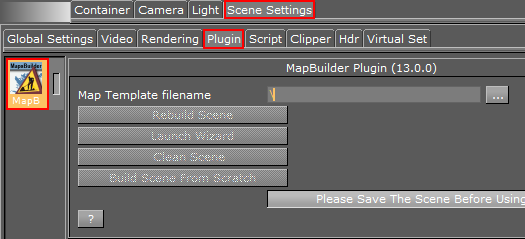
Add the Map Builder Plugin plugin to the Scene Settings
-
Save the scene
-
Open the Map Builder Plugin editor and click Launch Wizard
-
This will open the Map Builder. Note that it may open behind Viz Artist.
-
-
From the Choose Scene Type dialog box select Navigator
-
Click the Base Map
-
This will open the Viz World Maps Editor
-
-
Select a stylesheet for your map and click OK
-
Click the map for Destination 01
-
This will open the Viz World Maps Editor
-
-
Click the Browse Map button (see Map Tool Bar) and select two regions (e.g. Trentino-Alto Adige and Lombardia in Italy) and click OK
-
Click Build
-
Save the map template file to your desired location (e.g. C:\Temp\Maps)
-
Once saved, the map scene will be generated
-
-
For creating a single texture do the following:
-
Navigate the scene tree to the Region-Holder container found under object -> MapAndHops -> GeoReferenceMap -> Holders ->
-
Add the Region to Texture plugin to the Region-Holder container
-
-
For creating multiple textures do the following:
-
Navigate the scene tree and split the Region__<name> container found under object -> MapAndHops -> GeoReferenceMap -> Holders -> Region-Holder -> Destination-n
-
Add a new group as a sub-container of the Region__<name> container
-
Add the Region to Texture plugin to the new group container
-
-
Open the Publish To Design editor and click the Publish and Refresh button
-
To adjust the textures, split the merged region containers and adjust the settings available in the Region to Texture editor