
Viz World User Guide
Version 17.0 | Published January 24, 2018 ©
3D Line
![]()
The plugin can be found in the folder: Viz Artist 3: Built Ins -> Geom Plugins -> Maps.
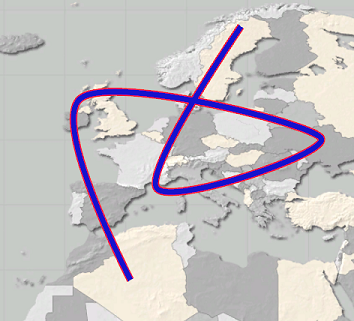
The 3DLine plugin has several graphic uses:
-
Drawing shape lines created in the Map Editor (WME) when selecting a map. A line design is created in the hierarchy and defined in the CWMClient plugin (see 3D Objects and Shapes).
-
Drawing a line between label locations, defined in the WME, from the first label in the list to the last label in the list. Labels in the CWMClient plugin must be enabled when using this mode.
-
Drawing a line along hop points defined in a Navigator scene. The line will follow the path of the Navigator animation between the hops.
-
Drawing a line using a Long/Lat coordinates list. The line will be drawn from the first Long/Lat pair to the last.
Note: When adding a 3DLine plugin to a container, a 3D Line Shader plugin will be added automatically to the same container. The 3D Map Setting Plugin plugin has to be added manually when using the 3DLine plugin with Navigator plugin. The 3D Line Manager plugin is used for controlling and creating 3D Line objects.
Note: Some of the uses of 3Dline plugin as described above requires the use of the Label Manager Plugin plugin in the scene.
This plugin also works together with plugins such as: Trace It
This section contains information on the following topics:
Width
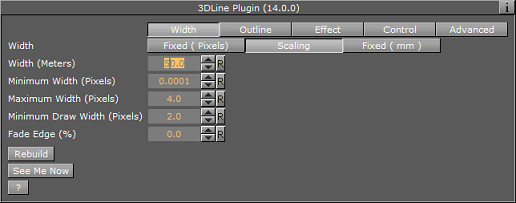
Note: Width parameters, Fixed (Pixels) and Scaling, will effect the line object only if the scene uses a Navigator plugin. In case of a static map, use the Fixed (Mm) to set the line width.
-
Fixed (Pixels)– Uses a fixed width when drawing the line. This parameter will cause the line to maintain the same width regardless of camera position/distance. Available parameters are Width and Fade Edge.
-
Width (Pixels): Sets the line width in pixels.
-
Fade Edge (%): Sets the percentage of softness added to the edges of the line. When set to 0% the line edges will be sharp and when set to 100% the edges will be soft.
-
-
Scaling: When selected, line width will vary according to the camera distance from the map. Available parameters that allow the user to set the line attributes are Width, Minimum Width, Maximum Width, Minimum Draw Width and Fade Edge.
-
Width (Meters): Sets the line width in meters on the map. The closer the camera to the map, the wider the line will be drawn.
-
Minimum Width (Pixels): Sets the minimal line width in pixels. If the calculated line width (according to the Width parameter) is smaller than the Minimum Width value, then the Minimum Width value will be used.
-
Maximum Width (Pixels): Sets the maximal line width in pixels. This value will be used when the camera distance is small and the line width should have been larger than the Maximum Width value (in pixels).
-
Minimum Draw Width (Pixels): Sets the minimal line width in pixels. If the calculated line width (according to the Width parameter) is smaller than the Minimum Draw Width value, and larger than the Minimum Width parameter, then the line will not be drawn.
-
Fade Edge (%): Sets the percentage of softness added to the edges of the line. When set to 0% the line edges will be sharp and when set to 100% the edges will be soft.
-
-
Fixed (Mm)– Uses a fixed width, in viz units, when drawing the line. This parameter will cause the line to maintain the same width regardless of camera position/distance. Available parameters are Width and Fade Edge.
-
Width: Sets the line width in pixels.
-
Fade Edge (%): Sets the percentage of softness added to the edges of the line. When set to 0% the line edges will be sharp and when set to 100% the edges will be soft.
-
-
See Me Now: Calculates (when width is set to scaling) the width needed for the line to be visible at a given distance.
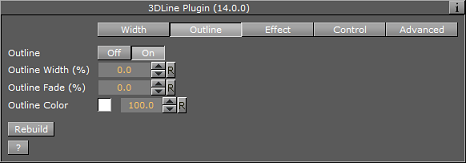
Outline
-
Outline: Enables (On) or disables (Off) outline.
-
Outline Width (%): Sets the width of the outline, as a percentage of the border width, where 0% is the border width.
-
Outline Fade (%): Sets the percentage of softness applied to the outline edges.
-
Outline Color: Sets the color of the outline and the Alpha value of the outline.
Note: The color palette is visible in all tabs of the editor, but it will only effect the outline color.
-
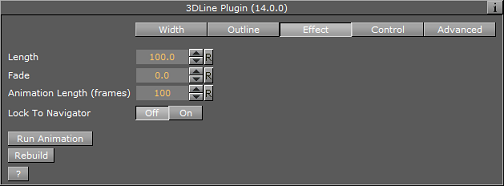
Effect
The Effect tab is used for creating an animation on the line size. After the line object is created it can be animated by setting keyframes on the length parameter.
-
Length: Sets line length, where 100 is 100% of the line length.
-
Fade: Defines the softness that will be added to the line edge as the length animation advances. When length is 100 the end of the line will not be affected by the Fade parameter.
-
Animation Length (frames): Sets the default length of the reveal animation in frames (relates to the Run Animation option) and allows you to run a simple reveal animation by pressing the Run Animation button (used by 3D Map Telestrator)
-
Lock To Navigator: When using the 3D Line plugin with a Navigator plugin, the line will animate with the Navigator animation. The starting point of the line will be the first hop location and the ending point of the line will be the last hop position. The line will animate as the hop animations are playing.
-
Run Animation button: will play the animation of that particular line
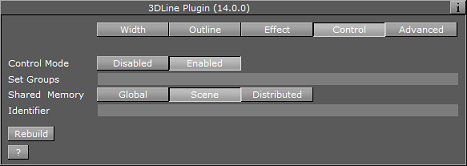
Control
The Control tab is used for defining external control parameters. External control is done by the 3DLineControl plugin.
-
Control Mode: Defines whether the object is externally controlled or not.
-
Set Groups: Defines the groups that the current 3DLine object is a member of. The same group names should be used in the 3DLineControl.
-
Shared Memory: What type of shared memory (viz 3 only) can be used in order to control the lines
-
Identifier: Shared memory name and general purpose Identifier for this line. Can be used to control the line or to share a display list data between scenes.
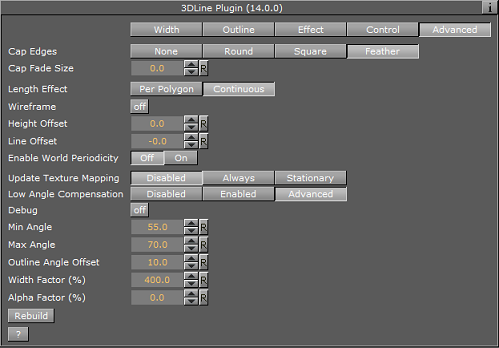
Advanced
-
Cap Edges: Sets the line’s cap shape:
-
None: The line edges will not change.
-
Round: Adds a a filled round shape to the line caps,
-
Square: Adds a filled square shape to the line caps,
-
Feather: Adds a feather shape to the line caps, An additional parameter will be enabled when Feather is selected: Cap Fade Size.
-
-
Length Effect: Determines whether the separate polygons in the line will animate at the same time (Per Polygon) or one after another (Continuous).
-
Wireframe: When enabled (On), the 3DLine object will be drawn as a wireframe.
-
Height Offset: Sets the height offset for the 3D Line object on the map (on the fly).
-
Line Offset: Sets the line offset for the 3D Line object on the map (on the fly).
-
Enable World Periodicity: When enabled (On), a line object that crosses the date line will continue from the other side of the map. When disabled (Off), it will continue across the date line.
-
Update Texture Mapping: Should the texture coordinates be updated based on line width. You have the following options; Disabled, Always or Stationary. Stationary will only update the texture mapping when navigator is moving.
Note: When enabled, symbols are easier to control, but as line width changes the cause texture changes which might be disturbing.
-
Low Angle Compensation: Lines become too thin at low camera angles as a result of the perspective distortion. When that happens, there are not enough pixels to support a smooth, anti aliased line, and the lines look jagged and aliased. This mode compensates for that by both widening the lines and applying transparency when they are viewed at too low angles. When set to Advanced, the following additional parameters are available:
-
Debug: Enables debug messages in the console.
-
Min Angle: If the angle between the camera and the ground below the line is lower than "Min Angle", then line width and transparency will not be changed.
-
Max Angle: If the angle between the camera and the ground below the line is higher than "Max Angle", then the line width is increased by the "Width Factor" and the transparency is scaled by the "Alpha Factor". If the angle is between Min Angle and Max Angle then the width and transparency are interpolated.
-
Outline Angle Offset: For outline width, apply an offset to the angle calculation in order to make the outlines affected at higher angles than the lines themselves
-
Width Factor (%): A factor for modifying line width when applicable.
-
Alpha Factor (%): A factor for modifying line alpha when applicable.
-
Rebuild
The Rebuild button triggers the plugin to redraw the lines according to the plugin parameters. Some parameters are updated as the parameters are changed and do not require a rebuild command but it is good practice to rebuild the lines after setting the parameters.