
Viz World User Guide
Version 17.0 | Published January 24, 2018 ©
3D Line Manager
![]()
The plugin can be found in the folder: Viz Artist 3: Built Ins ->Container Plugins-> Maps-Man.
The 3DLineManager plugin is used for controlling and creating 3D Line objects. The plugin uses a 3D Line design to create lines according to the defined settings. The plugin allows you to build 3D Line in four different modes: Navigator, Command, from WME and from a Shape file.
Properties
-
Design: Sets the 3DLine design container that is used for building lines. The design container should be built with a 3D Line object and a material. No special naming convention is required.
-
Target: Defines the container to be used as the parent container for the line containers:
-
Me: The 3D Line objects will be built under the current container (holding the 3D Line Manager plugin).
-
Next: The 3D Line Objects will be built under the next container (next container in the tree and at the same level as the 3D Line Manager container).
-
Down: The 3D Line objects will be built under the first child container.
-
Container: The 3D Line objects will be built under the container dragged into the Target container place holder.
-
-
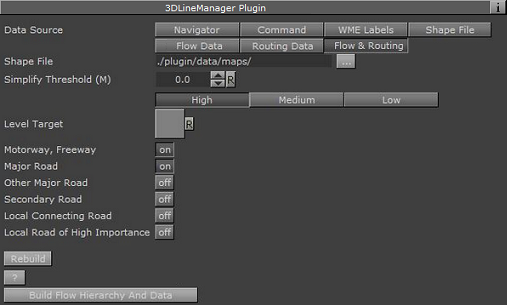
Data Source: Defines the source from which the 3D Line objects will be created:
-
Navigator: A 3D Line object will be created using the hop locations defined in the Navigator plugin. The line will start at the first hop location and end at the last hop location. Note that when using the Navigator as the data source, the 3D Line Manager should reside under the Navigator container.
-
Command: The 3DLine object will be created from a list of Long/Lat pairs defined by the user, for example: MyLine: 0,0 0,50 30,30
-
WME labels: Allows you to build a line between locations chosen in Map Editor Classic (WME) as WME labels (no line will be built if WME labels are not defined). Also, the WME source container must be specified and refresh should be applied by clicking the Refresh button in CWMClient (Rebuild button is disabled in this mode). The line between the labels starts and ends in the order they where added (as seen in WME’s Map Details list). The first label location is the label at the top of the list, and the last is at the bottom of the list. Rearrange the list to create a new order.
-
Shape file: Uses a shape file as data source.
Note: In WME Labels option, the 3DLineManager should be attached to the CWMClient plugin container. The Labels in the CWMClient plugin must be enabled.
-
Flow Data / Routing Data / Flow & Routing: For the selected data source, define the Simplify Threshold and FRC level. Simplify Threshold reduces the resolution of the data from the shp file selected. FRC level (High/Medium/Low) sets the FRC level, for example, High would draw highways and major roads.
-
-
Spline: Enables you to convert a line to a smooth curve in different modes:
-
Off: no curve, straight line chunks between data points.
-
Control Points: line is represented as smooth curve that passes between data points.
-
Curve Points: line is represented as smooth curve that passes through data points.
-
Controlled: same as Control Points, but smoothness (i.e. distance of the line from original points) can be controlled.
-
-
Set Navigator Hops: Enables the scene to do a hop animation between the labels.
-
The animation can be altered by using the Trace It plugin by setting and enabling a different Trace Camera, Lock Pan, Lock Tilt and Lock Distance mode/parameter (e.g. creating a flyby/flyover animation).
-
In this case the Trace It plugin is added as a sub container of the Default_Design container (defines the 3D line’s default design) which is resides under the Map Start (M-S) container. Once changes are made you simply republish the design (see Publish To Design plugin).
-
-
Exclude Hops: Excludes the hop animation for the following labels; None, First, Last or First & Last. Manual Shift allows you to define which destination that should be your starting point (limited to a selection of 30 destinations).
-
Set Hops Height: Allows you to disable or enable the Hops Height setting.
-
Hops Height: Enables you to define the height of the hops in Viz units.
-
-
Rebuild: This button will force a rebuild on the cache files generated for the selected shp file.
-
Build Hierarchy and Data: This button will build base scene hierarchy for traffic flows scene type and generate needed cache data from the selected shp file.