
Viz World User Guide
Version 17.0 | Published March 11, 2019 ©
Using the Map Name Editor
This section describes how to use the Map Name Editor. See the following sections for more information:
To create a new language file
-
Start Windows Explorer
-
Create a folder named Languages in the following location:
-
32 bit: C:\Program Files\Curious Software\Curious World Maps\SharedData
-
64 bit: C:\Program Files\vizrt\Viz World\SharedData
-
-
In the folder you can either place an empty file called <my language>.mdx or copy and rename UserNames.mdx (if you already have changed a lot of the label names)
-
Start the Map Name Editor executable found under
-
64 bit: C:\Program Files\vizrt\Viz World
-
-
Edit the new file
-
Your language will be added as a new column
-
-
Click Save Changes
To add language specific translations
-
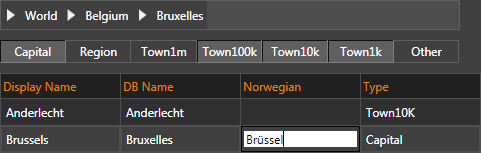
Start the Map Name Editor
-
Connect to your Viz World Server
-
Right-click and select your language column representing your custom language file
-
Search for the name that needs a language specific translation
-
Enter the translation and click Save Changes
To use the new language file
-
Start the Server Configuration tool and log on to your Viz World Server
-
Select the Maps’ Display section
-
Set the Alternate Label Display’s first option to be M-Language (multi-language)
-
Start for example Viz Artist, create a maps scene and launch the Map Editor (WME)
-
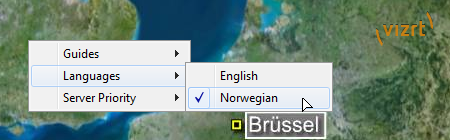
Right-click the map area and select your language from the appearing context menu
Note: Setting a language in WME does not affect the language used in Viz Artist.
-
For Viz Artist add/edit the VizWorld.ini file under C:\ProgramData\Vizrt\viz3\Maps and add the following entry:
language=[my Language ID] -
or (dynamically) send the following command to Viz Engine:
MAPS LANGUAGE [my Language ID]Note:my Language ID refers to the order in the list of languages, English = 0, Norwegian = 1etc. See the above screenshot.
See Also