Viz Artist User Guide
Version 3.14 | Published October 30, 2020 ©
Time Displacement

Time Displacement allows you to use a gray-scaled alpha image for setting animation time offsets for all the objects in a group container. This is typically useful if you want to create some kind of randomized animation effect or that should follow a certain pattern.
What the function does is to create links between the animated containers and the pixels of the gray-scale image and then use the alpha level of each pixel to set the offset of the containers. The range from 100% alpha to 0% alpha on the pixels sets the offset level. By default 100% alpha sets no offset and 0% sets maximum offset.
Note: This plug-in is located in: Built Ins -> Container plug-ins -> Arrange
Time Displacement Properties

-
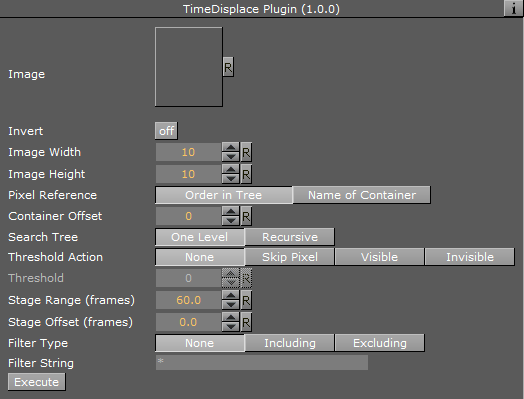
Image: Drag the alpha image you want to use for creating the containers offsets onto the drop zone here.
-
Invert: Inverts the link between the image pixels and offsets. 0% gives no offset and 100% gives maximum.
-
Image Width: Sets the height of the alpha image.
-
Image Height: Sets the height of the alpha image. The product of Image Width multiplied with Image Height should normally be the same as the number of containers that are to be used in the function.
-
Pixel Reference: Defines the way the pixels should be associated to the animated containers. You can choose between:
-
Order in Tree: Decides how the pixels should be associated.
-
Name of Container: Sets the order in which the containers are associated with the pixels.
-
-
Search Tree: Sets the search level of the function, when it decides which Sub-Containers to include in the function:
-
One Level: Includes only the first level of sub-containers in the function.
-
Recursive: Includes all levels of sub-containers in the function.
-
-
Threshold Action: Executes if the pixel value is lower than the threshold value.
-
None: Does not perform an action.
-
Skip Pixel: Skips the pixel in the offset process.
-
Visible- Makes objects visible when the pixel value is lower than the threshold value.
-
Invisible- Makes objects invisible when the pixel value is lower than the threshold value.
-
-
Threshold: Sets the threshold value where one of the above selected actions are performed.
-
Stage Range (frames): Sets the range of the offset distribution. A high value results in bigger differences in offset between containers that are associated with different pixel alpha values.
-
Stage Offset (frames): Adds a static offset value to all containers.
-
Filter Type- Filters the containers in or out. Available options are; None, Including and Excluding.
-
Filter String- Sets the name of the containers that are to be included in the filter. Use of asterisks is supported.
-
Execute: Starts the operation.
To Set Animation Time Offsets with a Grayscaled Alpha Image

-
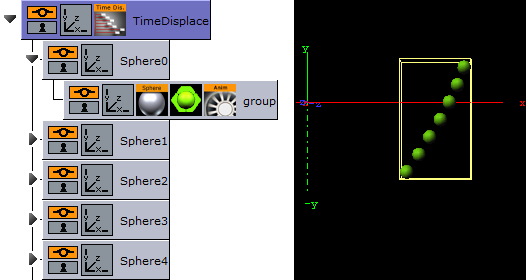
Add a group to the scene tree and name it TimeDisplace, and the TimeDisplace plug-in to it.
-
Create a Sub-Container of the TimeDisplace container and name it Sphere.
-
Create a new group container as a Sub-Container of Sphere.
-
Add a Sphere geometry plug-in and material to the group container.
-
Animate the group container from Position X -200.0 to 200.0.
-
Make six copies of the Sphere container under the TimeDisplace container.
-
Add the Grid Arrange plug-in to the TimeDisplace container.
-
Open the Grid Arrange editor and set Number of Rows to 6 and Row Offset to 30.0.
-
Optional: Remove the Grid Arrange plug-in.
-
Add the Corena plug-in and rename the containers to Sphere, starting at index 0. This allows you to filter out specific containers using the TimeDisplace filter.
-
Optional: Remove the Corena plug-in.
-
Open the TimeDisplace editor and add an alpha image to the Image drop zone.
-
Click Execute.

-
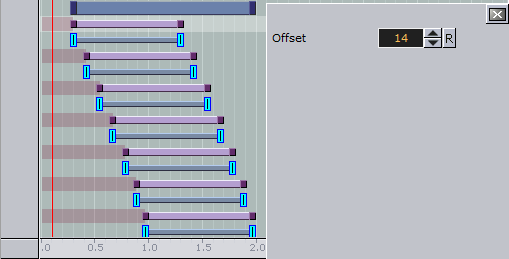
Click the Stage to see the offsets being added to the containers.
-
Run the animation to see the time offset in action!
See Also