Viz Vectar User Guide
Version 1.0 | Published May 07, 2020 ©
Title Pages
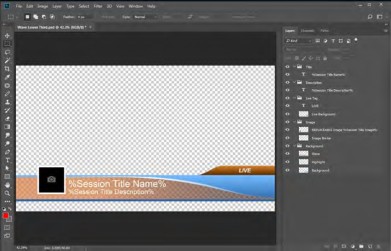
You can create title pages and graphics in Adobe Photoshop® and display these as images in (for example) as DSK. Loading a .psd file created in Photoshop into a Media Player or Buffer automatically compiles an editable title page (CGXML) file that works just like the Basic title pages supplied with Vectar. The text remains editable, and embedded images can be marked replaceable too.
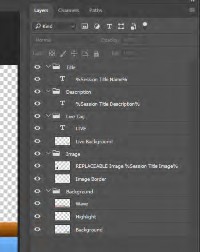
To make an image replaceable, add the string REPLACEABLE to the layer’s label in Photoshop. You can even assign a DataLink key to the layer in the same fashion, naming the layer in the format REPLACEABLE %twitterpic%, for example (without the quotation marks, of course).
A single title page can actually be used to display a whole theme pack of CG elements, and likewise (using Data Presets) a single title page can be updated to show individual player statistics for a whole team, and so on, with a single click.
Editing Title Pages
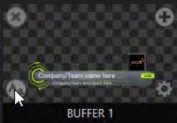
On mouse-over in a Media Player or Buffer, title page icons display a text edit gadget in their lower-left corner.
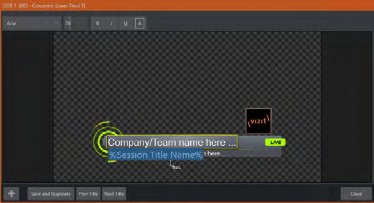
Click this button (or select Edit Title in the icon context menu) to open the pop-up Title Page Editor. Opening the Title Page Editor during playback is permitted, so that Title Page content can be edited even during display (changes are detected and shown immediately).
Tip: The panel can be re-sized by dragging its lower-right corner, and re-positioned by dragging its titlebar.
When you move the mouse over text in the Title Page Editor’s preview pane, a white bounding-box appears. If you click once inside the box it turns yellow (), indicating the text object is selected, and a text edit field opens.
Tip: When the box is yellow the text can be nudge either a pixel at a time using ALT + ARROW keys or five pixels at a time using SHIFT + ALT + ARROW keys. Press ENTER or click outside the box to complete editing operations or press TAB to advance to next entry field (press SHIFT + TAB instead to jump to the prior text field).
Note that the cursor keys – that is, the left/right and up/down arrows – allow you to navigate between text fields on the current title page. (If the text edit box is open, left/right arrows change the edit point as usual, but up/down closes the edit box, and subsequent cursor key actions move to the next object.)
Tip: A red line under a character or word indicates the spell-checker is questioning its spelling. Right click the word to open a menu suggesting alternatives. Click any entries shown if you wish to update the original.
Header Tools
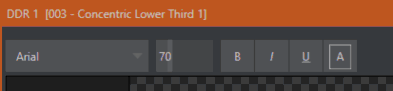
The header of the Title Page Editor holds an assortment of text attribute controls. These include a Font selector menu, numeric Size control, and Bold, Italic, Underline and ALLCAPS switches.
Tip: Layer and Data Preset controls may also appear here when editing a title page from a Buffer.
Footer Tools
![]()
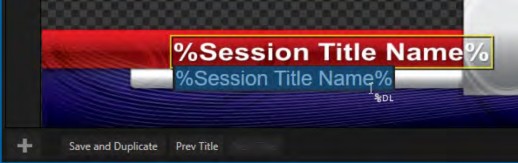
You can click Close when finished with the current edit, but often you’ll find the Save and Duplicate feature handy. Click it to store your edits to the current title page, create a clone of item in the playlist, and load the new page for editing. This is a great way to quickly produce a number of matching pages.
Tip: Press CTRL + S on the keyboard to perform this save and duplicate operation without using the mouse. Similarly, PageUp and PageDown keys perform Previous and Next operations. The Prev and Next Title buttons let you store your changes and move to another title page in the playlist without the tedium of closing the Title Edit pane.
Stand-in Images
Images embedded in Title Pages may be locked, or they may be editable stand-ins. When you roll the mouse over an embedded image and a white border is displayed around the image, the image is a stand-in. Click a stand-in to open the Media Browser and select a replacement image file (hold SHIFT while clicking to use the system file explorer instead).
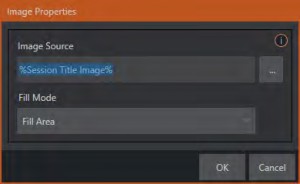
If, instead, you right-click a stand-in image, a context menu lets you select one of several optional methods of fitting the source image to its frame. Choosing Stretch causes the image to completely fill the frame. Fill Area retains the interested image’s original aspect, cropping if necessary to fit inside the frame. Show All Image also retains the original image aspect but fits the entire source image inside the frame (which may result in pillar-boxing or letter-boxing). This menu also allows you to open the Image Properties panel. It provides the same set of Fill Mode options but adds an Image Source box supporting direct entry.
DataLink
Both text and images on title pages accept DataLink keys as input. The Title Editor tells you which entry boxes accept DataLink keys by showing a custom %DL mouse pointer.
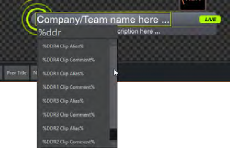
Making key entry even faster and easier to use, all available DataLink keys are shown in the drop-down menu as soon as you enter a % sign into an entry box (key names are in the format %key name%). If you continue typing, the list shown is filtered to show only relevant key names. A line of text or image on a title page that has been set to a key name will be automatically replaced by the current value assigned to that key when the page is displayed.
There are endless uses for DataLink, and many ways to supply and update values assigned to DataLink keys. For just one example, refer to Manage in The Session Page. And do not fail to take advantage of the power and convenience of the DataLink™ web browser extension, which makes it easy to populate your title pages over the network from a web browser running on virtually any platform.