Viz Vectar User Guide
Version 1.0 | Published May 07, 2020 ©
PTZ Control
Once primarily used in security applications, robotic or PTZ (pan, tilt, zoom) cameras are appearing on the production scene in ever increasing numbers. The PTZ implementation makes it easy to operate multiple (supported) cameras from the Live Desktop or a control surface.
Any external Switcher input can be configured as a PTZ cam, controlled directly from the Live Desktop or using a control surface. In addition to pan, tilt and zoom control, you can control White Balance settings, Focus, Iris (or brightness), and Animation Speed (travel speed) settings for your PTZ cameras. A convenient and very visual PTZ preset system is included, too, allowing you to lock in your shots and access them quickly.
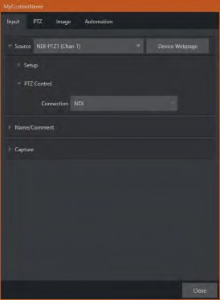
Input Configuration (PTZ Tab)
All of the controls and features just mentioned are located in the Input Configuration panel, specifically its first tab, which is labeled Input ( and ).
Connecting
A few steps are required before you can control a PTZ camera.
-
First, connect the camera’s output to a Switcher input (see Input Configuration).
-
Next you must configure the control connection to the camera by selecting its type. Since the default Connection type in this group is NDI, you can skip this step for an NDI camera, which eliminates all of the settings you would otherwise need to configure.
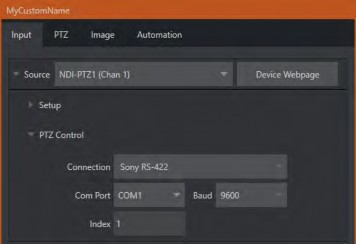
For non-NDI sources, use the Connection menu to choose the correct PTZ protocol for your device, and continue to enter other data as required for that protocol. Having performed these steps, you are ready to expand and use the PTZ Presets control group in the same panel, discussed next.
PTZ Operations
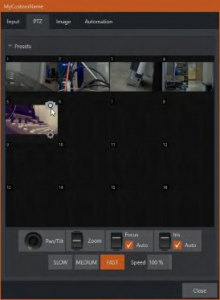
In this group, a set of manual Pan/Tilt, Zoom, Focus and Iris controls sits just beneath a large PTZ Preset bin. Drag the mouse on these controls to make manual adjustments. Speed controls, including SLOW, MEDIUM and FAST presets along with a numeric speed control allow you to modify the speed with which presets are applied.
Options

Expand the Options control below the PTZ speed group to access White Balance options (which may vary based on the camera model connected) and an Invert menu that lets you reverse the effect of joystick operations.
Note: Invert settings affect the related controls both in the Live Desktop and on hardware control surfaces.
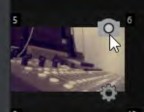
Presets
The Preset Bin shows sixteen thumbnail icons for the currently PTZ camera. Click a preset to select it, and the camera automatically begins moving to the new position.
To configure and store a preset:
-
Use the Position, Zoom and Focus controls mentioned in the previous section to navigate to the desired camera angle, etc.
-
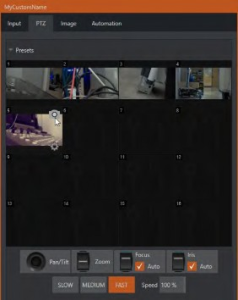
Then move the mouse over the preset icon you wish to store (or update), and click the Snapshot (camera) gadget that pops up at upper-right corner of the icon.
Tip: Hold SHIFT when clicking the Snapshot icon to update the representative thumbnail image without modifying the preset already stored in that slot.
-
(Optional) Click the Configuration gadget (gear) to open a Properties dialog that lets you assign a different Alias and Comment to each preset (these entries also provide values for DataLink keys that can be used in the usual ways.)
Tip: See Scopes to learn how to display and use presets in your multiviews.
PTZ and the Control Surface
Pan, tilt, zoom control, and preset selection for connected robotic cameras are also directly supported on some Vizrt hardware control surfaces. See Control Surfaces for details.