Viz Vectar User Guide
Version 1.0 | Published May 07, 2020 ©
Configuring Video Inputs
Source selection settings for video inputs can be accessed in the Live Desktop’s monitoring section, so let’s spend a few moments there before continuing.
The individual monitor viewports on the Live Desktop can be flexibly assigned to different Switcher sources and outputs. Complete monitor layouts can be stored and recalled using tools located in the Workspace menu, located in the Dashboard across the top of the screen. Now, though, let’s see how to configure video sources.
-
Click Workspace in the Dashboard (at the top of the Live Desktop).
-
Monitoring layout presets are listed at the top of the menu as Interface A through D. Select the layout labeled A under Multiview 1 (if it isn’t already check-marked).
-
By default, this default monitoring pane shows individual viewports for the various Switcher sources.
-
To continue to assign sources, you could select Configure from an input monitor’s (right-click) context menu, but let’s take a different approach. Move your mouse over the viewport for INPUT 1 and notice that a Configure button (gear icon) appears at lower right. Click this to open a tabbed settings panel.
Tip: As a quicker way to access the Input configuration panel, double-click the viewport; or, for a touch-screen, tap the viewport with two fingers.
-
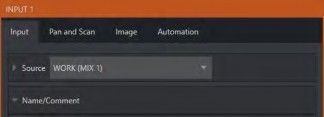
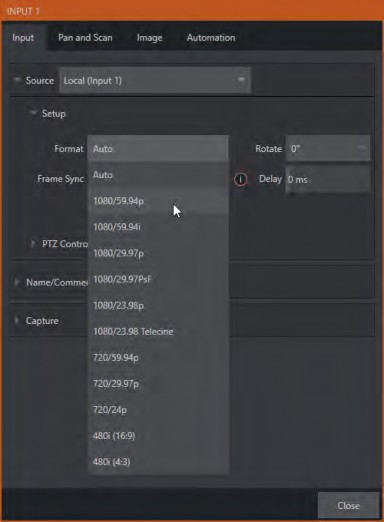
Click the Source drop-down menu to see a list of sources you can select. SDI inputs and Black are listed first under the Local heading. Additional NDI sources discovered on your network are grouped below under source device headings. For NDI sources, selecting an entry completes the connection. If you choose an SDI source, further selections may be required.
-
The Format menu defaults to Auto-Detect. Generally, this option suffices. Otherwise, for some SDI sources you can manually select the correct Format.
-
Close the Configuration panel for now (click Close, or click outside the panel to close it).
-
Continue to configure additional video sources in the same manner.
We’ll look at the other options and settings later, but at this point you should be able to view the video inputs you have configured on the Live Desktop multiview monitors.
Configure a Video Router Input
Right-click on the Switcher row button for the video input where the router is connected (see Input Connections for more detail) to select which router input will be transmitted to the Switcher input.