Viz Vectar User Guide
Version 1.0 | Published May 07, 2020 ©
Control Schema
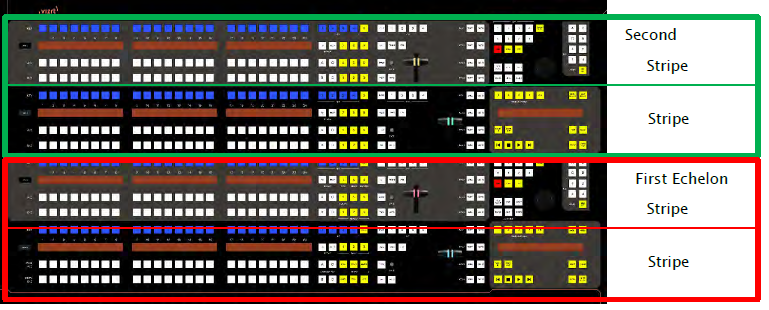
Generally, you can think of the various control groups provided as being organized into horizontal stripes. In turn, two stripes are paired together in upper and lower echelons, as shown above.
Stripes and Echelons
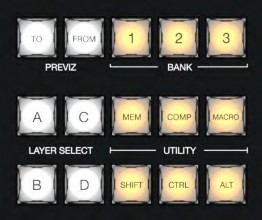
Broadly speaking, the control layout of the all stripes is quite similar, and the second echelon is nearly identical to the first. However, the first echelon is unique in providing several common controls (e.g., SHIFT, ALT, BANK, etc., conveniently locating these right under your hands at rest.
This being so, it’s not hard to see that the first echelon – that is, the one nearest the operator – can be considered dominant, even vital, while the second echelon plays a supporting role.
We’ll cover the functions assigned to these controls in due course but, for now, let’s continue our exploration of the control surface topography by looking at stripe organization, and the distinctions between odd and even stripes.
Control Columns
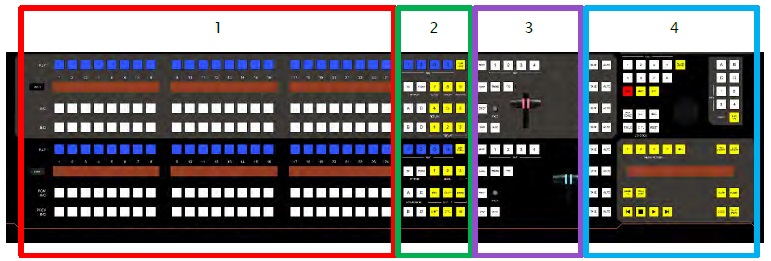
Controls in each horizontal stripe can be grouped into the following four columns:
-
Selection: Video sources.
-
Command: Control operations and options.
-
Layers & Effects: Transitions and layer visibility.
-
Joystick & Media: Layer position and PTZ control, plus Media Player control.
In the sections that follow, we’ll look at each the functions of controls in each of these columns more closely, but first, let’s sidestep briefly to talk about displays.
Displays
Both Viz Vectar control surfaces feature helpful indicators and system feedback by means of illuminated displays.
-
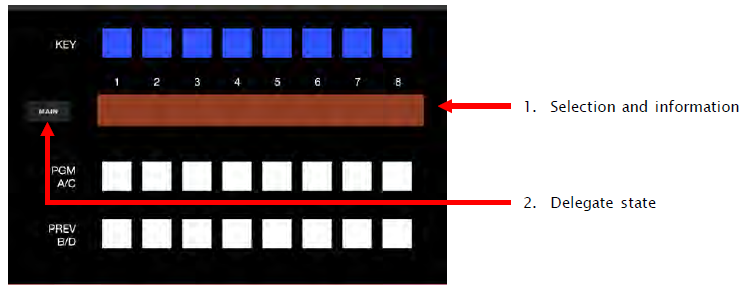
An OLED display positioned just left of each stripe normally shows the delegate state for the associated stripe. For example it may show that the stripe has been delegated (or assigned) to control the Main switcher, one or more M/Es, or for one of Vectar’s supplementary routed output.
-
The blue LCD panels spanning each stripe just below the KEY row show labels identifying the selection that would result from pressing a button in the same column.
Tip: The numbers 1-24 are silkscreened above the LCD panels as a further aid when making selections.
-
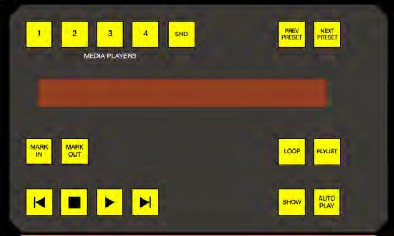
Another LCD strip appears in the Media Players group at right in the first stripe, and third for the four stripe surface.
Item 1 above raises the question, How do I delegate a stripe to control the desired module? Let’s go on to talk about this, beginning by discussing what delegating means in the context of a control surface.