
Viz Vectar Plus User Guide
Version 1.3 | Published November 18, 2022 ©
Working with Title Pages
Viz Vectar Plus comes with multiple title template pages, each individually styled. They can be edited even while live. Several pages include replaceable images already embedded.
This section explains how you can create your own custom title template pages.
-
Loading a .psd file created in Photoshop into a Media Player or Buffer automatically compiles an editable title page (CGXML) file that works just like the basic Title pages included with Viz Vectar Plus.
The text remains editable, and embedded images can be marked replaceable too. -
A single Title page can be used to display a whole theme pack of CG elements, and similarly (using Data Presets) a single title page can be updated to show, for example, individual player statistics for an entire team, with a single click.
Creating a Title Page
You can always create static Title pages and graphics in editors like Adobe Photoshop® and display them as images in, for example a DSK.
However, it is usually more useful to create an editable Title page in Photoshop that, once loaded and compiled as a native CGXML file, works just like those supplied with your Viz Vectar Plus system.
The text remains editable, and embedded images can be marked replaceable.
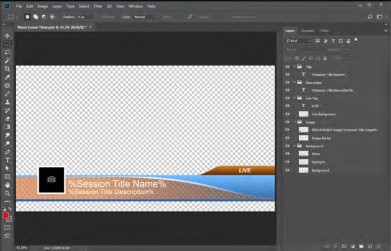
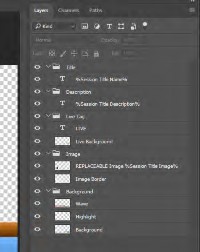
To make an image replaceable
-
Add the string REPLACEABLE to the layer’s label in Photoshop.
-
You can even assign a DataLink key to the layer in the same fashion, naming, for example, the layer in the format REPLACEABLE %twitterpic%.
To edit a Title page
-
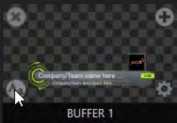
Mouse-over in a Media Player or Buffer, Title page icon display a text edit gadget in their lower-left corner.
-
Click (or select Edit Title in the icon context menu) the icon to open the Title page editor.
Tip:
-
The editing panel can be re-sized by and re-positioned.
-
Opening the Title page editor during playback is permitted, so Title page content can be edited even during display (changes are detected and shown immediately).
-
-
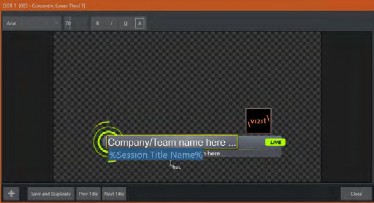
Move the mouse over text in the Title page editor preview pane.
A white bounding-box appears. Click once inside the box. It turns yellow, indicating the text object is selected, and a text edit field opens.
-
Cursor keys (left/right and up/down arrows) allow you to navigate between text fields on the Title page.
-
When the text edit box is open, left/right arrows change the edit point as usual, but up/down close the edit box. Cursor keys then move to the next object.
-
You can nudge either a pixel at a time using ALT + ARROW keys or five pixels at a time using SHIFT + ALT + ARROW keys.
-
Press TAB to advance to next entry field. SHIFT + TAB jumps to previous field.
-
Press ENTER or click outside the box to complete editing operations
-
Stand-in and Modifiable Images
Stand-in Image
Images embedded in Title pages may be locked, or they may be editable stand-ins.
If, when you roll the mouse over an embedded image and a white border is displayed around the image, the image is a stand-in.
-
Click a stand-in to open the Media Browser and select a replacement image file (hold SHIFT while clicking to use Windows File Explorer instead).
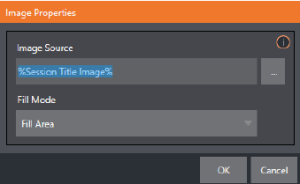
Modifiable Image
-
If you right-click a stand-in image and a context menu appears, you can select one of several optional methods of fitting the source image to its frame.
This menu also allows you to open the Image Properties panel. It provides the same set of Fill Mode options but adds an Image Source box supporting direct entry.
Stretch: The image completely fills the frame.
Fill Area: Retain the image’s original aspect, cropping if necessary to fit inside the frame.
Show All Image: Retain the original image aspect but fit the entire source image inside the frame (which may result in pillar-boxing or letter-boxing).
DataLink

Both text and images on Title pages accept DataLink keys as input. The Title editor indicates which entry boxes accept DataLink keys by showing a custom %DL mouse pointer.
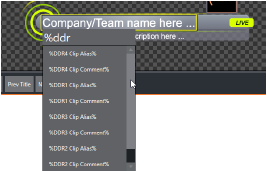
To edit DataLink entries on a Title page
-
All available DataLink keys are shown in the drop-down menu as soon as you enter a % sign into an entry box (key names are in the format %key name%).
-
Continue typing, the list shown is filtered to show only relevant key names.
A line of text or image on a title page that has been set to a key name will be automatically replaced by the current value assigned to that key when the page is displayed.
There are numerous uses for DataLink, and many ways to supply and update values assigned to DataLink keys. For example, see .
The DataLink™ web browser extension, which makes it easy to populate your title pages over the network from a web browser running on most platforms.
Title Pages in Buffers
Data Presets
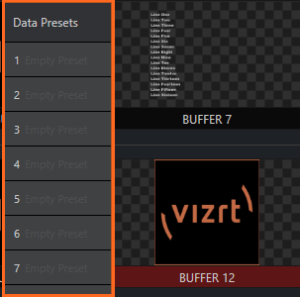
When a buffer is used for storing a Title page, selectable Presets can store the text data and (replaceable) image content.
To list Data Presets slots
-
With a standard page loaded into a buffer, click its thumbnail icon to display a list of Data Presets slots.
Live Graphic Layer Effects
When a buffer is used for storing Live Graphic Effects, as well as the text data, selecting Presets also offers storing of replaceable image content, as Layer Presets.
To list Layer Presets
When a buffer contains a LiveGraphics effect, a set of thumbnail icons depicting Layer Presets is also displayed.
-
With a layer effect loaded into a buffer, click its thumbnail icon to display the complete data set.
This action also immediately updates the page.
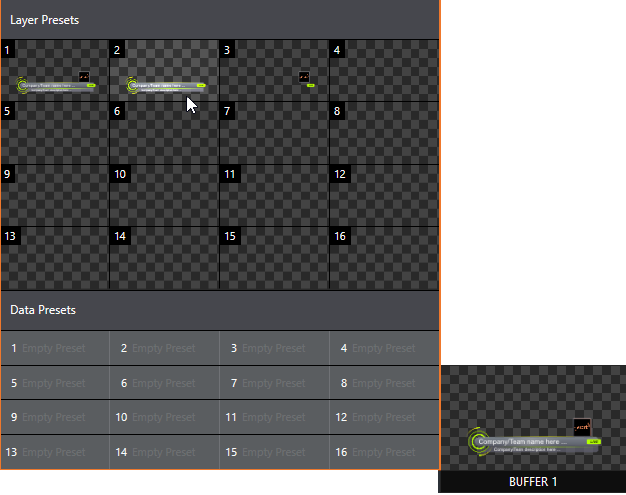
This is useful, for example, for storing details like name, player number and images of members of a sports team. A single click (or executing a macro) immediately recalls all data.
Tip: Text values can include DataLink™ key names. On a title page, statistics for a given player can be updated in real-time from external sources or text, XML or from CSV files in a watch folder.
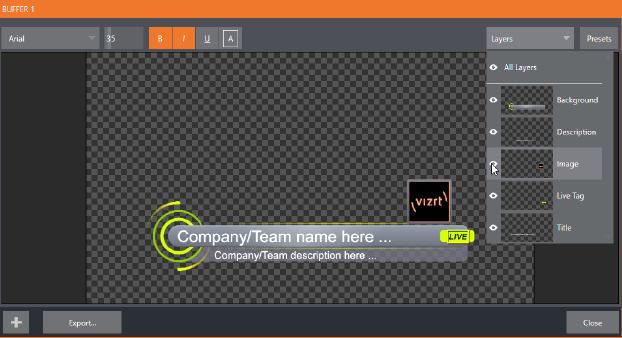
-
For further details, please refer to section LiveGraphics.

