Viz Vectar Plus User Guide
Version 1.3 | Published November 18, 2022 ©
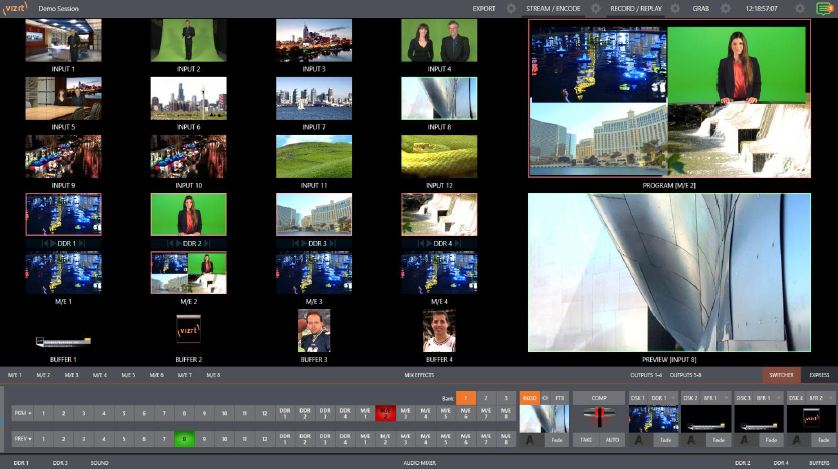
The Live Desktop
The Live Desktop is the control center for all your live production work. It provides control over switching, transitions and overlays, titles and graphics, audio mixing, playback of digitized content, and much more. In addition, streaming and recording features are located here, along with keying tools.
The Live Desktop is launched by creating (or opening) a session in the Launch Screen’s Home Page, then selecting the LIVE icon and clicking Start Live Production.
This section contains information on the following topics:
Requirements
The Live Desktop requires a minimum screen resolution of 1920x1080.
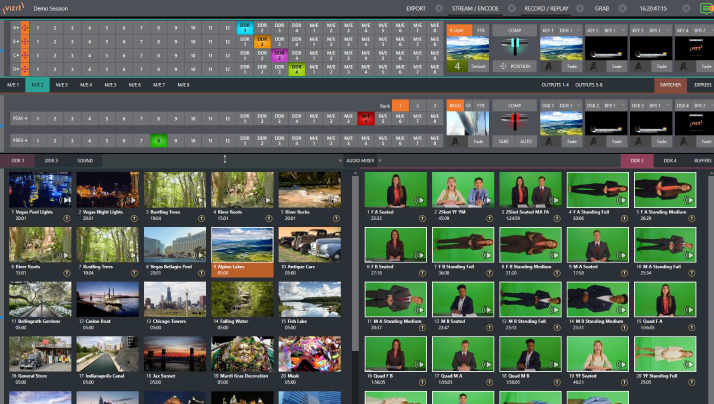
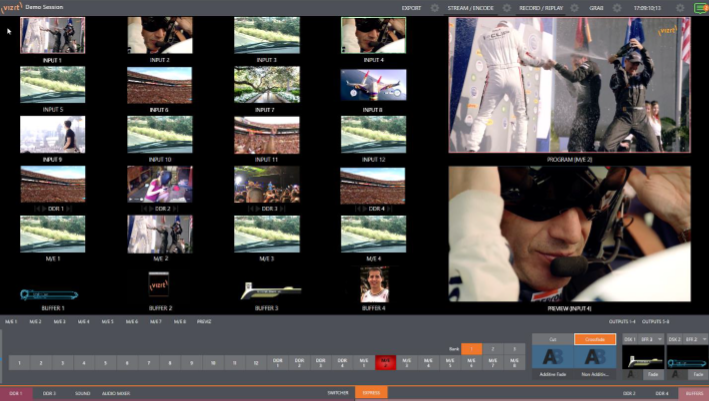
Appearance
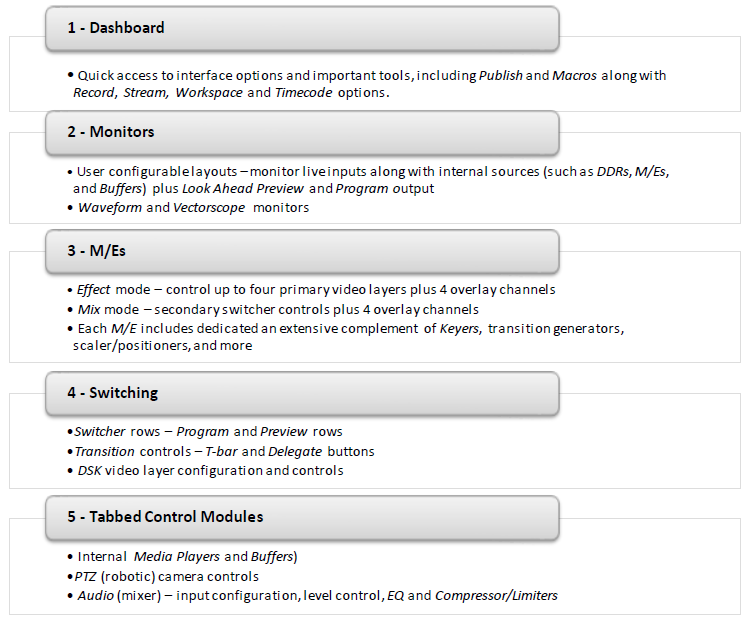
The Live Desktop provides visual feedback for operations, including monitoring, live switching, and so on. It is logically divided into five horizontal bands:
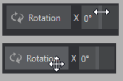
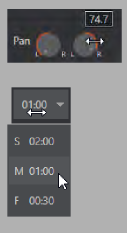
Control Types
You will find various control types used repeatedly in the Live Desktop. Some examples are shown in the tables below.
|
Control Type |
Type |
Examples |
Usage |
|
|
Numeric Slider |
Gain, Pan |
|
|
Rotary slider |
Position, Size, Rotate |
|
|
|
|
Rotary Knob (single-value) |
Audio Gain |
|
|
Combo-Slider |
Transition, Duration |
|
-
To make fine adjustments to slider values, hold down the CTRL key while dragging the mouse. This increases accuracy by 10x.
-
Hold down the SHIFT key and double-click a control to reset default values.
Customizing the Live Desktop
The Live Desktop layout can be adapted to many different scenarios, and provides a number of customization options that can be of benefit in your workflow. In this section, we’ll touch on several of these:
Renaming Inputs
You may wish to change default descriptive names (like Camera 1, DDR 2 and M/E 5) to something more appropriate for your local needs.
-
Open the Input Configuration pane for the Switcher source in question. There are several ways to open this pane. You can use any of the methods described below to do so.
-
Right-click a viewport in the Live Desktop or external Multiview, or a Switcher button, and select Configure from the context menu.
-
Roll the mouse pointer over the viewport for the source, and click the Configuration (gear) icon shown at lower right.
-
Two finger tap the viewport.
-
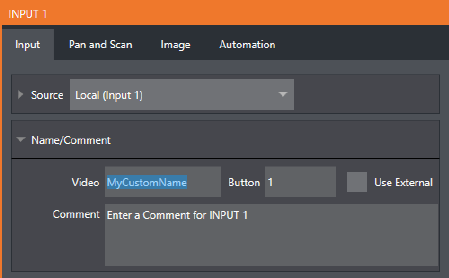
Expand the Name/Comment group in the Input tab of the Input Configuration pane, by clicking the twirl-down triangle at left. This group contains several editable text fields, including Video (the label shown under monitors), a shorter Switcher Button label, and the longer Comment field.
Tip: The Comment entry is more than just memory aid. The DataLink feature can automatically update title pages as inputs are displayed by drawing on the information you enter here.
Workspaces and Min/Maximize
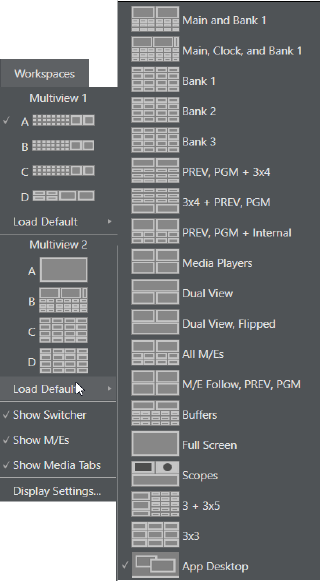
Various layouts and custom monitoring options for the Live Desktop and Multiviews are provided in the Workspace menu. When one or more Multiviews monitor is in use, Workspace preset options can be combined with great flexibility, letting you see what you want to see where you want to see it.
It’s easy to set up complementary displays. Each connected monitor, including the Live Desktop screen (listed in the Workspaces menu as Multiview 1) has four unique presets, labeled A-D. You can load a different viewport layout into each of these presets, and recall them easily using this menu, or perhaps using Macros assigned to keystrokes.
In addition, each individual viewport can be assigned to any Switcher input source or output using its own context menu. So, for example, even if you initially use Load Default to assign identical viewport layouts to preset A and preset B for a given screen, you can configure each viewport differently in the two presets.
Switching between presets, then, will allow you to view different sources. Even the overlays (such as Safe Area display) for each viewport are fully independent.
Screen Dividers
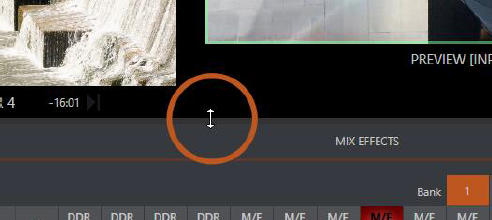
Notice too that, when the lower tabbed modules are visible, you can also drag the horizontal divider between the Live Desktop monitor pane and the Switcher up or down to modify its position.
You can even move the horizontal divider all the way up to the bottom of the Dashboard, thus hiding the Desktop monitor pane entirely, providing much more room for other modules in the process.
Tip: Reset the horizontal divider to its default locations by double-clicking it. Also, note that a vertical drag bar is provided just left of the Program and Preview viewports in some Workspaces.
Neither is it necessary to display modules you don’t access frequently (say, for a simpler production) at all times. For example, the M/E pane is hidden by default; click the Mix Effects label or an M/E tab above the Switcher to toggle display of the M/E pane – or press the keyboard shortcut M.
The App Desktop
The Application Desktop option (available for all Workspaces other than the primary Live Desktop) is a special case, and clears the designated to provide screen real estate for supported desktop applications.
This special workspace lets you run selected applications inside Viz Vectar Plus. A custom taskbar running across the bottom of this screen bears icons you can use to launch (or minimize) the various applications supported. The best part is that you can capture video from selected browsers, video conferencing applications, and their audio output and send it to Viz Vectar Plus' Switcher and Audio Mixer.
Supported applications you install appear along the taskbar, as shown here.
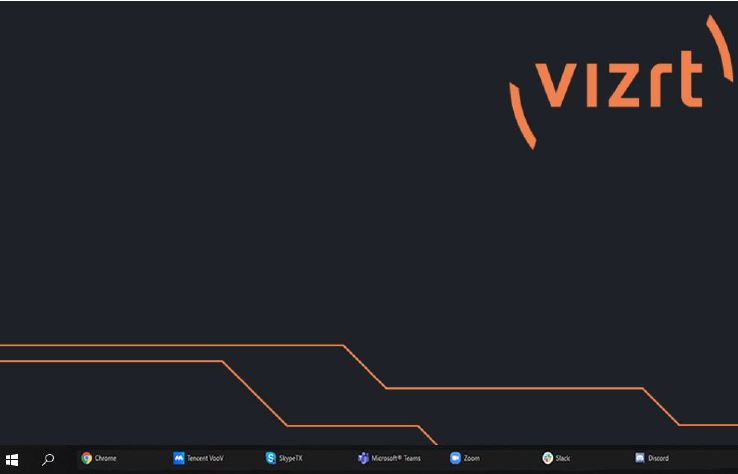
Supported Applications
Microsoft® Edge Chromium is installed on your Viz Vectar Plus. If you prefer a different browser, Google Chrome or another Chromium™ based browser can be installed. A number of popular video conferencing applications are also supported, such as Microsoft® Teams, Facebook Messenger, WhatsApp, FaceTime, Zoom, Discord, Slack, and many others .
Express Switcher Mode
In a related innovation, an alternative Switcher interface provides new opportunities to customize both the interface and workflow. The Switcher’s Express mode is very compact, freeing valuable Live Desktop space. Viewports in the multiview area above are significantly larger than in the more familiar two row (Program/Preview) Switcher mode.
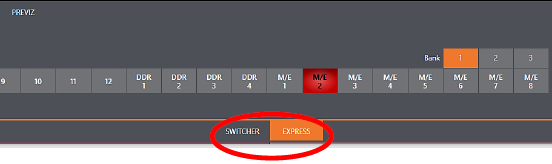
Express mode provides a simple single-click workflow, ideal for less complex productions, when a control surface is in use, or in environments involving student or volunteer operators who may struggle with traditional switcher workflows.
You can easily switch between the standard Switcher mode and Express operating modes by clicking their eponymous tabs at right in the horizontal bar just above the DSK controls.
For more information on these two modes of operation, see Switcher Modes.