Viz Vectar Plus User Guide
Version 1.3 | Published November 18, 2022 ©
Licensing
If Viz Vectar Plus is licensed for embedded Viz Engine, this license automatically installs once the configuration starts. If additional licenses or plugins are required, they need to be installed and configured manually. The Viz Engines embedded into Viz Vectar Plus can also be configured to use Viz Engine licenses not bundled with Viz Vectar Plus.
Preparation
Viz Engine and Viz Vectar Plus use Codemeter from Wibu-Systems AG as a licensing backend. The Codemeter Runtime is automatically installed by the Viz Vectar Plus installer.
WIBU Licenses can be hosted either on a local dongle or on a dedicated license server.
Dongle based systems do not need any further configuration, server based licenses need to be configured in the Code Meter Control Center web Application.
-
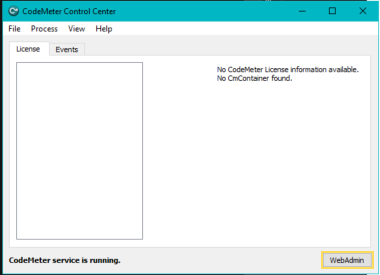
Navigate to http://localhost:22352/dashboard.html or open the Codemeter Control Center and click WebAdmin.
-
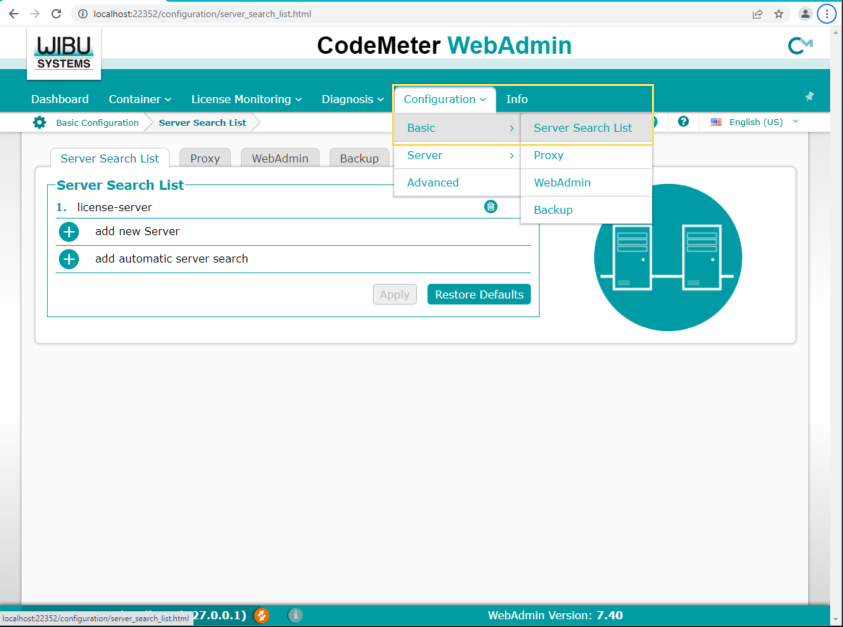
Select Configuration/Basic and Server Search List :
-
Add your license server by clicking Add new Server . If you have an additional backup server available, add it as second option.
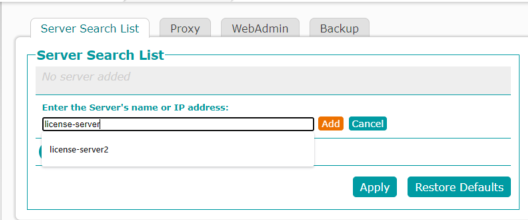
Note: It is not recommended to use the automatic server search as this will have an impact on startup times
-
Click Apply to confirm your configuration.
Configuring your License in Viz Engine
Configuration mode
Viz Engine must be correctly licensed to start up correctly. Any misconfiguration will force Viz Engine to start up automatically in Configuration mode.
-
Start the Viz Engine in configuration mode. Up to two Viz Engines can be used with Viz Vectar Plus, all instances need to be configured correctly.
-
Start the configuration utility from within Viz Vectar Plus in the Administration section.
-
Click on Shutdown , then Administrator Mode.
-
Select Configure Viz Engine (Instance x)

Viz Engine starts in Configuration mode.Note: The first launch might take some while as Viz Engine is building the shaders for your dedicated GPU.
-
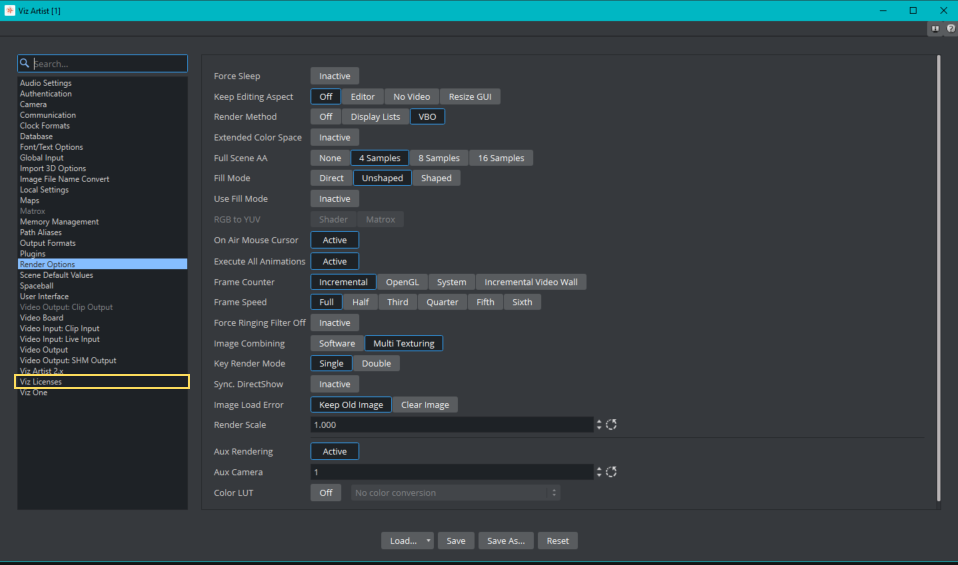
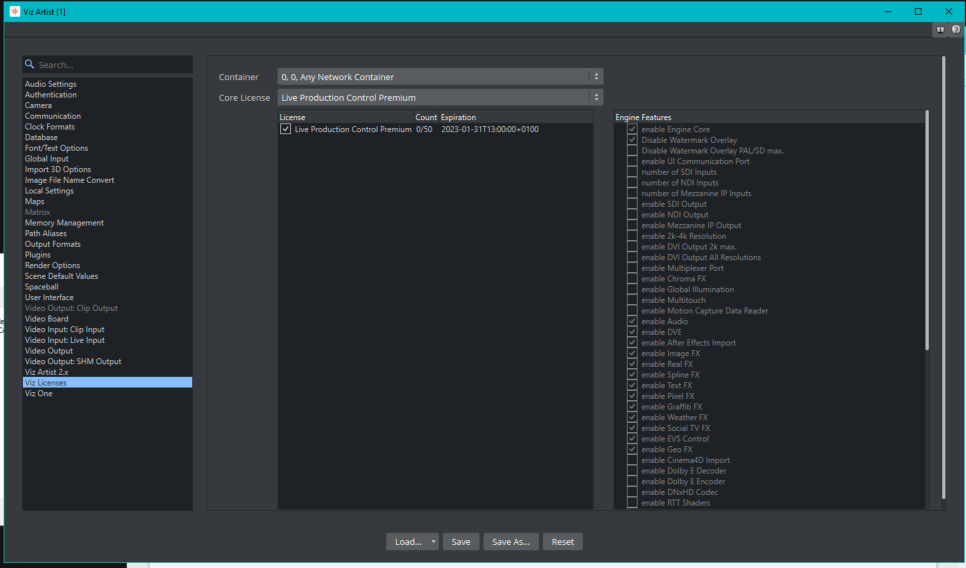
Once started, select Viz Licenses
-
License type:
-
If you use a dongle based license, select the local dongle in the Container location.
-
If a server based license is used and has been correctly configured (see Preparation ) the License Server should show up in the Container location:

The cores available on your License Container will be listed.
For Viz Vectar Plus Installations, the Live Production Control Premium core should be sufficient. Please see Use cases for additional information when to re-configure your licenses.
-
-
Make sure, your second instance is also correctly licensed.
Setup Examples
Configuring for Output >2K
Every output resolution larger than 2K requires a 4K license.
This affects all UHD resolutions, as well as the 1440/50p and 1440/59.94p in portrait and landscape mode. Whilst this is automatically configured, the license needs to be acquired.
-
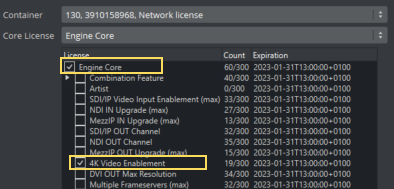
The Live Production Control Premium Core license does not have a 4K enablement license. Therefore another core license (e.g. ENG_CORE) is required. To do so, start Viz Engine in Configuration mode via the Admin panel.
-
Switch to the Viz License section and select a Core license including the 4K enablement, like the Engine Core license. Enable the 4K Video Enablement by clicking on the checkbox.
Using Matrox DSX Core
Viz Engine 4.4.1 and higher can handle the licensing of Matrox DSX core automatically. DSX cores can be used in virtualized environments to enable Clip Playback, Recording or RTP streaming.
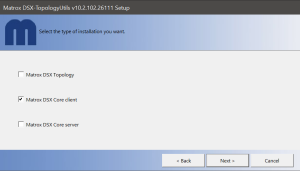
This requires the Matrox Topology Utilities to be installed, they are not part of the Installer but available on the Vizrt FTP or via Vizrt support.
-
Install Matrox Topology utilities and select Matrox DSX Core client
-
Once installed, you need to correctly configure your License. Live Production Control Premium Core does not include the DSX Core enablement, therefore a proper license core needs to be selected, for example Engine Core.
-
Start Viz Engine in Configuration mode via the Admin panel.
-
Switch to the Viz License section and select a Core license including the DSX Core license, like the Engine Core license.
There are two licenses for DSX Core:-
Any resolution up and including HD (DSX.core HD)
-
Everything beyond (DSX.core UHD)
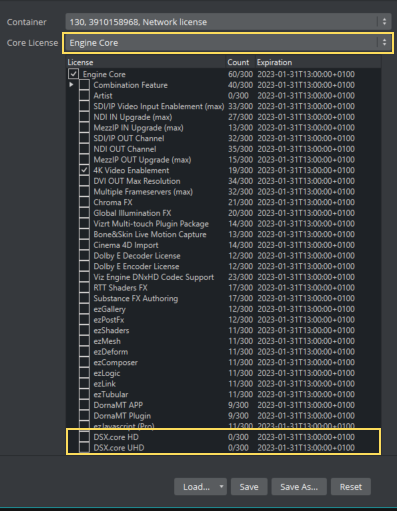
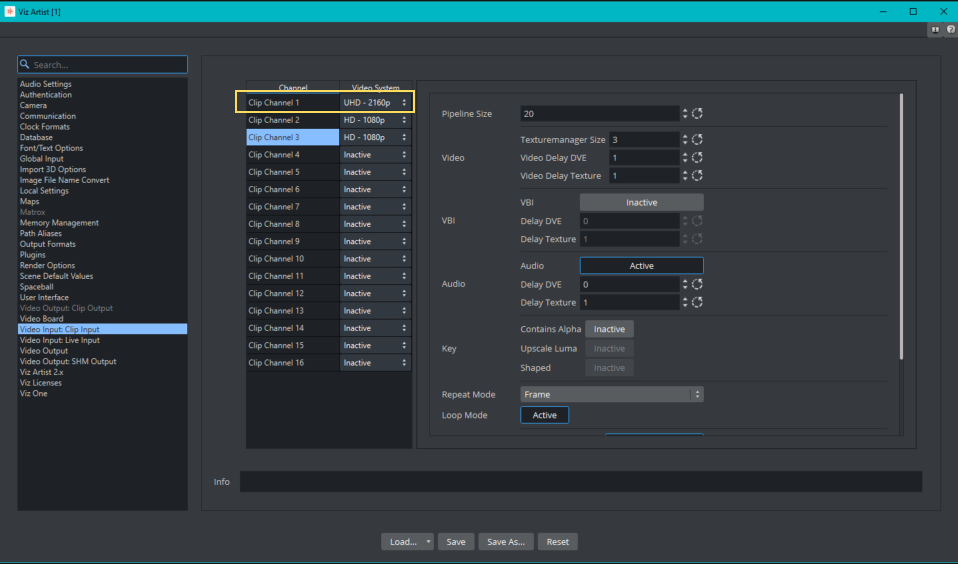
Note: The DSX.core license is bound to the configured clip resolution, not the output resolution. If any of your clip channels are configured higher than HD, you need to have the DSX.core UHD license configured.
-
See Also
-
Viz License Configuration in the Configuring Viz section of the Viz Engine Administrator Guide.
-
Matrox DSX Core in the Viz Engine Administrator Guide.