Viz Vectar Plus User Guide
Version 1.3 | Published November 18, 2022 ©
Comps
Different virtual camera positions, along with other M/E attributes, can be stored in the Comp Bin associated with each M/E. In particular, T-Bar and most Positioner attributes for all layers in the module are stored in a Comp and are re-applied when you click the Comp icon later. This includes such things as cropping and edge-feathering performed using Positioner settings (layer source selections are not stored, nor are Border or Tracking settings.
Managing Comps
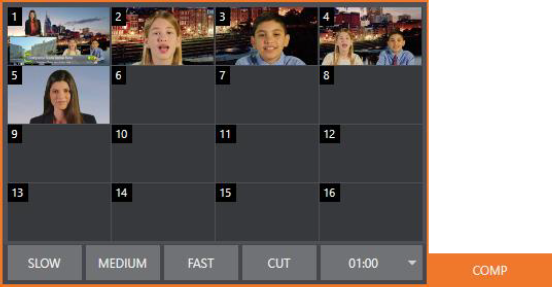
Having prepared a composition you wish to keep, storing a corresponding Comp is simply a matter of clicking the COMP button above the T-Bar to open the Comp Bin, and clicking an empty position. An image grabbed from output of the module is displayed to represent the Comp.
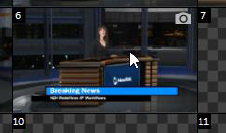
If you later wish to revise a Comp, you can do so either by rolling the mouse over it and clicking the snapshot icon shown at upper-right or by right-clicking the icon and selecting Update in the context menu that appears.
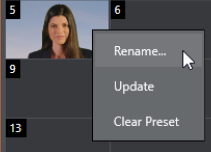
The context menu also allows you to Rename a Comp, update it, or clear it entirely.
Animation
Making a selection in a Comp Bin changes the current composition of layers displayed by the module to the new one. Changes can be immediate or animated over time. The timing controls in the footer of the Comp Bin determine the duration of the move from one position to another, while transition effects for layers are governed by their individual effect durations.
Tip: The main Switcher also hosts a Comp Bin. However, only Mix effects are supported in this case.
It’s worth noting that, since T-Bar states are stored and applied by Comps, transition effects can be applied by selecting a Comp. Let’s discuss an example:
-
Suppose KEY 1 is a lower third title overlay and has a fly on type transition assigned to it.
-
Comp 1 was stored with KEY 1 not visible.
-
Comp 2 was stored with KEY 1 hidden.
-
Click Comp 1, then – a moment later - Comp 2.
The result is that KEY 1 animates in and out according to the state stored in each Comp. Actually, Comps can apply transitions to multiple layers at one time with a single click. Animation between the current layer states and settings is not limited to the effects provided by transitions, however. Let’s consider a different example:
-
Select Comp 2, ensuring that KEY 1 is visible.
-
Use the Positioner controls for KEY 1 to slide the lower third title off the page, completely hiding it from view.
-
Store a new Comp.
Switch back and forth between these two Comps and you’ll notice that animating the layer’s position of the layer has effectively allowed you to create a custom transition. Experiment with other settings, such a Z or Y axis rotation and you’ll begin to see just how much power Comps give you.
Using these and other settings to animate the various video layers, very complex compositions can be introduced into your production with a single click in the Comp Bin.