Viz Vectar Plus User Guide
Version 1.3 | Published November 18, 2022 ©
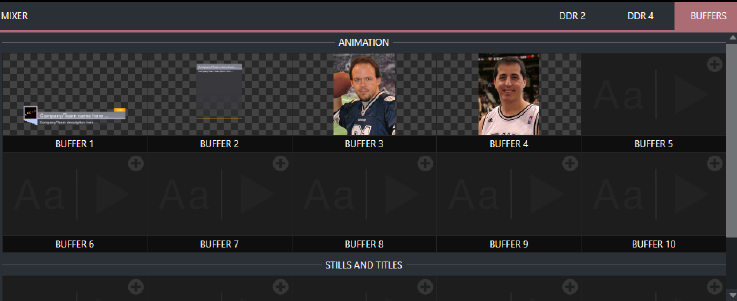
Buffers
Working with Buffers
-
Buffers provide alternative to media players as graphics and animation sources for M/Es (including their associated KEY channels), the main Switcher and its DSK channels.
-
Selection and display of buffers is controlled by buttons on main Switcher source rows, M/E rows, and similar options in DSK and M/E KEY source menus.
-
The top ten buffer slots support all animated effect types, titles and graphics
-
The other five slots are for graphical effects, supporting still image files or title pages.
To display the Buffers menu
-
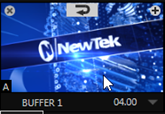
Select the BUFFERS tab to display icons and controls for the fifteen buffers.
Buffers are always available for immediate recall and display.
Tip: Using a buffer for a specific DSK or M/E channel (rather than a media player) eliminates the risk of accidentally selecting the wrong media player and displaying an unintended graphic.
Buffer Types
Buffers support the following media types:
You select and display buffers with buttons on main Switcher source rows, M/E rows, and similar options in DSK and M/E KEY source menus.
-
The first ten buffer slots support all types of animated effect (HTML web pages, titles, and graphics)
-
Buffer slots 11-15 are for graphics content, including standard image formats and special Title pages (.cgxml files).
Animation Effects
These are short duration full-motion video effects prepared in your favorite graphics, video application or the add-on utility Animation Store Creator . These sources are compiled into an effect by loading them into a buffer.
-
Looping effects: These animations endlessly repeat, useful for applications like station ID ‘bugs’.
-
Auto-run effects : These effects auto-run on display following a Take or Auto . Playback runs the effect, and then holds the last frame.
Graphics

-
Images: 24-bit or 32-bit (with embedded alpha channel) images.
-
Title pages: Editable title pages, identical to those served up by your media players.
Layered PSD files are automatically converted to editable CGXML files with layer visibility support in the Title Editor.
Please refer to section Title Pages for more details. -
LiveGraphics (optional): Animated graphics and titles.
See sections Animation Features and Live Link.
HTML
You can display a live webpage in Viz Vectar Plus as a switcher source by using HTML in a buffer. Alternatively you can bring in live graphics from a website that provides graphics as ready-rendered HTML output.
Note: Displaying a live web page uses the Live Link feature. See section Live Link below for more details.
For these HTML web pages, you can:
-
Scale and crop using the Viz Vectar Plus input and key layer tools.
-
Use keyboard input and mouse movements such as click, back/forward, refresh, scrolling and keyboard input.
-
Ingest web output from CG providers.
-
Work with audio, macros, and alpha transparency.
Selecting Content
To select content
-
Open the Media Browser menu by either:
-
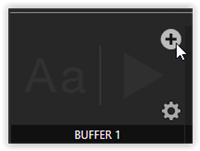
For an in-use buffer: Move the mouse over a Buffer display (top right) to reveal the Add Media [+] button. Click on it.
-
For an unused buffer: Click in the Buffer display to open the Media Browser menu.
-
-
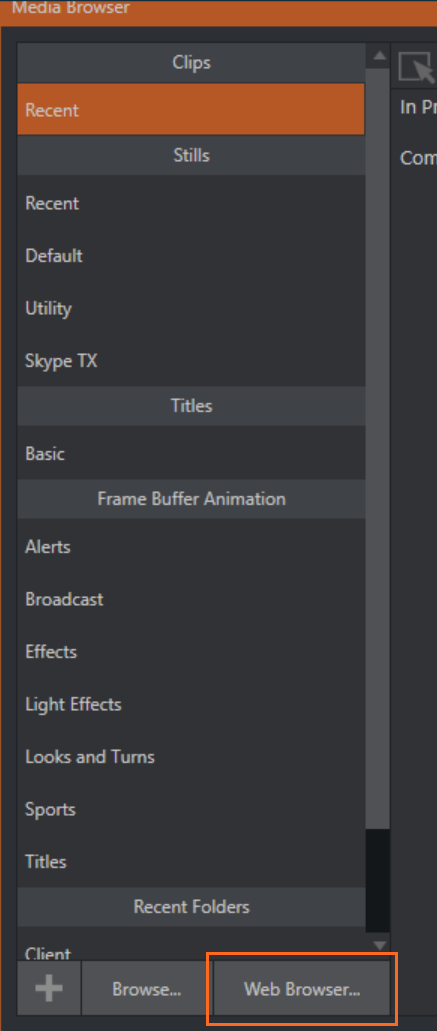
In the Media Browser, menu add media by either
-
Selecting from the listed sources.
-
Selecting a file to populate the buffer with either Browse or the + button.
-
Selecting a Web Browser source.
-
-
From the Live Panel, you can also populate a buffer by:
-
Dragging the displayed content from a media player to a buffer.
-
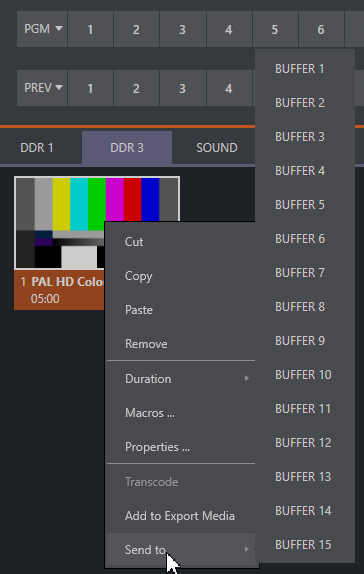
Right-clicking a still image or title page in a media player and choosing Send to from the context menu and then choosing a buffer slot (1-15) from the selection menu.
-
Source availability
Note: Most buffers are linked to a source file on your hard drive. Having added a file to a buffer using the Send to (Buffer n) menu, the item can be removed from your media player. The buffer link will only fail if the media source file is moved or deleted from its assigned location on your hard drive.
However, editable title page buffers are stored separately from their originating file and are still available even after the source is deleted.
Buffers Menu
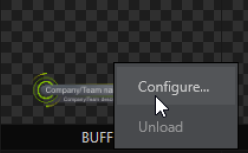
Right-click a thumbnail icon in the Buffers pane to open a context menu:
-
Configure: Open the standard configuration options, including cropping, color processing, and even LiveMatte keying.
-
Unload: Clear the effect, freeing this buffer slot for another effect.
-
Update Icon: The thumbnail icon updates to a snapshot of the current web feed.
-
When the mouse pointer is over a buffer, the [x] icon in the upper-left corner also unloads the effect.
-
Similarly, the Configuration (gear) icon that appears lower right, opens the Configuration panel for the buffer.
Animation Features
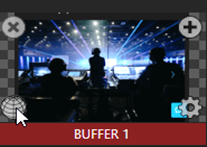
When an animated effect has been created with the Animation Store Creator (ASC), clicking the A icon (bottom left) on the buffer provides several additional features.
ASC effects can be either looping or auto-run. A timer is displayed on the right in the buffer.
To control ASC effects in a buffer
-
Select a Slow, Medium, or Fast preset value from the drop-down menu, drag the mouse left or right over the time to change the current value, or click to enter a number directly using the keyboard.
-
For auto-run animation effects, mouse-over the buffer to display a Rehearse button (top-center)
Click to play the animation from first to last frame, before freezing the image.In addition to providing a way to preview the effect (by displaying it on the Preview monitor, for example), Rehearse enables rerunning animated alerts and similar overlays.
This is useful in conjunction with the Macros feature for driving what a buffer displays.
Live Link
The Live Link feature opens up internet resources to your video switcher. Web page elements can be displayed directly in a production.
As described above in section HTML, the first ten of the fifteen Viz Vectar Plus buffers support HTML/WEB Buffers macros, alpha transparency for HTML5 and audio.
To work with Live Link
-
Click the Buffer's + (add) icon to add or replace a buffer slot source.
-
The Media Browser menu opens.
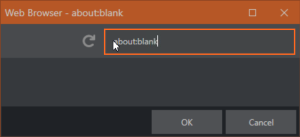
Click the Web Browser button to open an integrated browser.
-
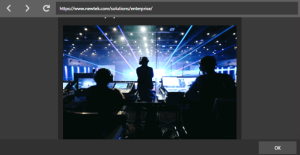
Enter the web page (URL) to assign to the specified buffer slot.
-
Click OK.
It may take a few seconds for the thumbnail to update.
To create an Internet shortcut
You can also assign a web page to a buffer by creating an Internet shortcut URL file by dragging a link from a web browser onto a file folder.
-
Click on a buffer's + icon to open the Media Browser menu.
-
Select Browse and find your internet shortcut file.
-
Click Open.
-
With the web page displaying in your buffer, hover-over the buffer's thumbnail.
A Web icon (globe) appears in the bottom left corner of the buffer.

-
Click the Web icon.
-
The Web Browser opens, allowing you to make changes to the web page.
Interaction includes mouse movement, back/ forward, scrolling and keyboard input.
The URL being viewed can also be changed in the Address field.
-
Use the Web Browser to preview the web page.
Once you are happy with your changes, click OK.
This closes the Web Browser and applies the URL to the buffer.
To remove web browser borders
Once you have delegated the buffer to Preview or Program, the web page borders might appear in the monitor.
-
To remove the border, hover-over the buffer thumbnail in the DSK channel.
A gear icon appears on the lower right of the buffer.
Click to open the buffer's Configuration panel. -
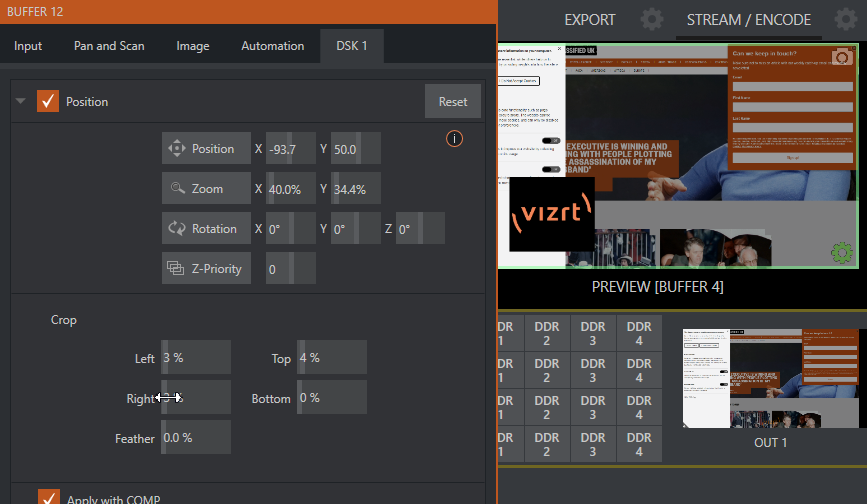
Click the DSK n tab.
-
In the buffer's Configuration panel, from the Position panel, you can position the webpage, crop, and zoom-in to remove the outer borders.
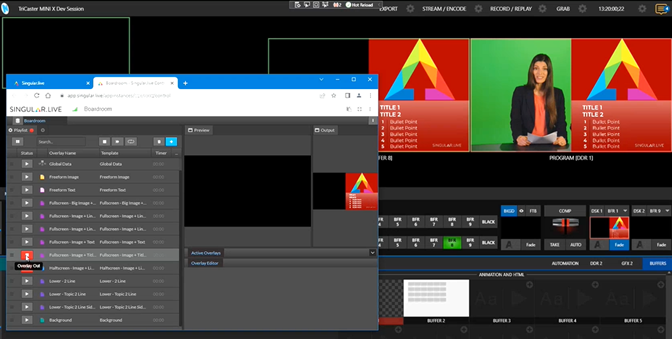
HTML Buffer Graphics
You can use professional live graphics in your production by bringing in HTML graphics ready-rendered on a CG website.
To work with rendered HTML graphics
-
Locate the CG site, running on a separate system.
-
Copy the URL into an HTML Buffer Web Browser.
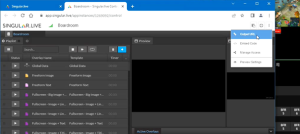
In this example, the site singular.live. There are numerous CG websites online.
-
Changes made on the CG webpage (on the separate machine) appear in your system in real time.
Transparent files are easy to bring into Viz Vectar Plus, as the alpha is sent from the render-based platform.
Data Presets
When a buffer is used for storing a Title page, selectable Presets can store the text data and (replaceable) image content.
-
Please refer to Data Presets in section Title Pages.
Note: Data Presets can include dynamic, continually updated data through the LiveGraphics utility.
Buffer Watch Folder
The Frame Buffer folder is a watch folder. When you save an image for a given buffer, the buffer updates even if it is currently displayed, allowing you to refresh overlays instantly across the network.
-
Still image buffers are normally stored as 32 bit PNG format Other formats are also supported.
-
Specific filenames are not important in the buffer workflow. Multiple media files with different names can reside in buffer folders.
-
A buffer always displays the newest file (the one with the most recent modification date).
Displaying Buffers
There are many uses for buffers. Sample media content supplied with your system includes various styles of animated buffers. Some are intended for full screen, suitable for looping backgrounds or similar applications, others are suited to overlay, bug or alert tasks.
You can display any type of buffer in the following locations:
-
Main Switcher
-
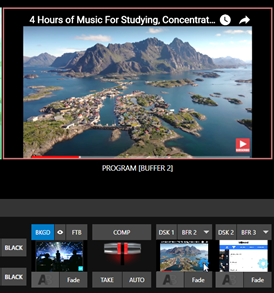
Program/Preview rows: All 15 buffers are directly accessible in the Switcher
-
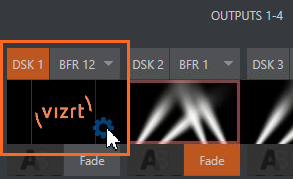
DSK channels: Use the DSK’s (drop-down) Source menu and choose a specific buffer.
-
-
M/E banks
-
Select a buffer on an M/E row, as you would for the main Switcher.
-
KEY channels: Choose a buffer for any KEY channel using its (drop-down) Source menu.
Buffers enable animations throughout your productions. For example as layered graphics overlays, without employing a media player. -
M/Es also support buffers. M/Es are re-entrant, so layering possibilities are expansive.
-
Keying, Proc Amps, LiveMatte, Position and Edge
-
You can apply LiveMatte, Proc Amp and Edge (cropping and feathering, when supported) settings to individual buffers by opening its Input Configuration panel.
-
From this configuration, you can also apply Position settings, including Rotation and Scale, in DSK, M/E and KEY channels.
Editing Titles
When a Title page (.cgxml file) is loaded into a buffer, you can open the Title page editor.
To edit a title page in a buffer
-
Clicking the edit icon Aa at lower-left.

See section Title Pages in Buffers.