Viz Vectar Plus User Guide
Version 1.3 | Published November 18, 2022 ©
The Dashboard
The Dashboard groups important production features and system display controls in one convenient place for quick access and review. It provides information on the current session, status updates and storage usage, with timecode and includes access to Macros, Workspaces and Options menu.

Initially the Dashboard shows only the name of the current session. Moving the mouse pointer to the top of the screen reveals the menu items.

The right half of the Dashboard contains additional features and tools that are more frequently accessed.
File Menu
This menu drops down to reveal the following items:
-
Eject: Opens a sub-menu that lets you safely disconnect selected storage volumes.
-
Import: Adds media files from external sources to the appropriate session folders and automatically transcodes them to friendly formats for optimal playback if necessary (Import Bin features are similar to those of the Publish Bin).
-
Share Media Folders and Buffers (see Buffers).
-
Exit: Closes your live production session, and return to the Session page of the Launch Screen (all session settings are stored on exiting).
Options Menu
A number of very useful interface and workflow options are presented in the Options menu.
-
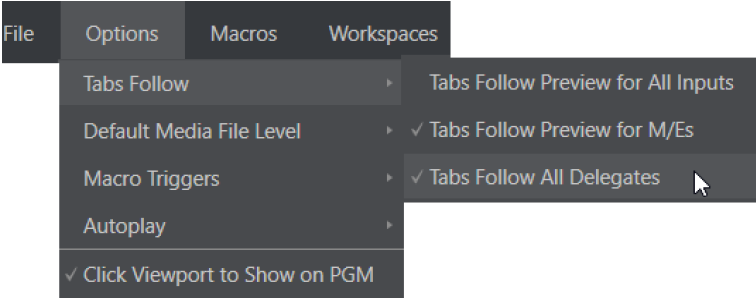
Tabs Follow
-
Tabs Follow Preview Row for All Inputs: Displays the tabbed pane for a Preview row source automatically on selection changes (for M/E selections, the M/E pane must be maximized to see the M/E tab update).
-
Tabs Follow Preview for M/Es: Updates the M/E pane selection only (when you select an M/E as source on Preview) when checked.
-
Tabs Follow All Delegates: Updates the Desktop in sync with control surface delegate changes.
-
Tip: Control surface delegate operations can sometimes result in a tabbed module that you want to view being obscured when certain options are enabled. When this happens, press the control surface Delegate button again to re-display the tabbed pane you are interest in.
-
Default Media File Level: Controls the default per-clip audio level applied to imported media files.
-
Macro Triggers
-
Tally: Enables State Change macros configured in the Automation tab (Input Configuration panel) for any video source.
-
Audio Levels: Enables the Run Macro at (threshold dB) feature for Audio Mixer sources.
-
Disable Hotspots: Disables macro triggering based on Hotspot activity (see Input Configuration).
-
Disable Hotspots on M/Es: When this is on, Hotspot macros are only triggered if the source is visible on Program output (including via an M/E shown on Program output, or a DSK).
-
-
AutoPlay
-
Enable Autoplay Out on M/Es: Enables Autoplay’s transition-out behavior for M/E’s (Mix mode) displayed on Program out (off by default).
-
Extend Play: Playback extends past any marked out point, up to the last frame of the file (even if the operator manually removes the DDR from output) when enabled along with Autoplay in the DDR. After the last frame is displayed, the playhead advances to the next playlist item.
-
-
Click Viewport to Show on PGM: When this feature is enabled, clicking a viewport (or tapping a viewport on a touchscreen) selects the corresponding video source on the main Switcher’s Preview row and perform the current Background transition to display it on Program output.
-
Show Tally on Skype Return: Shows a tally overlay on the return video sent to remote Skype TX callers.
Macros
Macros provide extremely important production benefits. There is a chapter that follows on Macros and Automation.
Note: Shortcut Commands used in macros are listed on your locally served Viz Vectar Plus Home web page.
Workspaces
When clicked, the Workspaces menu opens to reveal control groups for each connected screen Viz Vectar Plus detects.
These control the monitor viewport layouts shown on the Live Desktop and external Multiview displays. Workspace features are discussed in Interface and Multiview.
Clock
The Dashboard also hosts a clock which, in addition to showing the current time, can display countdowns to event start and end times when enabled.
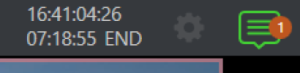
To access time features, click the small gear icon next to the timecode display at right in Live Desktop’s Dashboard.
Hint: You can set the system clock through the Windows® Desktop.
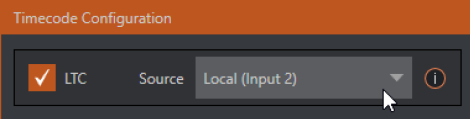
LTC Timecode
Linear timecode has long served as a method of sharing an external timecode reference in video production. Output from an external timecode generator is supplied to devices in the video pipeline using a standard audio connection.
Choose an LTC source in the Timecode Configuration panel, and the feature decodes time stamps from the audible signal, using the values for clock displays as well as embedded timecode when recording video (if the file format supports this). This is a great asset for post-production purposes.
Tip: The timecode display in the Live Desktop titlebar is tinted blue when external timecode is in use. If the external connection is lost for any reason, the display changes to white. Viz Vectar Plus attempts to maintain continuous timecode from the interruption on, until a valid signal is restored (in which case the display turns blue once more).
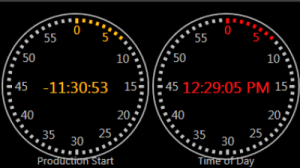
Event Time
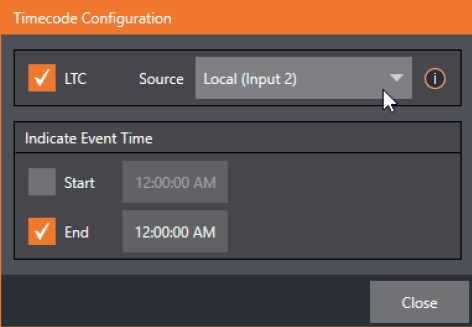
Two switches under the label Indicate Event Time allow you to configure Start and End times for your upcoming show. Beside each of these is an editable time field. Enable the Start/End switches, then click inside the field to modify the time value by direct entry, or drag left right to raise or lower the current value.
During live production, the Dashboard and monitor panes and default Multiview layouts offer Broadcast Clock displays based on the current timecode. Secondary clock displays show a useful countdown to the (production) Start and End times when the corresponding switches are enabled in the Timecode Configuration panel.
Notifications
-
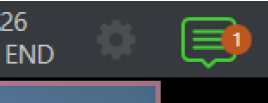
Clicking the icon displays the Notification Pane, which provides both helpful information and also some very useful tools.
A number bubble indicates unviewed entries.
The Notification icon can be colored white, green, amber or red. The color indicates the type of messages available for review:
-
A green icon denotes an informative message, as well as the availability of new media.
-
An amber icon indicates a warning message has been received.
-
Higher priority alert messages are denoted by a red icon.
The highest priority (un-viewed) item in the list at the moment determines the Notification icon color. After you open the panel to review the notifications in the list, the icon turns white.
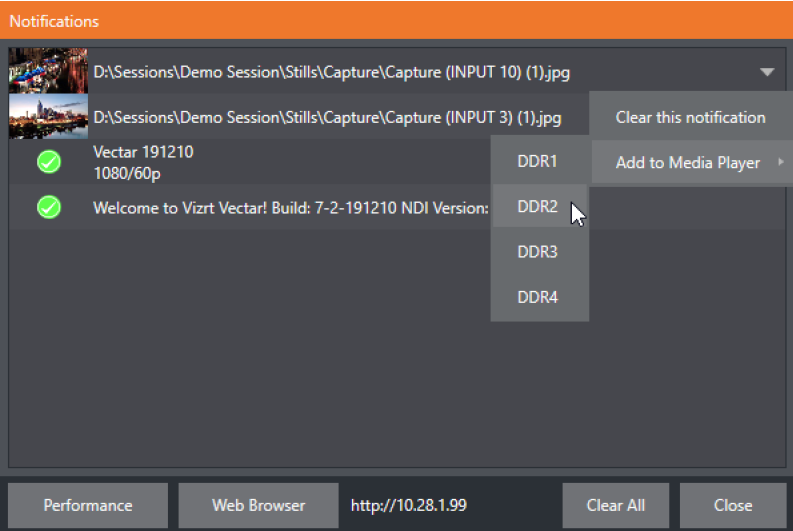
Individual items can be cleared from the list using the context menu opened with the triangle gadget shown at right when you roll the mouse over an entry, or you can empty the list with one click using the Clear All button in the footer of the panel.
Information appearing in the Notification Pane can include the following:
-
Session name, format, and software build number (press ALT + B on the keyboard to update this item)
-
Status messages pertaining to operations or system conditions; these may be benign notifications or cautionary. For example, a message indicating that the connection to a control surface has been lost is given an icon with an amber color. A higher priority warning triggers a message with a red icon.
-
A special message is added if a clip or still image is added to one of the Session’s media file locations (such as the session Clips and Stills folders). These entries show a thumbnail icon at left, along with the filename and path. In this case, the item’s context menu includes an Add to Media Player option, which lets you immediately append the new file to a selected Media Player playlist.
Tip: This last feature is particularly handy when adding files across the network, as perhaps when using the DataLink™ for Viz Vectar Plus plug-in to import images from the Chrome web browser.