Viz Engine Administrator Guide
Version 5.0 | Published December 20, 2022 ©
Configuration Using Datapath Devices
This section has some basic information on how to configure a videowall using Datapath devices:
For detailed instructions on how to use these devices, please refer to https://www.datapathdocuments.co.uk/downloads/.
A Maxwell or Pascal GPU supports up to 4K (5K Pascal) resolution per head. This allows for a maximum resolution of 16Kx16K on one GPU. As single GPU installations are preferred for performance issues one can utilize a multi display distributor from Datapath to grab the incoming signal and split it up into four individual HD signals. A single head drives four HD outputs, four heads can drive up to 16 HD outputs. The Datapath devices are recognized by the nVidia driver as one single monitor with its full resolution. Additionally, each Datapath device can be synced on a house signal, usually the same sync used for synchronizing the GSync board and the Matrox devices.
Please follow these steps to setup a videowall based on Datapath devices. It is recommended to perform each of the following steps one after the other:
-
Prepare the Datapath environment.
-
Setup nVidia Mosaic.
-
Synchronize your Mosaic.
Bezel correction
A bezel correction needs to be done on Datapath side, as the nVidia driver only sees one big display and is not aware of any bezel information.
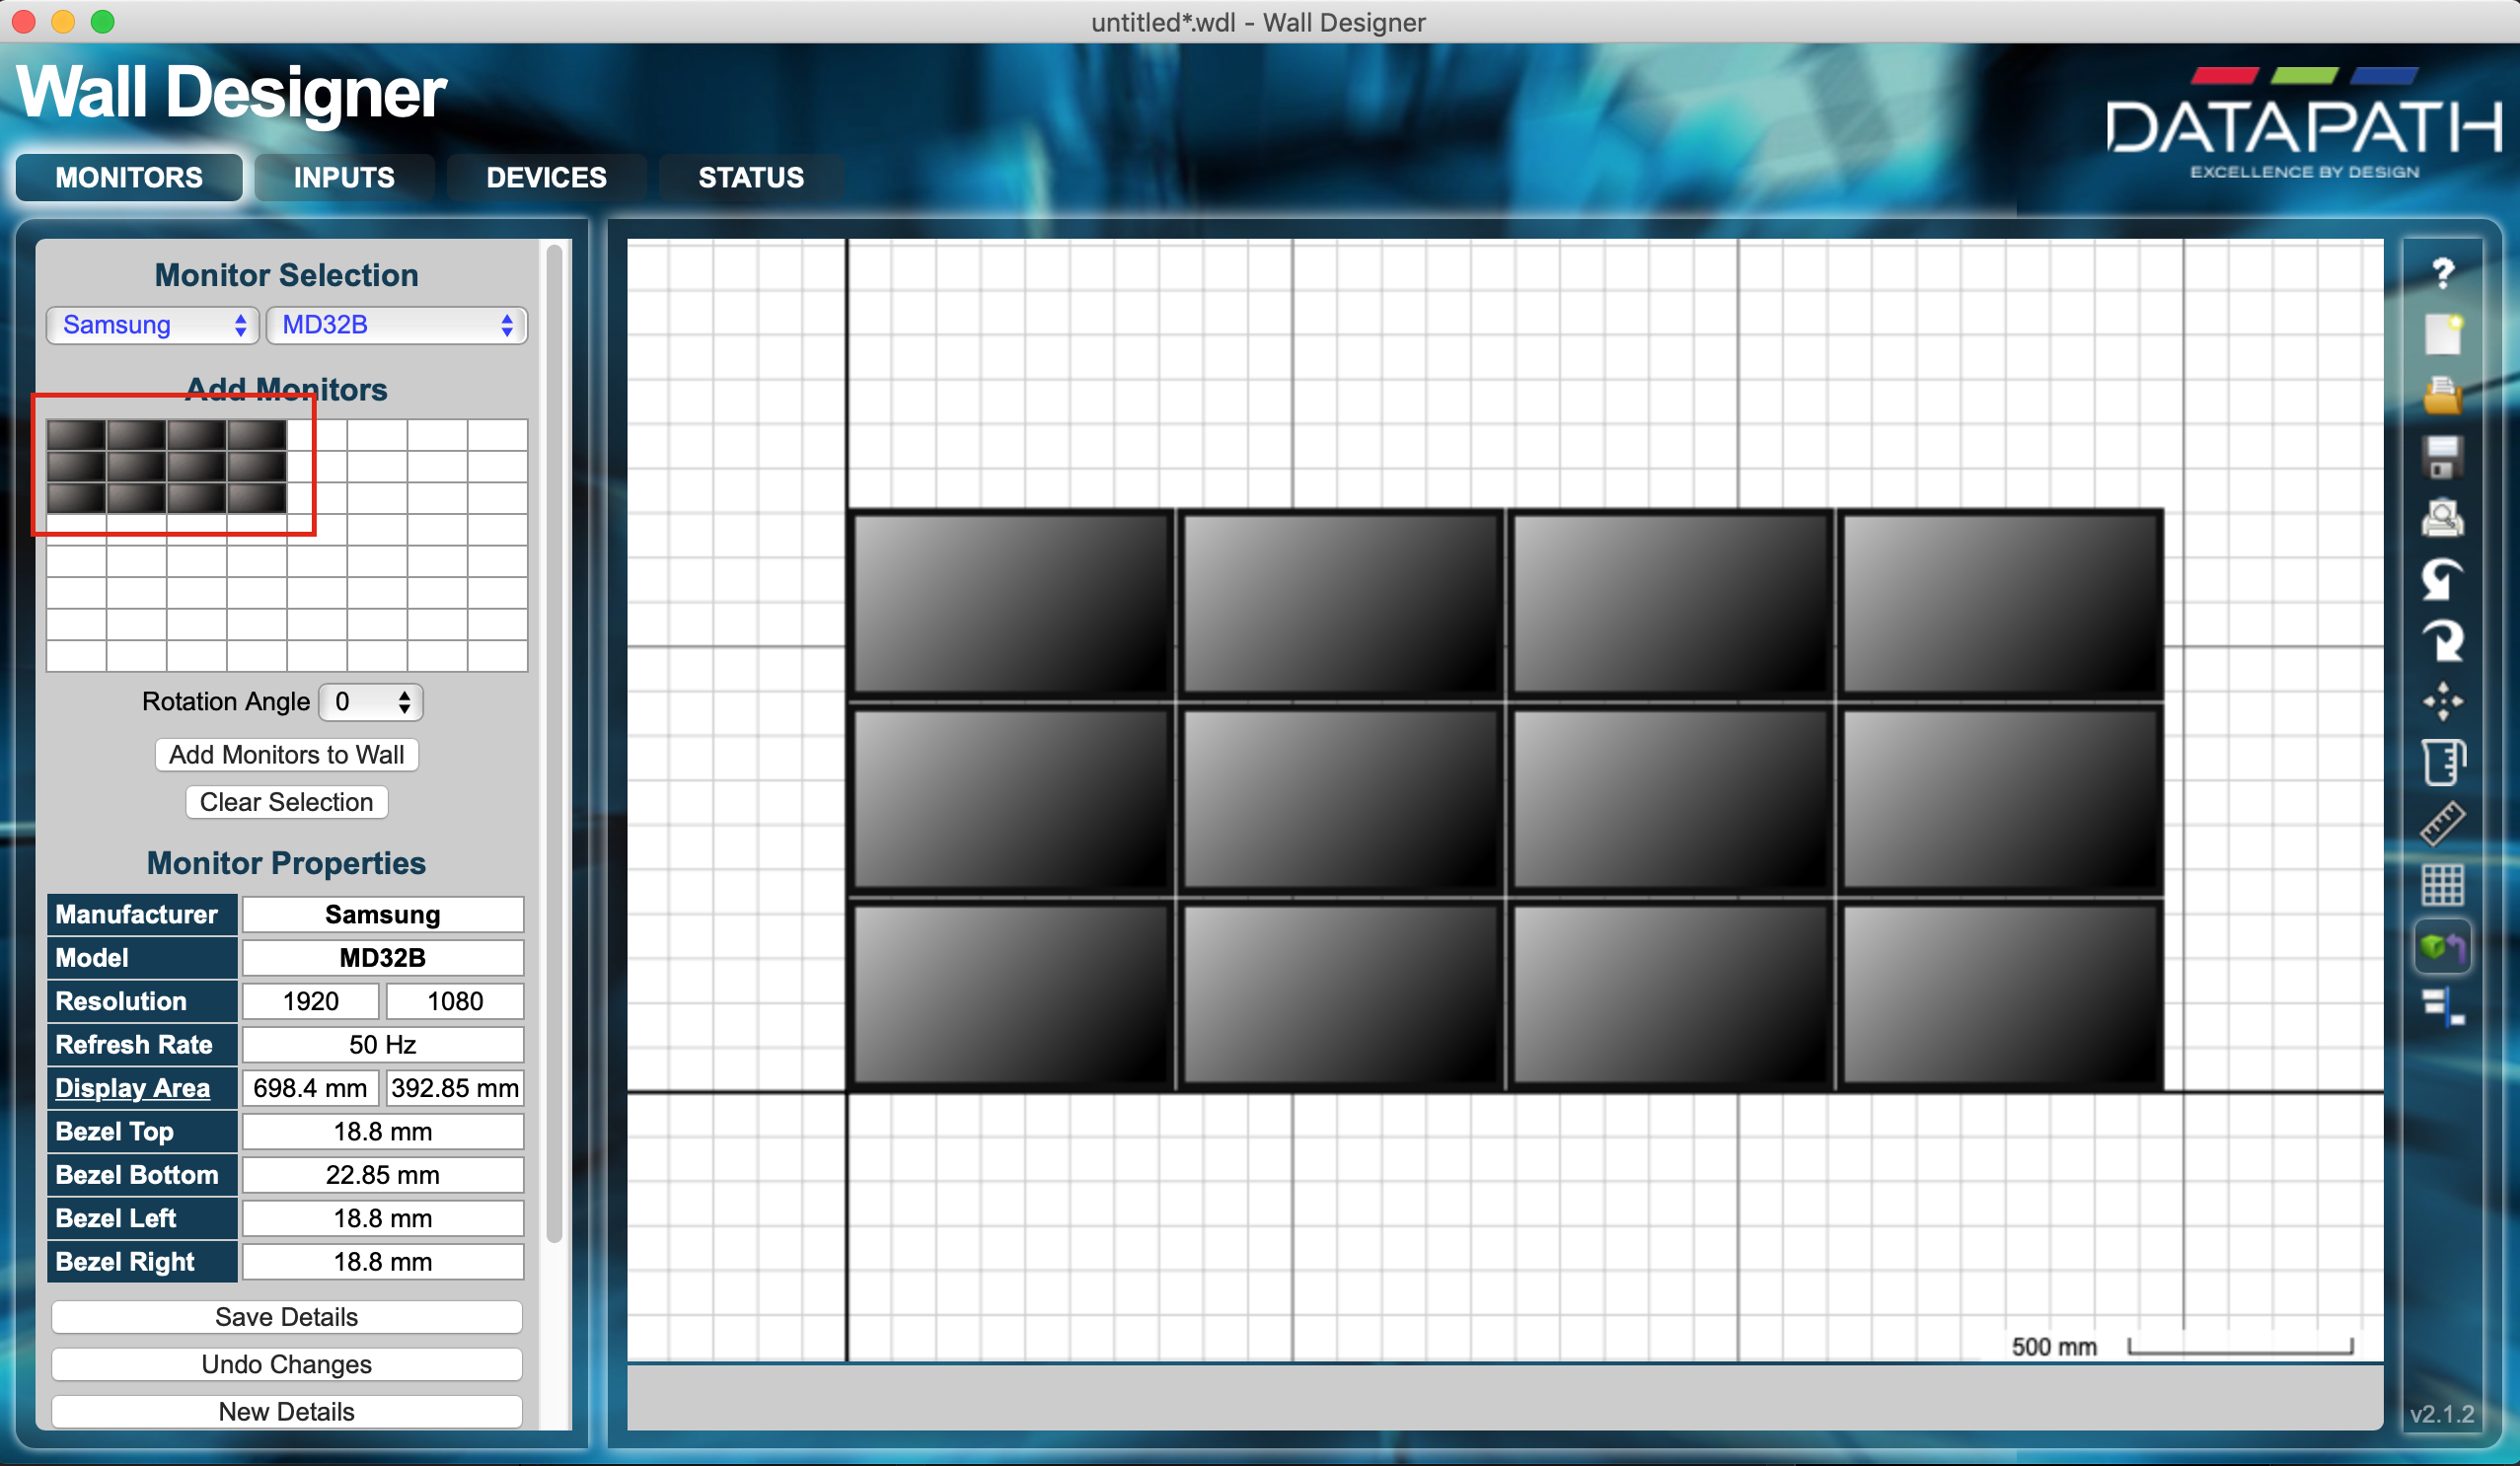
Prepare the Layout
Choose your monitor vendor and add the number of screens you want to utilize.
Please make sure the resolution is the correct native resolution of your monitors and the refresh rate matches your final refresh rate (50Hz or 59.94Hz). After that, press Add Monitors to Wall button.This represents the physical alignment of your monitors. Perform any modification of your alignment in this screen.
Note: You can also rotate and flip monitors within this view.
Prepare the Input
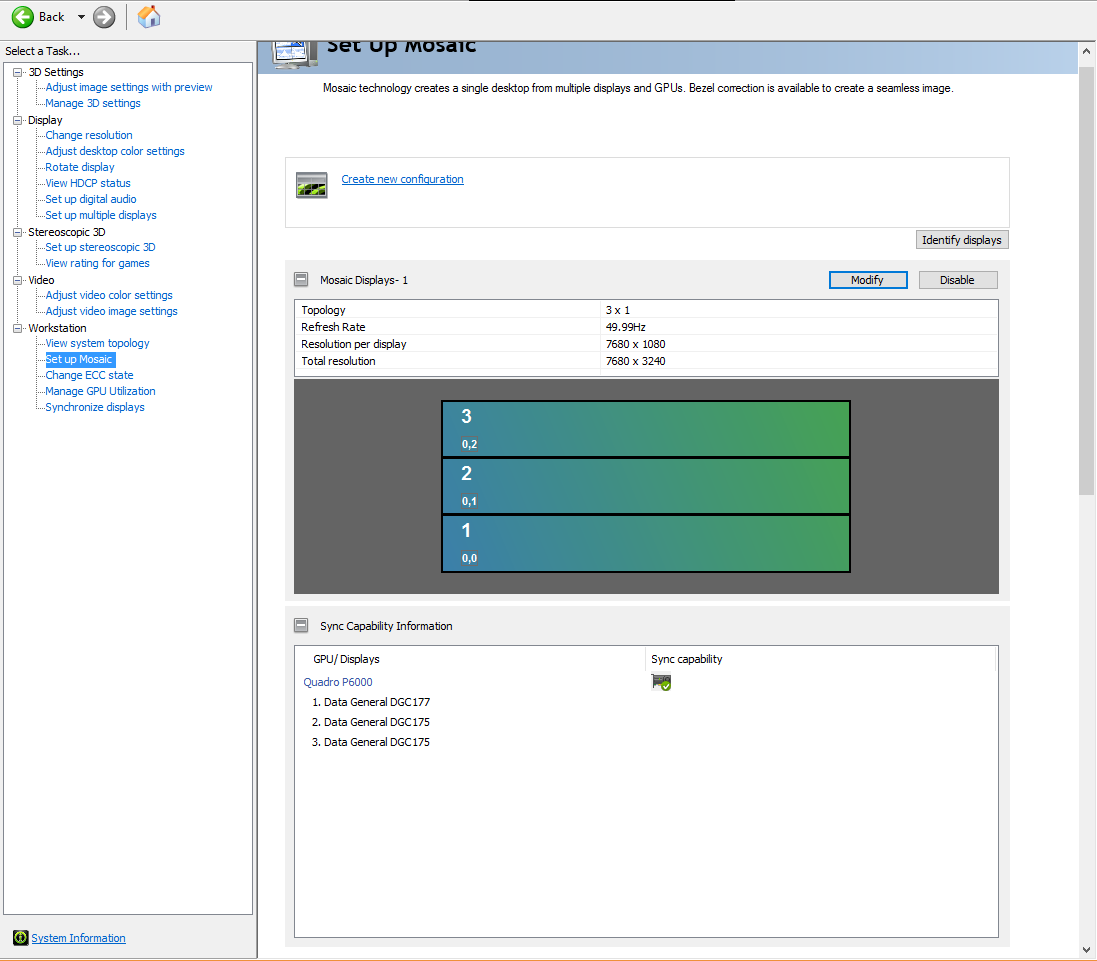
In this step, we create a virtual device recognized by the nVidia GPU as monitor(s). Create as many inputs as heads (=Datapath devices) physically connected to your nVidia GPU. In our example, we use three devices, each one of them is driving one row. One input is 4x1920px and 1080 pixels height. The input needs to be configured to be 7680px * 1080px. This is the same resolution as nVidia needs to recognize them.
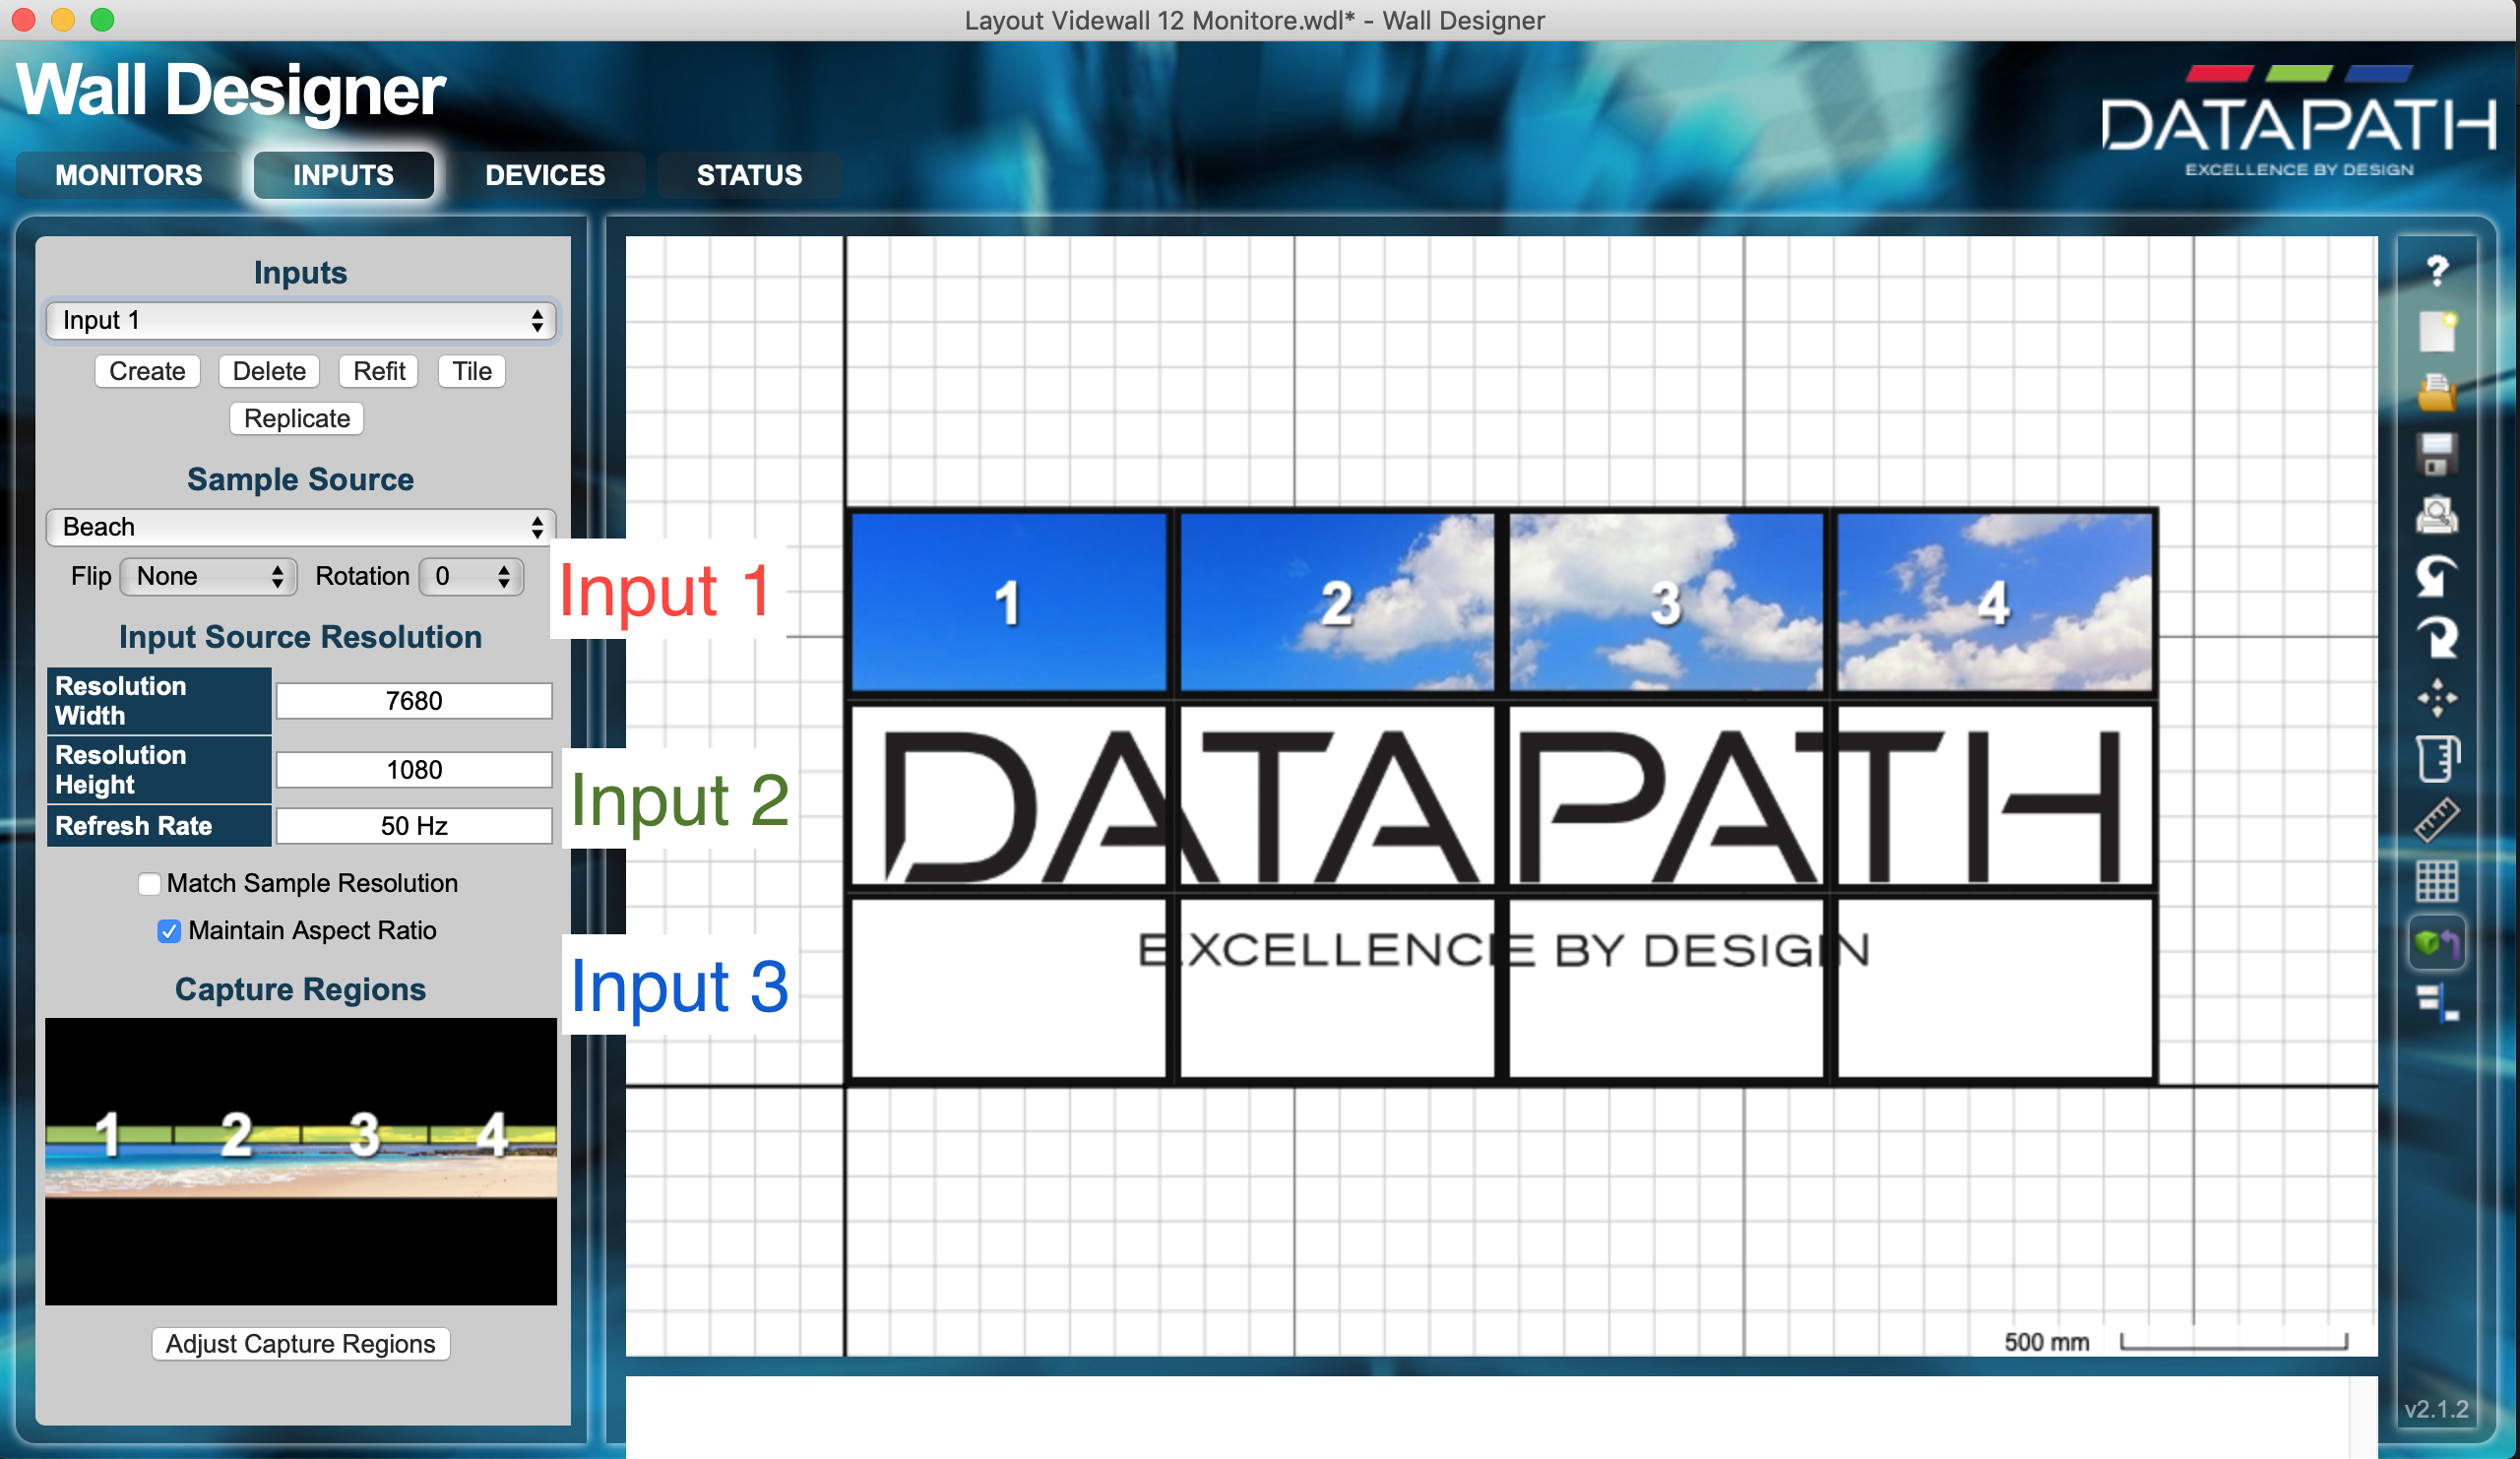
Press Adjust Capture Regions if you need to adjust the area the input captured by the various monitors. The alignment of monitors can be fine tuned pixel accurate. Any bezel correction needs also be done here. Make sure the displays align correctly to the configured input.

Attach the Device(s)
We need to connect the input to our physical Datapath devices. This is done in the devices section of Wall Designer. If you hit the Auto Configure Device on your current device, it generates an input, a Datapath device and the number of monitors. Now, we need to assign the Datapath devices to the one available. Make sure your environment discovered all your Datapath devices either on the network or connected via USB. This can be done in the status page. If no devices are present, they must be added manually.
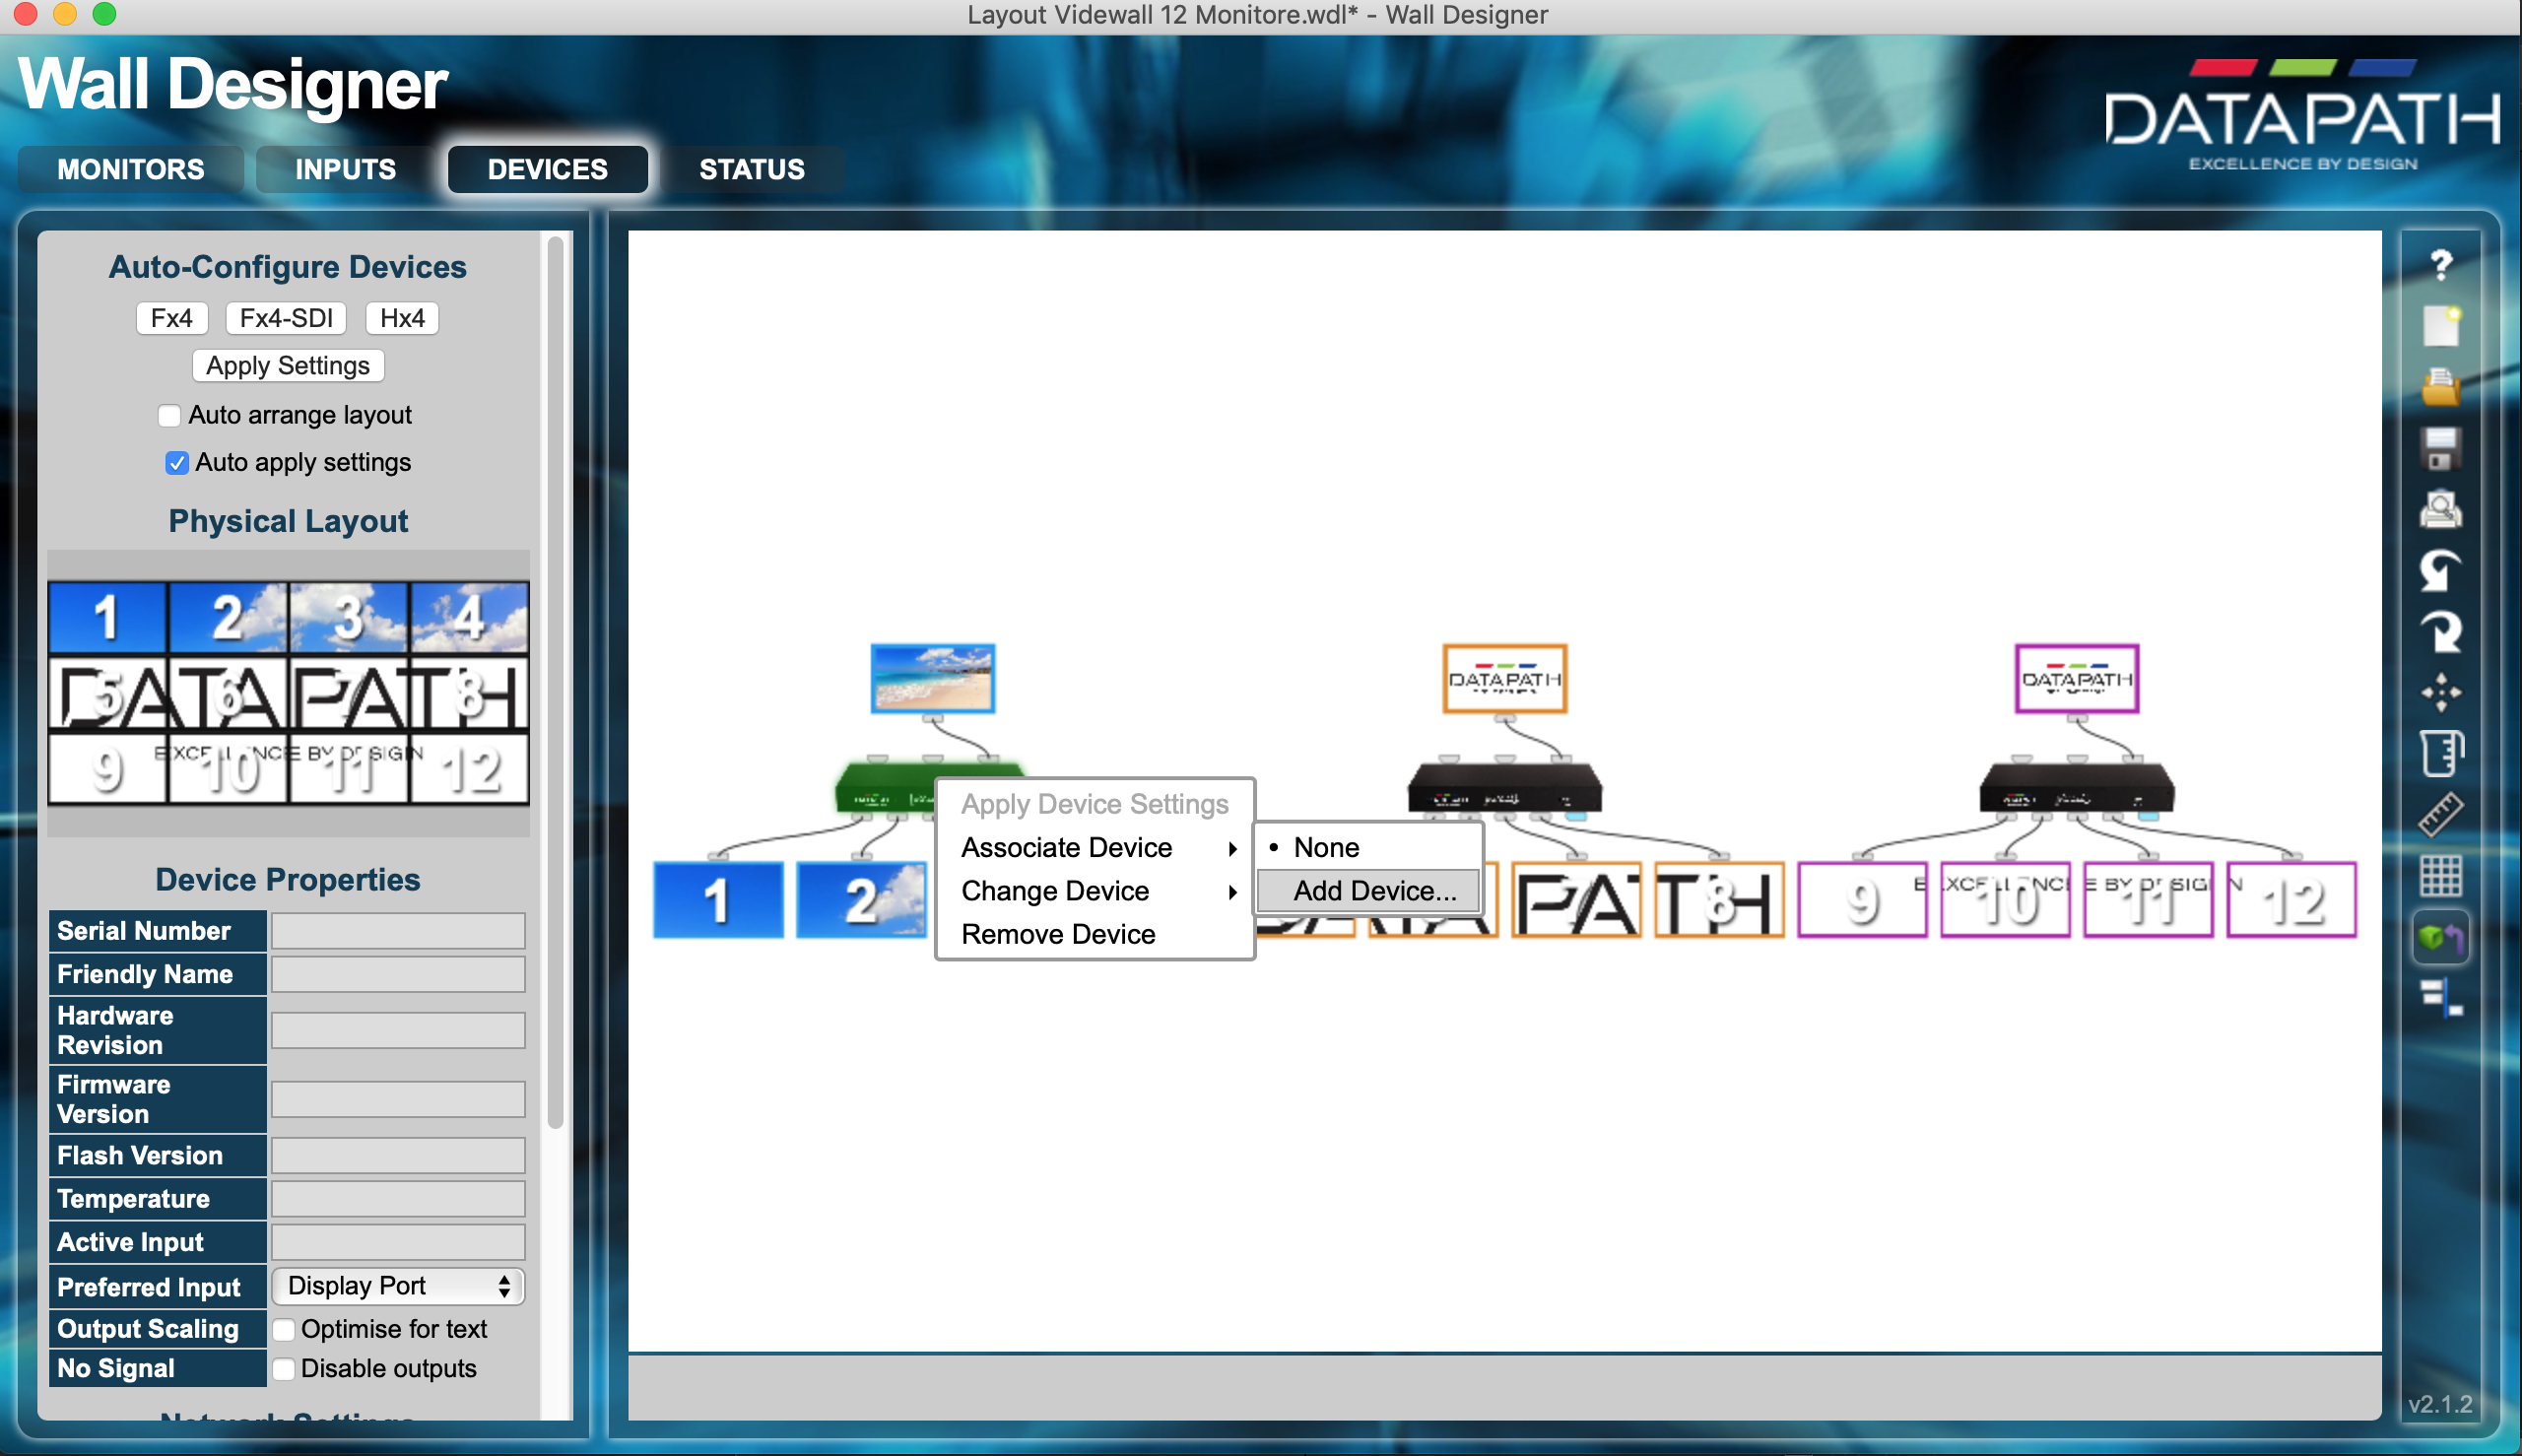
Right click on the Datapath and assign the correct one. If it is missing from the list, please manually add the IP number of your device. (This can be obtained by connecting it via USB). Once you click on the Apply Settings button, the configuration activates and the nVidia should recognize three virtual monitors with a resolution of 7680x1080 each. Verify the input by clicking on the input image(s). Once this step has been completed, you can continue by creating your nVidia mosaic:
Troubleshooting
Detailed setting of each Datapath device is available by opening its built-in webpage. It allows setting proper name, network settings, correct timing and most important correct sync settings. Open the webpage and verify the correct timing for the sync and the refresh rate for each monitor. It can also display a test pattern instead of the nVidia output, which makes troubleshooting much more easier. If monitors remain black, but give a proper image when using a test pattern, verify in the nVidia control panel by checking the color depth per display. It must be set to eight bits/pixel, not six bits/pixel.