Plug-ins User Guide
Version 5.2 | Published March 20, 2024 ©
Wall

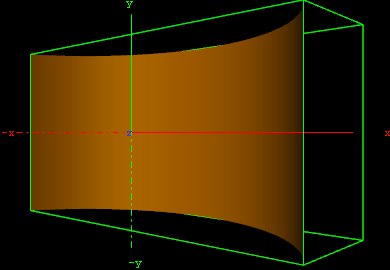
The Wall plug-in creates a curved wall object. The size and curving of the wall can be customized.
Note: This plug-in is located in: Plugins -> Geom plug-ins -> Default
Wall Properties
-
Use LOD: Enables/disables dynamic level of detail.
-
Height: Sets the height of the wall.
-
Width: Sets the width of the wall.
-
Depth: Sets the depth of the wall curving. The higher this value is set, the more curved the wall is.
-
Angle: Sets the angle of the walls curving. Use this parameter together with Depth to achieve the desired curving of the wall.
-
Corners: Sets the number of internal corners the wall should be built up from.
-
Center: Sets the center axis of the object. Choose between Center, Bottom or Top.
-
Front: Lets you switch between front and back.
To Create a Wall

-
Create a new group and add the Wall plug-in to it.
-
Open the Wall editor and set the following parameters:
-
Set Height to 200.0.
-
Set Width to 400.0.
-
Set Depth to 400.0.
-
Set Center to Center.
-
-
Add a material and/or a texture to it.
-
Open the Transformation Editor and set Rotation Y to -45.0.