
Viz Mosart User Guide
Version 3.9 | Published November 04, 2019 ©
Control Command Keys
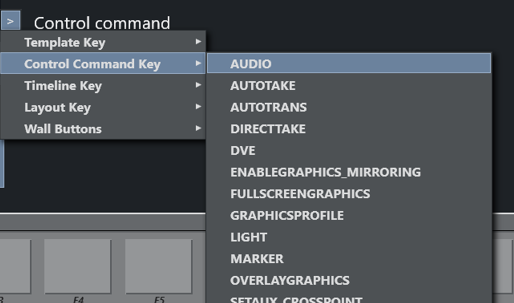
Control Commands are commands the operator can send directly to one of the connected devices independent of templates currently in use. A DVE FORWARD command can be sent to the vision mixer or a Continue graphics command can be sent to the connected graphics system. They can also be used to change template set, graphics profile, or to set the system in AUTOTAKE mode.
In addition to being assigned to shortcuts, control commands can be set into the timeline from the NCS using written commands, or they can be attached to templates either as continue points or to be automatically performed when a template goes on or off air.
Most of the Control Commands have parameters attached to them, and are described below:
Using the Control Commands
Control commands can be used in two ways beyond as keyboard shortcuts:
-
Inserting a Control Command in the Viz Mosart Timeline from the NCS
-
Use a textual command, either as a machine command in iNews or such as this in ENPS:
(**COMMAND=DVE FORWARD <00:04**)This command will perform a DVE FORWARD four seconds into the main item.
Attaching Control Commands to a template
Some control commands can also be attached to a template. Please refer to the Viz Mosart Administrator’s Guide for detailed instructions
Parameters with Placeholders
Control commands parameters may contain placeholders which can be replaced with values found in the fields of the Viz Mosart item which is currently on-air. See the Parameters with placeholders section in Additional Template Functionality.
Add New Command
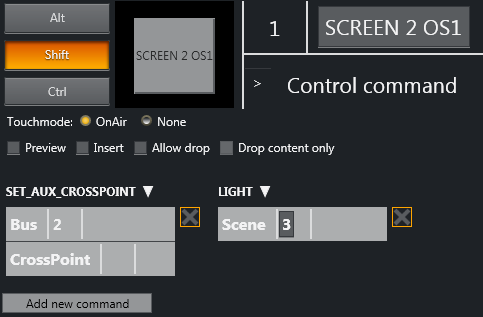
The Add new command button allows users to add multiple commands to a shortcut. These commands will be executed sequentially from left to right.
Common Parameters
Touch Mode
![]()
All control command keys share the "TouchMode" parameter. "OnAir" indicates that clicking or pressing the keyboard shortcut in the shortcut window will immediately execute the relevant control command. "None" disables touch/click functionality for the button.
AUDIO
Audio Control Commands have an associated Faderate parameter, which allows the operator to set a fade rate in frames where relevant.
Audio Parameters
|
Name |
Description |
|
FADE_OUT_KEEPS |
Faders that are set as "keep level" in the template on air will be faded out.Default: CTRL+F |
|
FADE_MANUAL |
The audio faders for the On-Air server channel are set to Manual control, and will not be changed by Viz Mosart until taken out of manual control again.Default: CTRL+M |
|
FADE_UP_SECONDARY_AUDIO |
Viz Mosart will fade up relevant audio sources not connected to the video currently on air, when cutting between sources. For example, when cutting from a camera to a live source, internal Viz Mosart logic dictates that all the microphones in the camera template are left up. Pressing SHIFT+F10 will fade the camera template microphones down. F10 will bring them back up again, for example to allow the presenter to talk to a reporter at the end of a live segment.Default: F10 |
|
FADE_DOWN_SECONDARY_AUDIO |
Viz Mosart will fade down relevant audio sources not connected to the video currently on air. Default: SHIFT+F10 |
|
FREEZE_AUDIO |
With the Control Command Freeze Audio all sound faders are frozen, and do not respond to commands from templates. This command is a toggle function. Default: CTRL+K |
|
SET_LEVEL_2_PREVIEW |
The second level for faders in the template will be set on the template which is in preview, and be performed on next transition.Default: CTRL+L |
|
SET_LEVEL_2_ONAIR |
The second level for faders in the template which are on-air will be set.Default: SHIFT+CTRL+L |
AUTOTAKE
Set the Viz Mosart system to auto take mode.
PARAMETERS: The key can be defined as a toggle key, or two separate keys can be used to activate or deactivate autotake mode.
Default: Toggle with CTRL+SHIFT+A
AUTOTRANS
This will tell the switcher to perform a transition on a given ME between the currently cued and on-air source.
PARAMETERS: ME and transition rate
DIRECTTAKE
This key will execute a directtake template.
PARAMETERS: Number of the directtake template
DVE
Send a forward or reverse command to the DVE in the vision mixer.
PARAMETERS: Set to forward or backward.
Default: Forward with PageUp
Default: Backward with PageDown
ENABLE_GRAPHICS_MIRRORING
Target: FULLSCREEN, OVERLAY, ALL - Where to enable/disable graphics mirroring
Action: ENABLE, DISABLE - What to do
FULLSCREEN_GRAPHICS
CONTINUE: Send a continue command for a fullscreen graphic on a graphics engine.
PARAMETERS: Choose a specific engine, or use current to send the command to the engine currently on air.
Default: Send a continue to the current engine with F11
MACRO: For graphics systems that support this function, this sends a macro command to the defined engine. The Parameter field is in the form <engine>:<Macro>. The macro is a public macro on Viz Trio.
GRAPHICSPROFILE
Change the current graphics profile loaded.
PARAMETERS: Enter the name of the desired graphics profile
LIGHT
Activate a specific light setup.
PARAMETERS: Enter the number of the desired scene
MARKER
Inserts a metadata marker into the timeline.
PARAMETERS: Description to be entered for the marker.
OVERLAY_GRAPHICS
All Overlay Graphics commands share the Render parameter. This parameter can be set to send the given command to a specific engine, or to engines which currently have active graphics on air. In addition, the Parameter value has varying functionality depending on the chosen command.
-
CONTINUE: If the current overlay graphic contains stop points/triggers, this command will continue the timeline. Parameter has no effect. Default: Send a continue with SHIFT+F11
-
MACRO: For graphics systems that support this function, this sends a macro command to the defined engine. The Parameter field is in the form <engine>:<Macro>. The macro is a public macro on Viz Trio.
-
TAKE MANUAL OUT: This command takes out overlay graphics which have been set to wait for a manual take out. Parameter has no effect. Default: SHIFT+Home
-
TAKE LAST OUT: This command takes out the last overlay graphics which have been taken in. Render value has no effect. In the Parameter field, it is possible to enter a graphics Handler name (i.e. WALL or DSK etc). Default: Home
-
PRETAKE NEXT: With this command, the next overlay graphics in the timeline will be taken in. In the Parameter field, it is possible to enter a graphics Handler name (i.e. WALL or DSK etc). This value will override the Render value. Default: CTRL+O
-
CLEAR: This command takes out all on-air overlay graphics. Parameter has no effect. Default: CTRL+X
SET_AUX_CROSSPOINT
Sets a crosspoint on one of the AUX buses on the mixer.
PARAMETERS: Select bus and specify crosspoint.
SET_CROSSPOINT
Sets a crosspoint on the vision mixer.
PARAMETERS: The operator can choose the ME, bus (A, B or keyers) and crosspoint for the command.
SET_CURRENT_ME
This command sets a given ME on air.
PARAMETERS: Choose an ME.
RUNDOWN_NCS_RESYNC
Initializes a reconnect to the NCS.
SEQUENCE
This command contains controls for a sequence as defined in a template.
-
START: Restarts a previously stopped sequence.
-
STOP: Stops a running sequence.
-
STARTLOOP: Sets a running sequence to start looping.
-
STOPLOOP: Stops running a looped sequence in loop
STUDIOSETUP
Change the current studio setup (template set) loaded.
PARAMETERS: Enter the name of the desired studio setup.
VIDEOWALLMODE
This toggles a mode where key parts of production are shifted via an ME to a connected video wall (e.g. video server ripple, but not camera switching). It is not recommended to use this feature without consulting Viz Mosart support.
PARAMETERS: The ME to be used.
TAKE_SERVER_TO_PROGRAM
Takes a video server port to program on a selected ME. For example: a video clip is running on a video wall. The shortcut can then be used to
PARAMETERS: Select on which ME the video server should be taken to program, and the transition rate to use.
TRANSITION_TYPE
This command sets the transition type to use on the next transition.
PARAMETERS: The type can be set including Toggle, which cycles through the various transition types. In the Value field, the transition rate in frames can be set, or the effect number for the mixer effect transition type.
DEFAULT: Tab is set to Toggle.
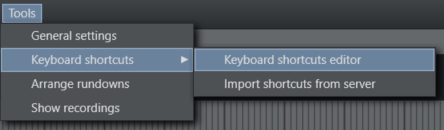
How to test - Using keyboard shortcuts TOGGLE transition functionality
Open the Tools → Keyboard shortcuts → Keyboard shortcuts editor
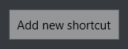
Create a new shortcut by clicking on Add new shortcut
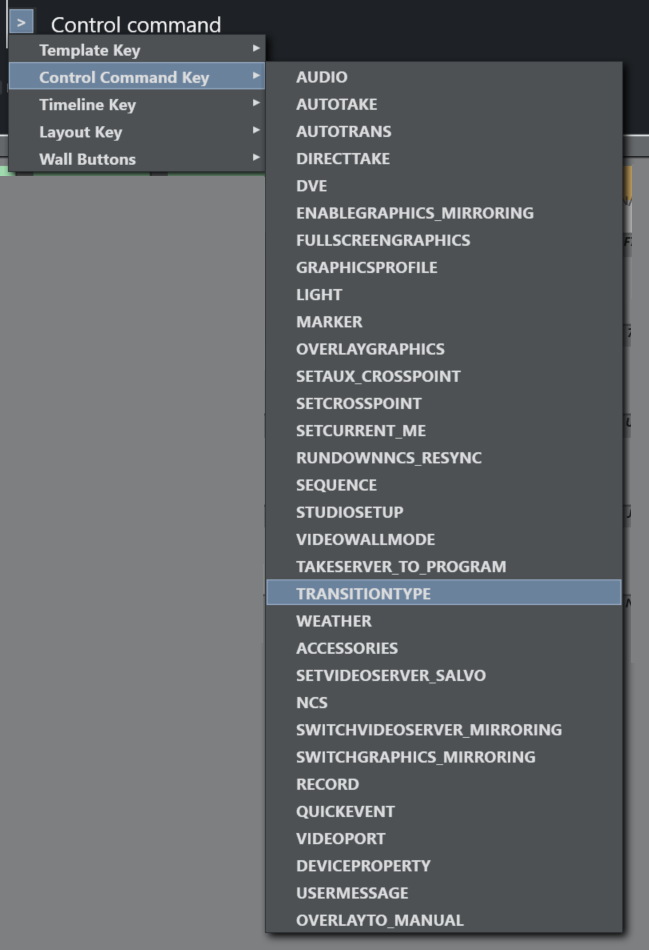
Go to Choose Control Command and click on

Browse the Control Command Key options and select TRANSITIONTYPE
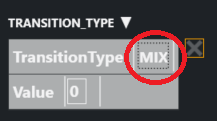
Click on the selected TransitionType
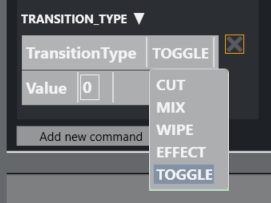
Browse the drop-down menu and select TOGGLE
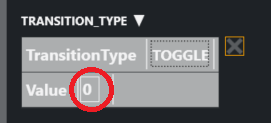
Set Value to 0
Set Control Command name to TOGGLE TRANSITION TYPE
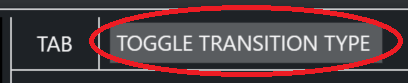
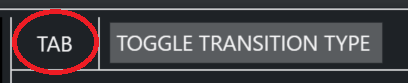
Assign the TAB-key to this shortcut
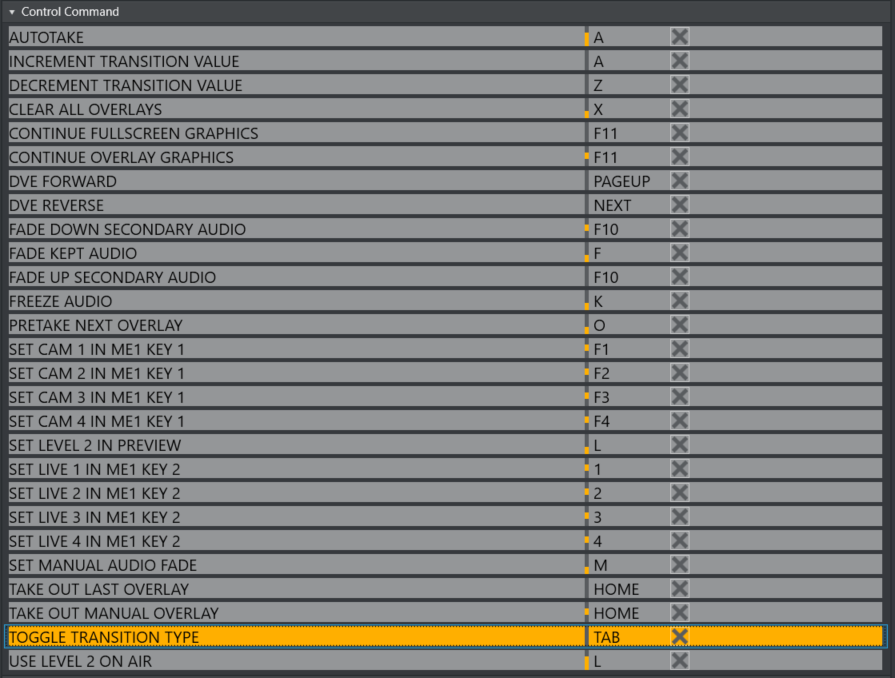
The newly created shortcut will appear in the list of all the control commands
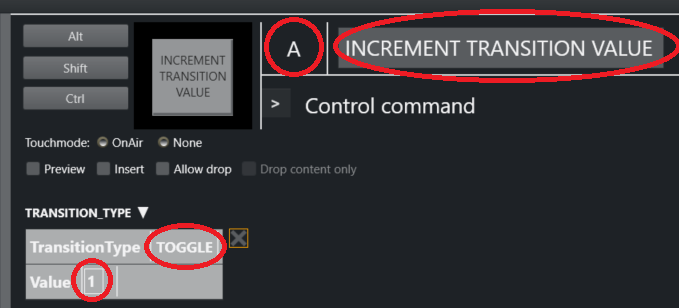
Create another shortcut by repeating the procedure above
-
TransitionType = TOGGLE
-
Control Command = INCREMENT TRANSITION VALUE
-
Key assigned = A
-
Transition Value = 1
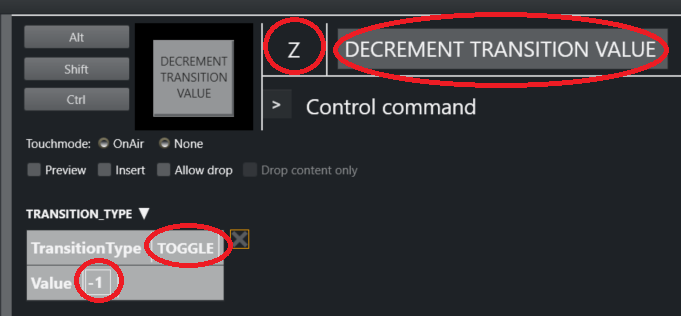
Create another shortcut by repeating the procedure above
-
TransitionType = TOGGLE
-
Control Command = DECREMENT TRANSITION VALUE
-
Key assigned = Z
-
Transition Value = -1
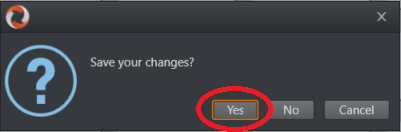
Close the Keyboard editor

Click Yes to save your changes
Start rundown (if not started)
Use the TAB-key to toggle between transitions
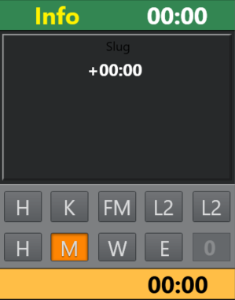
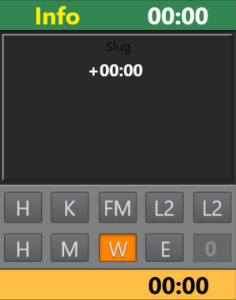
Use the A-key to increment the value


Use the Z-key to decrement the value

Observe that the value is also changed in AVAutomation
WEATHER
This command controls the timeline of a connected Viz weather system.
-
PLAY: This command starts the timeline of the weather system.
-
CONTINUE: When a weather timeline has stop points, this command sends continue commands to the timeline.
-
GO TO FIRST: This command cues the weather scene to its first page/frame.
ACCESSORIES
Pretake of accessory. Pretake requires accessory template to have preload enabled and also a primary type to trigger the pretake defined. Only use accessories with in-time=0
SET_VIDEOSERVER_SALVO
Switch to the videoserver salvo specified in the combobox parameter.
NCS
NCS [OpenMedia]
Start\Stop rundown/story/item status.
SWITCH_VIDEOSERVER_MIRRORING
Toggles a switch of any mirrored video ports
SWITCH_GRAPHICS_MIRRORING
TOGGLE - Toggles mirroring mode for graphics for fullscreen graphics
ACTIVATE - Activates mirroring mode
DEACTIVATE - Deactivates mirroring
RECORD
The Record control command has the following parameters:
-
Command:
-
PREPARE: Cue record for the specified Recorder on PortName for recording to the specified file with the clip name.
-
START: Only supports the Recorder parameter.
-
STOP: Only supports the Recorder parameter.
-
-
ClipName: The name of the recorded clip.
-
Recorder: The name of the recorder. A value of Default will select the default recorder.
-
PortName: The name of the recorder port. Default value is “Rec”. It is always in the “Rec” group.
QUICKEVENT
Quickevent control command has the following commands:
|
Name |
Description |
|
TOGGLE_SELECT |
Viz Mosart will mark the current item in the list as group-selected. The group selected items can be iterated with NEXT_GROUP_ITEM and PREVIOUS_GROUP_ITEM. |
|
NEXT_GROUP_ITEM |
Viz Mosart will select the next group-selected item (down). |
|
PREVIOUS_GROUP_ITEM |
Viz Mosart will select the previous pre-selected item (up). |
|
CLEAR_SELECTION |
All selected and group-selected marks will be removed. |
|
NEXT_ITEM |
Viz Mosart will select the next item (down). |
|
PREVIOUS_ITEM |
Viz Mosart will select the previous item (up). |
|
TAKE_SELECTED |
Viz Mosart will attempt to put the selected item to air. |
|
TAKE_SELECTED_TO_WALL |
Viz Mosart will take the selected item to the wall item specified in the parameter. See Wall Manager . |
|
PREVIEW_SELECTED |
Viz Mosart will attempt to put the current selected item to preview. |
|
PREVIEW_SELECTED_TO_WALL |
Viz Mosart will put the selected item to the selected wall salvo preview wall item specified in the parameter. See Wall Manager. |
|
PRELOAD_SELECTED |
Viz Mosart will try to preload the current selected item to the preload port\engine if available and configured in AvAutomation. |
|
FILTER_LEFT |
Viz Mosart will switch the selected filter to the filter displayed to the left of the currently selected filter (this will also work with QAP). |
|
FILTER_RIGHT |
Viz Mosart will switch the selected filter to the filter displayed to the right of the currently selected filter (this will also work with QAP). |
|
LOWERTHIRD_ACTION_SELECTED |
Viz Mosart will put the selected lowerthird in the quick access tab based on the parameter. The parameter is mandatory and available with the following actions:
|
VIDEO_PORT
Command for sending a specific command directly to a specific video port. Not applicable for all video servers. Behavior varies depending on video server type.
This is will not be visible in the rundown! (only visible in Wall Manager)
Action : What action to perform on clip assigned to port:
-
PLAY_PAUSE : Play or Pause assigned clip
-
STOP : Stop assigned clip
-
CUE : Cue assigned clip
-
RECUE : ReCue assigned clip
-
SET_LOOP : Tells the video player to loop the current clip
-
PLAY_TAIL : Skip to end of clip and start playing. Use parameter e.g. -10 to skip to 10 seconds before end of clip. Used for rehearsal.
-
CUE_TAIL : Same as PLAY_TAIL but does not start to play.
VideoPort : Name of VideoPort to send command to.
Parameter : Used for PLAY_TAIL and CUE_TAIL commands. Specified length from end or start of clip to skip to. Use negative number to count from end.
DEVICE_PROPERTY
n/a
USER_MESSAGE
Writes a simple message to the log
OVERLAY_TO_MANUAL
Converts all lowerthirds (overlays) to manual for the current, preview or selected story.
The control command OVERLAY_TO_MANUAL has three optional parameters:
-
Parameter 1: The type of story to be converted, either:
-
SELECTED (default): The selected story. Used for GUI.
-
PREVIEW: The story in preview
-
ONAIR: The on air story
-
-
Parameter 2: Comma-separated list of handler names, e.g. WALL,DSK. Empty list means all handlers.
-
Parameter 3: Method for the converted overlays to be taken out, either:
-
AUTOMATIC (default)
-
MANUAL
When activated, OVERLAY_TO_MANUAL will convert all lowerthirds in the specified story (Parameter 1) with the specified handler name (Parameter 2) to MANUAL. If no handler name is specified it will convert all lowerthirds in that story to MANUAL. If Parameter 3 is set to MANUAL, the converted overlays also have to be taken out manually, otherwise they are taken out (automatically) after the specified duration.
-