
Viz Artist User Guide
Version 5.0 | Published December 20, 2022 ©
Working with Holdout and Trash Mattes
The Trash Matte and Holdout Matte have changed between Viz Artist 3.x and Viz Artist 4.x.
Info: This feature requires Vizrt Virtual Studio/Tracking Hub Version 1.3.1 or later.
In previous Viz Artist versions, the trash-matte was created in VIZIO or Tracking Hub and then transferred to Viz Engine via command interface.
In Viz Artist, the trash-matte and holdout-matte are defined in a scene. This scene must be a scene using the Classic Render Pipeline, it should have active tracking (set necessary cameras to REMOTE) and lens distortion activated (if needed). It is rendered like the main scene, except that the result is not visible but only used to define trash matte, Cyc and holdout matte.
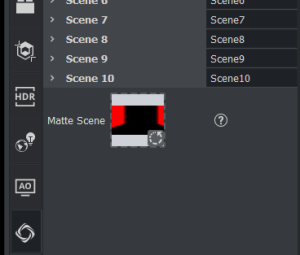
The color channels are interpreted as follows:
-
Red: Trash matte.
-
Green: Cyc (unused).
-
Blue: Holdout matte.
-
Cyan: Unprocessed holdout area.
If a holdout matte is set, the green channel is interpreted to select unprocessed (original LIVE input) vs processed (for example, despilled) input for the holdout area. Green=0 results in fully processed holdout area, Green=255 results in a unprocessed holdout area.
You can either manually define your scene in Viz Artist (verify correct camera settings) or use Tracking Hub, which provides a plug-in and a GUI to control the mattes.
See the following example with different matte scene scenarios:
|
|
Matte Scene |
Result |
|
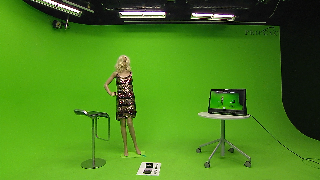
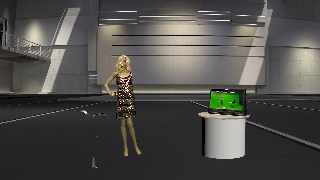
Original live input. |
|
|
|
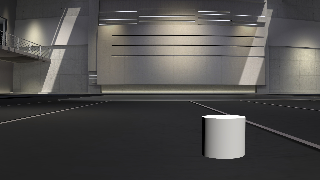
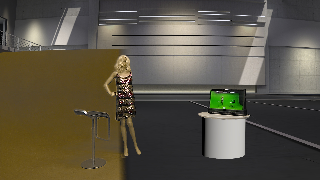
Virtual set only, no keying. |
|
|
|
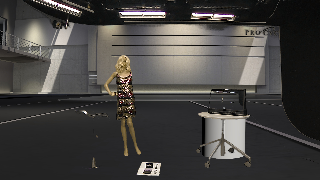
No matte scene used, studio lights and obstacles visible, monitor keyed. |
|
|
|
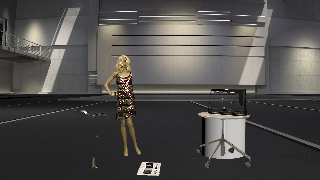
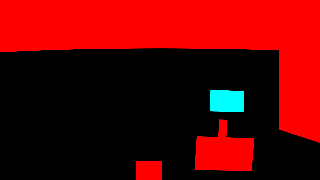
Add trashmatte to mask out lights on top and black area on the right. |
|
|
|
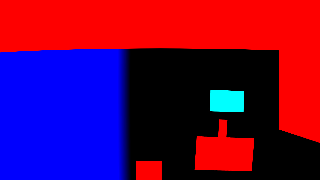
Add trashmatte to mask out obstacles on bottom, add holdout matte to prevent keying of image shown on monitor. |
|
|
|
Add holdout matte to create unkeyed but color processed area, |
|
|


Tracking Hub
Tracking Hub can directly modify this scene via the command interface.

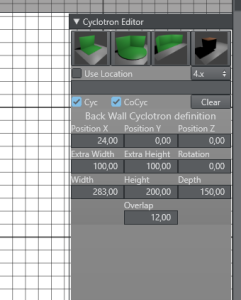
The new geometry plug-in Cyc is responsible for rendering the special geometry needed to represent a back wall, one corner and two corner cyclotron. It is now possible to define an overlap size, which blends the hard edges softly into the key.
Creating a Trash Matte Scene
-
Create an empty scene in Viz Artist. This scene MUST use the Classic Render Pipeline.
-
Drag and drop the Cyc plug-in into the scene.
-
Make sure that the Use Lens Distortion flag is checked and the camera is on remote.
-
Save the scene under a name of your choice and remember the location in the server.
-
Open your virtual studio scene.
-
Make sure the scene uses the Viz Engine Render Pipeline.
-
Go to the scene settings for Virtual Studio.
-
Drag and drop your new created scene to the matte scene property.
-
Set the cameras to Remote.
-
Save your virtual studio scene.
-
All position and size changes can then be done in the Studio Manager.
Adjusting the Trash Matte from Studio Manager
-
Open the Studio Manager.
-
Open the new Cyc editor.
-
Create a new Cyc model.
-
Set the Render Pipeline to Viz Engine.
-
Leave the Use Location check box empty! This will explained later.
-
Modify the parameters according to your Cyc model.
-
The meaning of the parameters is explained in the Tracking Hub User Guide.
-
When finished, save the studio. The definitions are then saved into the configuration files.
Selecting the Workflow
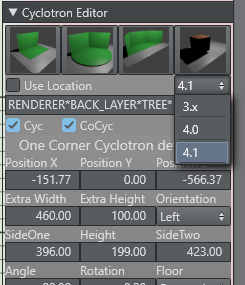
Viz Artist 4.0 introduced a new workflow with the Cyc scene as scene property in the scene settings. The dimension and position of the Cyc was sent direct to the Cyc plug-in in the scene. In Viz Artist 4.1, this workflow was enhanced by using the shared memory implementation. From Viz Artist version 4.1 and later, the settings of the Cyc are stored in the shared memory. Therefore, it does not matter where the Cyc scene is located. To adjust the Cyc visible in the editor, the user can load the scene into the main layer and watch the geometry change. Later on, this scene can be moved into the scene property of the Virtual Studio scene and used as in Viz Artist 4.0.
In the Cyc editor of the studio the user can now choose between three modes. The old 3.x workflow, the 4.0 workflow and 4.1 workflow with shared memory. Don't forget to adjust the workflow according to the Viz Artist version used.