
Viz Mosart Administrator Guide
Version 4.1 | Published October 29, 2021 ©
Viz Mosart Installation Administrator
Viz Mosart has its own installation utility, Viz Mosart Installation Administrator (MIA). It can save a lot of time when installing and upgrading a Viz Mosart setup.
Note: The Viz Mosart Installation Administrator is beta software. Please provide any feedback to your Vizrt Support organization.
This section contains the following topics:
Installing the Viz Mosart Installation Administrator (MIA)
![]()
You need to first download and install the Viz Mosart Installation Administrator (MIA) before working with Viz Mosart system installations.
To Install the Viz Mosart Installation Administrator
-
Download the MosartInstallationAdministratorInstaller.<version>.msi to the preferred location.
Default location is C:\Mosart\Installers. -
Double-click the installation file, and follow the prompts to complete installation.
Repeat this installation process on all PCs where you plan to install any Viz Mosart Applications.
Warning: The directory that holds the Viz Mosart installers must be named using the Release.Version.Patch.Build naming convention.
For example:
C:\Mosart\Installers\3.4.5.12345 for Viz Mosart 3.4.5 build 12345, or
C:\Mosart\Installers\4.0.0 for VizMosart-4.0.0 etc.
If this rule is not followed, MIA will not display the installation directory.
Viz Mosart Installation Administrator Interface

The MIA utility assists in installation and upgrade of Viz Mosart.
The various tools are described below.
Semi-Automated Installation

The Viz Mosart Installation Administrator can run a semi-automated installation process.
The buttons above are placed in the order you would normally progress through when upgrading an existing Viz Mosart installation.
New Installs
If Viz Mosart has not been installed before and installer files are in the correct installation location, begin from the Install Mosart button.
Upgrades
Follow a five-step process running from left to right when performing a semi-automated upgrade.
Note: If Viz Mosart has previously been manually installed on the system you are using without using the Viz Mosart Installation Administrator, the user must uninstall Viz Mosart manually through Windows’ Uninstall or change a program before using the installation assistant. This is due to a filename mismatch in the Windows Registry and installation assistant that makes MIA unable to locate previous manually installed Viz Mosart Applications.
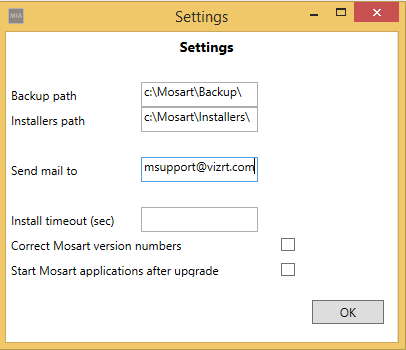
Settings

Settings are accessed by clicking on the cog-wheel icon, at the top right of MIA.
The screenshot below shows default settings.
Note: Any paths not found in MIA settings can be manually changed by editing the file:
C:\Program Files (x86)\Mosart Medialab\Mosart Installation Administrator\MosartInstallationAdministrator.exe.config
-
Backup path: Defines the path to where the installation assistant places backup files.
-
Installers path: Defines the path to where the installation assistant should look for installation files.
-
Send mail to: Defines the e-mail address where error reports should be sent when troubleshooting.
-
Install timeout (sec): Viz Mosart Services attempt to start/stop for the defined number of seconds.
Take Snapshot

-
A snapshot of current Viz Mosart logs and user configuration files. These are helpful for Viz Mosart Support to assist in diagnosing any issues you encounter.
-
You must specify a date and time in the past for the snapshot.
-
The following files are collected:
-
C:\MMLogs
-
C:\MMLogs\MosLog
-
C:\MMLogs\AsRunLog
-
%appdata%\..\Local\Mosart_Medialab\.\user.config
-
Once complete, the MIA copies the files to the configured Backup path (see Settings) and compresses the files in .ZIP format. An email interface appears with the .ZIP attached for the user to send the file to Viz Mosart Support.
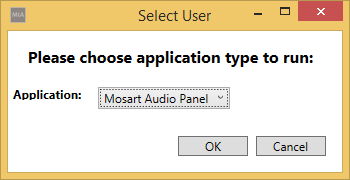
Start Mosart Application
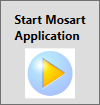
-
MIA provides an quick launch of any installed Viz Mosart application. This feature only allows for one application to be started at a time.
Backup Files
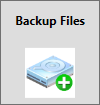
-
This tool backs up all user.config files from folders with current version numbers and all files located in C:\channeltemplates.
-
The files are copied to the specified Backup path (see Settings) with the Viz Mosart version/username as folder name.
Stop Services
-
Pressing this button stops all Viz Mosart services installed, with a timeout of six seconds.
Tip: The timeout length can be adjusted in the installation assistant Settings.
-
A dialog box appears with the current service status:

-
Repeat as necessary.
Alternatively, perform a manual stop within Windows Services.
Uninstall Mosart
-
Pressing this button displays all installed Viz Mosart Applications.
You can then select one or all of the applications to uninstall. -
The MIA does not delete desktop shortcuts.
Existing shortcuts can be reused on completion of an upgrade.

Install Mosart
-
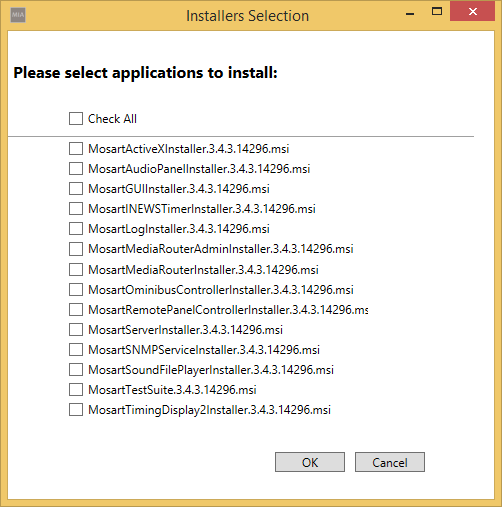
Pressing this button displays all available Viz Mosart installers found in the configured Installers path (see Settings).
The default is C:\Mosart\Installers.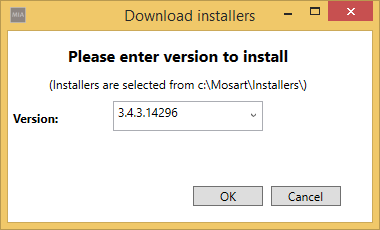
-
Select the Viz Mosart version you want to install, and click OK.
The next screen shows applications found in the installation folder. You can select one or all of the installers to run.
Note that if the installation folder is not named purely with the Viz Mosart version number, like the example 3.4.3.14296 above, MIA will fail to show the below list of installers.
Tip: For details on how to locate/change your installation folder path, see Settings.
-
MIA then performs a silent installation of the selected applications, no user interaction is required.
The installation assistant does not create or delete desktop shortcuts. Any existing shortcuts from a previous version can be reused on completion of the upgrade.
Note: Viz Mosart Server components must be selected on the first installation. This is done by creating shortcuts from C:\Program Files (x86)\Mosart Medialab\Mosart Server. Select the components relevant to your broadcast environment.
Start Services
-
This button starts all installed Viz Mosart services, with a default timeout of six seconds.
Tip: The timeout length can be adjusted in the installation assistant Settings.
-
A dialog box then displays current service status:

-
Repeat as necessary, or perform a manual start within Windows Services.