
Viz Mosart Administrator Guide
Version 4.1 | Published October 29, 2021 ©
Template Device Functions
This section lists a selection of device properties:
Working with Device Functions
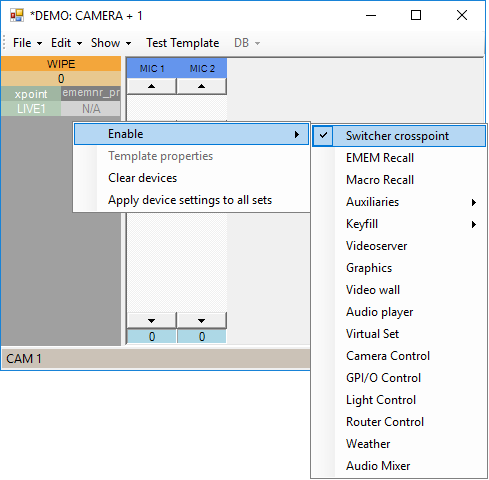
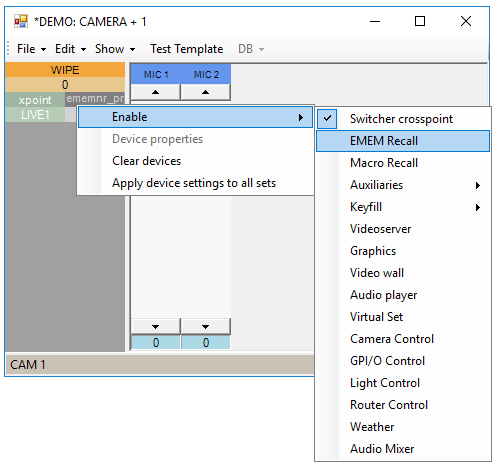
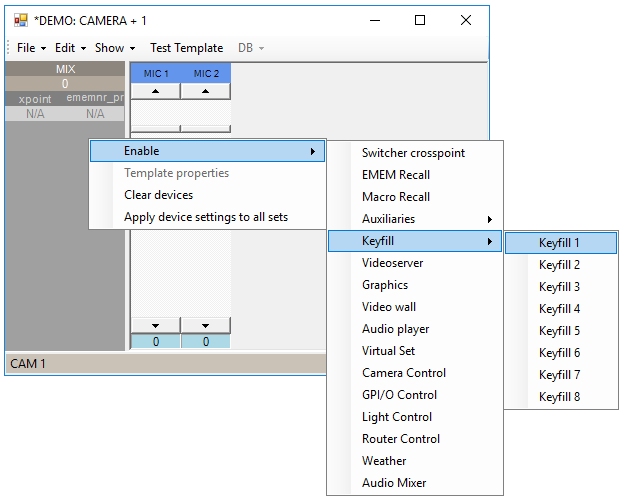
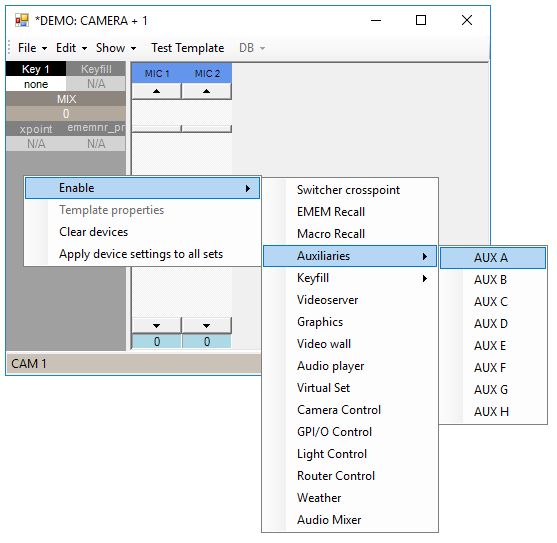
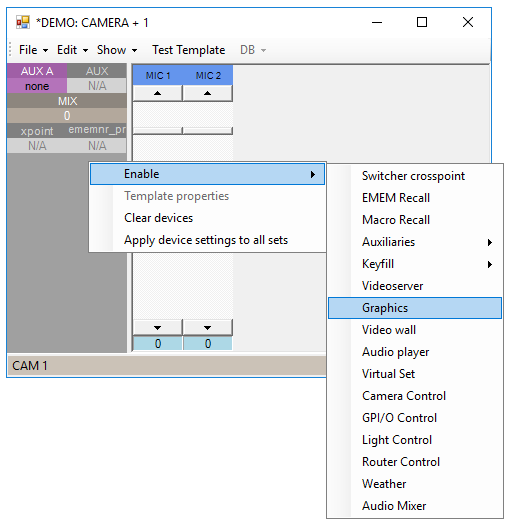
Right-click inside the device function area to open a menu containing the following options:
-
Enable: these commands are described in more detail below.
-
Template properties: opens the current template's properties page, see Template Properties in the Working with Templates section.
-
Clear devices: removes all devices from the device function menu, after confirming in a pop-up message window.
-
Apply device settings to all sets: applies all the device settings to all templates of same type and variant throughout all template sets.
To Enable Device Functions
-
Right-click in the device Function area.
-
Select the device to configure from the Enable menu.
This opens the edit box for the selected device.
-
Right-click over the top half of a device Function area.
-
Select Device properties. Please refer to the Template Device Functions for a list of properties for each device.
Note: Depending on the Protocol chosen, the caption EMEM Recall may alternatively be:
-
Emem Recall
-
Dmem Recall
-
Snapshot Recall
-
MemoryRecall
(Macro Recall may alternatively be named Custom Control).
To Remove Device Functions
-
Right click in the Device function area
-
De-select it from the Enable menu.
Linking Device Properties and Newsroom Tags
To Make a Device Property Editable from the NCS
-
Right-click over Property and select Add newsroom tag.
The property is then reassigned to the value supplied from the newsroom system.
If several device properties are given to a newsroom tag with the same name in a template, all devices use the value given in the NCS.
See also: Newsroom Tags.
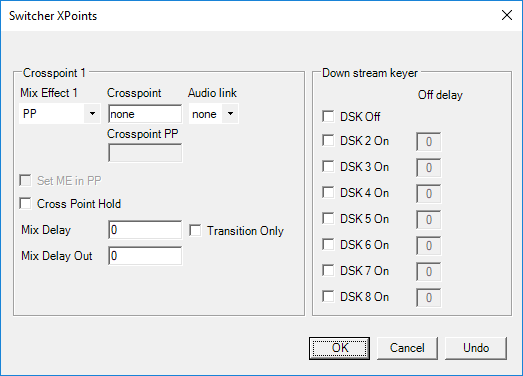
Video Switcher Crosspoint
The video switcher crosspoint enables switching on the video switcher. The A or B bus assignment of the mixer effect (PP/MEx) is automatically handled by the automation.
Guidelines for Video Switcher Crosspoint Configuration
|
Item |
Description |
|
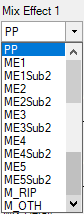
Mix Effect |
Selects which Mix Effect (ME) bank on your vision mixer that you are currently handling. |
|
Crosspoint |
Crosspoint on the video switcher. Default value: none
Note: Newsroom tag available. |
|
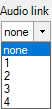
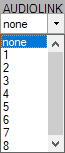
Audio link |
Default value: none |
|
Crosspoint PP |
If another Mix Effect (ME) than PP is selected, then you can select a crosspoint for program by writing the crosspoint name in the field. |
|
Set ME in PP |
If another Mix Effect (ME) than PP is selected, check this box to make that ME the crosspoint for PP. (Checking this box disables XPOINT PP). |
|
Cross Point Hold |
Keeps the crosspoint on the selected Mix Effect. |
|
Mix Delay |
Offset, in frames, of when to perform the transition. |
|
Mix Delay Out |
Delay, in frames, of when to perform the next transition. |
|
Transition Only |
Only delay the switcher transition (sub items will perform). |
|
DSK Off |
Turns off the Downstream Keyer (DSK) on the video switcher when the template is active in program. |
|
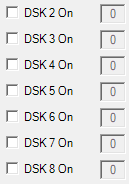
DSK 2 On, ..., |
Downstream Keyer (DSK) 2-8 on. Turns on the DSK 2-8 (PP key 2-8) on the video switcher when the template is active in program. |
|
Off delay |
Delay in frames to set the DSK 2-8 off. |

Video Switcher Transition
The transition device is only available when video Switcher crosspoint is enabled.
To Define Video Switcher Transitions
-
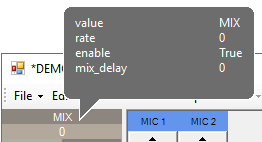
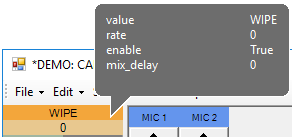
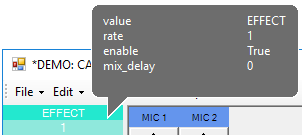
Click on the entry to cycle through the transition types; MIX, WIPE and EFFECT.
-
Click directly on the value.
-
Enter
-
The default duration for the Mix/Wipe transition, or
-
The effect name for the Effect transition.
-
The transition is performed with the auto transition functionality in the video switcher.
Usage and Tips
-
To do a cut, use a MIX transition with 0 frames duration.
-
To add a mix delay, enter a value in frames in the same property window.
Adding a mix delay delays the start of the transition, compared to other device commands, when the template goes On Air. -
To disable the transition, right-click over the device and select Disable.
Video Switcher Register/Timeline Recall
Video Switcher Register/Timeline Recall (EMEM Recall) will recall a register and/or timeline in the video switcher.
To Open the Video Switcher Register/Timeline Recall
-
Open Template Editor.
-
Right-click over ememnr_pr
-
Select Enable > EMEM Recall
-
Enter or select required values

Note: If a Register recall is used in pair with the video switcher key bus delegation and/or auxiliary bus delegation,
the key/aux bus delegation should be disabled in the Video Switcher Register to prevent a conflict between the stored delegation and the Viz Mosart-assigned delegation.
Guidelines for Video Switcher Register/Timeline Recall Configuration
|
Item |
Description |
|
NAME |
Name of Register/Timeline. |
|
DESCRIPTION |
Description of Register/Timeline. |
|
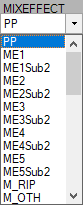
MIXEFFECT |
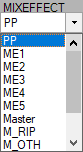
Select the MIXEFFECT (ME) from where the Register/Timeline should be recalled. Drop-down menu values are PP (Program), ME1, ME2, ME3, ME4, and Master. Default value: Master. To dynamically choose ME1 or ME2, values M_RIP and M_OTH are available. Note: Newsroom tag available |
|
EMEMNR PREVIEW |
Register/Timeline to be recalled when the template is cued in preview. |
|
EMEMNR PROGRAM |
Register/Timeline to be recalled when the template is taken to program. |
|
LOAD TIME |
Additional delay time (in frames) from when the mixer register is activated (in Program or Preview), till the rest of the template will be executed. |
|
OPEN VS FADER |
When selected, Viz Mosart opens the fader specified in Audio effect server, defined in the Audio tab of Device Properties in AV Automation. |
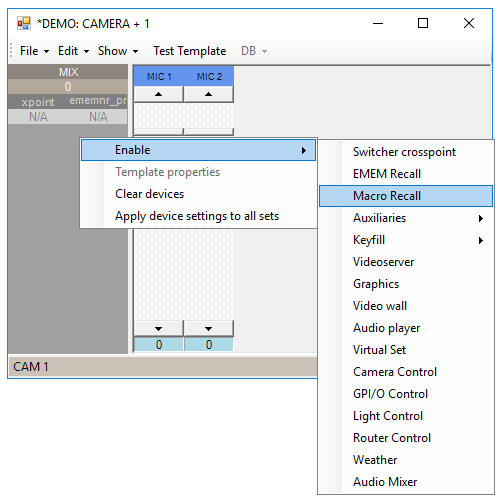
Macro Recall
Macro Recall is available when one of the following vision mixer protocols was selected in the configuration menu AV Automation Devices Vision Mixer.
-
Carbonite
-
GV CPL
-
GV DD35
-
KAHUNA (Kahuna/Kula)
-
SONY SERIAL TALLY
-
vizrt-ip (NewTek\Vizrt Group IP Seriers Mixers (e.g. TriCaster, VMC1)
To Open a Macro Recall
-
Open Template Editor.
-
Navigate to Enable > Macro Recall
-
Enter or select required values.
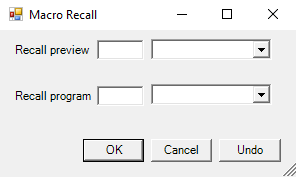
Guidelines for Macro Recall Configuration
|
Item |
General description |
Drop-down |
Text field |
|
Recall preview |
Action to be taken when entering preview mode. |
See below |
See below |
|
Recall program |
Action to be taken when entering program mode. |
See below |
See below |
Drop-down Menu Alternatives
|
Drop-down option |
Description |
|
None |
No action. |
|
Recall |
Macro is prepared (or cued). |
|
Take |
Macro is taken. |
|
Recall and Take |
Macro is prepared and taken. |
|
Load project |
Project is loaded (Kahuna/Kula only). Warning: Load Project could affect the performance of the switcher. Use with caution during a running show. |
The format of the text fields depends on the mixer chosen:
|
Mixer |
Text field |
Remark |
||||||||||
|
Carbonite |
One bank character and two macro characters. |
Recall (and Recall and take) only. |
||||||||||
|
GV CPL |
Macro number (integer) in the range 1-999. |
Recall (and Recall and take) only. |
||||||||||
|
GV DD35 |
Macro number (integer) in the (byte) range 1-255. |
Recall (and Recall and take) only. |
||||||||||
|
Kahuna/Kula |
The meaning and format of the text fields depend on the selected drop-down option:
|
|||||||||||
|
SONY SERIAL TALLY |
Macro number (integer) in the range 1-250. |
Recall (and Recall and take) only. |
||||||||||
|
vizrt-ip |
Plays a macro having the name provided |
Take only |
||||||||||
Note: Some Tricaster drivers use a non-standard macro in which the argument is the macro text itself. However, this does not apply the driver currently used by Viz Mosart.
Video Switcher Key Bus Delegation (Keyfill)
Video switcher key bus delegation enables routing of internal video switcher signals to the keyers on the different mixer effects on the switcher.
For some of the video switchers supporting M/E effects with 4 layers (e.g. vizrt-ips), the device is named Key/Layer.
To Enable Keyfill by Bus Delegation
-
Open Template Editor.
-
Navigate to Enable > Keyfill > [Keyfill index]
-
Enter or select required values.

Guidelines for Keyfill Configuration
|
Item |
Description |
|
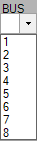
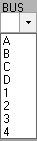
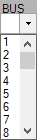
BUS |
Selects the key bus on the selected ME. If the video switcher supports M/Es with 4 layers (e.g. vizrt-ips), 4 more buses are available corresponding to each layer, A, B, C and D: Note: Newsroom tag available. |
|
XPOINT |
Crosspoint on the video switcher. Default value: none Note: Newsroom tag available. |
|
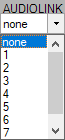
AUDIOLINK |
Assigns a link group to this delegation. Please refer to Audio and Video Setup (previously Linking video and audio sources) for the use of this feature. |
|
MIXEFFECT |
Select the ME where the key crosspoint should be set. Note: Newsroom tag available. |
|
KEY SET DELAY |
Set the delay in frames of the key delegation when taking the template to a program. If the field is left blank the key is set in preview. |
|
KEY ENABLE |
Key enable drop-down menu. Note: Newsroom tag available. |

Video Switcher Auxiliary Bus Delegation
Auxiliary bus delegation enables routing of internal video switcher signals to the auxiliary outputs of your video switcher.
-
Type or select relevant values.

Guidelines for Auxiliary Bus Delegation Configuration
|
Item |
Description |
|
BUS |
Selects the auxiliary to assign a new source. Note: Newsroom tag available. |
|
XPOINT |
Crosspoint on the video switcher. Note: Newsroom tag available. |
|
AUDIOLINK |
Assigns a link group to this delegation. Please refer to Audio and Video Setup for the use of this feature. |
|
SET DELAY |
Set the delay in frames of the key delegation when taking the template to Program. If the field is left blank, the key is set in Preview |
|
TRANS DUR |
If the vision mixer has the ability to mix on the AUX channels, this is where the mix rate is set, 0 is a cut |
Graphics
The Graphics device enables recall of graphic elements.
-
Graphic elements are cued (loaded) in Preview and played (started) when taken to Program.
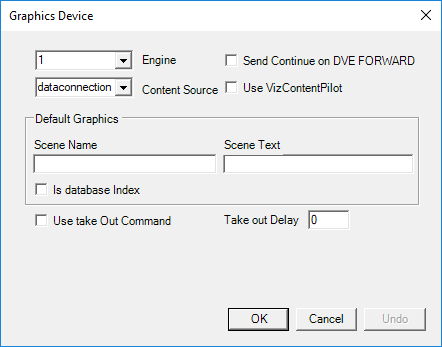
Guidelines for Graphics Configuration
|
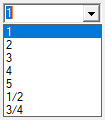
Engine |
Selects the engine to operate on when using this template based on your configuration. |
|
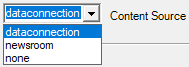
Content Source |
|
|
Send Continue on DVE FORWARD |
If checked, a continue command is sent together with a DVE Forward command. |
|
Use VizContentPilot |
Enable to run this element through a Viz Pilot client. This allows for OnLiveUpdate events in Viz Pilot data elements. |
|
Scene Name |
The default scene name is used if not overridden by the NCS. Note: Newsroom tag available. |
|
Scene Text |
The default scene text will be used if not overridden by the NCS. Note: Newsroom tag available. |
|
Is database Index |
|
|
Use take Out Command |
If checked, a take-out command is sent when the template status changes from On Air to Off Air. |
|
Take Out Delay |
Delay of sending takeout command after template status changes from On Air to Off Air. |
Robotic Camera Control
The camera control device allows for recalling camera shots (and pre-programmed moves) when the template is cued in preview or aired in program. The device editor supports salvo recalls of shots by adding multiple lines for each shot recall.
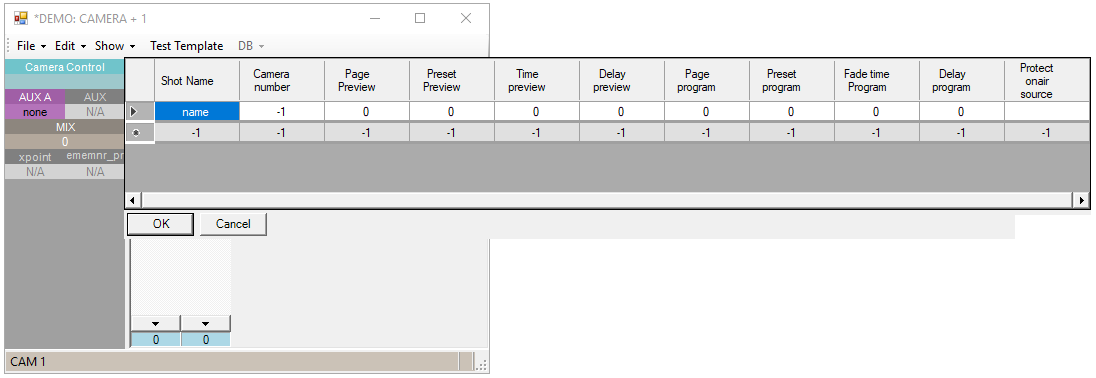
The Standard Robotic Camera Control Properties are described below, as well as exceptions for specific camera types:
Guidelines for Standard Robotic Camera Control Configuration
|
Shot Name |
Name of the shot. |
|
Camera number |
|
|
Page Preview |
For recalling a shot/move when the template is cued in Preview. |
|
Preset Preview |
For recalling a shot/move when the template is cued in Preview. |
|
Time preview |
Time to shot’s position in Preview. |
|
Delay preview |
Delay of the move when cued in Preview (frames). Note: Not recommended for use! Will be deprecated in future versions. |
|
Page program |
For recalling a shot/move when the template is aired in Program. See Page Preview for an explanation. |
|
Preset program |
For recalling a shot/move when the template is aired in Program. See Preset Preview for an explanation. |
|
Fade time Program |
Time to shot’s position in Program. See Time preview. |
|
Delay program |
Delay of move in Program (frames). Note: Only available for Radamec robotics systems |
|
Protect onair source |
Protected video switcher cross-point. If the video switcher cross-point is On Air, the shot/move recall will be ignored. This protection may, by configuration for some robots, be confined to Preview and/or Program, and to Cuts and/or Moves. |
Cambotics Properties
-
Camera Number: Set camera number to 1.
-
Page Preview/ Page program: Robotic camera number.
-
Preset Preview/ Preset program: Shot number.
-
Time preview/ Fade time Program: [Optional] Duration for move in deciseconds (10 deciseconds = 1 second).
Note: All parameters not defined specifically, must be set to -1.
Camerobot Properties
-
Page Preview/ Page program: Name of shot’s matrix in preview/program.
-
Preset Preview/ Preset program: Shot’s cell number in the selected matrix - the shot is adjustable from NCS and GUI.
-
Time preview/ Fade time Program: 0 ~ cut (fastest move) to position, ?0 ~ programmed move speed (adjustable from NCS and GUI).
Cinneo System Properties
-
Page Preview/ Page program: Name of the camera to recall.
-
Preset Preview/ Preset program: Name of shot to recall - adjustable from NCS/GUI.
-
Time preview/ Fade time Program: Desired moving time (seconds).
Fx-Motion Properties
-
Page Preview/ Page program: Identifies the camera to recall (identical to Camera Number > 0), optionally followed by :category for temporary overriding any NCS or GUI settings.
-
Preset Preview/ Preset program: Name of shot or move to recall.
-
Time preview/ Fade time Program: =0 cut, <0 ~ default time to shot, >0 ~ wanted time (frames).
Panasonic Properties
-
Camera Number: Identifies the Controller that the command is linked to.
-
Page Preview/ Page program: Identifies the Camera Number to be controlled in Preview/Program.
-
Preset Preview/ Preset program: Identifies the Preset Stored Move in Preview/Program.
-
Time preview/ Fade time Program: Sets the Timed Delay in Preview/Program.
-
Delay preview: Not in use.
-
Delay program: Not in use.
Technodolly Properties
-
Page Preview/ Page program: Identifies the camera, identical to Camera Number when >0.
-
Preset Preview/ Preset program: Name of the move to recall.
-
Time preview/ Fade time Program: =0 ~ go to start of move, ?0 ~ move.
Shotoku TR_T Properties
-
Page Preview/ Page program: Page of shot to recall.
Telemetrics Properties
-
Page Preview/ Page program: Preset page number to recall.
-
Preset Preview/ Preset program: Preset number to recall.
-
Time preview/ Fade time Program: =0 cut, <0 ~ default time to shot, >0 ~ wanted time (seconds).
Vinten 200 Properties
-
Page Preview/ Page program: Name of the show to recall.
-
Preset Preview/ Preset program: Name of shot or move to recall.
-
Time preview: <0 ~ go to end position of a move, = 0 ~ cut to shot, >0 ~ go to start position of a move, or move to a shot (frames).
-
Fade time Program: For moves, move forward or backward according to Time preview. For shots, = 0 ~ cut to shot, ?0 ~ move to shot (frames).
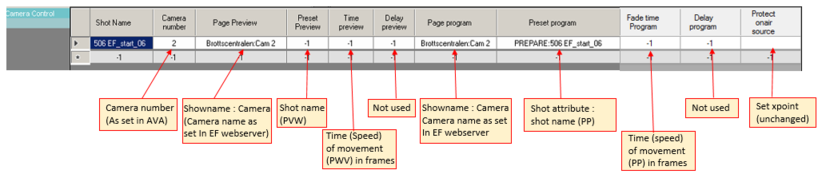
Electric Friends Robotic Camera
For Preview use:
-
Page Preview: Show and Robotic camera name separated with a colon (e.g.: ShowName:Cam 1).
-
Preset Preview [Optional]: Shot name. Shot attributes: prepare, prepareplay and loop. Separated with a colon (e.g.: prepare:ShotName and prepareplay:ShotName).
-
Time Preview [Optional]: Duration for move in frames. The time is rounded up to the nearest second.
For Program use:
-
Page Program: Show and Robotic camera name separated with a colon (e.g.: ShowName:Cam 1).
-
Preset Program [Optional]: Shot name. Shot attributes: prepare, prepareplay and loop. Separated with colon (e.g.: prepare:ShotName and prepareplay:ShotName).
-
Fade time Program [Optional]: Duration for move in frames.The time is rounded up to the nearest second.
Router Control
The router control device allows setting crosspoints for source/destination pairs when the template is both cued in Preview and aired in Program.

-
Add new lines in the router device editor to support setting multiple crosspoints.
Guidelines for Router Control Configuration
|
Item |
Description |
|
Source preview |
Source to route when a template is cued in Preview. Note: Newsroom tag available. |
|
Dest preview |
Destination of routing when a template is cued in Preview. |
|
Source program |
Source to route when a template is aired in Program. |
|
Dest program |
Destination to route when a template is aired in Program. |
|
matrix |
If the router system supports multiple matrices, select the matrix to use here. |
|
level |
|
|
program_delay |
Delay, in frames after the template has been taken to the air, for ‘program’ routing to happen. |
|
salvo_preview |
Salvo name to recall when a template is cued in Preview. |
|
salvo_program |
Salvo name to recall when a template is aired in Program. |
Light Control
Note: The commands to use are driver-dependent and may vary.
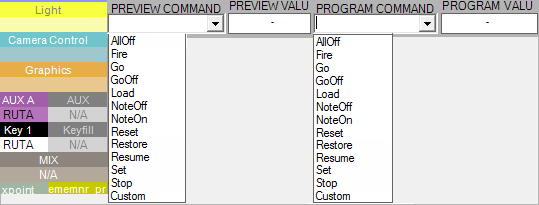
Guidelines for Light Control Configuration
|
Option |
Description |
|
PREVIEW COMMAND |
Command to use for the light mixer cue to be recalled when template enters preview. Note: Newsroom tag available. |
|
PREVIEW VALUE |
Light mixer cue to use when template enters preview. Note: Newsroom tag available. |
|
PROGRAM COMMAND |
Command to use for the light mixer cue to be recalled when a template is taken On Air. Note: Newsroom tag available. |
|
PROGRAM VALUE |
Light mixer cue to use when a template is aired in program. Note: Newsroom tag available. |
Preview Command and Program Command options are available from the drop-down list:
|
Command |
Parameter count |
|
AllOff |
<none> |
|
Fire |
1 |
|
Go |
cue number |
|
GoOff |
cue number |
|
Load |
cue number |
|
NoteOff |
numeric note # (Std. MIDI command) |
|
NoteOn |
numeric note # (Std. MIDI command) |
|
Reset |
<none> |
|
Restore |
<none> |
|
Resume |
variable |
|
Set |
4 or 9 |
|
Stop |
cue number |
|
Custom |
SysEx bytesSend multiple custom SysEx bytes in the format \xnn where nn is a numeric value (0-255). |
|
TimedGo |
- (unsupported) |
GPI/O
The GPI/O editor is used for sending GPOs to external equipment.

-
The editor supports multiple GPO sends.
Add a new line in the editor for multiple GPO sends.-
gpo_preview: GPO to send when a template is cued in Preview.
-
gpo_program: GPO to send when a template is aired in Program.
-
Video Wall Register Recall
This device is only available for Videowall template types.

|
Setting |
Description |
|
NAME |
Internal name of the shot. |
|
RECALL PREVIE |
For WATCHOUT, see notes below. For the other brands, this is the number of the recall to be taken when the template comes in Preview. |
|
EMEMNR |
For WATCHOUT, see notes below. For the other brands, this is the number of the preset to take when the template comes in Program. |
Notes for WATCHOUT
-
The fields RECALL PREVIE and EMEMNR should contain the command or sequence of commands to be sent when the template comes in Preview or Program, respectively.
-
The general format is: [load "show"] [resetrun "timeline"]
-
Both load and run are optional, however at least one of them must be present. The show and timeline parameters may not contain double quotes.
-
The reset value is optional. For more information see the connection string property ResetAnyway, described in the section ‘Watchout Connection String’ in the Viz Mosart Administrator Guide .
-
In most cases, RECALL PREVIE contains load "show", and EMEMNR contains run "timeline".
Video Server

Guidelines for Video Server Configuration
|
Setting |
Description |
|
SERVERCHANNEL |
The Mosart video port / port group where the clip is to be played out /recorded. For recording the corresponding video port has to be part of the “Rec” port group. Port groups are created as part of the video server configuration in menu AvAutomation > Devices > Preferences. In addition, the non-empty groups (groups with at least one port) are available. |
|
CLIP HIRESPATH |
The (default) clip ID or name. Note: Newsroom tag available, meaning that a value from the NCS will override the value specified here. |
|
CLIP DESCRIPT |
You can enter a Clip description, however a clip description from the NCS or video server overrides this value. Note: Newsroom tag available. |
|
TRIGGER START |
Enables the Trigger start function from control commands, a shortcut or continue point could be set to PLAY the Clip. |
|
RECUE CLIP |
In an A/B roll situation, when several Adlibs are played back-to-back, this setting determines how a clip will be restarted after it has been paused. |
|
LOOP |
Sets the server port to loop the clip. Beware! Not all video servers can loop. |
|
CUE ONLY |
Cues only the clip when the template is in Preview. The template will not start playing the clip when the template is taken. |
Audio Player

-
LEVEL: Enter the value for the audio fader to be set to when taken to Program.
-
AUDIOFILE: Enter the default audio file name here, this value is replaced by a value from the NCS.
Note: Newsroom tag available.
-
OUTPUT: Choose the output on the Audio Player to be used, if nothing is inserted, the first port is used. This value is overwritten by values coming from the NCS.
Note: Newsroom tag available.
Virtual Set
You can specify camera to take in a virtual set.
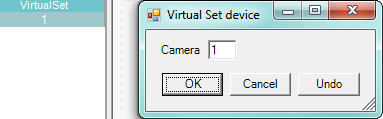
-
Insert the camera number in the virtual set that is to be taken when the template is taken to Program.
Audio Settings
-
The main level for the fader is set by dragging the notch or clicking the arrows.
The default fader level when adding a new fader is 0 dB. -
To set level 2 of the fader press SHIFT while dragging.
A tool-tip opens to signal the editing of the level 2 fader level. -
To set level 3 of the fader press SHIFT+CTRL while dragging.
A tool-tip opens to signal the editing of level 3 fader level.
Level 3 is the mute level of the audio fader.
To Add Audio Faders
-
Add audio faders to the template by right-clicking in an empty part of the audio fader area and selecting Add fader.
-
Set the audio mixer crosspoint from the drop-down menu by clicking the label at the top of the fader.
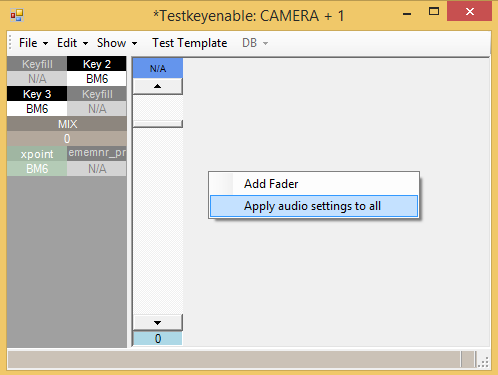
Note: clicking Apply audio settings to all a pplies all the changes to all templates of the same type and variant throughout all template sets.
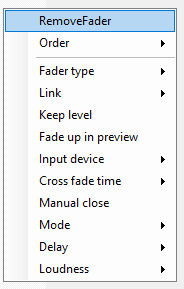
To Remove a Fader
-
Right-click over the fader and select Remove fader.
To Configure a Fader
-
Right-click over the fader to open the context menu and follow the Guidelines below.
Guidelines for Audio Properties Configuration
|
Remove Fader |
Removes the fader from the template. |
||||||||||||||||||||||||
|
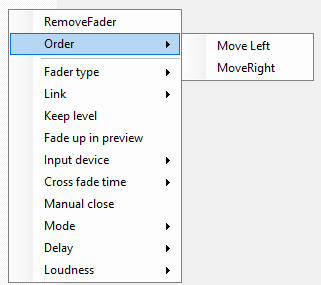
Order |
Re-arranging the order:
|
||||||||||||||||||||||||
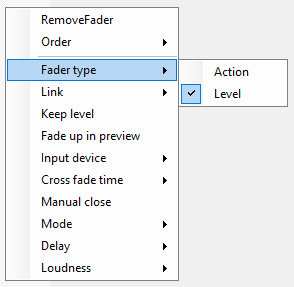
|
Fader type |
Action: When a fader control is set as an action fader, the controls define whether the fader is enabled or disabled. Level: For normal operation.
|
||||||||||||||||||||||||
|
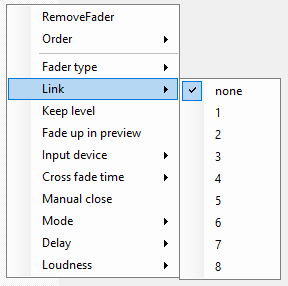
Link |
Assigns a video/audio link group to this fader.
|
||||||||||||||||||||||||
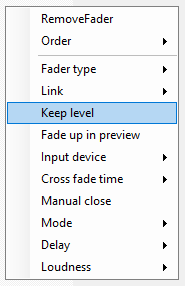
|
Keep level |
Keeps the fader level until manually changed. |
||||||||||||||||||||||||
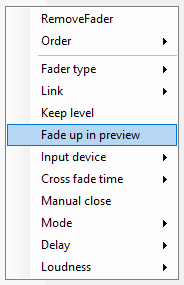
|
Fade up in preview |
Fades up the audio in preview, when camera is in program. Enabling this functionality only works with specific template combinations, as shown below:
|
||||||||||||||||||||||||
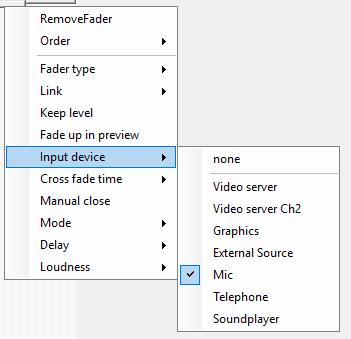
|
Input device |
Sets the type of the audio fader.
|
||||||||||||||||||||||||
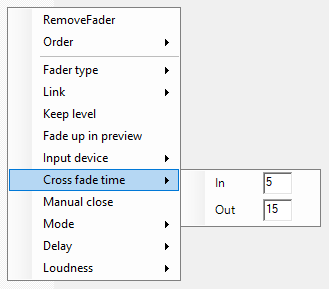
|
Crossfade time |
Sets the in and out crossfade time for the fader.
|
||||||||||||||||||||||||
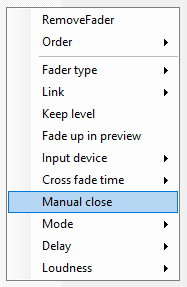
|
Manual close |
Select to ignore sending Close-level commands to audio mixer. |
||||||||||||||||||||||||
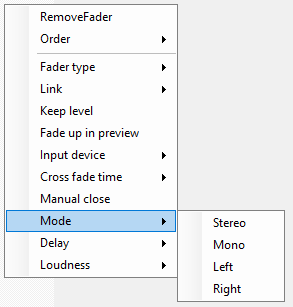
|
Mode |
Only for Studer Vista and Lawo! Sends the chosen value to the mixer board for the audio fader.
|
||||||||||||||||||||||||
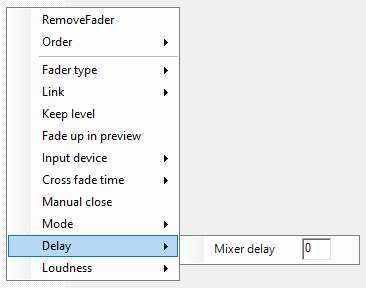
|
Delay |
Only for Studer Vista and Lawo! Gives a delay value for that audio fader that will be sent to the audio board.
|
||||||||||||||||||||||||
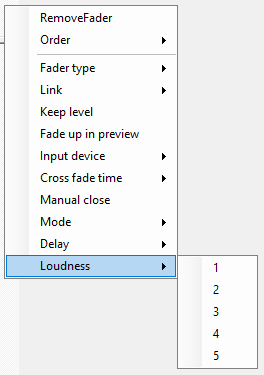
|
Loudness |
Sends chosen recall value to send to the Junger audio processor.
|
Testing a Template
You can test the behavior of your template by simulating a Preview then Take.
To Test a Template
-
Select Test template from the main menu.
This cues the template in Preview then five seconds later take it to Program with the selected transition.