Viz Mosart Administrator Guide
Version 4.1 | Published November 09, 2022 ©
Template Examples
This section contains the following examples:
Studio
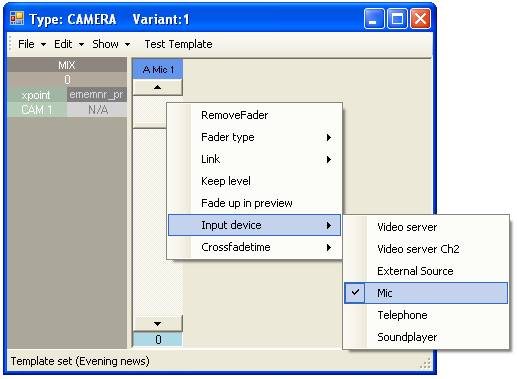
The template for a typical studio camera is based on the CAMERA type. The example below defines a standard camera 1 variant. An entry named CAM 1 in the video setup is selected at the PP bus cross point. Transition duration is 0 frames (hard cut) and E-mem recall is disabled. There is only one studio microphone, which fader is called "A Mic 1" in this template. Audio level is set to 0 dB, and the input device is a microphone. The input device type is important for the handling of audio in an ad lib sequence of full camera, DVE and full external source.
For our standard camera 2 variant, the only difference in the above setup is the PP bus cross point which is called CAM 2.
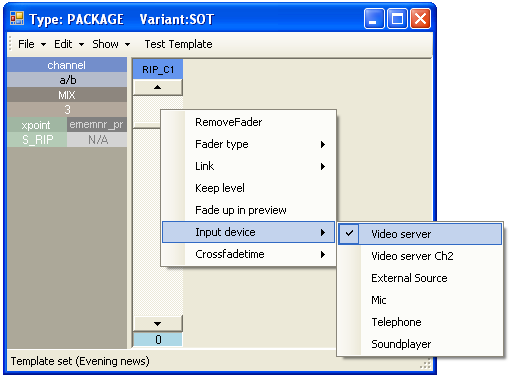
Video Clip with Full Sound
As crosspoint on the vision mixer, we use a source called S_RIP, which means Viz Mosart uses the A/B roll and roll between the sources defined in the AV setup as videoserverA and videoserverB. We chose RIP_C1 as the audio source, but as long as A/B roll is enabled, any source defined as Video server follows the video source. The default transition is a three frame mix. The video channel control is also enabled and controls the clip. The server channel is automatically assigned within the automation.
Voice-over
In this example, the variant VO is defined. Notice the difference from the two last examples and the two fader setups. A Mic 1 is microphone input type and RIP_C1 is video server type.

A second sound level can be set for each fader by using the SHIFT key over the fader to set the second level. This second sound level for all faders is used as the start level for the voice over sound bite type. The same special variant logic for video clip with full sound applies for the voice-over type.
Live External Source
Live external source variants are typically defined by their corresponding vision and audio mixer inputs. In the example below, we define variant 1 as source MW 1 on both PP bus cross point and audio fader.
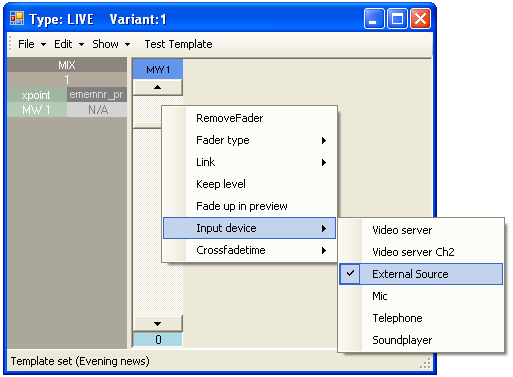
Additional variants 2 to 9 would typically use MW 2 to MW 9 as sources for both video and audio.
DVE
The example below describes four setup steps necessary to create a template that recalls a predefined E-mem (emem number 10) defining a split screen DVE on M/E 1 on the vision mixer.
1. E-mem Recall Definition
The vision mixer effect uses key 1 and key 2 on M/E 1 as left and right split windows.
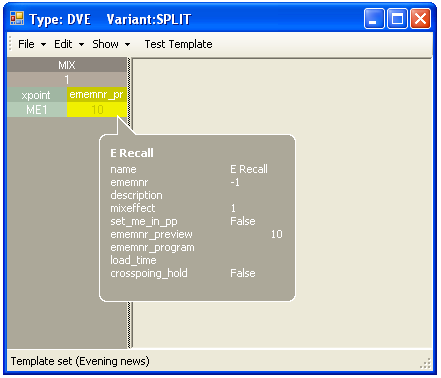
The PP bus cross point is set to ME1 (program output of mixer effect). The E-mem recall control is defined to recall emem 10 when the template is taken to preview.
2. Key bus Delegation Setup
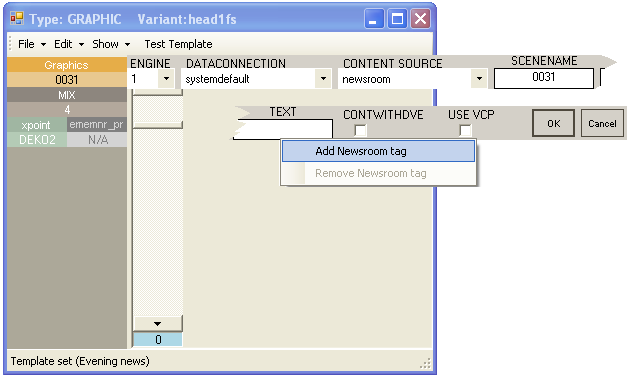
Default crosspoints are chosen (CAM 2 and MW 1) and since a newsroom tag has been added for both keys, the crosspoints can be set from the newsroom system.
Right click over the XPOINT window to add a newsroom tag. In addition, the template defines a recall of a graphics background
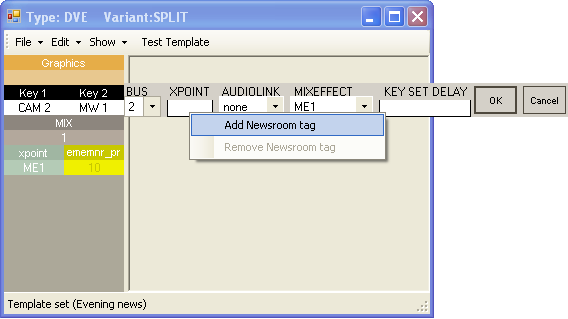
The second key bus delegation is shown. As a default we assign CAM 2 to key bus 1 and MW 1 to key bus 2 on the ME1 mixer effect bus.
(This assignment can be overridden from the NRCS story element by using the newsroom tag).
3. Audio Linking
The audio link is set to 1 for both the key 2 delegation and the second fader (MW 1).
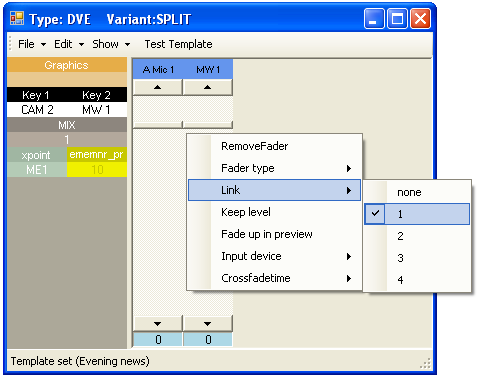
When using the newsroom tag to set key 2 to a different source (for example MW 3), both video and audio delegation will follow:
This leads to the key 2 source being set to MW 3 and the second audio fader being set to MW 3
.
4. Graphics Engine Data Element Setup
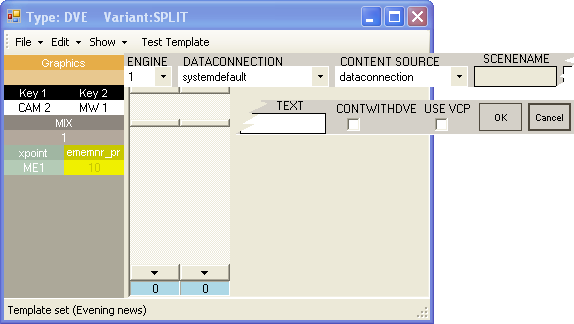
Setup of the graphics controller is described in the next section.
Full Screen Graphics
The graphics controller in the Template Editor is vendor-specific, due to the lack of a generic control API. As a general feature, it can control multiple graphic engines. A typical controlled cluster could for example be, one for full screen graphics, one for studio wall graphics and additionally, an overlay CG engine. For DVE effects, this can be a fixed element, while for telephone graphics or maps the element name and data are provided in the NCS story.
The controller's task is to cue graphics when taken to preview and run them when taken to program.
Accessory Templates
In this example you create an accessory template for driving content to a video wall driven by the Template Router feature in Viz Mosart. this feature merges new template-based instructions onto an existing one, enabling, as in this example, an asset to be diverted to the video wall. You need a separate accessory template for each wall that will be controlled. The accessory template can contain settings for cross points, video server port, graphics engine and aux.
Creating the Wall Accessory Template
The wall accessory template is created as a standard template.
-
You can create a new accessory template with a variant name of for instance "wall2".
Switcher Cross Point
-
To change switcher crosspoints enable Switcher crosspoint in the Template Editor.
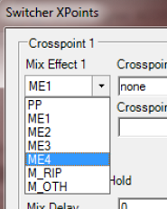
The Switcher XPoints appear.
Here you can set the ME-step you want for the wall taken template. -
When the template is set to the wall item it will use this ME step instead of the one specified in the template.
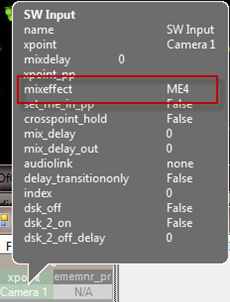
The ME-step will show as a mix effect in the Template Editor.
Video Server Port
If a video clip is wall taken; another video server should be used.
-
This can be changed in the accessory.
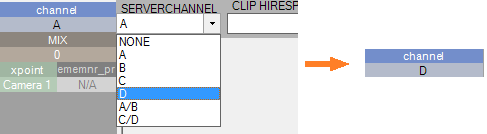
Make sure the video clips are available through this port.
AUX
-
The AUX is controlled by the template but should be added to the accessory template.
The setting will be replaced by the wall taken template.
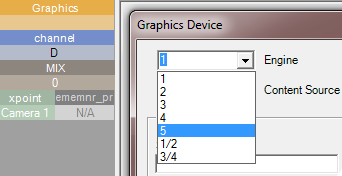
Graphics
-
To avoid conflict with other graphic elements, you may want the wall to run on its own engine. This can be changed in the accessory.
A wall taken graphic element will then use this engine.