Graphic Hub Administrator Guide
Version 3.6 | Published December 10, 2021 ©
Servers and Folders
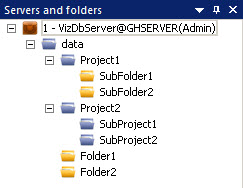
The Servers and Folders panel displays folders, and the servers they are on, in a tree structure.
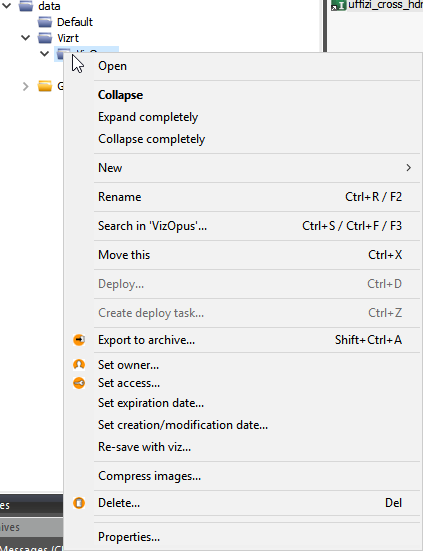
Right-click a server folder in the tree to open a context menu. From this menu, the folder tree can be expanded or collapsed, and, for example, new folders created or access rights set.
The server tree order can be changed by drag and drop. The server order changes, but server numbers stay the same.
This page contains information on the following topics:
Folders
The server tree can contain two types of folders:
-
Project folders, displayed with a blue folder icon.
-
Regular folders, displayed with a yellow folder icon. Project folders cannot be created inside a regular folder, but can contain regular folders. Both types of folders can be dragged around after being added to the server tree. Also, project names must be unique and in compliance with the list of illegal characters.
![]()
In Viz Artist, the difference between a regular folder (2) and a project folder (1) is that by defining a working project, the tree can be collapsed so that only the currently selected project and its sub-folders and sub-projects folders are shown.
Tree Structure
Within the database, files are organized in a virtual structure of project and regular folders. This structure is shown as a tree in the Servers and Folders panel.

In this panel, all connected servers are shown as root entries. These entries show the name of the Graphic Hub Server, the Graphic Hub Naming Service the server is registered on, and the current user name.
The level below the root entry contains the data project, which other clients refer to. New projects or regular folders/files can be added under the data project.
Tip: It is possible to create folders on the same hierarchy level as data, but these folders are not accessible from client applications such as Viz Artist. In these folders, it is practical to move data that should not be worked on anymore, yet is not ready to be deleted.
The data directory holds folders that the server files are stored in.
To View the Content of a Folder
-
Click the folder in the tree, or
-
Double-click a subfolder in the Explorer, or
-
Right-click the folder, and select Open.
The server files in the selected folder are then shown in the Explorer.
Working with Folders
To Expand Folders
After logging in, the branch representing this database is collapsed. To expand the branches, use one of the following options:
-
Click to the left of the branch.
-
Double-click the branch to be expanded.
-
Right-click the required branch and select Expand.
-
Right-click the required branch and select Expand Completely to expand the branch and all its subbranches.
To Collapse Folders
-
Use one of the following options:
-
Click to the left of the branch.
-
Double-click the branch to be collapsed.
-
Right-click the required branch and select Collapse.
-
Right-click the required branch and select Collapse Completely to collapse the branch and all its subbranches.
-
To Create a New Folder
Use to create new Regular or Project Folders.
Note: A new project folder cannot be created in a regular folder.
-
Right-click on a folder, or select the folder and right-click in the Explorer.
-
Select New > Project or Folder.
To Rename a Folder
-
Right-click the folder and select Rename.
Note: The data project below the server root entry cannot be renamed. Folder names must be unique, and in compliance with the list of illegal characters below.
To Move a Folder
-
Drag the folder from either the servers and folder or the Explorer onto the target destination. The Action Log for moving folders is shown.
-
Click Duplicate. You can also use standard Windows functions CTRL + X, CTRL + V and Right-click > Cut/Paste.
Note: This procedure only applies to moving a folder within a single server. For information about moving folders between multiple servers, see Schedule a Deploy Task.
To Change the Owner of a Folder
-
Right-click the folder.
-
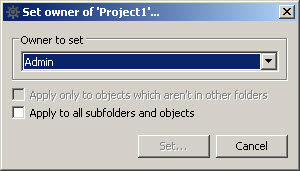
Select Set Owner.
-
Select the new owner from the drop down list.
-
Select the Apply to all subfolders and objects check box, if required.
-
Click Set.
The Action Log opens. -
Click Set owner.
-
Click Close.
The owner of a folder can also be assigned from the folder Properties window.
To Set Rights for a Folder
-
Right-click the folder.
-
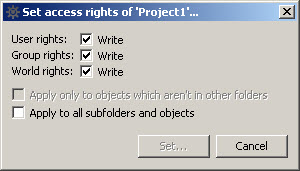
Select Set access.
-
User: The owner of the folder.
-
Group: All the members of the group the owner belongs to.
-
World: All database users.
-
-
Define the new rights.
-
Click Set.
The Action Log for changing the rights is shown. -
Click Set access.
The rights for a folder can also be assigned from the folder Properties window.
To Delete a Folder
-
Select the folder.
-
Delete the folder:
-
Press Delete, or right-click the folder and select Delete...
The Action Log opens.
-
-
Click Delete.
-
Click Close.
Note: Only empty projects or folders can be deleted. Also, by deleting a folder from the Graphic Hub, the respective folder-links in the properties of the files are deleted too.
Folder Properties
The Folder Properties window lists available properties of each folder.
To View the Properties of a Folder
-
Right-click a folder.
-
Select Properties.
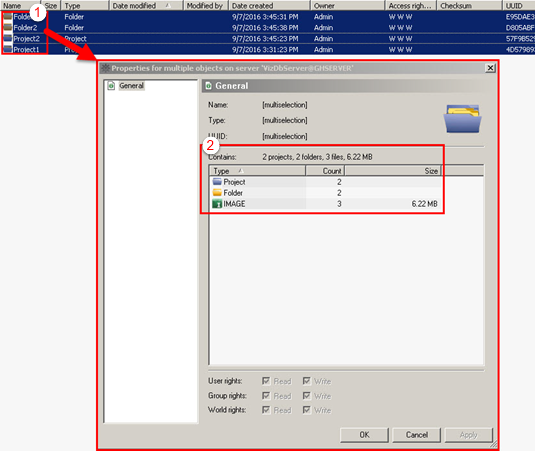
To View the Properties of Multi-selected Folders
-
Multi-select the required folders (1).
-
Right-click folders with CTRL pressed, or
-
Select a range of folders with right-click with SHIFT pressed
-
-
Right-click on one of the selected folders.
-
Select Properties.
The Properties window shows the Generally combined contents of all selected folder (2) and is for information only.
Add-ons are not available.
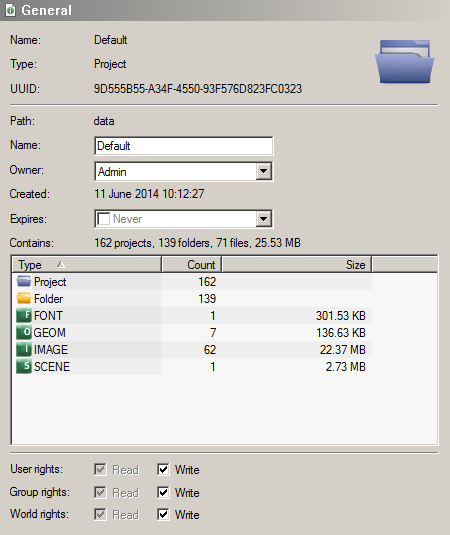
General Properties
-
Name: Shows the name of the folder. Folder names must comply with the list of Illegal Characters.
-
Type: Shows if the folder is a regular folder or a project folder.
-
UUID: Shows the automatically generated UUID of the folder.
-
Path: Shows the path of the folder within the data directory of the database.
-
Name: Shows the name of the folder. To rename the folder, type a new name in the box.
-
Owner: Shows owner of the folder. To reassign the folder to a new user, select a user from the list.
-
Created: Shows the date and time when the folder was created.
-
Expires: Set an expiration date for the selected folder or file.
-
Contains: Shows a summary of all folders and files contained in the selected folders.
-
Access Rights: Shows the access rights for the folder. To change the rights, enable/disable one or more check boxes (see User and Group Management).
Add-Ons Properties
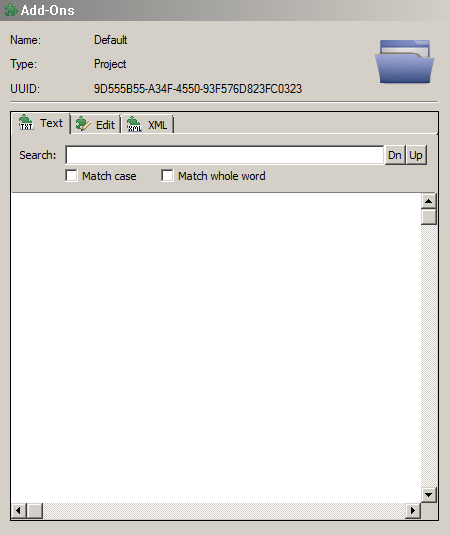
The following folder properties are available in the Add-ons panel:
-
Name: Folder name.
-
Type: Project or Regular Folder.
-
UUID: Automatically generated UUID of the folder.
-
Text tab: Assigned add-ons as text.
-
Edit tab: Enables editing and assignment of add-ons.
-
XML tab: Assigned add-ons as XML.
-
Search: Search text within assigned add-ons.
Working with Files
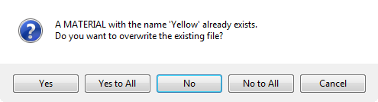
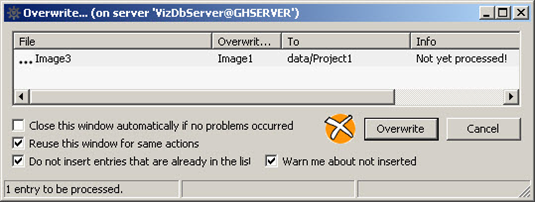
Overwrite Files
When a file type is to be linked or duplicated in another folder, and the same file type with the same name already exists in the destination folder, the Overwrite Existing File dialog menu opens.
Select an option from the window:
-
Yes: Overwrites the existing file.
-
Yes to All: Overwrites all existing files.
-
No: Does not overwrite the existing file, and create a new file.
-
No to All: Does not overwrite all existing files and create new files.
-
Cancel: Cancels the action.
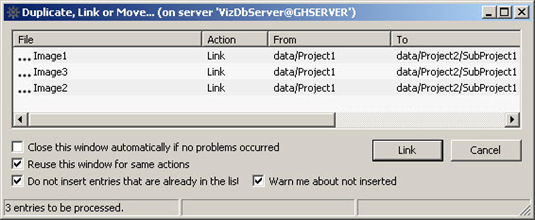
To Create Linked Files
A link to the file is created in the destination folder.
Linked files have the benefit of saving disk space and enhancing system performance. It is especially useful when a file is referenced in many places. For example, a station logo is best to be referenced as a link rather than duplicated in many locations.
-
Select the required file.
Note: Multiple files can be selected.
-
Drag the file to the target folder and release.
-
In the Action Log click Link.
-
If the same file type, with the same name, already exists in the destination folder select to overwrite, or not overwrite, the existing file.
-
Click Close.
or
-
Select the required file.
Note: Multiple files can be selected.
-
Create a linked shortcut:
-
Right-click and select Link (create shortcut), or
-
Press CTRL + Y.
-
-
Select the target folder.
-
Link the file:
-
Right-click on the target folder and select Link here, or
-
Right-click in the folder area and select Paste
-
-
In the Action Log click Link.
-
If the same file type with the same name already exists in the destination folder select to overwrite, or not overwrite, the existing file.
-
Click Close.
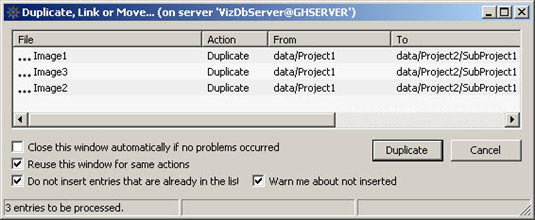
To Create Duplicate Files
-
Select the required file.
Note: Multiple files can be selected.
-
Press CTRL and drag the file to the target folder and release.
-
In the Action Log click Duplicate.
-
If the same file type, with the same name, already exists in the destination folder select to overwrite, or not overwrite, the existing file.
-
Click Close.
or
-
Select the required file(s).
-
Copy the selected file(s).
-
Select the target folder.
-
Duplicate the file:
-
Right-click on the target folder and select Duplicate here, or
-
Right-click in the folder area and select Paste
-
-
In the Action Log click Duplicate.
-
If the same file type with the same name already exists in the destination folder select to overwrite, or not overwrite, the existing file.
-
Click Close.
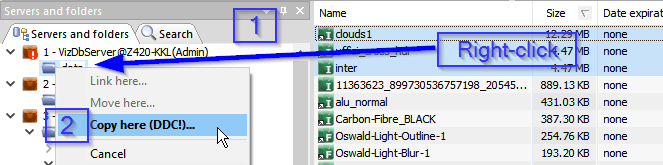
To Create Duplicate Files Including Referenced Objects
-
Select the required files. Right-click and drag files to target servers folder.
-
Select Copy here (DDC!).
-
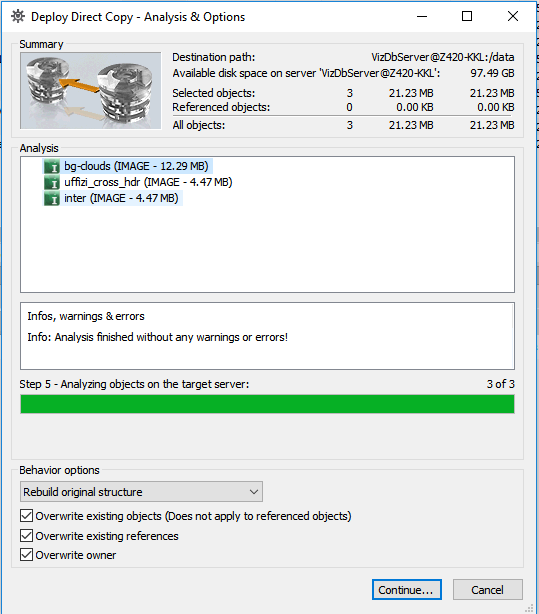
In the Deploy Direct Copy dialog after Analyzing and checking Behavior options, Click Continue.
-
Click Deploy.
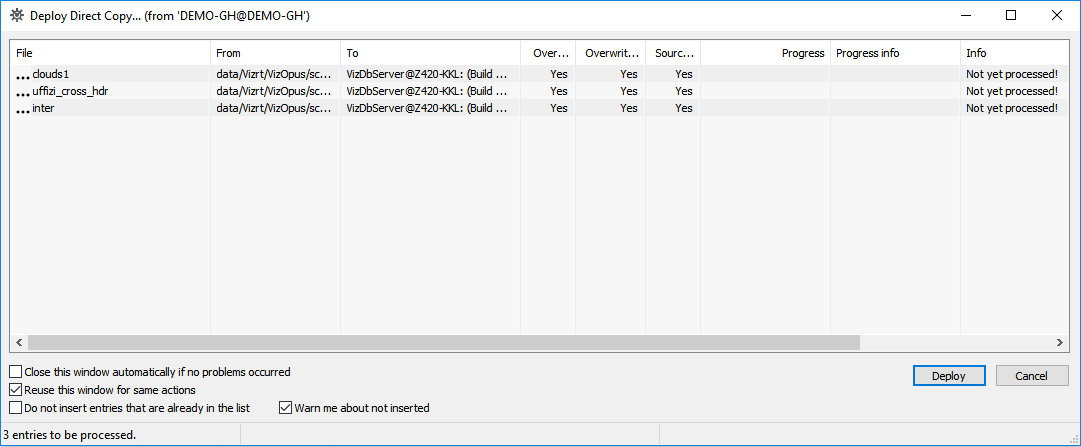
-
The selected files are being deployed including all references.
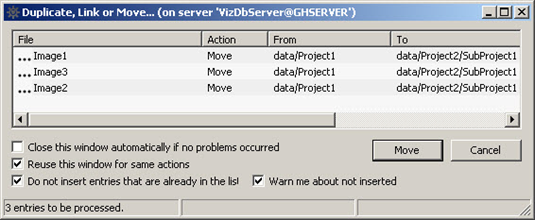
To Move Files
If a the same file type, with the same name, exists in the destination folder, the moved file is set with a new name (for example: Yellow would be renamed Yellow(1)).
-
Select the required file(s).
-
Hold Shift and drag the selection to the target folder.
-
In the Action Log click Move.
-
Click Close.
or
-
Select the required file(s).
-
Cut the selected file(s).
-
Select the target folder.
-
Move the file(s):
-
Right-click on the target folder and select Move here, or
-
Right-click in the folder area and select Paste.
-
-
In the Action Log click Move.
-
Click Close.
To Overwrite Files
A file can only be overwritten if it is in the same folder and of the same type.
-
Select the required file.
-
Drag the file to the file to be overwritten and release.
Note: Source and target file must be of the same type.
-
In the Action Log click Overwrite.
-
Click Close.
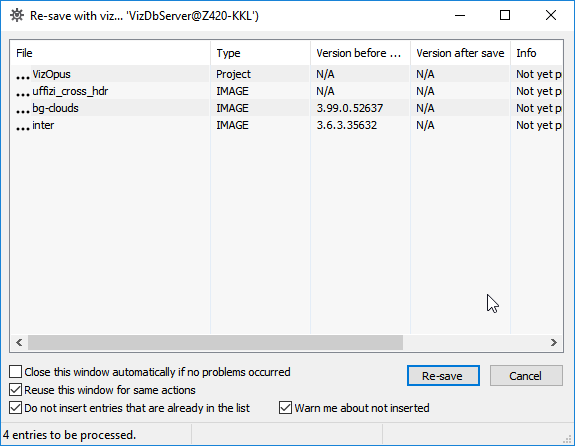
To Re-save with Viz Executable
The menu action Re-save with viz... execution starts viz.exe (if not already running) and re-save the selected files through Viz Engine. Be sure to define a proper Viz executable path in Tools > Edit preferences > Viz > General.
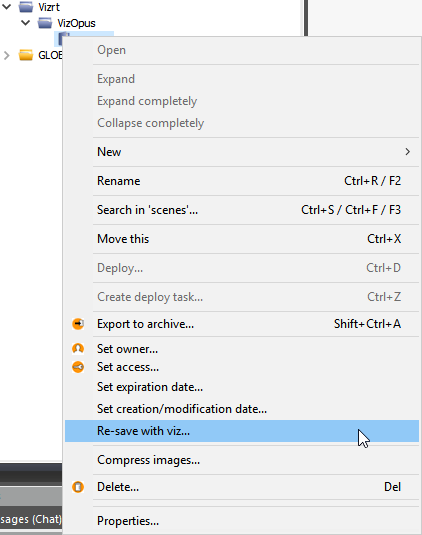
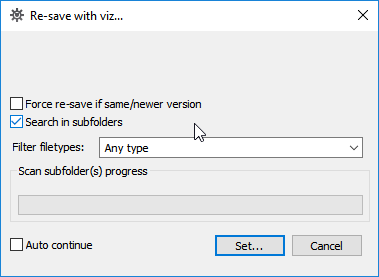
Click Set..., Continue... and Re-save to initiate the viz.exe re-save.
File Properties
This section describes the available properties of each file.
To View the Properties Assigned to a File
-
Double-click a file in the Explorer, or
-
Right-click a file and select Properties.
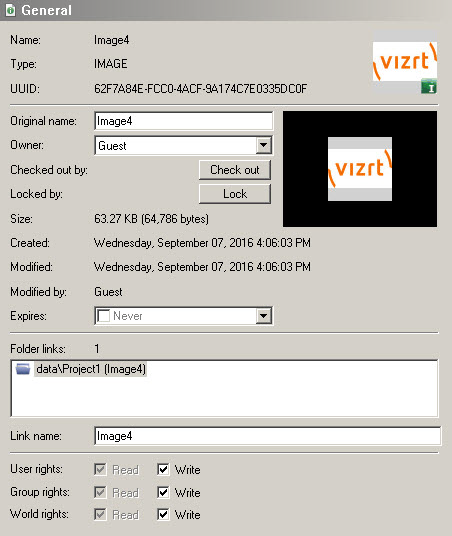
General Properties
-
Name: Shows the name of the file. File names must comply with the list of Illegal Characters.
-
Type: Shows the file type, for example material.
-
UUID: Shows the UUID of the file.
-
Original name: Shows the name of the file. To rename the file, type a new name in the box. If changing the name of a file that has more than one folder-link, only the name of this link is altered. In other folders, the name is not changed.
-
Owner: Shows the name of the user that owns the file. To reassign the file to a new user, select a user from the list.
-
Checked out by: If the file is checked out, shows the name of the user that has checked it out. To check out the file, click the Check Out button. To check in the file, click the Check In button.
-
Locked by: If the file is session locked, shows the name of the user that is working on it. To session lock the file, click the Lock button. To unlock the file, click the Unlock button.
-
Size: Shows the size of the file.
-
Created: Shows the date and time when the file was created.
-
Modified: Shows the date and time when the file was modified the last time.
-
Modified by: Shows the name of the user that modified the file the last time.
-
Expires: Set a date for the select file to expire.
-
Folder links: Shows the number of folder-links (number of folders the file is placed in). The box below shows the paths to folders where the file is linked.
-
Link name: Shows the name of the folder-link. By default, the folder-link name automatically equals the file name.
-
Access rights: Shows the access rights for user, group, and world. User refers to the owner of the file, group refers to all the members of the group the owner belongs to, and world refers to all database users.
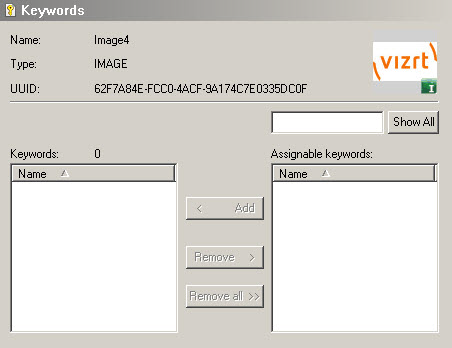
Keyword Properties
-
Name: Shows the name of the file.
-
Type: Shows the file type, for example material.
-
UUID: Shows the UUID of the file.
There is a search field for locating keywords and you can assign and remove keywords from the selected file.
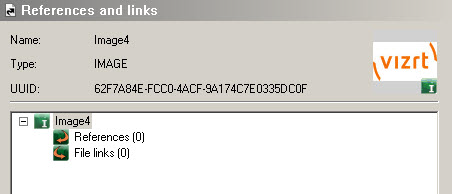
References and Link Properties
-
Name: Shows the name of the file.
-
Type: Shows the file type, for example material.
-
UUID: Shows the UUID of the file.
-
References: Shows the files which are contained in the current file. For example, if you check the references for a scene, you see images, geometries, etc., that are used in this scene. Drilling down, the references of the images show the images used in that file. And so on.
-
File links: Shows the files where the current file is referenced. For example, with an image used in different scenes, all those scenes appear as file links.
-
Folder links: Shows all folders where the same file is linked (all shortcuts).
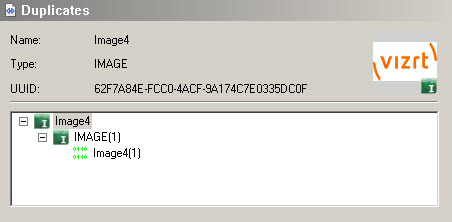
Duplicates
-
Name: The name of the selected item.
-
Type: Shows the item type, for example, BASE_FONT.
-
UUID: Shows the item’s UUID.
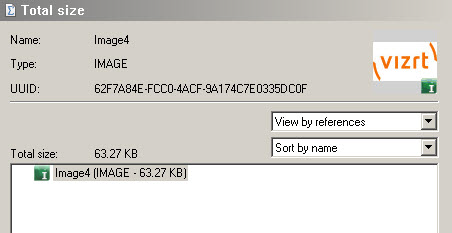
Total Size Properties
-
Name: Shows the name of the file.
-
Type: Shows the file type, for example material.
-
UUID: Shows the UUID of the file.
-
Filters
-
View by Reference or View by Size.
-
Sort by Name, Size, Type and Name, Type and Size.
The file’s total size in KB, MB or GB is shown. Using the tree, you can see all the component parts and their respective sizes.
-
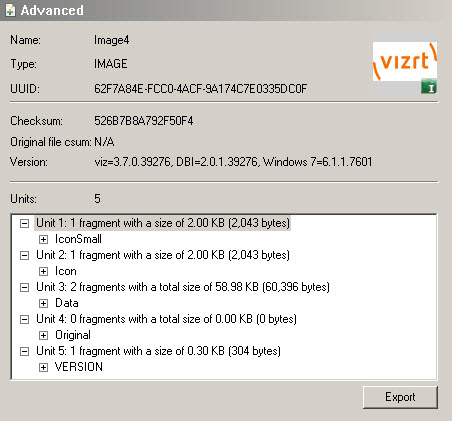
Advanced Properties
-
Name: Shows the name of the file.
-
Type: Shows the file type, for example material.
-
UUID: Shows the UUID of the file.
-
Checksum: A server-generated value to detect duplicates and differences between similar files. Useful for importing and replicating and deploying files; when two files are very similar, you can use the checksum to determine whether to overwrite or allow a parallel instance.
-
Original file csum: The file’s original checksum from before it was imported to the Graphic Hub. This is used to determine if a specific file has already been imported, and to improve duplicates discovery.
-
Version: Version is the last client application version that changed the file/wrote to the file. This should be the same as the last entry in the history.
-
Units: The component units of a file. A file consists of multiple units that form part of the internal data. Used in troubleshooting.
-
Attributes: Each unit has specific attributes describing it. Used in troubleshooting.
File History
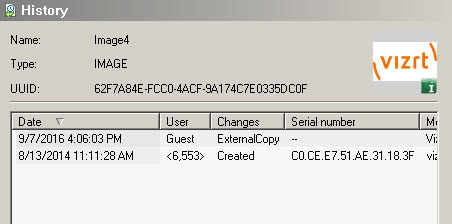
-
Name: Shows the name of the file.
-
Type: Shows the file type, for example material.
-
UUID: Shows the UUID of the file.
The file’s transaction history is shown with columns for date, user, changes and serial number.
File Availability
If you are logged into multiple servers, you are able to check whether a file exists and is identical among instances.
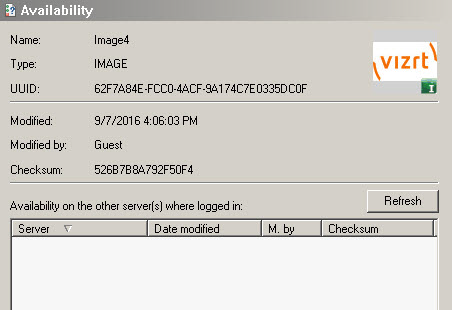
-
Name: Shows the name of the file.
-
Type: Shows the file type, for example material.
-
UUID: Shows the UUID of the file.
-
Modified at: Displays last date and time modified.
-
Modified by: Displays last user to modify the file.
-
Checksum: Indicates whether the file is the identical on every server.
-
Availability on other servers where logged in: The availability of the same file on other servers where you are logged in. Even if the file name is different, if the UUID and checksum are the same, the file figures in this panel, shown as OK.
File Add-ons
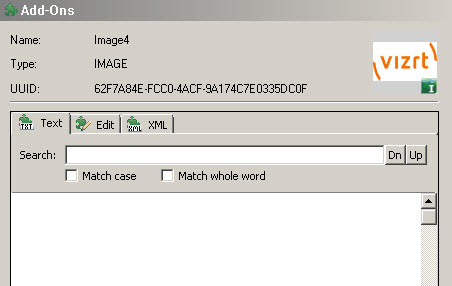
-
Name: Shows the name of the file.
-
Type: Shows the file type, for example material.
-
UUID: Shows the UUID of the file.
-
Text tab: Assigns add-ons as text.
-
Edit tab: Enables editing and assignment of add-ons.
-
XML tab: Assigns add-ons as XML.
-
Search: Searches text within assigned add-ons.
Folder and File Expiration Dates
Each folder (and its contents) and files can be set an expiration date.
When a Clean-up of Expired items Scheduled Tasks is performed, folders and files with an expiration date on or before the date configured in the task are deleted. The following exceptions apply:
Note: Folders are deleted recursively.
-
If a folder, which has expiration date before a due Clean-up operation, contains a folder or files that have an expiration date set after a due Clean-up operation, it is ignored in the delete operation. The expired folder is not deleted, although it is expired.
-
The deletion of a folder only happens when all folder contents, and any linked content, have reached their expiration date.
-
Any files and folders, in an expired folder, that do not have a set expiration date get deleted.
-
An expired folder or files, with file links, can only be deleted if all linked files are inside the expired folder.
Example: If a scene, which includes an image that is inside of an expired folder, is not included in the expired directory, the image cannot be deleted because it has file links to the scene which has not expired.
After a clean-up task has completed, a log file is created: %ProgramData%\Vizrt\Viz GH Terminal\CleanupExpired.log. The log file contains:
-
Timestamp for when the task was performed.
-
Expired items that were found.
-
Number of deleted items (folders/projects/file links).
-
Duration of cleanup operation.
-
Number of physically deleted files grouped by file type.
-
List of errors that occurred during the cleanup operation.
-
List of UUIDs that got physically deleted by file type. If an expiration date is removed before running the Cleanup of Expired Items task, the folder and its contents, or files, are not deleted.
To Set an Expiration Date
-
Right-click the folder or file.
-
Select Properties...
-
Check the Expires box.
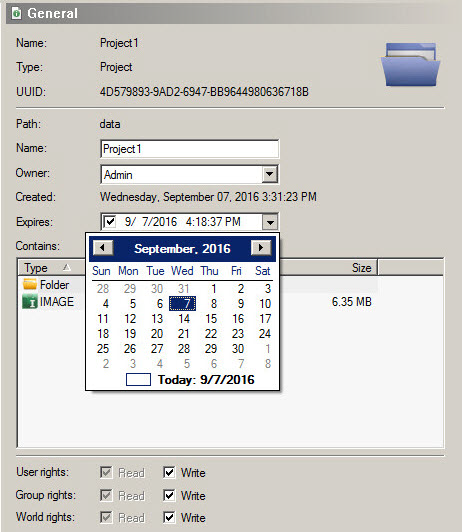
-
Click on the drop-down arrow and set an expiration date and time.
Note: Click the drop-down or highlight a date number and change it, to set the date. Click on the hour or minutes to change the time.
-
Click OK.
Illegal Characters
The following list of characters are not allowed in folder or file names:
-
Colon: (:)
-
Semicolon: (;)
-
Period: (.)
-
Comma: (,)
-
Question mark: (?)
-
Asterisk: (*)
-
Quotation marks: (“ ”)
-
Angle brackets: (< >)
-
Braces: ({{{ }}})
-
Tab key escape character: (\t)
-
Newline key escape character: (\n)
-
Blank space: ( )
See Also