Graphic Hub Administrator Guide
Version 3.6 | Published December 10, 2021 ©
Manage Imports
This page contains information on import behavior and how to manage Destination directories, W atchfolders, GH REST hosts and Pre-Authenticated hosts.
The ImEx Agent can only upload content to the configured Graphic Hub’s destination directories.
Import Behavior
During import, handling of destination directories and images differs depending on the import variant.
-
When importing via media staging (MSE triggered):
-
A child folder with the title and id of the Distribution Plan is created in the destination directories. If the folder already exists, the existing folder is used.
-
The expiration date defined in the Distribution Plan is set as the expiration date for the project/folder on the Graphic Hub.
-
When an expired items cleanup task is enabled and configured in the Graphic Hub Terminal, the project/folder and its contents are deleted automatically when expired as soon as the expired items cleanup task is executed.
-
Files are always imported with a unique name (file name with asset ID). Files are never overwritten during import.
-
-
When importing via watchfolder:
-
The images are saved directly in the destination directories.
-
Corresponding distribution plans do NOT expire. Images uploaded from a watchfolder have to be cleaned up manually.
-
Images which are deleted from a destination directory are automatically re-uploaded. To clean them up, first delete the corresponding file from the watchfolder and then delete it from the destination directory.
-
Importing different but identically named files from different watchfolders into the same destination directory leads to conflicts. These need to be resolved manually.
-
Overwriting images in the watchfolder leads to overwriting on the Graphic Hub if the checksums are different.
-
Renaming images in the watchfolder leads to upload of the renamed images. The image with the old name is not automatically deleted on the Graphic Hub.
-
Renaming or overwriting images in the destination directories re-uploads the versions in the watchfolder. The renamed file is not automatically deleted on the Graphic Hub.
-
Overwriting or deleting images from the watchfolder updates the corresponding distribution plan with the new information.
-
By default, Add file extension is enabled. Images are named by appending their original names with an underscore and their respective file extension (e.g. image.bmp > image_bmp). It is not advised to disable this option, see Add watchfolder for details.
-
Manage Destination Directories
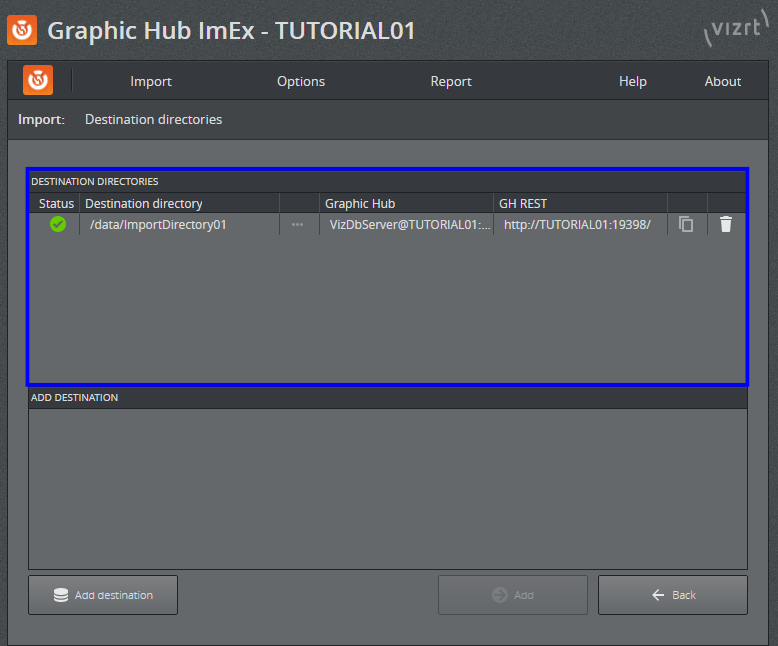
Use the Import > Destination directories page to configure the destination directories used by the GH ImEx Agent.
-
Status: The current status of the configured destination directory. If a warning or an error is shown, hovering over the icon displays additional information.
-
Destination directory: The absolute path of the currently configured destination directory (project or folder on the Graphic Hub).
-
Graphic Hub: The configured Graphic Hub of the destination directory to which the GH REST is connected to.
-
GH REST: The GH REST service(s) used for importing assets to the destination directory.
Note: Click the ![]() copy icon to open a dialog containing the import directory link to copy it for the Media Sequencer configuration .
copy icon to open a dialog containing the import directory link to copy it for the Media Sequencer configuration .
To Add a Destination Directory
-
Open Import > Destination directories.
-
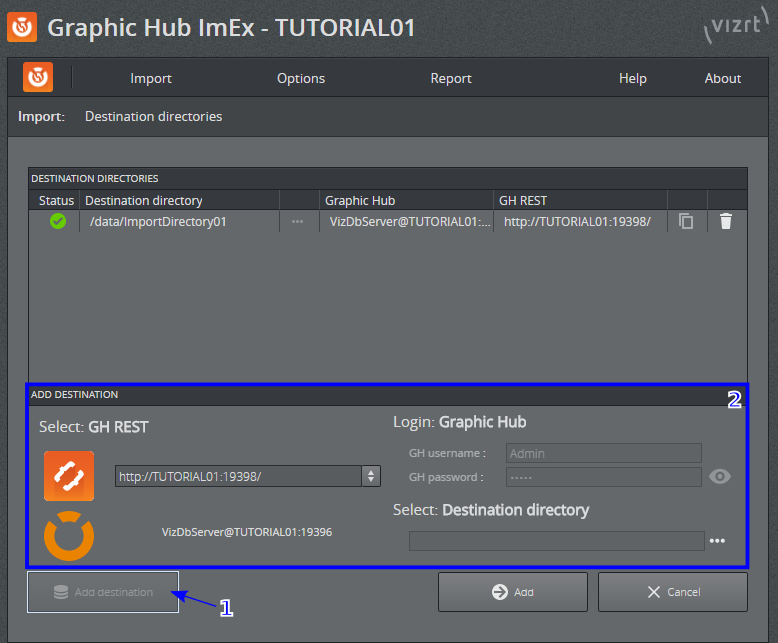
Click Add destination at the bottom left (1). This shows the Add Destination dialog (2).
-
Select a Graphic Hub REST host to use for importing assets. You can also enter the host manually, in the format http://resthost:port/. The GH REST must be bound and connected to a running Graphic Hub.
Note: GH REST version 2.0.1 and Graphic Hub version 3.0.1 or higher are required.
-
Provide a valid GH username and password from the Graphic Hub you are connecting to.
-
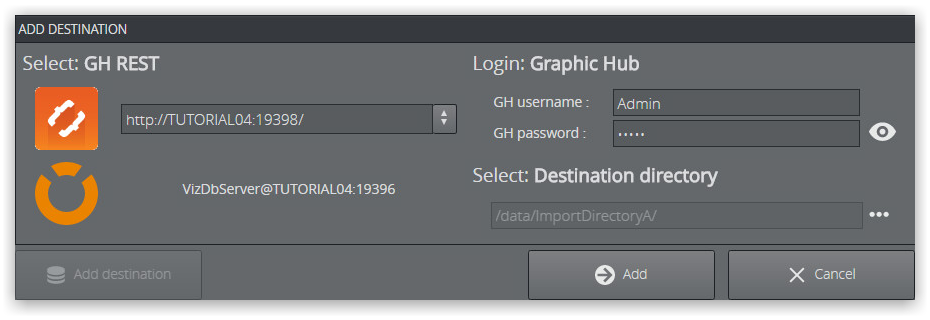
Select a destination directory (folder or project), by clicking the browse icon (... ) on the right side. You can also create new projects or folders using the directory browser.
-
Click Add to add the destination directory.
The new Destination directory appears in the Default directories list: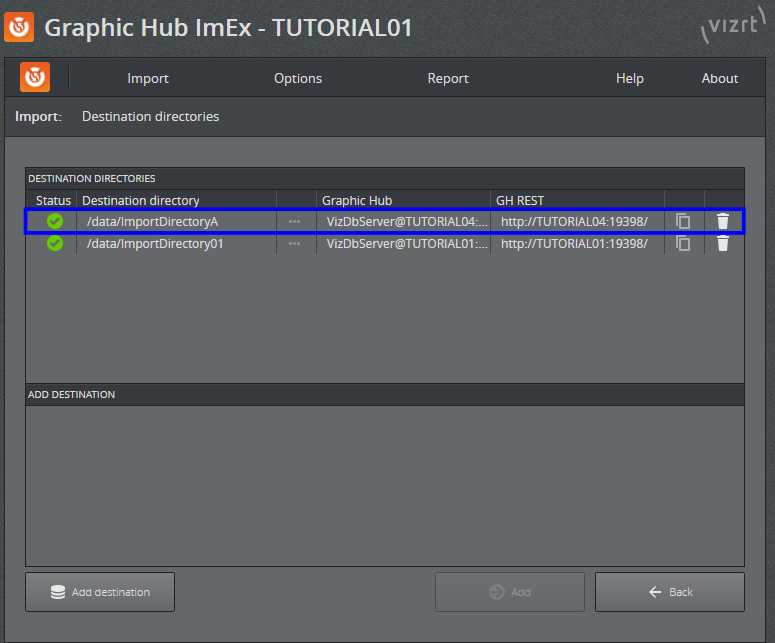
To Remove a Destination Directory
You can remove destination directories that are not in use.
-
Open Import > Destination directories.
-
Remove the desired destination directory by clicking the trash can icon at the far right of the watchfolder's destination directory.
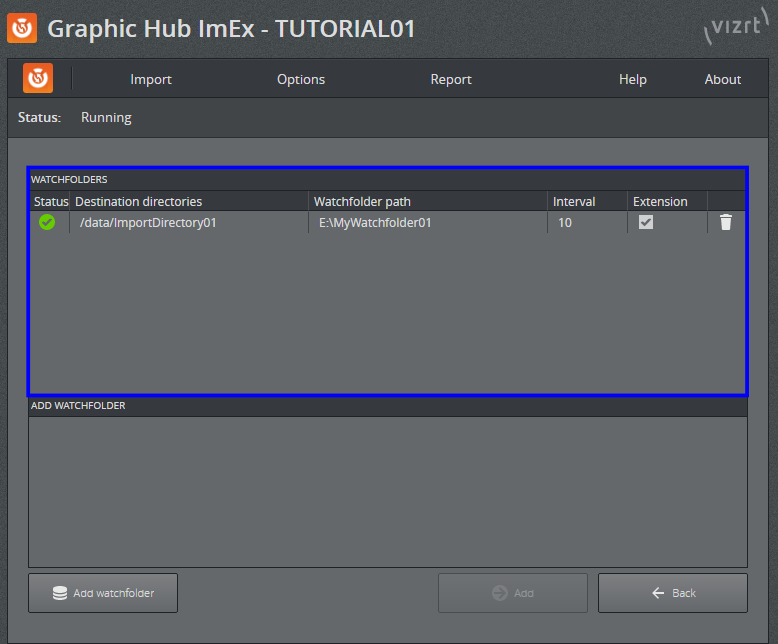
Manage Watchfolders
Use the Import > Watchfolders page to configure watchfolders which the ImEx Agent can use to import images from.
-
Status: The current watchfolder status. If a warning or an error is shown, hovering over the icon displays additional information.
-
Destination directories: The absolute path of the destination directory. This is a project or folder in a Graphic Hub.
-
Watchfolder path: The absolute path of the watchfolder. This is a folder in the local file system or on a network share drive.
-
Interval: The scan interval in minutes. Determines in which intervals the watchfolder is scanned.
-
Extension: Shows if files have their file extension appended to their name.
To Add a Watchfolder
-
Open Import > Watchfolders .
-
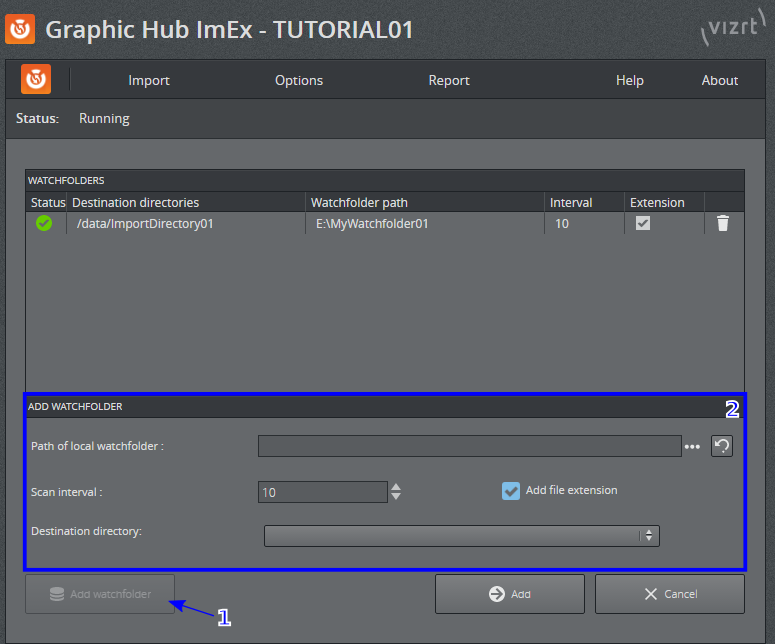
Click Add watchfolder at the bottom left (1) to show the Add watchfolder dialog (2).
-
Select a watchfolder by clicking the browse icon (...) on the right side and choosing a folder. The folder list consists of folders on all local drives and correctly mounted network share drives.
Note: For a network share drive to appear in the folder list, it needs to be mounted as the SYSTEM user, because the ImEx Agent service is running under the SYSTEM user.
Alternatively, manually enter the absolute path of the folder.
-
Choose the length of the additional scan interval in minutes by either entering a value manually or increasing/decreasing it using the up/down arrow buttons.
-
Choose if files have their file extension (i.e. file type) appended to their name by checking/unchecking the Add file extension checkbox. (e.g. the files image1.jpg, image1.png and image2.bmp are imported as image1_jpg, image1_png and image2_bmp if the box is checked).
Note: It is not advised to deactivate file extension adding as files with identical names overwrite each other on upload. Which of these persists depends on its position in the upload queue (i.e. the last one that gets uploaded is then the file on the Graphic Hub).
-
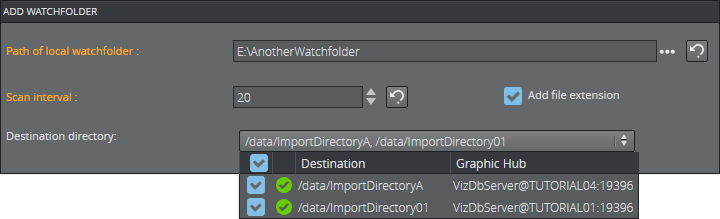
Select a destination directory from the drop-down menu by checking the directory. By checking multiple destination directories, images are imported to multiple destinations. More details regarding the destination directories is listed in the drop-down menu: Destination reads the absolute path of the destination directory on the specified Graphic Hub.
-
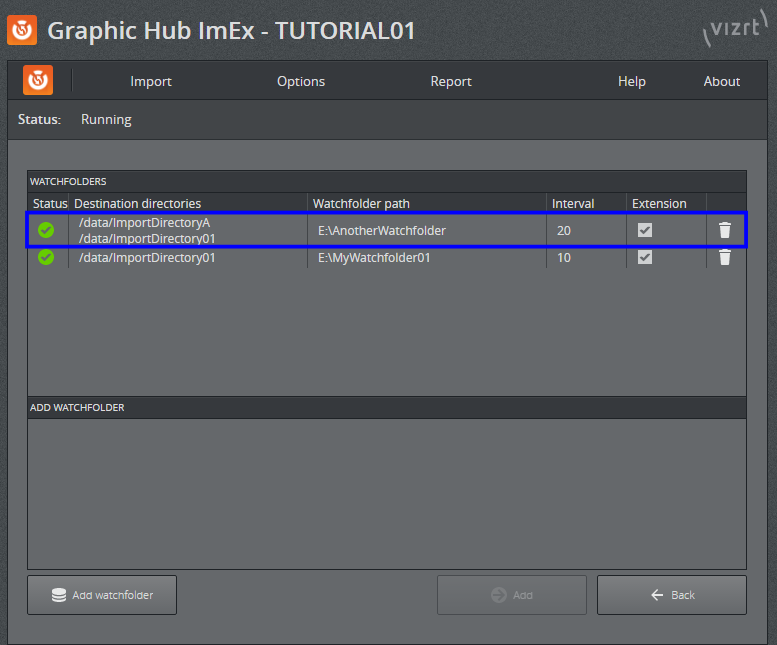
Click Add to add the watchfolder. The new watchfolder appears in the Watchfolders list:
To Change Watchfolder Scan Interval
You can change scan intervals of your watchfolders. The ImEx Agent periodically scans the content in teh watchfolder in addition to the monitored update notifications from the file system.
-
Open Import > Watchfolders .
-
Click on the watchfolder you want to re-configure the scan interval for.
-
Change the length of the scan interval in minutes by either entering a new value manually or increasing/decreasing it using the up/down arrow buttons.
-
Click Apply to apply the change. The new scan interval is applied to the watchfolder and is shown in the Interval column.
To Remove a Watchfolder
-
Open Import > Watchfolders .
-
Remove the desired watchfolder by clicking the trash can icon at the far right of the watchfolder's entry.
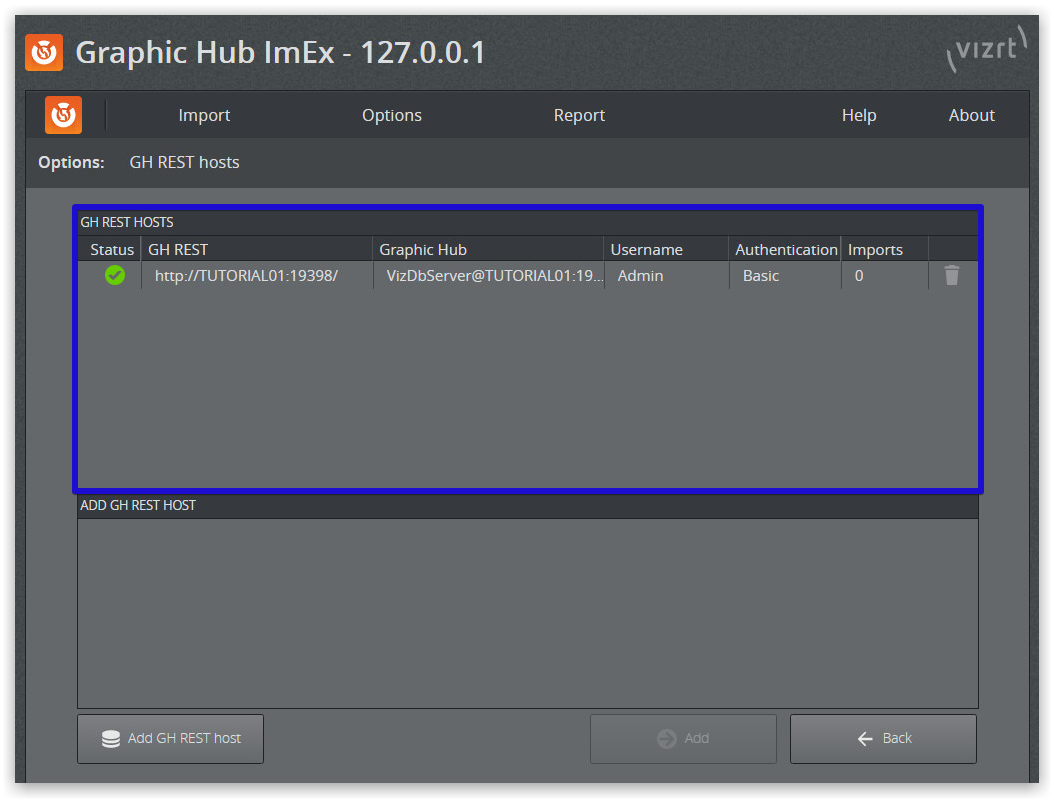
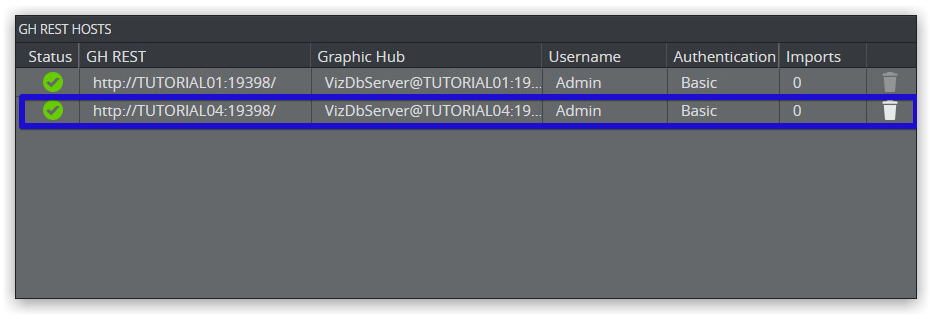
Manage GH REST Hosts
Use the Options > GH REST hosts page to configure the Graphic Hub REST hosts used by the GH ImEx Agent.
-
Status: The current GH REST host status. If a warning or an error is shown, hovering over the icon displays additional information.
-
GH REST: The GH REST host URL.
-
Graphic Hub: The Graphic Hub to which the GH REST is connected.
-
Username: Graphic Hub username that is used.
-
Authentication: Authentication method (Basic means HTTP basic authentication).
-
Imports: The number of imports that are currently performed on this GH REST (refresh interval is five seconds).
To Add a GH REST Host
-
Open Options > GH REST hosts.
-
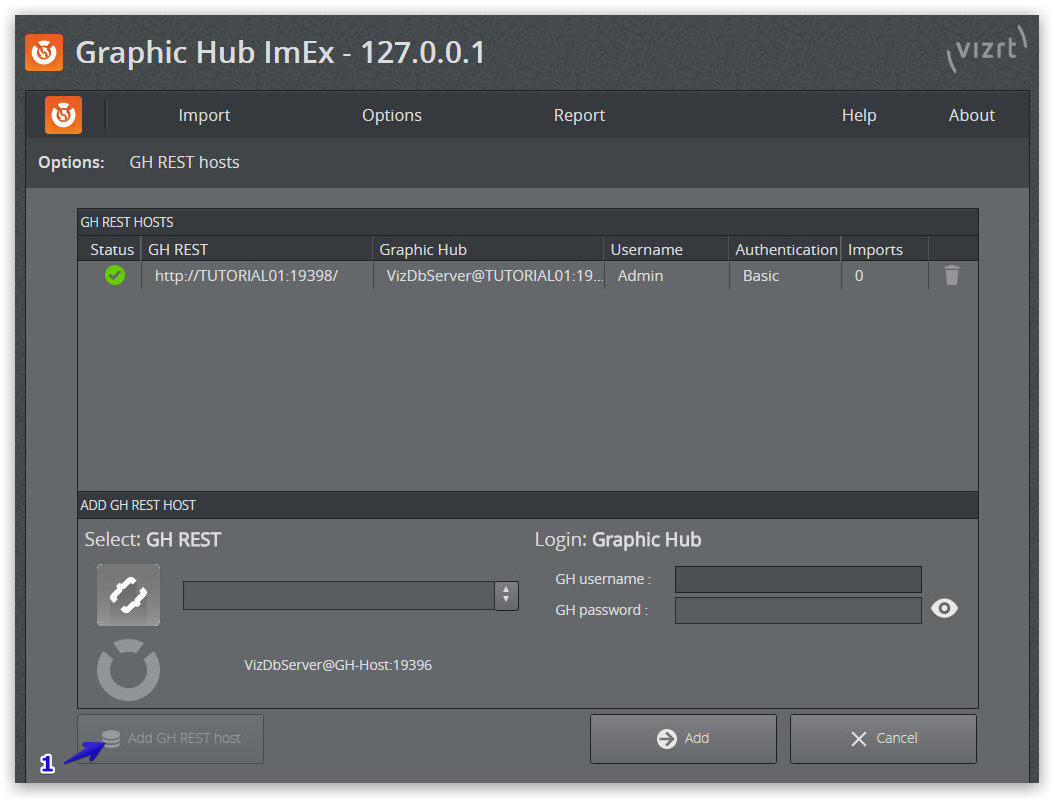
Click Add GH REST host at the bottom left (1) to show the Add GH REST host dialog.
-
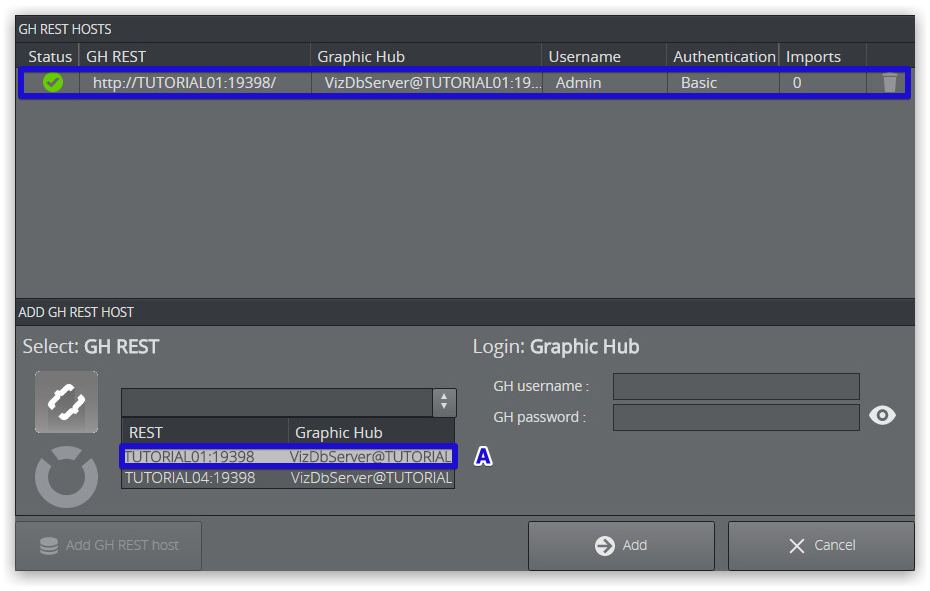
Select a Graphic Hub REST host to use for importing assets. A GH REST host can only be added once. Already configured hosts are disabled in the selection drop-down (A). You can also enter the host manually, in the format http://resthost:port/. The GH REST must be bound and connected to a running Graphic Hub.
Note: GH REST version 2.0.1 and Graphic Hub version 3.0.1 or higher are required.
-
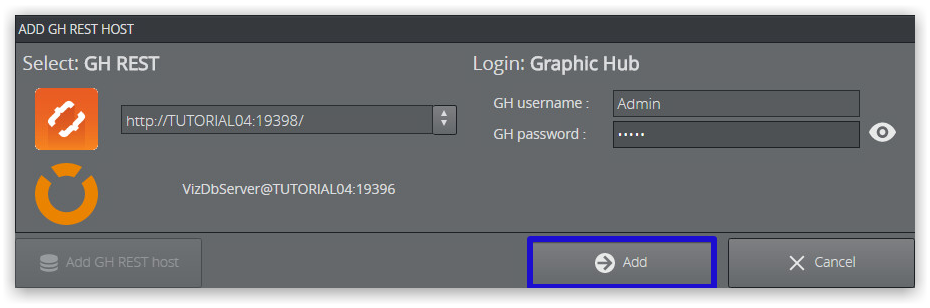
Provide a valid GH username and password from the Graphic Hub you are connecting to.
-
Click Add to add the destination directory. The new GH REST appears in the list.
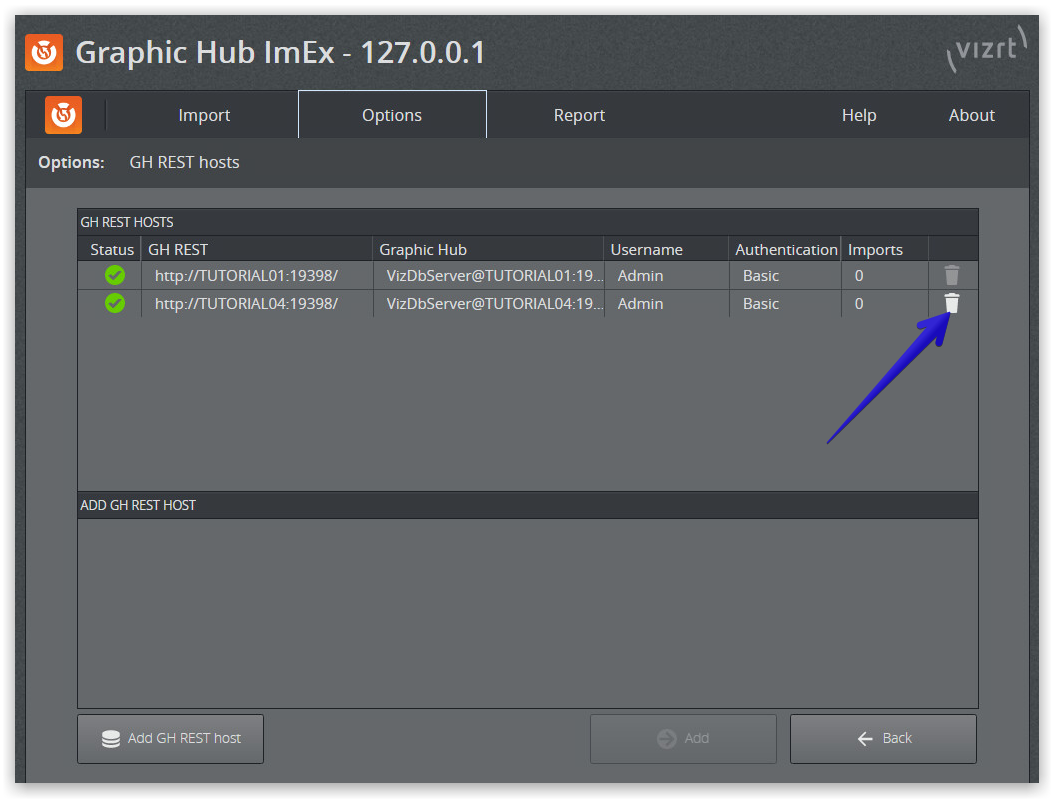
To Remove a GH REST Host
You can remove GH REST hosts that are not referenced/used by any of the configured import directories. You can view a list of GH REST hosts in use under Import > Destination directories.
-
Open Options > GH REST hosts.
-
Remove the desired host by clicking the trash can icon at the far right of the host's entry.
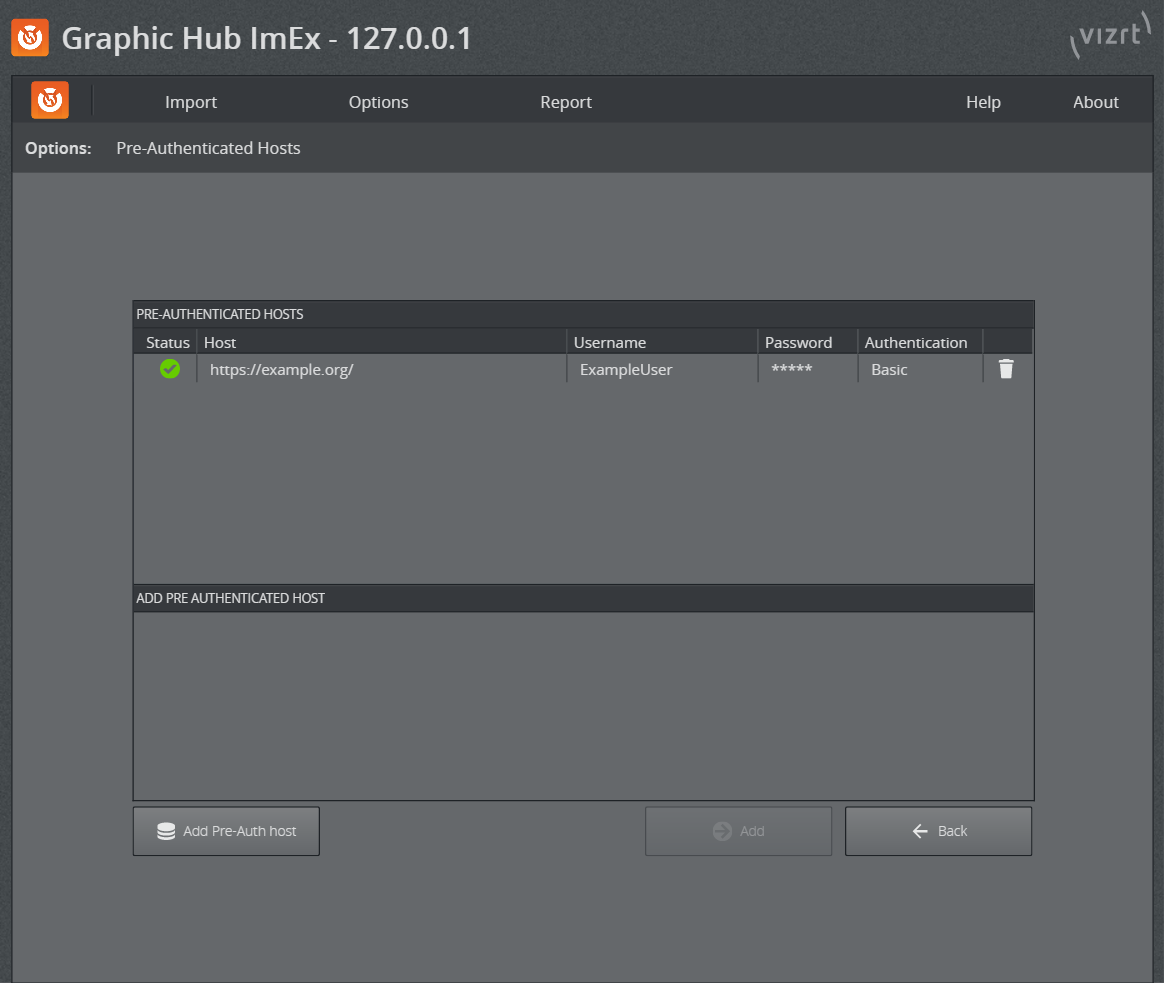
Manage Pre-Authenticated Hosts
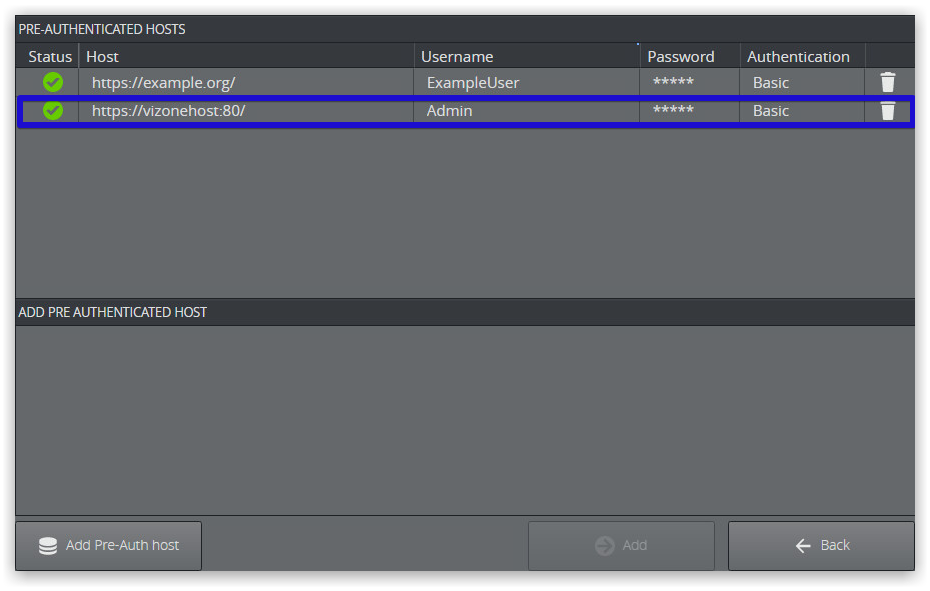
Go to Options > Pre-Authenticated Hosts to view a list of configured pre-authenticated hosts that are used by the ImEx Agent to authenticate at external HTTP image sources.
-
Status: The current Pre-Authenticated host status.
-
Host: The URL of the configured Pre-Authenticated host.
-
Username: Pre-Authenticated host username.
-
Password: Pre-Authenticated host password.
-
Authentication: Pre-Authenticated host authentication method.
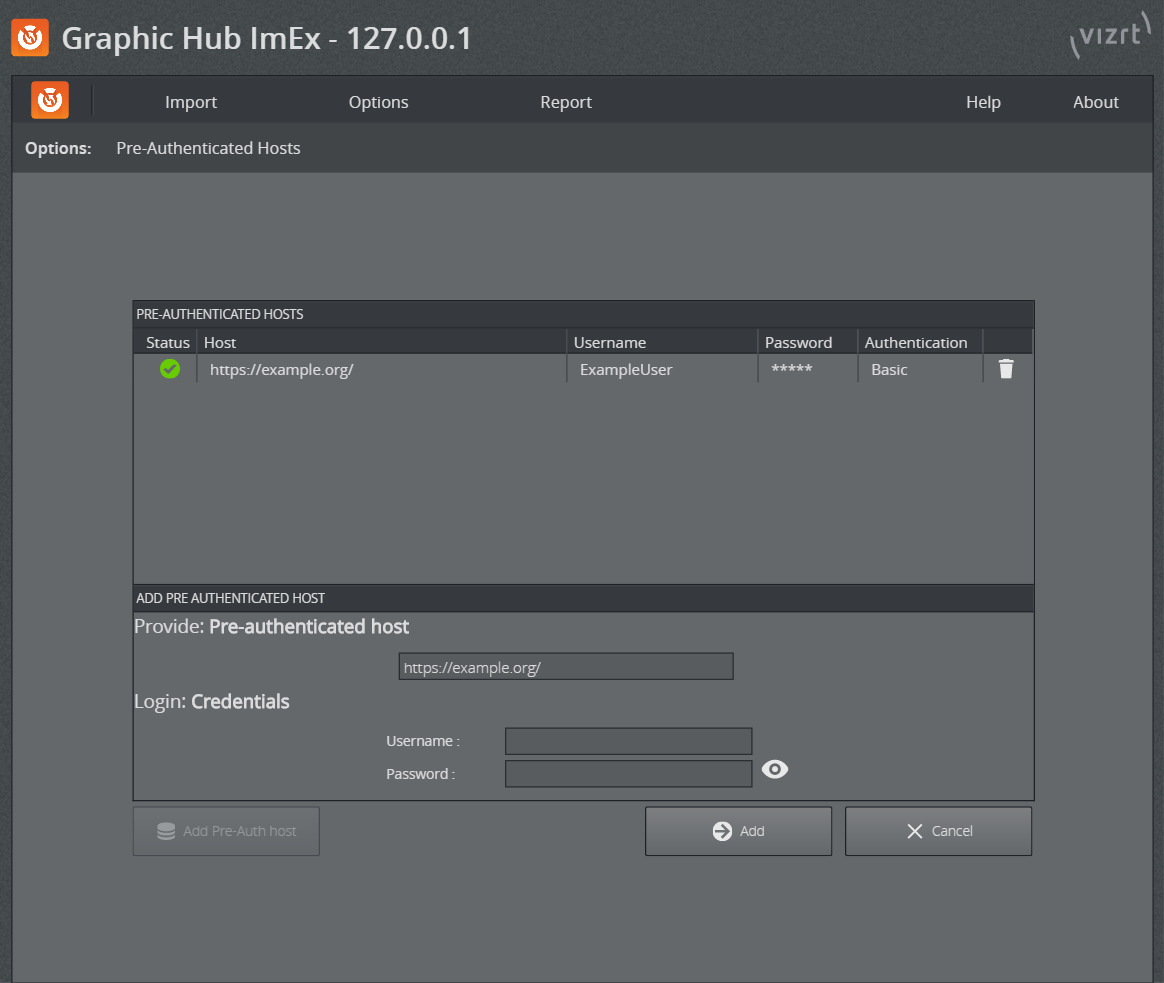
To Add a Pre-Authenticated Host
-
Open Options > Pre-Authenticated Hosts.
-
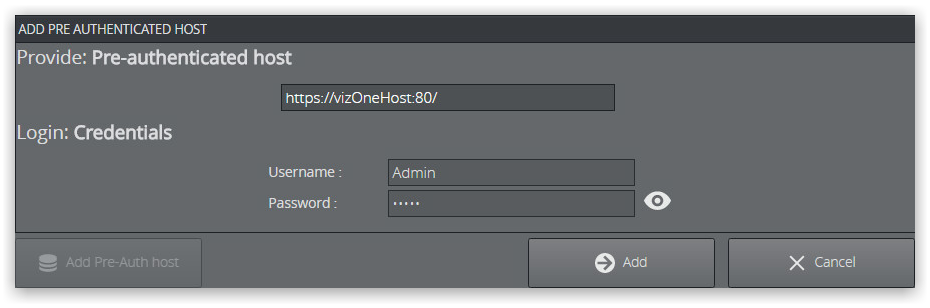
Click Add Pre-Auth host at the bottom left. This enables the Add Pre-Authenticated Host pane:
-
Enter the URL for the host you are pre-authenticating, as well as the Username and Password.
-
Click Add. This adds the Pre-Authenticated host to the list view.
To Remove Pre-Authenticated Hosts
You can remove pre-authenticated hosts that are not in use.
-
Open Options > Pre-Authenticated Hosts.
-
Remove the desired host by clicking the trash can icon at the far right of the host's entry.