Graphic Hub Administrator Guide
Version 3.6 | Published December 10, 2021 ©
Add Metadata
Graphic Hub supports keywords and add-ons that work like metadata, to help you to dynamically organize your files better and enhance search capabilities.
Keywords
Up to 20 keywords can be assigned to any file, to enhance search capabilities.
-
Select Tools > Administer Keywords to open the Administer Keywords window.
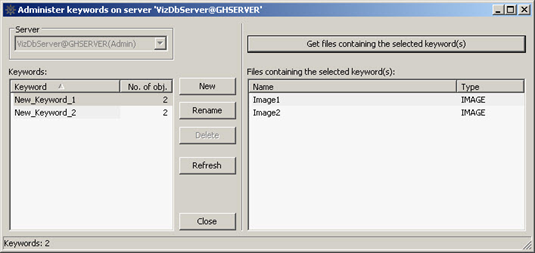
To View Files which Use a Selected Keyword
-
Open the Administer Keywords... window.
-
Click on a keyword(s).
-
Double click a keyword to view files assigned to it.
-
All files assigned with the selected keywords show in the right side panel.
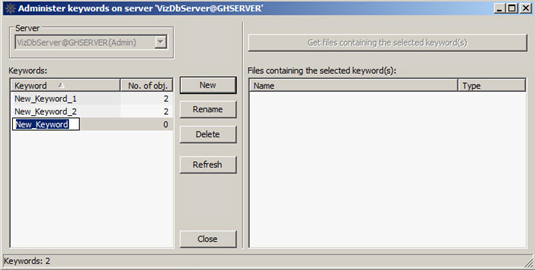
To Create a Keyword
-
Open the Administer Keywords window.
-
Click the New button. In the left panel, a new keyword is created.
-
Enter a name for the new keyword, and press ENTER.
To Delete a Keyword
A keyword can only be deleted if it is not assigned to a file or folder. Look in the No. of Obj. field to verify how many files or folders the keyword(s) are assigned to.
Note: If multiple keywords are selected, only the keywords with no assigned files or folders are deleted.
-
Open the Administer keywords window.
-
In the left panel, click on the keyword(s) to delete.
-
Click the Delete button.
-
Click Yes in the delete confirm window.
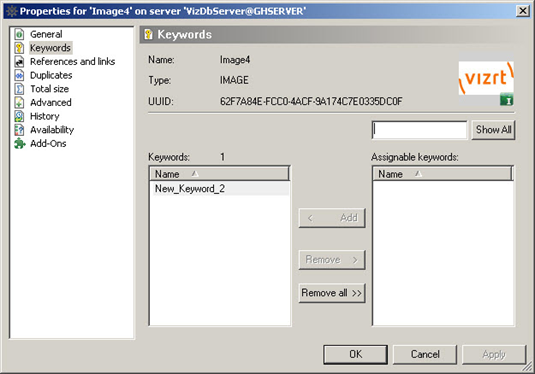
To Assign a Keyword to a File
-
Right-click a file in the File panel and select Properties from the context menu.
-
Click on Keywords in the Properties for <file name> window that opens.
-
Select/find a keyword(s) to assign to the file:
-
Enter a keyword name in the search box.
-
Click on Search, or Show All to see all available keywords
Tip: Wildcards such as * or ? are allowed in the keywords search string.
-
-
Click a keyword, in the Assignable keywords panel, to select it.
-
Click the < Add button.
Note: Up to 20 keywords can be assigned to one file.
-
Click OK.
To Assign a Keyword with the File Context Menu
To assign a keyword(s) with the file context menu is better for on-the-fly keyword additions, but does not show any other data about the keyword(s) which are assigned.
-
Right-click a file in the File panel to open the file context menu and select Add keywords...
-
Search for available keywords by entering the name of a specific keyword, or asterisk (*) to show all available keywords.
-
Select the required keyword(s).
-
Click Add...
-
Click Add in the Add keywords... window.
-
Click Close.
To Remove a Keyword from a File
With this procedure a keyword(s) is first selected then the file(s). The advantage to that method is greater visibility of information regarding each keyword and where it is used.
-
Open the Administer Keywords... window.
-
Click on a keyword(s) in the list of available keywords.
-
Double click a keyword to view the files assigned to the selected keyword. All files assigned with the selected keyword(s) show in the right side panel.
-
Right-click on the file(s) from which the keyword is to be removed.
-
Click Remove keyword(s).
-
Click Remove.... in the Remove keywords from <file name>... window.
-
Click Remove in the Remove keywords... window.
-
Click Close.
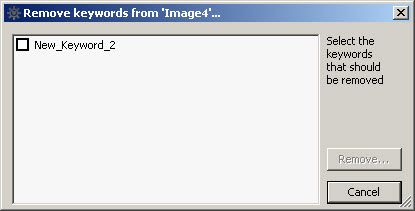
To Remove a Keyword with the File Context Menu
To remove a keyword(s) with the file context menu is better for on-the-fly keyword removal, but does not show any other data about the keyword(s) which are to be deleted.
-
Right-click a file in the File panel to open the file context menu, and select Remove Keywords...
-
Select the keyword(s) to be removed.
-
Click Remove....
-
Click Remove in the Remove keywords... window
-
Click Close
Add-ons
Add-ons are a solution for creating templates to assign custom metadata to objects in the Graphic Hub. This provides another dimension for searching, tagging and organizing objects. Add-ons work similarly to Keywords, but are actually more extensible.
Simple Add-on Use Case and Conceptional Workflow
Images of people need to be tagged with the first name, last name, gender, and age.
-
Add-on template with corresponding fields is created and published. Only published add-ons can be assigned to files.
-
The add-on is assigned to a file and the values wanted are entered.
-
Afterwards, the search grants the ability to view this information, for example, all files with a specific add-on or gender male assigned are retrieved.
Tip: Add-ons assigned to files are exportable and importable through Archives and are deployed with Graphic Hub Manager and the Deploy Agent.
A typical add-on assigned on a specific file could look like:
-
Add-On: Vizrt Meta Data
-
Title: My Metadata Element 01
-
Alternative title: Add-on Example 01
-
Synopsis: Add-on use case
-
Rights: Rights reserved and held by creator and contributors
-
Date: 20-02-2018
-
Language Code: ENGLISH
-
Media Type: Production Element
-
Creators: various
-
Add-ons are administered from the Add-ons window. They are assigned from the Add-ons Panel.
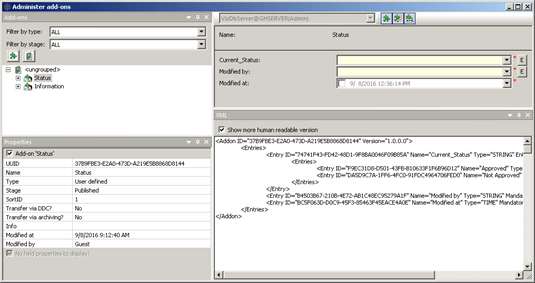
Each add-on can have several entries. Entries can be numbers, strings, UUID, date and XML (for use by external applications). Each entry also has a Proposal, which sets out the options for the add-on in an eventual drop down box. You can also add informational text for a tool tip, which is shown when you mouse over the region of its name in the add-ons window.
One use case for add-ons is approval states. You can create an add-on with the parameters of Draft, Pending, and Approved. If an art director does not want any scene on the design cluster to be make it to the playout engine, they can use the Import External Images functionality to take all new scenes, assign the add-on, and then only deploy scenes that he has personally approved to the playout engine.
To Create a New Add-on
-
Open the Graphic Hub Manager
-
Open the Administer add-ons window:
-
Click Tools > Administer add-ons..., or
-
Press CTRL + SHIFT + F8.
-
-
Open the Create add-on window:
-
From the Administer add-ons window, click the Create new add-on... button
 , or right-click in the Add-ons quadrant and select Create new add-on...
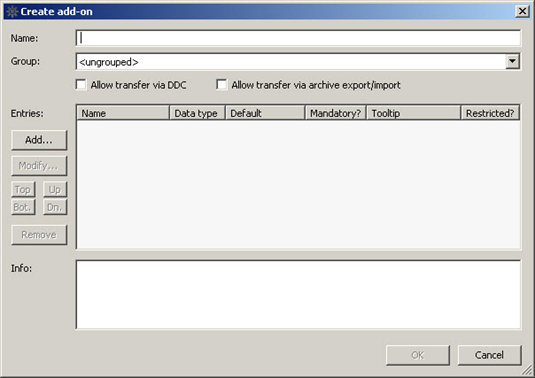
-
-
In the Name field, enter a name for the add-on.
-
From the Group drop down box, select from:
-
ungrouped: The new add-on is not in a group.
-
<group name>: Select a group to put the new add-on.
-
-
Check the Allow transfer via DDC, if required (when checked, the add-on is transferred through DDC (Direct Deploy Copy)).
-
Check the Allow transfer via archive export/import, if required (when checked, the add-on may be transferred via Archives (exported/imported)).
-
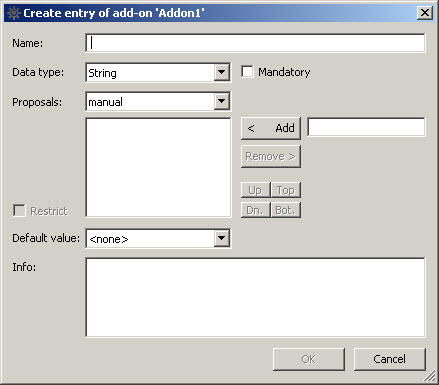
Click the Add... button. The Create entry of add-on window is shown.
-
In the Name field, enter a name for the add-on entry.
-
From the Data Type drop down box, select one of the following options:
-
Number: Only manual proposals supported.
-
String: Supports manual proposals and having all registered users as a proposal option.
-
Date: No proposals supported, namely selecting a date from a calendar.
-
UUID: No proposals supported.
-
XML: No proposals supported.
-
-
Check the Mandatory check box for it to be mandatory for this entry to have a value. Uncheck it for the entry to be optional.
-
From Proposal drop down box, make sure Manual is selected.
Note: If the Data Type is String, the option of selecting <all users> as the Proposal is available. In this case, no further Proposal configuration is required.
-
In the Add field, enter an option that is available for selection and click the Add button. Repeat for as many options as you want to have in your proposal. You can also remove options by clicking the Remove button, as well as changing the order in which options appear by clicking the Up, Down, Top and Bottom buttons.
-
Check the Restrict check box to restrict the proposal entries to what you have added above. Uncheck it to allow user-defined entries in addition to your proposal options.
-
From the Default value drop down box, select one of the following options:
-
<none>: There is no default value assigned. Not available if the entry is restricted.
-
<user defined>: The value is defined when assigning the add-on. Not available if the entry is restricted.
-
<current user>: The logged-in user is the default value. The other proposal values are also available.
-
<current time>: The current date and time are the default value. Only valid if the Data Type is Date.
-
Any of the other proposals you have defined above.
-
-
In the Info field, enter any text that you wish to appear as a tool tip when mousing over the add-on once it has been published.
Caution: Any text you enter in this field is exposed to end users.
-
Click OK.
To Create an Add-on Group
-
Open the Graphic Hub Manager.
-
Open the Administer add-ons window:
-
Click Tools > Administer add-ons...
-
-
Open the Create add-on group window:
-
In the Administer add-ons window click the Create new add-on group... button
 , or right-click in the Add-ons quadrant and select Create new add-on group...
-
-
In the Name field, enter a name for the add-on group
Note: Make sure that the new Group name is unique.
-
Click the OK button. The new Add-on group shows in the Add-ons quadrant.
Note: Add-ons can be dragged from group to group as required.
To Publish an Add-on
IMPORTANT! Add-ons are automatically saved during the creation process and can be modified as required. But the Add-on cannot be assigned until it has been published. As long as the Add-on is assigned to any file on the server, it cannot be deleted. If the Add-on is not (no longer) assigned to any file on the server, it can be deleted.
-
In the Add-ons quadrant of the Add-ons window, right-click the add-on and select Publish add-on. You are queried if you are sure you want to publish this add-on.
-
If the add-on is ready for use, click Yes.
To Filter Add-ons by Type
-
In the Add-ons quadrant of the Add-ons window, from the Filter by type drop down box, select one of the following options:
-
All: All add-ons.
-
User-defined: All add-ons created by any users.
-
Viz: External metadata created by another Viz application.
-
System: All Graphic Hub server-delivered add-ons.
-
To Filter Add-ons by Stage
-
In the Add-ons quadrant of the Add-ons window, from the Filter by stage drop down box, select one of the following options:
-
All: All add-ons.
-
Draft: Unpublished add-ons.
-
Published: Published add-ons.
-
Retired: Add-ons retired from active use (because they can be withdrawn from service but not deleted from the system).
-
Imported: Metadata exported to Graphic Hub by other Viz applications.
-
Copied: Transferred in a deploy operation.
-
From archive: Add-ons exported by Viz Engine and re-imported from a Viz Artist archive to the Graphic Hub.
-
To Sort Add-ons and Add-on Groups
-
Click Tools > Administer add-ons... to open the Administer add-ons window.
-
In the Add-ons panel, select on an Add-on or an Add-on Group.
-
Drag the Add-on or an Add-on Group to its new location.
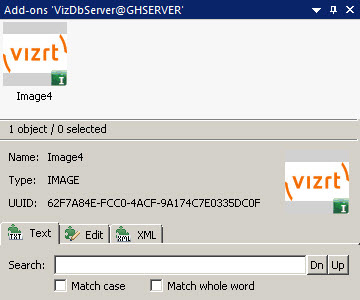
To Assign an Add-on
-
Enable the Add-ons Panel.
-
Select one or more files and drag them into the add-ons header. To remove a file from the add-ons header, click it and press Delete.
-
Click the Edit tab.
Add-ons available for assignment are shown.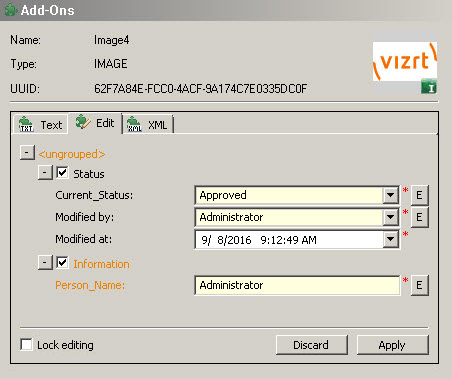
-
Click the button to the left of an add-on to expand it.
-
Check the check box beside the add-on to select it.
-
Do one of the following:
-
Select a value from the proposals drop down box.
-
Enter a value in the field (allowed only if the add-on is unrestricted).
-
Click the E button to the right of the add-on to edit the proposals (allowed only if the add-on is unrestricted).
-
Select a date (allowed only if the add-on is for the Date data type).
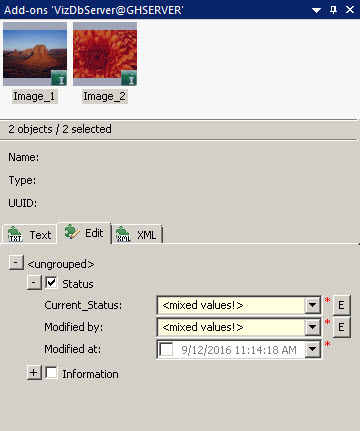
Note: With multiple files selected, where some have add-ons with different values, the entries that have different values displays <mixed values!>.
-
-
Click Apply.
To Retire an Add-on
-
In the Add-ons quadrant of the Add-ons window, right-click the add-on and select Retire add-on. You are queried if you are sure you want to publish this add-on.
-
If the add-on is ready for use, click Yes. The add-on is no longer available for use.