Graphic Hub Administrator Guide
Version 3.6 | Published December 10, 2021 ©
Import Viz 2.x Data and Archives
To use files from other data directories, they must be imported into the Graphic Hub. In Graphic Hub Manager either data directories or archives created with Viz Artist 2.x. can be imported.
Tip: When single files are imported from a data directory or an archive, referenced files are also imported.
Expert Settings
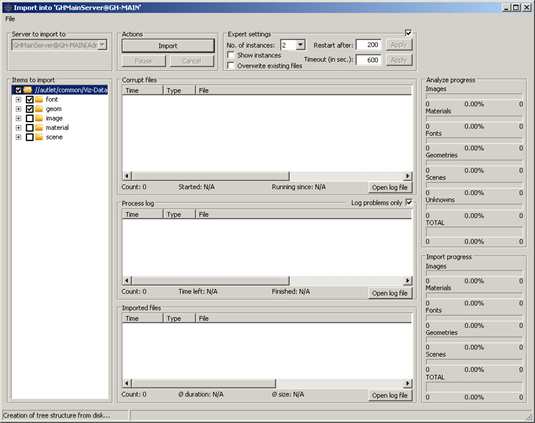
In the Import Window, there are a number of optional Expert Settings that can be used for import operations.
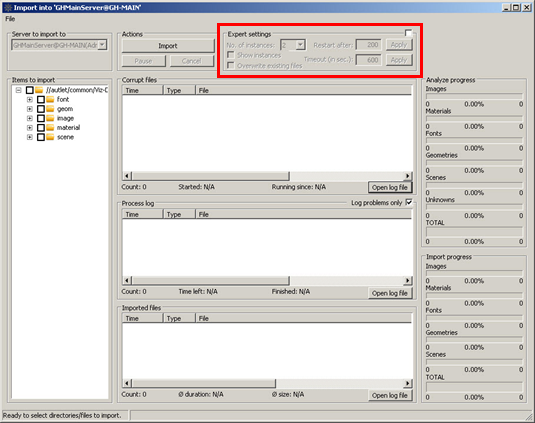
IMPORTANT! Expert Settings must only be used by experienced and qualified personnel.
Expert Settings Properties
-
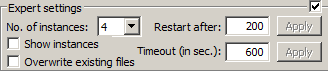
Expert settings: Tick the tick box to enable Expert Settings.
-
No. of instances: Number of import threads allows to run asynchronously.
-
Show instances: Shows all currently configured import threads when check.
-
Overwrite existing files: Select this option before starting the import operation if you want imported files to overwrite Viz 2.x files on the Graphic Hub.
-
Restart after: Enter a value representing the number of objects after which the import executable restarts.
-
Timeout: Restarts the import if the import executable takes longer than the value specified here.
Import Viz 2.x Data Directories
To Import a Viz 2.x Data Directory
-
Click Server > Import > Viz 2.x data.
-
Select a Viz 2.x data folder to import from, and click Open.
-
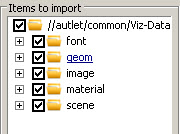
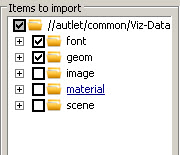
In the Import Window select the files to be imported, in the left panel.
-
Click Import.
-
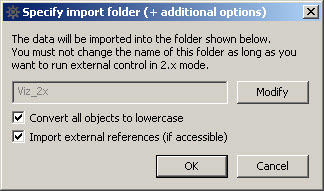
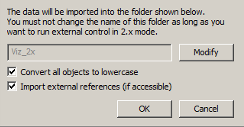
Click Modify and select a directory.
-
Select the Convert all objects to lower case check box. This gives full Viz 3.x compatibility with Viz Artist and Viz Trio.
-
Click OK.
Note: If the directory is big, the import process can take some time. The import window show the import status.
Import Viz 2.x Archives
Viz Artist 2.x archive files (*.eva) can be imported into a Viz 3.x system with the Graphic Hub Manager.
To Import a Viz 2.x Archive or Selected Items
-
Click:
-
For complete archives: Server > Import > Viz 2.x archive(s).
-
For selected items from one or more archives: Server > Import > Manually selected Viz 2.x archive(s).
-
-
Open the selected archive or files:
-
For complete archives: Select a folder housing archives to import, and click Open.
-
For selected items from one or more archives: Select an .eva archive file, and click Open.
-
-
Select the required files from the left panel.
-
Click Import.
-
Click Modify and select a directory.
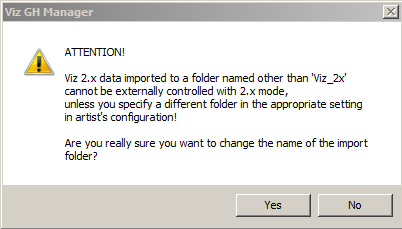
IMPORTANT! A warning shows to make sure that it is correct to modify the file.
-
Select, if required:
-
Convert all objects to lower case check box (this gives full Viz 3.x compatibility with Viz Artist and Viz Trio).
-
Import external references (if accessible)
-
-
Click OK.
Note: If the directory is large, the import process can take some time. The import window shows the import status.
Resume a Canceled/Crashed Import Operation
If an error occurs and the import procedure crashes, or the import is canceled, it is possible to resume from where the import ended. When an import operation does not complete, an import backup file is automatically created. This backup file is used to resume the import procedure.
Note: As the log file for an import is created on the hard disk of the physical machine, the import can only be resumed on the machine it has been canceled on.
To Resume a Canceled/Crashed Import Operation
-
Click Server > Import > Resume from canceled or crashed import.
-
Select a backup file to import.
-
Click Open.
-
Click Import.
-
Click OK.
Note: If the directory is large, the import process can take some time. The import window show the import status.
Tip: If resuming from a crashed import, check the selection of files to prevent the crash from happening again. Also, it is possible to automatically start the import when resuming, by enabling the Import option in the Preferences window.