
Viz Multiplay User Guide
Version 2.3 | Published August 10, 2018 ©
Studio Editor
Design your studio, including multiple video walls, using the Studio Editor.
Open the Studio Editor by clicking the ![]() icon on the toolbar of the Video Wall Designer
icon on the toolbar of the Video Wall Designer
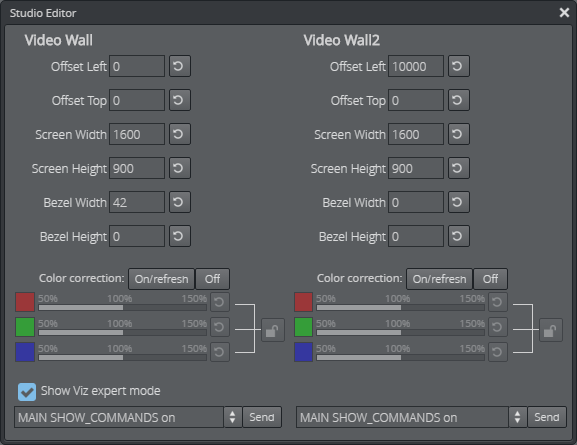
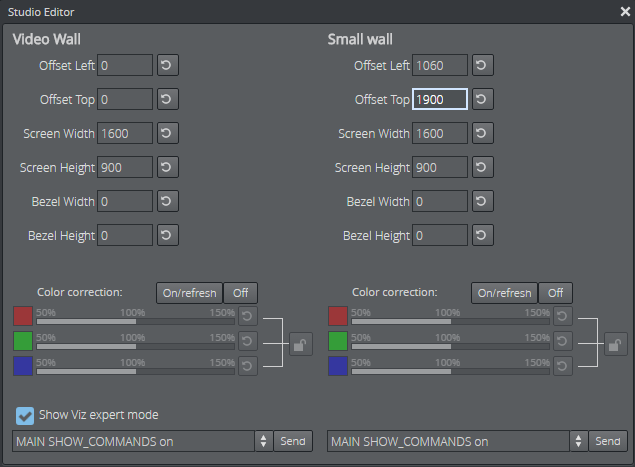
The Studio Editor defines the physical positions for the screens in each of the video walls in the setup. It is especially useful when there are multiple video walls in the studio. Updates made to the values in the Studio Editor are instantly reflected in the actual output.
Multiple Video Walls
In Viz Multiplay multiple video walls can be merged into one “studio”. Each wall is controlled by one Viz Engine, and when content is played out on a GFX channel, each Viz Engine plays out the same content, but different parts of it, so it looks like content can span over several video walls.
Each wall has a dimension and an offset in the total “studio” area.
To configure the setup of the locations and sizes of the walls, use the Studio Editor to adjust the screen positions “live”. While some test content is played out in the GFX channels, use the Studio Editor to configure the bezels, dimensions and locations of the physical placements - until the content matches the pixels on the outputs.
See Also
Color Correction on the GPU
Note:
Color Correction via the Studio Editor requires Viz Engine 3.8.2 or later, as well as NVIDIA Quadro 5000, 6000 or Plex 7000.
From the Studio Editor, RGB intensity can be controlled directly on the GPU for each video wall.
To use this feature, open the Studio Editor from within the Video Wall Designer, and adjust the RGB sliders for each of the renderers in the video wall setup.
When Show Viz expert mode is enabled, commands can be sent directly to the Viz Engine.