
Viz Multiplay User Guide
Version 2.3 | Published August 10, 2018 ©
Configuring Your Display
This section covers the following topics:
Layout Options
-
For a list of supported browsers, see Setting up the Viz Multiplay Client.
-
Chrome has features that can be useful when launching Viz Multiplay in a browser, see Chrome Setup.
-
Channels are collapsible individually and their size can be adjusted, see Resizing and collapsing channels.
-
Viz Multiplay can be run in portrait mode, which allows more space for displaying channels.
Toolbar

Configure how Viz Multiplay looks in your display from the tool bar using Settings, Hide Sources Pane and Show pane, and 1-Tap Mode.
Click on the Viz Multiplay logo for version information, as well as links to documentation and third party licenses.
Hide Sources Pane and Show pane
![]()
Click the Show/Hide button in the toolbar to toggle both the Show Pane and Sources Pane on/off.
Settings
![]()
Open the Viz Multiplay Settings window from the tool bar.
-
From the General Tab it is possible to change the thumbnail size, show/hide the status bar, and set whether to display a preview in the Program column when clips are taken to air.
-
Use the Profiles Tab to individually configure Profiles, Channels, Viz Engine handlers and Viz Video handlers, as well as easily configure video walls.
-
Use the Workspaces Tab to create Workspaces, which define the set of channels that are hidden from view for each type of user.
-
The Inboxes Tab allows setup of one or more global shows in which multiple users can ingest new elements (images, clips, graphics) simultaneously. These elements are available for the Viz Multiplay operator instantly.
-
Use the Servers Tab to configure preview servers and MAM systems that help to search media quickly.
On Air Mode

Click this button to toggle between on and off air mode. In On Air Mode, the button turns red and the label is ON AIR. In off Air Mode, the button is grey and labeled OFF AIR. Certain functionality in the user interface related to sending items to air in On Air Mode is unavailable in Off Air Mode. This is in order to protect against accidentally sending elements to air while editing a show or channel.
The following panels and columns are hidden in Off Air Mode:
-
The Arm and Take Multiple Elements Action Bar
-
The Armed column
-
The Program column
1-Tap Mode
![]()
When 1-Tap mode is enabled, the Armed column is hidden and tapping an element or shortcut in the Media column will take it directly to Program. In this mode, elements can still be dragged between channels, or dragged to the program channel.
When 1-Tap is disabled, tap will arm an element. Tap in the Arm column to take it to Program. Drag elements to the preview pane to preview them.
Set up on a Tablet
As space is limited on a tablet, a compact layout is provided automatically. You can also consider using the following display settings:
-
Hide the Status bar (See Settings)
-
Enable 1-Tap Mode
-
Adjust the Icon size (See Settings)
Resizing and collapsing channels
Channels can be custom sized, expanded by row or collapsed entirely.
-
Set custom channel size
-
Resizing channels from the context menu
-
Collapsing channels
Set custom channel size
-
Hold down ALT.
-
Hover the mouse pointer over the top edge of a channel header until the cursor turns into a row separator (row resize cursor).
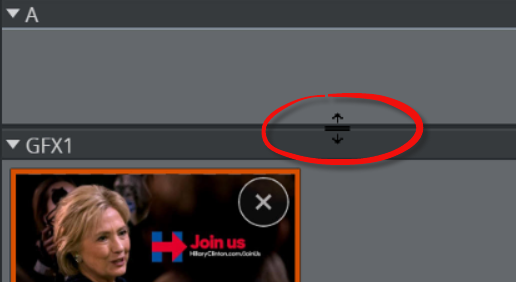
-
Drag the separator up or down as desired.
Resizing channels from the context menu
Expand channels by multiples of rows.
-
Right-click the channel header and point to the Set Height menu item.
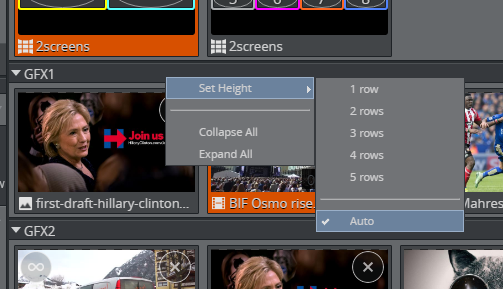
-
Select the desired row height.
Auto resize
Select Auto to enable automatic creation of new channel rows when new items are added to a full row.
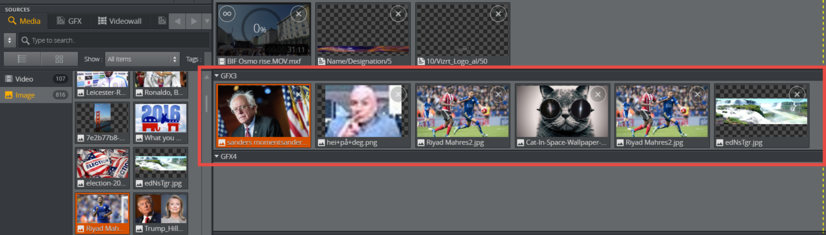
How this works:
-
Click Auto from Set Height, as explained above.
-
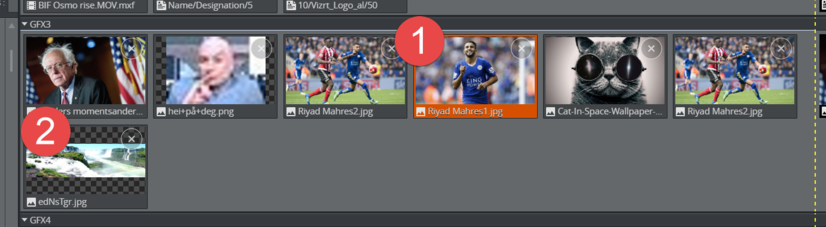
The channel row is full of items, as shown here:
-
Drag an image from the Media tab into the row.
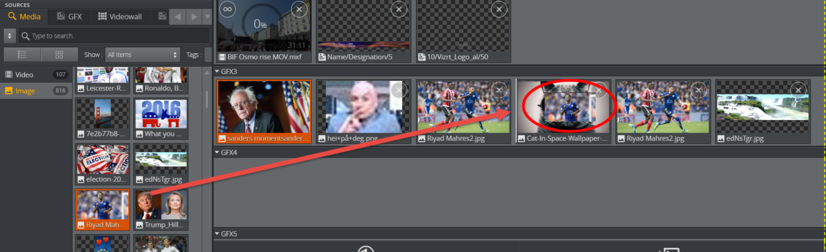
-
Two things happen: (1) The image appears in the row where it was dropped and (2) the last image in the row moves onto a new row below, which appeared because Auto was selected.
Collapsing channels
Collapse a single channel from view:
-
Click the channel header to collapse individual channels.
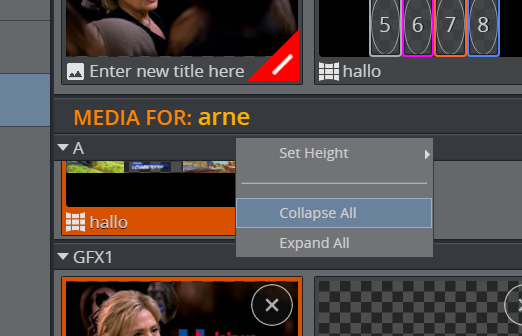
Collapse or expand multiple channels from view:
-
Right-click a channel header.
-
Click Collapse All (or Expand All depending on the objective).
-
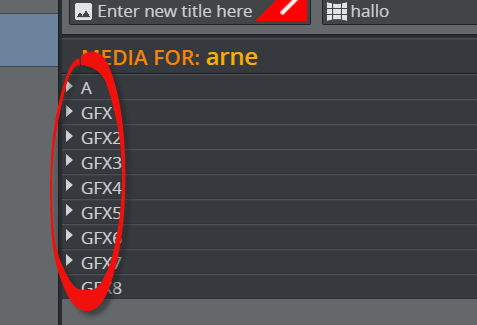
All channels in the Media Tab collapse.
Tip:
Use the keyboard shortcuts SHIFT+C and SHIFT+E to collapse and expand all channels, respectively.