
Viz Multiplay User Guide
Version 2.3 | Published August 10, 2018 ©
Creating prefilled walls
Presets represent the layout of the video wall. Each GFX channel has a size and a position. When you change a preset on air, the content of each GFX channel stays the same and the GFX channel moves to the new position.
But imagine a scenario where you play out both a layout and content at the same time. You may have a fixed set of images, clips or graphics for a special occasion, such as an opener for a show. Or you prepared a set of content for a news story. In that case, you want to prepare both a preset and its content and save it as a filled preset, and let the Viz Multiplay operator play it out with one click or tap.
The following topics are covered in this section:
Example workflow
The following is an example workflow:
-
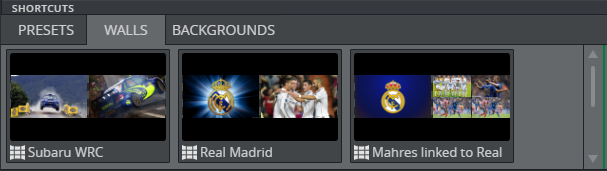
Create a new group in the shortcuts playlist
Note:
The shortcuts playlist already contains one group called “Presets”. Now you want to have an additional group for your pre-filled walls. This group will appear as a tab in the Shortcuts bar.
-
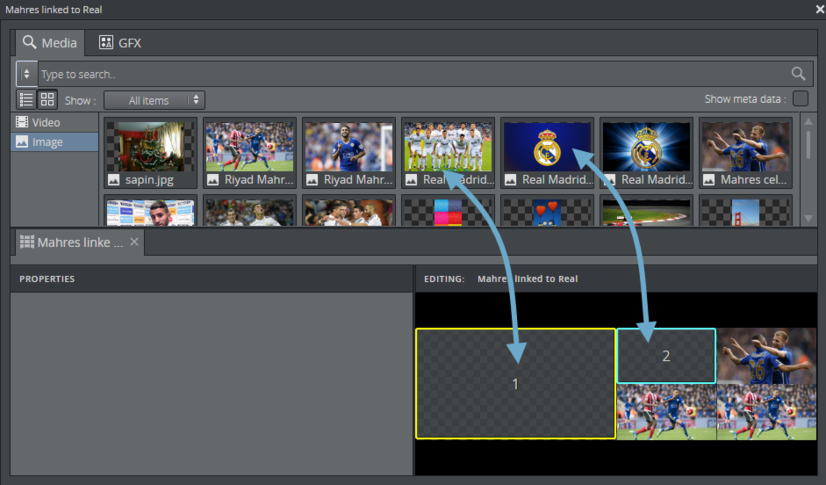
Drag a preset from the Videowall tab to your new group in Shortcuts, or the main channel (usually channel ‘A’).
-
Right click the preset and select Edit Content.
-
You can drag elements from the different tabs (Media, inboxes, the GFX playlist) from the editor that appears down to the GFX channels in the video wall.
-
Edit individual elements in a video wall by clicking the play symbol.

-
Finally, close the editor when the video wall preset is filled (partly or completely) with elements.
-
In Viz Multiplay, the preset thumbnails in the “Walls” group in the shortcuts playlist should now reflect the content put into the video wall preset.
Tip:
It is possible to fill only one or some of the GFX channels in a filled preset. The existing content on air of the non-filled GFX channels will then stay on air when a partly-filled preset is played out.
Preparing content for playout
Initializing
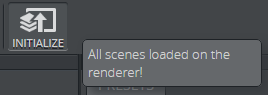
Graphics should be initialized before the broadcast or event. Initializing means that the renderer will load into memory all resources needed to play out the graphics, so they will appear instantly when taken on air.
Initialize a show
To initialize the show, click the Initialize button. If you hover the mouse pointer over the button, the progress of the initialization will show in the tooltip.
Tip:
Initializing during a broadcast may impact scenes playing on air.
Clean up the renderer
Clean up all video walls or a particular wall in a profile. Cleaning up a wall unloads all the resources from the memory of the renderer, which may be necessary periodically.
See Also
Arming
You can arm elements, which means preparing them to be played on air, in Viz Multiplay. Armed videos are prepared by the MSE, so the first frame is ready in the renderer. Images and graphics are not pre-loaded in any explicit way. To arm elements, disable 1-Tap mode so the Armed column becomes visible.
Armed elements are visible in all Viz Multiplay clients connected to the same MSE. If two operators want to arm their own private content on the same channel, ready to be played out, they will conflict. To resolve this - it is possible to select different workspaces for the two operators. Armed elements are visible per workspace - so if the first operator has activated his own workspace, his armed elements are not visible for the second operator in another workspace.
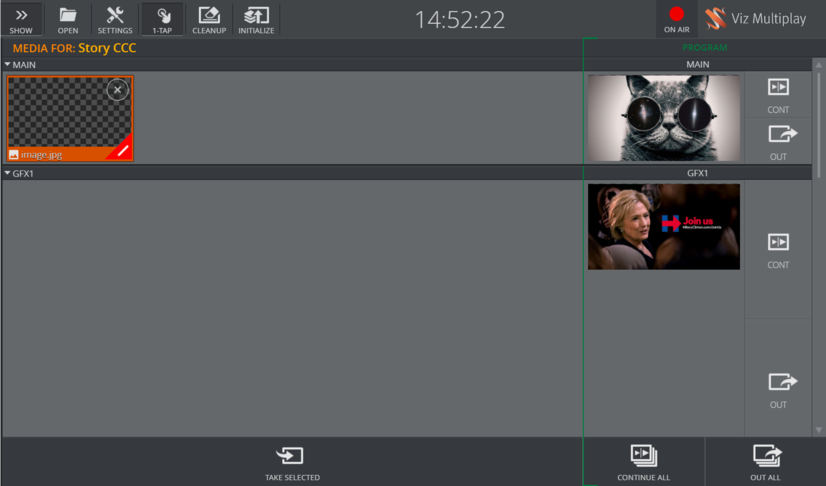
Playing out content
There are several ways of playing out elements in the renderer. The simplest way is to click an element, which sends it to the armed column or directly on air if 1-Tap mode is enabled.
Tip:
It is possible to select elements manually from one or more groups and click Take Selected or Arm Selected. You can de-select elements by holding down the CTRL key.
Viz Multiplay also has another, more story-centric way of playing out elements:
-
Organize your material in groups, for example one group per story.
Tip:
Each group can have one or more elements placed in the order they will be played on air. Elements can also be assigned to the channel where they should appear.
-
The first element in each channel will be selected when the operator clicks a group (story)
-
Now all the selected elements can be played out or armed by clicking Take Selected or Arm Selected
-
The selection now jumps to the next element in each group
-
When this procedure is repeated, Viz Multiplay can be used as a tool for sequential playout of elements ordered in a story-centric fashion.
Tip:
There should always be a preset on air when using Viz Multiplay with video wall presets. The preset element plays out in the middle layer on the main channel of the renderer (normally host:6100). The GFX channels will not show without a preset on air.
Workspaces
The workspaces can be used to adapt the GUI to one specific role, such as the anchor in the studio or the person responsible for playing out a part of the video wall. In each workspace it is possible to hide channels that should not be visible for the Viz Multiplay operator.
The main channel should often be hidden from the user. The main channel of a videowall is used to play out the presets, which are usually located in the Shortcuts bar. It is therefore not necessary to populate or show the main channel (normally called ‘A’) in the GUI.
To hide the A channel:
-
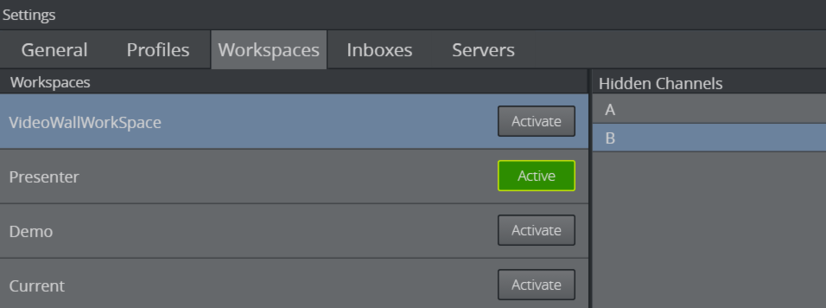
Go to Settings > Workspaces
-
Create a new workspace by clicking the Add
 button in the Workspaces list
 -
Add the names of the channels you wish to hide by clicking the Add
button in the Hidden Channels list Tip:
Hide multiple channels by right-clicking the Hidden Channels panel and selecting the relevant channels from the context menu. See Hide channel context menu.
-
Enter the name of the channel to hide
Note:
This will hide the channel regardless of which profile is active. If you hide channel “A” in the workspace, the channel called “A” will be hidden for all profiles you activate.
-
Activate the workspace by clicking the Activate button
Example workflow
A nice workflow is to create a workspace where you hide all GFX channels and only show the main channel. In addition, remove the shortcuts playlist and increase the thumbnail size to 200. Then you can drag presets from the Videowall tab over to the A channel and fill them with content. You will then have a GUI where the operator can control full walls, but not individual elements.
Only the main channel is visible in this workspace, and the thumbnails have a maximum size. With one click or tap, the Viz Multiplay operator can now toggle complete walls with layout and content.