
Viz Multiplay User Guide
Version 2.3 | Published August 10, 2018 ©
Get started with one video wall
This section covers the following topics:
Set up profile and video wall
-
Click Settings > Profiles
-
Create a profile by clicking the Add
 button in the bottom of the Profiles list
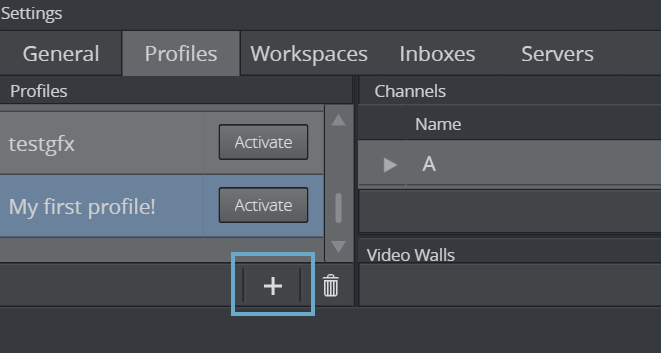
-
Enter a name for the new profile
-
Create a video wall by clicking the Add
button in the bottom of the Video Walls list -
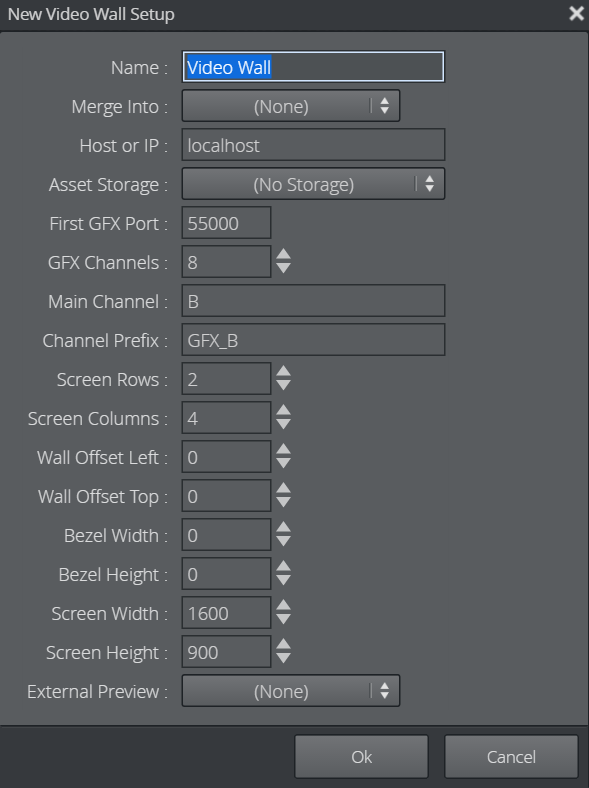
Enter the hostname of the Viz Engine driving the video wall, the number of screen rows and columns the video wall consists of (this must match the NVIDIA Mosaic settings), and how many GFX channels you need to use.
Note:
Currently, the Viz Engine supports up to 16 GFX channels, and you need to license the number of channels you want to use. Do not enable more than you need. The number of GFX channels does not need to match up with the total number of screens you have.
Tip:
Remember also to enable GFX channels in the Viz config file. See the Viz Engine Viz Engine Administrator's Guide for more information.
-
Enter an approximate number for the screen width and height.
Note:
These numbers can be in any units (mm, cm, pixels etc.). They are just relative numbers used to calculate where the physical pixels should be drawn. Later on, you will use the Studio Editor to fine tune the output, so you can leave the numbers as they are in this dialog box, if your screen is in HD aspect (i.e. 1600x900).
Info:
The screen width and height are the dimensions of the physical rendering area, not including the frame around the screen.
The bezel width and height is half of the horizontal and vertical distance between the screens.
-
Bezel values must first be set in the NVIDIA Mosaic settings. When that is done, the GPU knows how large the total output dimension is. The larger the gap between the screens, the larger output dimension. The point of setting bezel values in Viz Multiplay is to guide the preset designer on where the screens are located in the physical wall, and where the ‘dead’ areas are.
The offset values are only used when combining two video walls into one big area. Leave the values on 0 (zero) for now.
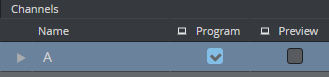
When you Click OK and confirm in the next warning dialog box, Viz Multiplay will create the necessary Viz and Video engine outputs in the lists to the right, and also add them to the newly created playout channels for this video wall. Notice that the channel list now has a channel called A (the main channel) and a number of GFX channels. -
Set the main channel as Viz program. All elements not containing an explicit channel will now be played out on the program channel.
Adjust screen dimensions and bezels numbers
Now that we have a profile with a video wall setup, we should adjust the numbers we entered for screen dimensions and bezels, so our content matches the physical screens. This is important if you have a large bezel value, or use multi video walls. If not, you can skip this step.
We can adjust the configuration visually in the Studio Editor, but first we need to have something to play out in out GFX channels, so we visually can confirm where the pixels end up on the screens.
Instructions:
-
Create a new show by clicking Open
-
Click the Add
button. Viz Multiplay will create a show with three default playlists (see previous chapter) and one video wall config preset you can use to do the wall adjustments. -
Click Ok
-
To use the new show together with your profile, click Settings > Profiles
-
Click the Activate button.
Tip:
Activating a profile is a Media Sequencer operation. You now activate your show in this profile for all clients while the show is open. Activating a show in a profile means that the Media Sequencer starts monitoring resources in that show, so the operation is potentially resource demanding if the show is big and contains lots of media assets. Your show can only be active in one profile.
-
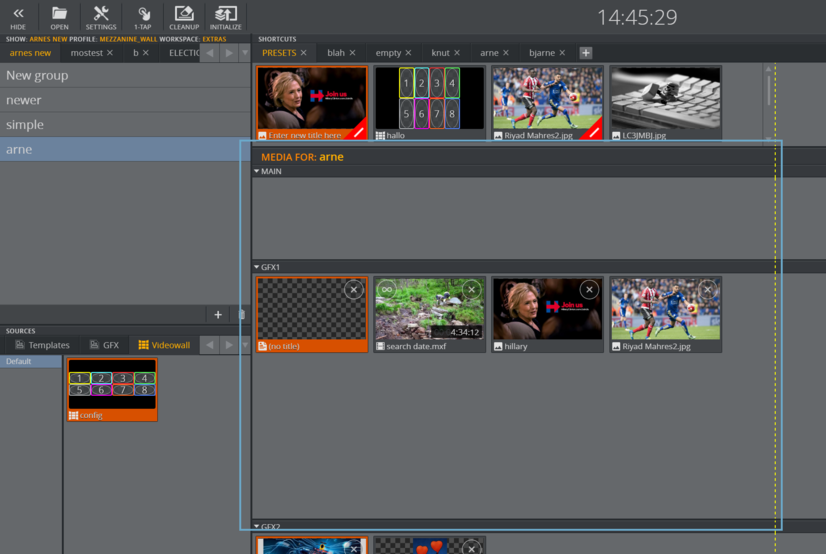
You should now see one group for each channel in the Media Column
-
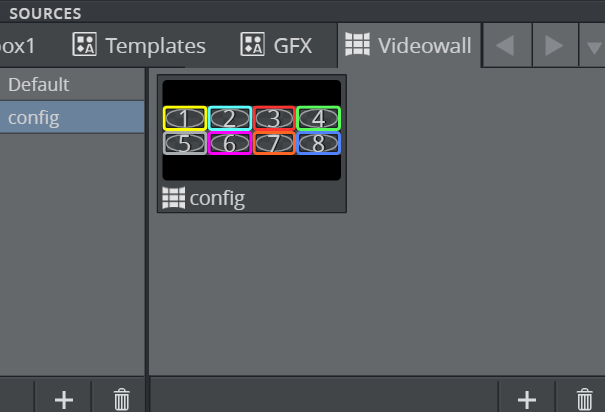
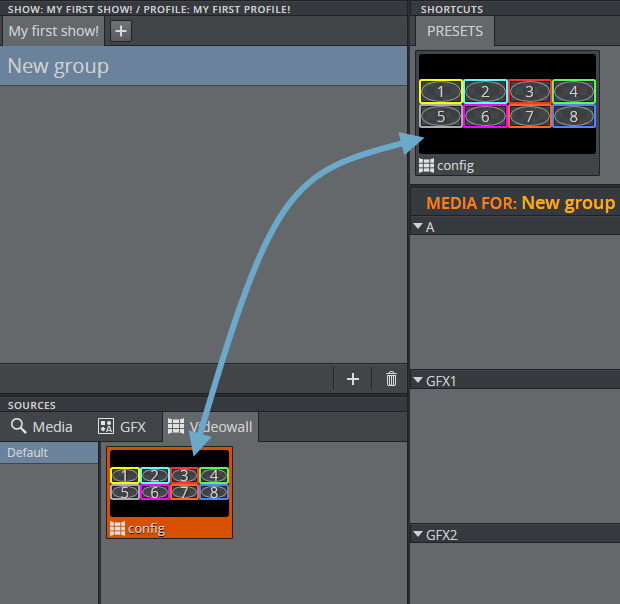
You now have a videowall tab with one group and one preset called ‘config’ in the Sources pane in the bottom left corner. Use this preset when you configure your video wall.
-
In the Sources pane, click the Videowall tab
-
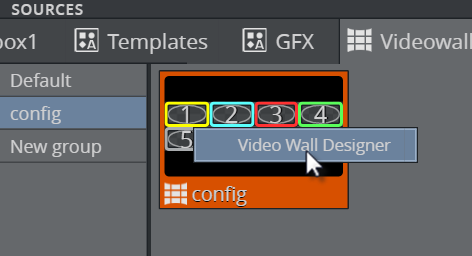
Right click the ‘config’ preset and enter the Video Wall Designer for designing the layout of the GFX channels
-
The GFX channels will not match the physical screen setup the first time you open the Video Wall designer. Right click a GFX channel and select Hide all channels.
-
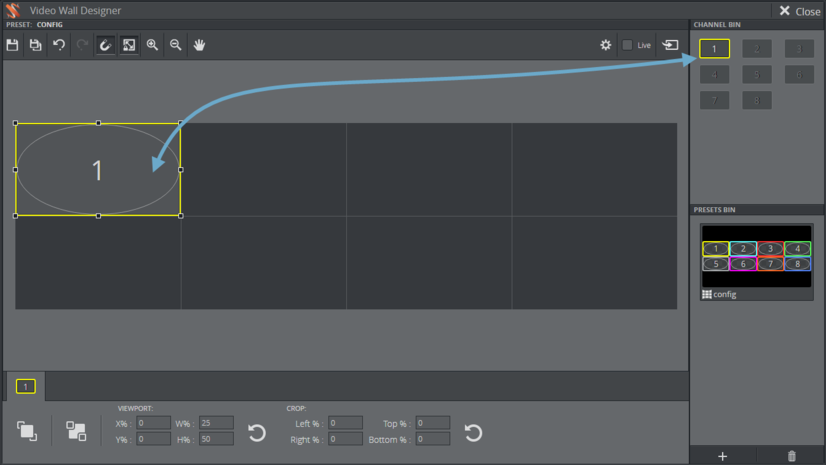
Drag channels one by one from the Channel Bin and drop them onto the areas marking each of the screens.
Tip:
For the configuration preset, it is smart to have one GFX channel per screen. This allows you to see how the physical output of each screen matches with the configuration.
-
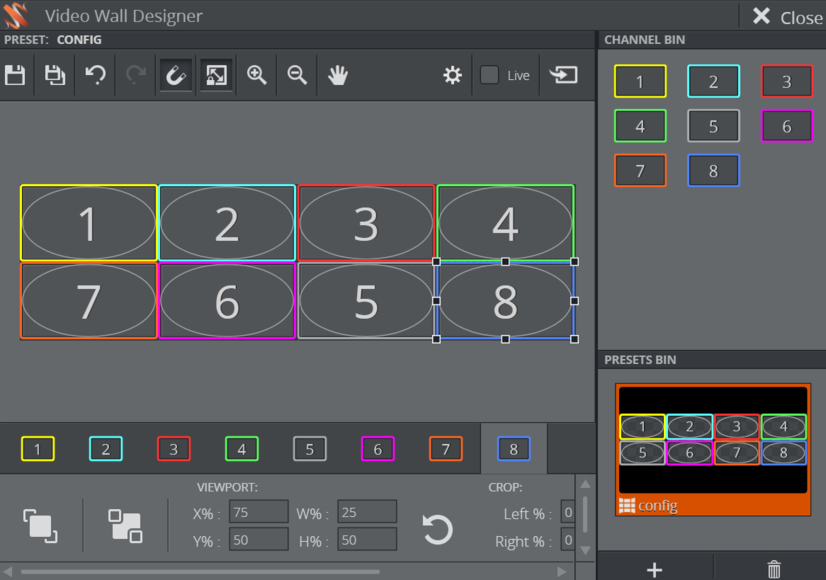
Save the preset by clicking the Save icon

-
Click Close
Take presets on air
You are now back to the main GUI in Viz Multiplay, and you have created one default config preset. It’s time to take this on air on the main channel:
-
The Videowall tab is a source for different presets, pre-made to quickly be used in a show.
-
To play out a preset, drag it onto the PRESETS group in the Shortcuts bar
-
Click it and verify that the preset now appears in the Armed column
-
Click Take
 and verify that it appears in the Program column
 Tip:
To ensure the preset is on air also watch the Media Sequencer console (it is smart to run the Media Sequencer in a console during configuration). Also watch the Viz Engine console, preferably with the Viz commands enabled.
Adding content to GFX channels
Now that the preset is on air, we need some default content in each GFX channel. See the previous chapter on how to get content into Viz Multiplay.
Play out an image or a scene with some distinct visual edges in each of the GFX channels. The output may not match each screen, especially if you use screens with a gap (bezel) between, so we may need to go into the Studio Editor to do the final tweaking.
-
Right click the Preset in Shortcuts Bar
-
Click Video Wall Designer
-
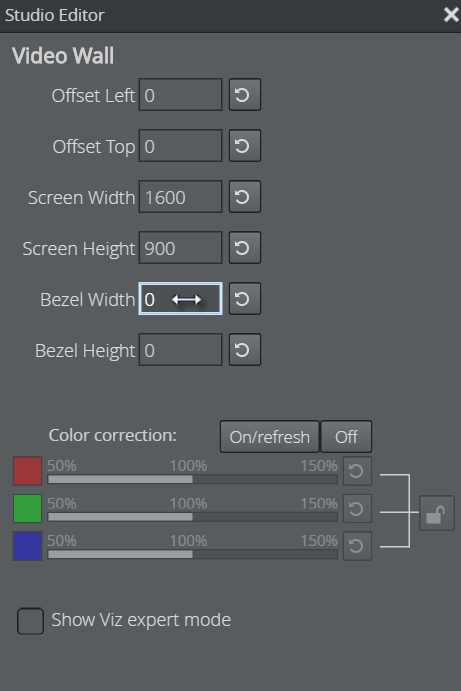
Click the Studio Editor button

-
In the Studio Editor, adjust bezels and screen dimensions. The content on the video wall will adjust live as you change the numbers in the GUI.
Tip:
Left click in a text input box and adjust the values by holding down the mouse button and dragging sideways.
-
When the configuration matches the physical locations and dimensions of the screens, close the Studio Editor
-
Save the preset.
Colour correct DVI output
You can also do colour correction on the DVI output. This feature requires Viz 3.8.2 or higher. RGB intensity can then be controlled directly on the GPU. This works by letting Viz Multiplay send the SCANOUT_INTENSITY SET (r,g,b) command to the Viz Engine, and the engine then sets the intensity values directly on the NVIDIA graphic card.
Tips:
The color correction mode is not remembered after the Viz Engine is restarted, so you need to click “On/Refresh” if you restart Viz Engine. The numbers are remembered so you do not need to do the color tweaking again.
Enable the Viz expert mode to send Viz commands directly from Viz Multiplay. The dropdown is pre-filled with some common commands, including enabling the performance bar, toggling commands on or off in the console and sending the RENDERER JOIN_SWAPGROUP 1 command. This is necessary for single walls also if you want to send exact values for the colour correction, if the GUI slider is not accurate enough.
It is crucial that you test-run your scenes, clips and live sources on the video wall before going on air. Use the performance bar in the Viz Engine to get an indication on how the performance is. To enable this, use the Viz expert mode to send the RENDERER SET_PERFORMANCE 1 command. A performance bar in the bottom of the renderer window will appear, indicating how many fps the system is capable of rendering.