
Viz Multiplay User Guide
Version 2.3 | Published August 10, 2018 ©
Setup and organize content
This section covers how to import graphics and set up servers to fill Viz Multiplay with content ready to be played out on the video wall.
The following topics are covered in this section:
Setting up a preview server
Viz Multiplay’s GUI largely consists of thumbnails for the elements, including video clips, images and graphics.
The thumbnails for video clips and images are fetched by following URLs to thumbnail images served out by the asset management system. But the thumbnails for graphics are generated on the fly by a Preview Server, which ensures that the thumbnails contain the actual data of the elements:
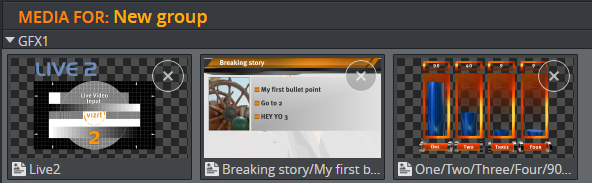
Without a Preview Server configured, the thumbnails of graphics will remain blacked out.
Tip:
Viz Multiplay uses the Preview Server configuration in the Media Sequencer. So if you use a Media Sequencer with a Preview Server already configured, there is no need to do anything in Viz Multiplay.
Running Preview Server
To run a Preview Server, you need a separate Viz Engine in VGA mode. A Viz Engine generating snapshots for a Preview Server cannot be combined with other tasks like running Viz Trio or Viz Artist.
-
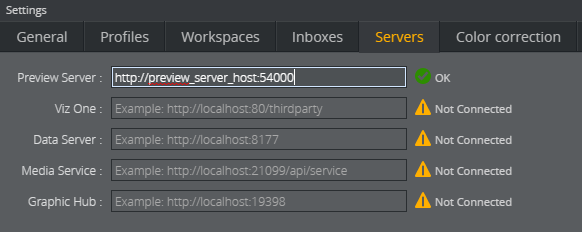
When a Preview Server is up and running, click Settings -> Servers
-
Enter the hostname of the Preview Server in the input field
-
Press the TAB key, Viz Multiplay will fill out the rest of the URL
-
Click Ok
-
The thumbnails should now appear in the GUI if you have graphics in your show or playlist
Tip:
The Viz Engine will generate snapshots requested by the Preview Server. This is normally done very quickly. However, it can take a few seconds before the thumbnails appear if your show or playlist contains a large number of elements. After that they should be cached in the Preview Server or in the web browser, so the GUI will redraw quicker.
Tip:
Remember that the Preview Server is connected to one or more Viz Engines. These engines are connected to one Graphic Hub database with the scenes and resources. When you later import graphics from different sources (e.g. Viz Trio, Pilot Data Server) the scenes used in these graphics must exist on the Graphic Hub used in the Preview Server. Preferably, you will only have one Graphic Hub on the system containing all your graphics.
See Also
-
Preview Server Administrator’s Guide 3.0
Getting started with shows and profiles
In a playout situation, Viz Multiplay is an independent client. When preparing and configuring material for playout, Viz Trio is needed to:
-
Import graphics from a Viz Engine
-
Configure a Viz Gateway (a MOS/newsroom workflow)
Content in Viz Multiplay is based on the Viz Trio show structure. Any show you create in Viz Trio is usable in Viz Multiplay and vice versa. However, there is one important difference: In Viz Multiplay the content is organized in groups. The workflow in Viz Multiplay is to select a group and control the content in the selected group. Therefore, elements on the root level in the show or playlists are not accessible in Viz Multiplay.
Creating shows and profiles involves the following steps:
-
Create a new show
-
Create a profile
-
Create playout channels in the profile
-
View output channels
Create a new show
The first step is to create a new show.
-
Click the Open button

-
Click the Add
 button in the bottom of the dialog box
 -
Give the new show a name
-
Click Ok
Note:
The show structure in Viz Multiplay is compatible with a Viz Trio show.
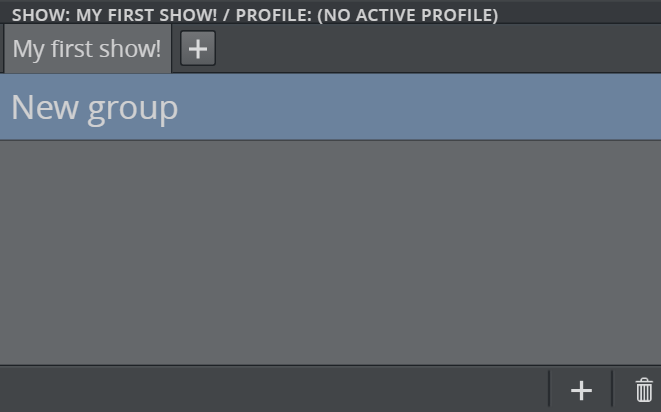
The Show Pane will now have one tab with the same name as the show, as shown here:
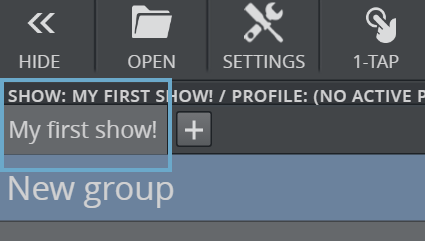
This tab displays the content of the page list in the Viz Trio show.
Differences between Viz Trio and Viz Multiplay
Shows and page lists appear in both Viz Trio and Viz Multiplay, but they behave differently in each program.
In terms of the page list, the difference between Viz Multiplay and Viz Trio is that, in Viz Trio, the page list is mostly used to host pages with unique callup codes. In Viz Multiplay, however, the page list is a free structure that can contain any type of element with any name.
Another difference between a show in Viz Trio and Viz Multiplay is that Viz Trio displays the playlist of elements as a tree structure while Viz Multiplay organizes the playlist per channel. So all elements in a group assigned to, for instance, the channel GFX2 are placed in the row representing GFX2 in the GUI. This is why you must create and activate a profile for your show in Viz Multiplay, because the profile contains the channels Viz Multiplay needs in order to organize the elements.
Create a profile
You need a profile so Viz Multiplay can create one row for each channel in the GUI. The profiles you create in Viz Multiplay are compatible with any Media Sequencer client that uses profiles such as Viz Pilot, Viz Trio etc.
-
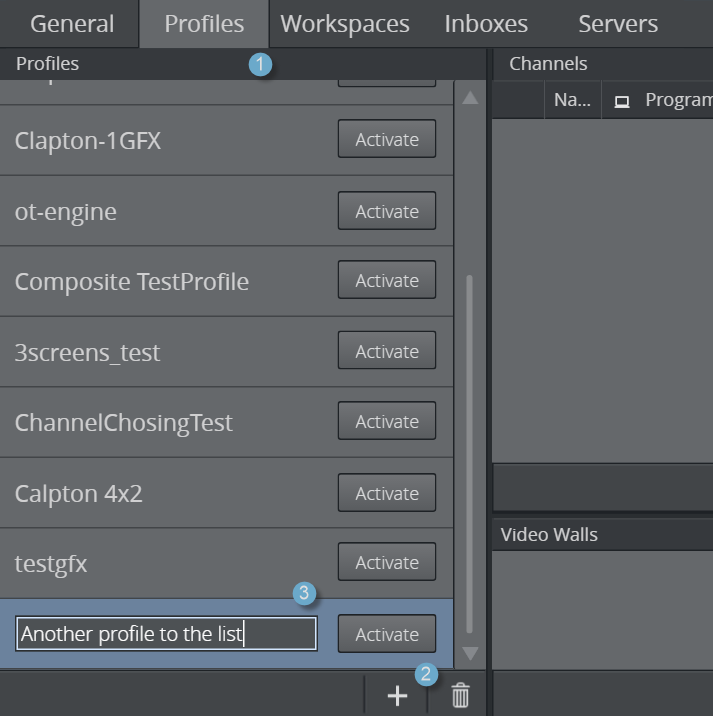
Click Settings > Profiles.
-
Create a new profile by clicking the Add
button at the bottom of the Profiles list -
Enter the name of the new profile
Create playout channels in the profile
There are two ways to create playout channels in the profile:
-
Create channels manually (usually for a non video wall scenario). In this case you must add Viz Engines and Video Engines in the window to the right in the Profile Configuration. Then create channels in the middle window and drag engines over to the channels. One channel can contain several engines.
-
Create a video wall. The channels and engines will be automatically created. For now you can, for instance, create a video wall with 4 GFX channels on localhost.
To create playout channels in the profile
-
Click Settings > Profiles.
-
Click the Add
button in the Video Walls list 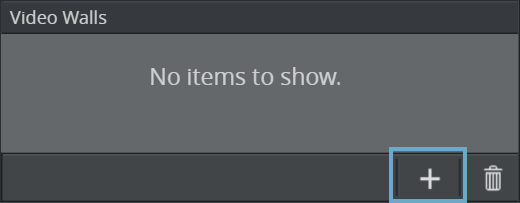
-
Fill in some dummy data in the Video Wall Setup dialog
-
Click Ok

Tip:
The channels list in a profile can be reorganized by clicking a channel, holding down CTRL and using the ARROW KEYS to move the channel up or down. This is useful if you want to, for instance, display GFX8 on the top of the GUI in Viz Multiplay. Viz Multiplay draws the channel groups in the order channels are found in the profile.
Now you have a profile and a show with a page list containing one group called ‘New Group’.
View output channels
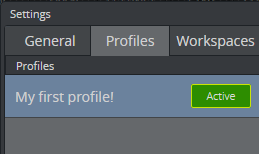
You must activate the profile for this show in order to view the output channels in the GUI.
-
Go to Settings > Profiles
-
Click the Activate button for your profile
Tip:
Activating a profile is a Media Sequencer operation. You now activate your show in this profile for all clients with this show open. Activating a show in a profile means that the Media Sequencer starts monitoring resources in that show, so the operation is potentially resource demanding in the event of a large show that contains lots of media assets. Your show can only be active in one profile.
Shortcuts
When you created the new show, Viz Multiplay created and set up a special playlist in this show called “shortcuts”. The shortcuts playlist is a regular playlist with groups and elements.
If desired, you can use another playlist as the shortcuts playlist by clicking Settings > General. In the Shortcuts dropdown, you can select any available playlist and use it as the shortcuts playlist.
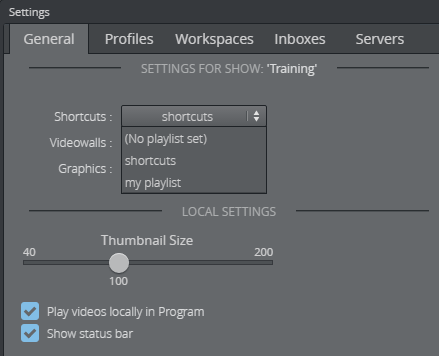
The shortcuts playlist will appear in the Shortcuts Bar. Each tab here is a group in the playlist. Create a new group in Viz Trio or click Settings > General and de-assign it as the shortcuts playlist. Select (No playlist set) as the value in the Shortcuts dropdown. Now it becomes a regular playlist in Viz Multiplay, where you can add or remove groups.
The Shortcuts bar is not assigned to any special channel, as the other channel groups in Viz Multiplay are. Elements in the shortcuts bar play out on the assigned channel of each element. This means that if you drag an element from the GFX playlist directly to the Shortcuts bar, the element will keep its assigned channel. If the element has no assigned channel, it will play out on the Program channel in the profile.
Tip:
The Shortcuts bar normally contains the video wall presets, “filled” video walls (presets with content) and backgrounds. These should be played out on the main channel of the video wall using the defaults from Viz Multiplay. The main channel is called “A”. Right click elements on the Shortcuts bar to check and change the playout channel.
Working with graphics
Now we want to import some graphics from a Graphic Hub. It is useful to open Viz Trio and verify that everything you do in Viz Multiplay is reflected in Viz Trio and vice versa. You need Viz Trio when you want to import graphics into the show, because this is not supported by Viz Multiplay.
In Viz Trio:
-
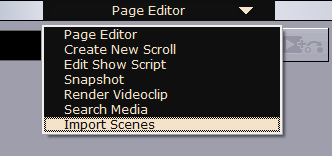
Select Import Scenes in the Page Editor menu
-
Browse the scene tree in Graphic Hub and import the scenes you want to use
Note:
You now have one template per scene you imported. These are not visible in Viz Multiplay.
-
Create a page for each of the templates
Note:
These pages end up on the root level of the page list in Viz Trio, not visible in Viz Multiplay.
The show workflow and the GFX workflow are the two main ways of working with graphics in Viz Multiplay
The show workflow
This workflow aims to pre-create all the content needed for the Viz Multiplay operator, before the actual show or broadcast starts. This is meaningful if you already have a Viz Trio workflow, or if you have content that changes very little during the broadcast.
In Viz Trio:
-
Create all your content in Viz Trio as pages
-
Drag the pages into the relevant groups in your show.
-
Set a channel on each of the pages to make them appear in the right group channel in Viz Multiplay.
In Viz Multiplay:
-
Drag elements between channels
The GFX playlist workflow
As your studio increasingly becomes the location for event analysis, you can get more video wall flexibility by allowing the Viz Multiplay operator to fill in content for graphics.
You can use Viz Trio to create default content (i.e. pages) for the graphics you want to expose to the Viz Multiplay operator. These pages can be dragged down to relevant groups in the GFX playlist in Viz Trio.

The GFX playlist will appear as a tab in the Sources Pane. After completing this Viz Trio is no longer needed. From the GFX playlist, the Viz Multiplay operator can drag graphics into the relevant groups and channels, quickly edit the data in Viz Multiplay and take the element on air.
Note:
Graphics elements can also be dragged from a channel into the GFX playlist.
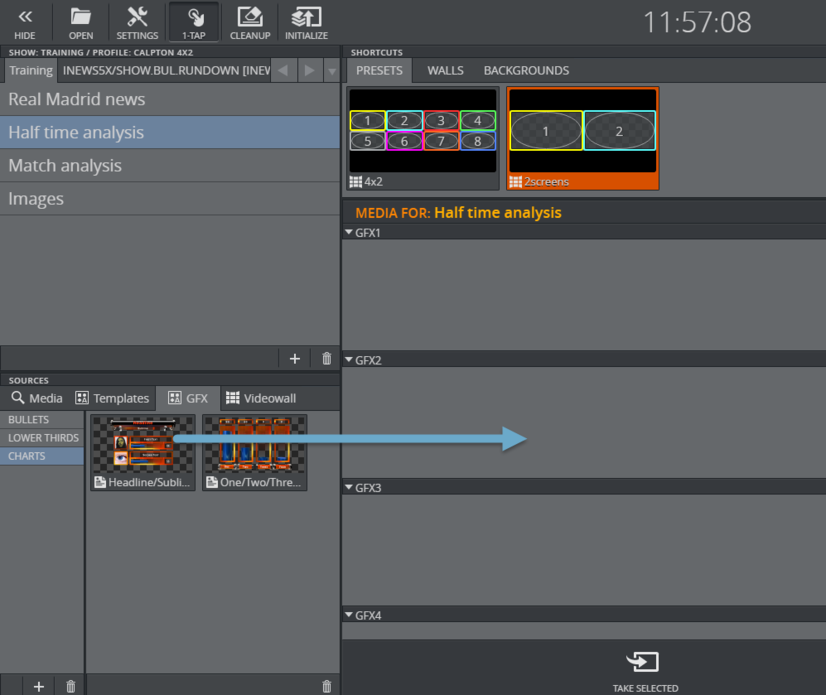
This workflow is a more rapid, ‘live’ workflow where you can, for example, place a set of graphics in the GFX playlist (nameplates, match results, fullscreens etc.) During the broadcast or event, the Viz Multiplay operator can drag the set of graphics out to the playout channel, fill the graphics with relevant data and take it on air instantly.
Create playlists for shows
A show can also have playlists, as in Viz Trio. You can create new playlists inside the show with Viz Trio or Viz Multiplay. A playlist is usually a subset of the pages in the page list.
In Viz Multiplay:
-
Click the Add
button rightmost on the tabs in the Show pane 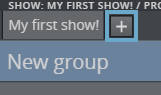
-
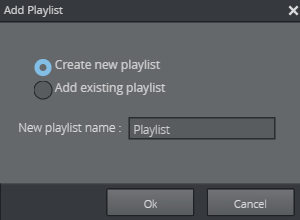
A dialog box appears asking whether you want to create a new internal show playlist or create a reference to an external Viz Pilot or MOS playlist. These playlists are compatible with Viz Multiplay.
Note:
These playlists are compatible with Viz Multiplay. The difference between internal and external playlists is that the internal playlists are owned by the show. They follow the show when exporting it and are deleted when removed from the show. The external playlists are not owned by the show.
Inboxes
The inboxes are global shows that are always available in the Sources pane. They can contain any type of element (images, clips and graphics), and the content does not have to be placed in groups.
Typical use of inboxes are:
-
For a special show that is a target for Sequencer Ingest. New ingested material will then appear automatically in the inbox, ready to be used in Viz Multiplay.
-
For listing available live source elements. These can be dragged to any group channel in Viz Multiplay and played out.
-
For graphics created during the broadcast or event that are imported by a Viz Trio operator into the inbox show. Then the graphics is available instantly in Viz Multiplay.
To use a show as an inbox:
-
Click Settings > Inboxes
-
Create a new show or select an exisisting show
-
Drag the show over to the Inboxes list to the right
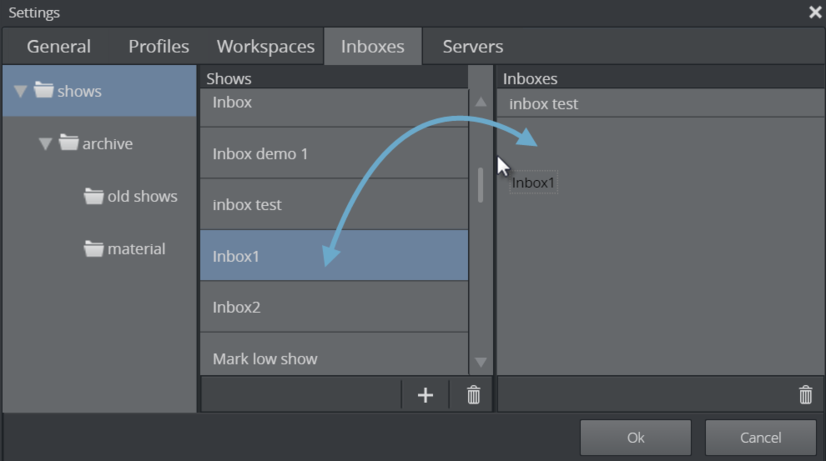
-
The show will now appear in the Sources pane

Working with images and videos
To get media assets into Viz Multiplay, you need to have access to a MAM system such as Media Service, Viz One or a Graphic Hub REST service (images only).
When a MAM system is up and running:
-
Go to Settings > Servers
-
Enter a hostname in the input field for the service
-
Press TAB, and Viz Multiplay will fill out the full URL
-
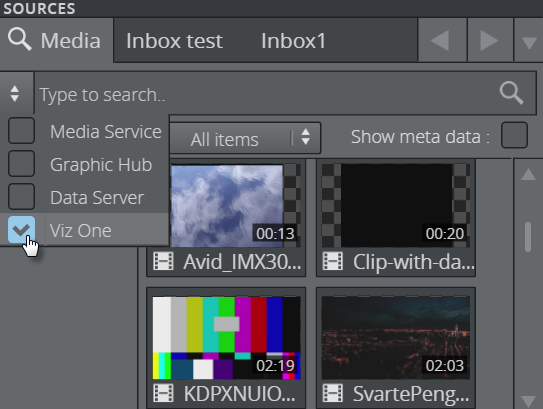
After clicking Ok, the Media Tab in the Sources pane will contain your MAM system as a search provider.

Setting asset storage
The Viz One setting is global for the Media Sequencer. Configuring this means that the Media Sequencer starts to monitor shows and playlists and transfers assets to the Viz Engines. In case you have a Viz One system, you also need to set the Asset Storage in the video wall dialog box.
Do so by clicking Settings > Profiles and double-clicking the video wall in the selected profile.
Note:
If you do not have video walls, the Asset Storage must be set for each Viz and or Video Engine in the list to the right. Failure to do so will result in videos not being transferred to the Viz Engine.
Configuring the Media Service
There are two ways to configure the Media Service, as explained below.
By entering the hostname in Media Service
-
Click Settings > Servers
-
Enter the Media Service URL (or hostname) in the Media Service input field
This setting is private for Viz Multiplay; the Media Sequencer is not aware of it. The Media Sequencer will think that no asset storage is configured. This works fine, because a Media Service is meant to host its clips on the clip root of the Viz Engine, so they do not need to be transferred. But it can lead to some error messages from the MSE and in Viz Trio - so there is another way of configuring Media Service.
By entering the hostname in Viz One input field
-
Click Settings > Servers
-
Enter the Media Service URL (not only the hostname) in the Viz One input field.
The Media Sequencer now thinks it communicates with a Viz One service - and Media Service uses the same API as Viz One, although no file transfers are needed. Use this method if it is OK that the Media Sequencer is configured with a Media Service. Remember that this configuration is common for all users of the Media Sequencer.
If you use a Media Service, all the Viz Engines must use the Media Service clip folder as their clip root, i.e. a shared disk. This can affect playout performance. If you have a single Viz Engine, a Media Service is well suited to run on the same PC as the Viz Engine, and they both have access to the local clip root folder.
If you have set up a Graphic Hub REST service you have access to images in the Graphic Hub. These images will have best performance when playing them out because they can be pre-loaded. Images from Viz One and the Media Service are loaded when they are played out, and that can produce a small delay.
You can configure all search providers and only search in some of them by checking or unchecking the boxes in the search provider’s list in the search panel.
Edit graphics, videos and images
Viz Multiplay is not just a playout client. If a show is carefully prepared and an asset provider is set up, the Viz Multiplay operator can also add and edit elements during the broadcast or event. This provides for more flexibility in the studio.
This sub-section covers the following topics:
-
Example workflow
-
Editing elements
-
Setting in and out points in video clips
-
Zooming and cropping images
-
Editing graphics
Example workflow
In Viz Trio:
-
Prepare a show by importing scenes from a Graphics Hub into a show. These scenes become templates in the show.
-
Create pages of the most used graphics and drag them to groups in the GFX playlist.
-
Now these pages are available for the Viz Multiplay operator.
In Viz Multiplay:
-
During the broadcast or event, the Viz Multiplay operator selects the page list or a playlist in the Show Pane
-
Click a group. Now each group channel is populated with the relevant elements.
-
The Viz Multiplay operator sees that he needs a new element (a video, an image or graphics). He finds it in a source (the Media tab, an inbox, the GFX playlist etc.) and then drags it into the channel where it will be played out.
-
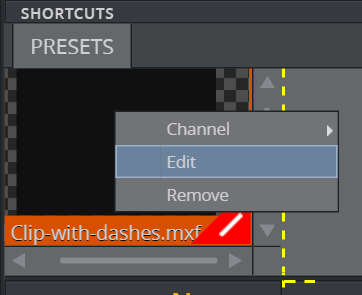
The operator can now edit the element by right clicking and selecting Edit
Editing elements
Common for all operations is that the changes done on the elements being edited are done ‘live’ on the elements in the Media Sequencer. They are saved immediately and it is not possible to undo.
Tip:
Copy an element by dragging it and pressing CTRL
Setting in and out points in video clips
The operator can scrub through video clips and set new in or out points.
-
Drag a video into the channel where it will be played out
-
Right-click the video and click Edit
-
Scrub in the timeline to where you want to set an in point.
-
Click the Set Mark In icon or press the i key to set an in point
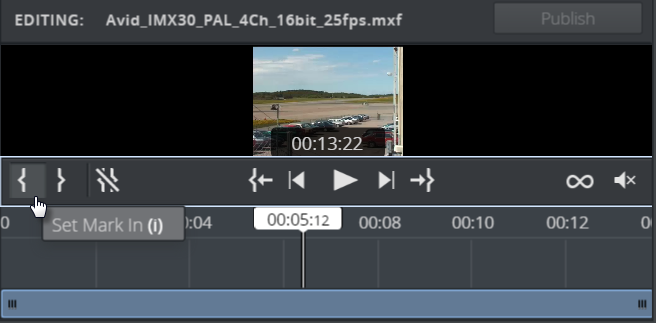
-
Click the Set Mark Out icon or press the o key to set an out point
See Also
Zooming and cropping images
The operator can add a zoom or crop effect to images.
-
Drag an image into the channel where it will be played out
-
Right-click the image and click Edit
-
Click either Crop or Animation
See Also
Editing graphics
For graphics, the operator can fill in data into the fields exposed by the scene designer.
