
Viz Multiplay User Guide
Version 2.3 | Published August 10, 2018 ©
Combine video walls
In Viz Multiplay multiple video walls can be merged into one studio. Each wall is controlled by one Viz Engine, and content in a GFX channel can then span over both walls. Each Viz Engine plays out the same content, but different parts of it.
One use case for this feature can be to let content “fly” from wall to wall by switching between presets where the GFX channels are placed respectively on the first and second wall, or simply to have content span over two walls.
Tip:
This feature should be tested thoroughly on actual hardware and actual content. Two physical video walls driven by two Viz Engines can have different physical output and performance. Videos will not be frame accurately synced.
Combine video walls
-
Click Settings > Profiles
-
Select your profile
-
Add a new video wall by clicking the Add
 button in the Video wall list.
 -
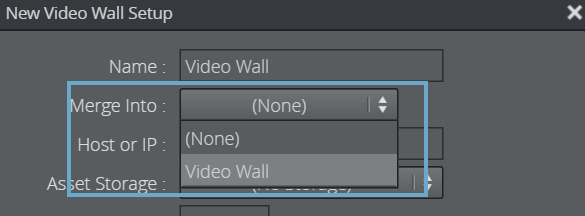
In the Video Wall dialog box, choose the first video wall in the “Merge into” dropdown.
-
Enter values into Wall Offset Top and Wall Offset Left
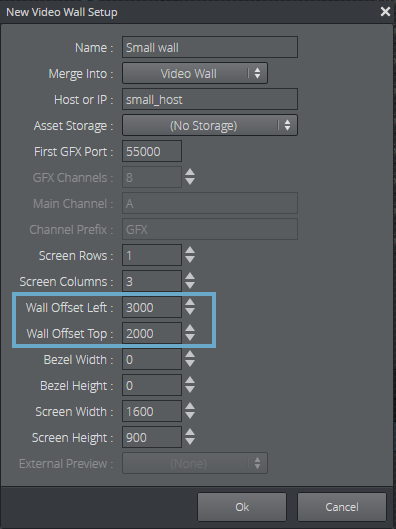
Note:
These values are just relative numbers in any units. They indicate where your second video wall is placed relative to the first one. Do not worry if you do not provide accurate numbers now, you will use the Studio Editor to fine tune them visually in the next step.
-
Click OK
-
A notification appears confirming your decision to create and merge video walls.
Note:
Now this second wall will share the main and GFX channels with the first wall, so these settings will be disabled in the dialog box.
-
Click Yes.
Adjust the layout on the new multi video wall
-
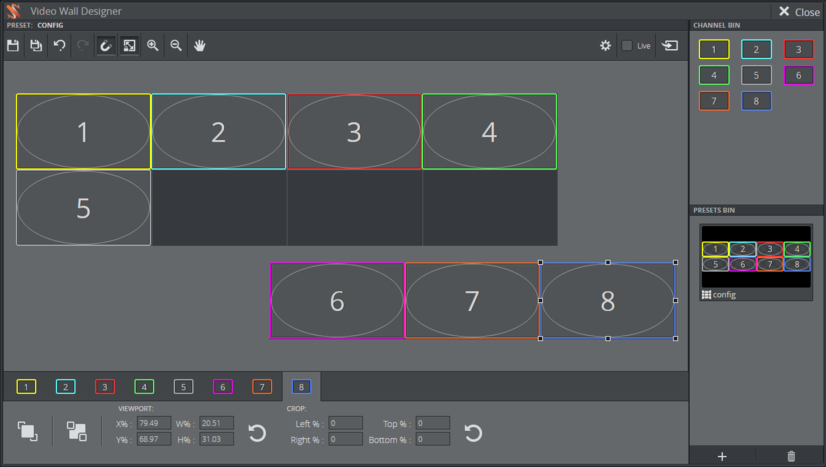
Open the Video Wall Designer for the config preset (In Sources panel click the Video Wall Tab and then ‘config’ in the list. Then right click the config preset and click Video Wall Designer.)
-
The GFX channels will now not match the physical layout. Remove them by right clicking a GFX channel and select Hide all channels
-
Adjust the GFX channels to fill out each of the screens in the physical layout, if you have enough GFX channels
-
The example below has two walls are used in the example below: a 4x2 wall and a 3x1 wall below. The numbers we entered in the config did not match up with the physical locations of the screens, so we have to use the Studio Editor to fine tune it.
-
Go back to the main view and play out content in the relevant GFX channels to see how it fits the physical output.
-
Enter the Studio Editor and adjust the offset, bezels and screen dimensions until the output matches the screens:
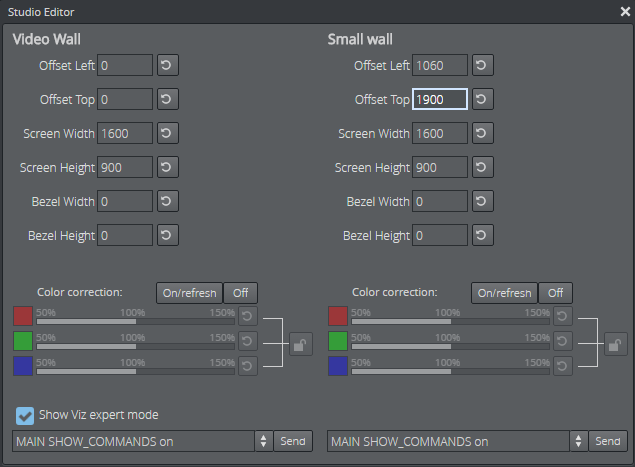
Tip:
Remember that you can adjust values in the Studio Editor by dragging them sideways with the mouse button.
Note:
In practice, you know the layout of the physical screens before you start the configuration in Viz Multiplay. Take some basic measurements of screen size and wall placement and enter these numbers in the Edit Video Wall Setup dialogue box in Settings. Create the walls there first and then use the Video Wall Designer and the Studio Editor to fine tune the values.