Viz Multiplay User Guide
Version 2.3 | Published August 10, 2018 ©
Screens with different sizes and resolutions
The NVIDIA Mosaic setup only supports output to an X * Y matrix of screens with similar resolution. NVIDIA also recommends that all the screens in a Mosaic video wall should be the same model. There is a work around for this limitation.
Workaround limitation relating to output only to screens with same resolution
It is possible to trick the NVIDIA Mosaic setup to think that it outputs to similar screens, while the actual screens are of different sizes and resolutions.
The following is an example:

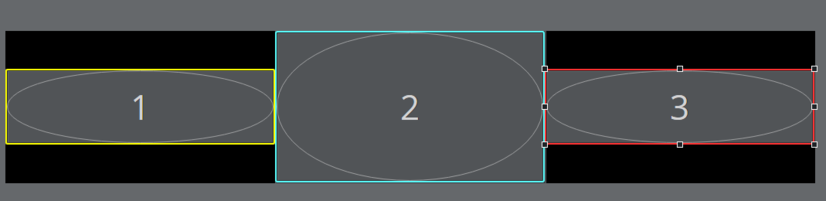
The real video wall has three screens, two smaller screens and one HD screen in the middle. Mosaic sees three similar HD screens.
In the Video Wall Designer, you can now set a mask on each of the screens so you can mark the active areas. In this way, the designer of the presets can have a visual indication of where the ‘dead’ areas are and where the active output is.
-
Play the config preset out on air, with some content in each GFX channel.
-
Open the Video Wall Designer for the config preset
-
Adjust the GFX channels until the output matches the real screen area
-
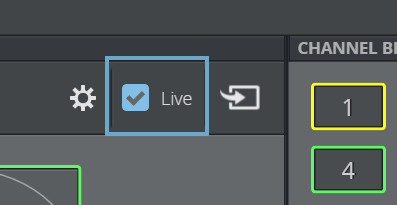
Activate the Live function by clicking the checkbox. This will play out content while you adjust the GFX channels in the editor
-
Right click the GFX channel and click Set mask
-
Repeat for all the non standard screens in the video wall
-
Clear mask
In the case above, we set the same mask for GFX3 but did not make changes to GFX2. This video wall setup will now have a mask so the person who designs presets can see where the active and dead areas are.
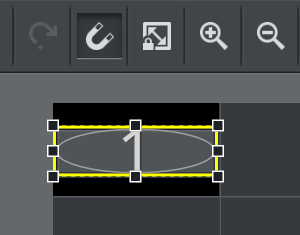
If you disable the GFX channels (by clicking them in the Channel Bin), you will see the physical layout of the screens:

When dragging GFX channels from the Channel Bin and dropping them on the gray (active) areas, they will snap to the active area, as shown here: