
Viz Trio User Guide
Version 4.1 | Published September 25, 2023 ©
Page Editor
Depending on the template or page edited, the page editor can display a wide range of specialized editors, including text, database and scroll editors.
When pages have editable elements, it's possible to navigate between elements by pressing TAB, or to select elements by clicking them in the local preview window.
The page editor is located in the upper right corner of the UI and is displayed by default when you start Viz Trio.

Edit a Page
The following example uses a page to edit common text properties:
-
Double-click or Read a page to open it in the page editor.
-
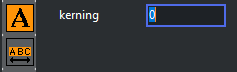
Click the Kerning button, or press the Cherry Keyboard’s Kern key.
-
Click the Text button to go back to text editing mode, or press the keyboard’s Text__key.
-
Click the Take button to play out the page on-air, or press the Take key on the keyboard.
-
Click the Save or Save As button, or press the Save or Save As key on the keyboard.
Note: It's not necessary to save a page before playing it out on air. However, a template cannot be played out before it has been saved as a page.
This section covers the following topics:
Controls
The main functionality of the editor window consists of the playout, script, save and transition effect buttons. In addition, a range of editors can be used to edit the different properties of a template or page.
Callup Code
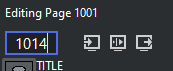
The callup code field is used to save callup codes for pages. The callup code can be set when saving a template as a page for the first time, or when saving a page as a new page.
Field Linking

When working with templates (not pages), the field linking button is shown in the properties area of the page editor. The button opens a panel, where it is possible to define a feed URI and to define how tab field properties in the template are linked to properties in the external feed.
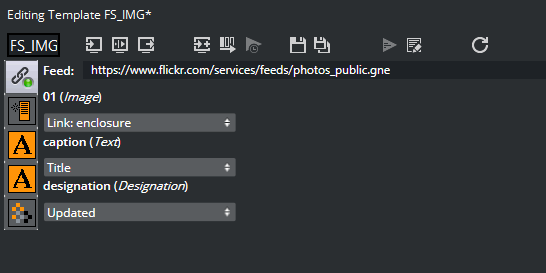
Feed URIs can link to Twitter, Flickr, and so on. After the feed has been defined, a new property icon (the select values button) appears in the page editor: ![]() .
.
Clicking the select values button displays a panel where you can browse for items from the specified feed, which can be used as tab field values. The list of feed items can be displayed and sorted in various ways, and a filter can be added to narrow down the search.
Options in the Field-Linking Panel
-
Check the Use structured content checkbox to automatically map tab field values to values in the VDF payload in the selected atom entry. VDF is the Viz Data Format, an ATOM-feed specification. Only check this option if the feed URI is known to be a valid VDF-formatted feed.
-
Check the Auto refresh on read checkbox to automatically refresh all tab field values when the template is read.
Playout Buttons
![]()
Control buttons for page playout are located above the page editor.
Note: Only pages (data instances of templates) can be taken on air.
The Take button takes the page that is currently displayed in the local preview On Air, if the client is set in on-air mode.
The Continue button continues the animation in the page currently loaded if it contains any stop points.
The Take Out button takes out the page that is in the preview window. If Take Out is clicked when a page that is not on-air is in the preview window, any element that is in the same layer as the page currently displayed in the preview will be taken out.
The Take + Read Next button takes the page currently read, and reads the next one in the page list.
The Cue button cues the page specified as parameter or the selected page if the parameter is empty.
The Cue append button cues the video after the currently playing video. This button is only enabled for video elements.
The Pause button pauses the video. This button is only enabled for video elements.
Save Buttons
![]()
When working with a template in the page editor, the Save template and Save as buttons are available. Clicking Save template saves all modifications to the template: feed linking information, feed browser layout, and default tab-field values. Clicking the Save as button creates a new page based on the template. The page’s callup code is by default set to be the highest callup code (number) in the page list + one (1). The page’s callup code is shown in the Callup Code field. Press ENTER to save the new page.
When working with a page in the page editor, the Save page and Save as buttons are available. Clicking the Save page button saves all modifications to the page without any changes to the callup code. Clicking the Save as button creates a new page. The page’s callup code is by default set as the highest callup code (number) in the page list + one (1). The page’s callup code is shown in the callup code field. Press ENTER to save the new page.
Script Buttons
![]()
The Execute script button executes a template’s script (see Script macro) and perform a syntax check. The show script is not executed unless the template script calls procedures or functions within the show script. For the button to work, the script that is to be executed must have an OnUserClick function wrapped around it.
Sub OnUserClick () ... End SubThe Edit script button opens the Script Directory. The editor by default opens the assigned script.
Refresh Button
![]()
For pages with linked tab-fields (Field Linking), the user may want to press this button to refresh the data of all tab-fields in the page. A typical use case is for weather or financial data.
The button is only enabled when at least one tab-field is linked to a feed which provides self links. While refreshing, the icon on the button changes to a cross. Press the button again to cancel the refresh operation.
On a template level, data is automatically refreshed upon read.
The following script commands are related to the refresh procedure:
-
page:refresh_linked_data: Refreshes the linked data in a blocking way (useful for scripts that manipulate the refreshed data afterwards).
-
page:refresh_linked_data_async: Refreshes the linked data in a non-blocking way so that the GUI stays responsive.
-
page:cancel_refresh_linked_data: Cancels a refresh started with page:refresh_linked_data_async.
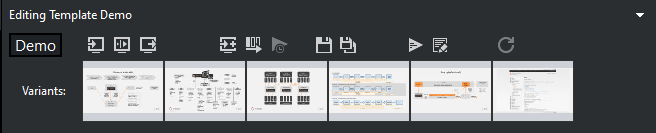
Variants
Template variants can be switched directly from the Template List or from the page editor. As with concepts, variants can also be switched using a macro command in a user-defined macro or a script.
Creating a Page
-
Double-click a template from the Template List to open the template in the page editor.
-
Edit and save it as a page with a new Callup Code.
Selecting a Variant From the Page Editor
-
Open the template or page in the Page Editor.
-
Click on the thumbnail image to select a variant.
Text
Text Editor Context Menu
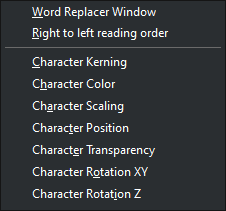
The text editor is the main editor for most users. Here, it's possible to do a number of operations if the scene’s text editing properties are exposed, such as setting text color or adjusting the position and scale of the text. In order to enable character formatting, the scene’s Control Text plugin's Use formatted text property must be enabled (on). This is done by the Viz Artist designer. The following can be formatted if enabled:
|
Mode |
Command |
Procedures |
|
Color |
text:set_color_mode |
|
|
Alpha |
text:set_alpha_mode |
|
|
Kerning |
text:set_kerning_mode |
|
|
Position |
text:set_position_mode |
|
|
Replace character |
text:show:replace_list |
|
|
Rotation X, Y and Z |
text:set_rotate_xy_modetext:set_rotate_z_mode |
|
|
Scaling |
text:set_scale_mode |
The desired text manipulation mode can be assigned to a shortcut key or used in scripts. See the User Interface section for how to assign shortcut keys. The active mode is indicated in the lower right corner of the Page Editor’s window. The default mode is Color editing. For more information on text commands, see Macro Commands and Events.
Tip: Text commands can be used in scripts or as assigned keyboard shortcuts to switch between text manipulation modes.
In some situations, if text effects are used in graphics there might be conflicts with editing of parameters such as scaling, alpha and position. For example: if the text effect controls the scaling of text, it's not possible to change the scaling of the fonts from the text editor. The text effect’s control over that parameter will override any changes made in Viz Trio. Text effects are Viz Artist plugins such as TFX Color, Scale and Rotation that are used by scene designers.
Word Replacement
The Word Replacement function allows the user to substitute a typed character with a word from a list of predefined substitution options.
This list becomes available in the text editor when you press an assigned shortcut key for the text:show_replace_list command, see the Keyboard Shortcuts and Macros section. The editor matches a typed character with the list of key characters that are configured.
This section covers the following topics:
Editing a Text Item

-
Open the appropriate template or page, and select a text element in the Tab Fields or Preview window.
-
To edit the next item, press the Tab key or select the item from the Tab Fields list or right-click the graphical elements in the Preview window.
-
To perform character-specific changes, right-click to open the text editor’s context menu, and select one of the options.
Editing Text Color

-
Open the appropriate template or page, and select a text element in the Tab Fields or Preview window.
-
Right-click the text editor, and from the Text editor context menu select Character Color.
-
To change the color of a character or selected characters, click a color in the color palette, or hold the ALT key down while using the right and left arrow keys to switch between the available colors.
Tip: Color can also be set using the command text:set_color_mode when enabled by the designer.
See Show Properties on how to customize the color palette.
Editing Text Kerning
-
Right-click the text editor and select Character Kerning from the Text editor context menu.
-
Select one or more characters and hold down the ALT key while using the right and left arrow keys to change the kerning, or
-
Click the Kerning for whole text button.
-
Click the Text editing mode button to switch back to the text editor.
Tip: Character kerning can also be set using the command text:set_kerning_mode when enabled by the designer.
Note: The Control Text plugin Expose kerning property enables the Page Editor’s kerning button.
Editing Text Position
-
Right-click the text editor, and from the Text editor context menu select Character Position.
-
Select characters.
-
Hold the ALT key down while using the arrow keys.
Tip: The position can also be set using the command text:set_position_mode when enabled by the designer.
Editing Text Rotation
-
Right-click the text editor, and from the Text editor context menu select Character Rotation XY *or Character Rotation Y*.
-
Select a character or multiple characters.
-
Hold the ALT key down while using the arrow keys.
Tip: Rotation can also be set using the commands text:set_rotate_xy_mode or text:set_rotate_z_mode when enabled by the designer.
Editing Text Scaling
-
Right-click the text editor, and from the Text editor context menu select Character Scaling.
-
Select a character or multiple characters.
-
Hold the ALT key down while using the arrow keys.
Tip: Scaling can be also set using the command text:set_scale_mode when enabled by the designer.
Editing Text Transparency (Alpha)
-
Right-click the text editor and select Character Transparency from the Text editor context menu.
-
Select characters.
-
Hold the ALT key down while using the arrow keys.
Tip: Transparency can be also set using the command text:set_alpha_mode when enabled by the designer.
Replacing a Word

-
Type a character in the text editor. Make sure the cursor is placed after the character that will be replaced.
-
Click the word replacement button or right-click the text editor and select Word Replacer Window.
-
Select a replacement word from the list and click OK, or press the Enter key to return to the text editor.
-
To close the word replacement window without changes click Cancel, or press the ESC key to quit the operation and return to the text editor.
Database Linking
In order to automate the way a page is filled with content, a page’s tab field can be linked at an external data source such as a database or Microsoft Excel spreadsheet (see Show Properties and To create a new database connection).
There are two variants of the database link editor. The type of editor depends on the type of control plugins used in the scene. Table plugins such as Control List and Control Chart have their own table editor. Click the Database link button below:
![]()
Database link: Opens one of the database link editors so you can link data to a page.

Save to database: Saves the updated data back to the data source.
This section covers the following topics:
Database Link Editor Common Properties
The Data Link editors common properties are:
-
Link to database: Enables the database link.
-
Database connection: Sets the connection to a selected database link defined in the Show Properties Databases settings.
-
Table: Sets the database table for the lookup.

-
Refresh: Refreshes the dataset.
-
Custom SQL: Displays by default the resulting SQL query to get the value (scalar or table) from the database. The query can be overridden to perform enhanced queries. This is mostly useful for table properties, for example to restrict the number of rows or apply a different sorting for the rows.
-
Apply: Applies the Custom SQL query.
Database Link Editor for Scalar Linking

The database link editor used for text properties (scalar linking) has the following properties:
-
Select column: Sets the Microsoft Excel spreadsheet column, from which the text value is selected.
-
Key column has value: Specifies the key value to match with the lookup column, which is specified in the Databases settings (see Show Properties). This mechanism selects the row of the value to use.
To restrict which rows from a Microsoft Excel spreadsheet will be inserted, a custom SQL query can be specified in the text box at the bottom of the database link editor (below is a Microsoft Excel spreadsheet example).
SELECT Value, Color FROM [Sheet1$] where Key > 2Note: Setting both Column and Key determines both column and row of the scalar value for the text property.
Database Link Editor for Table Linking
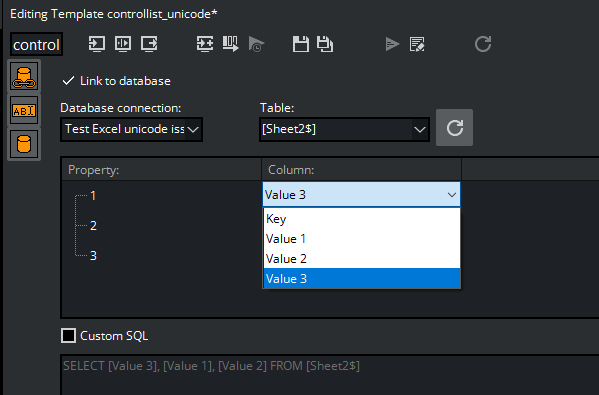
The database link editor used for table linking has the following properties:
-
Property: The scenes table property that is linked with the column of the data source.
-
Column: The data source column that is linked with the property of the scene. Press F2 in the column to change the source column.
Note: Mapping a tab-field property with a data source immediately updates the graphics.
Microsoft Excel and Unicode Support
Viz Trio supports the use of Microsoft Excel spreadsheets to provide templates with data.
Info: Unicode characters can be used in Microsoft Excel table names and in cell values of a table, but not in column names.
Image Property Editor
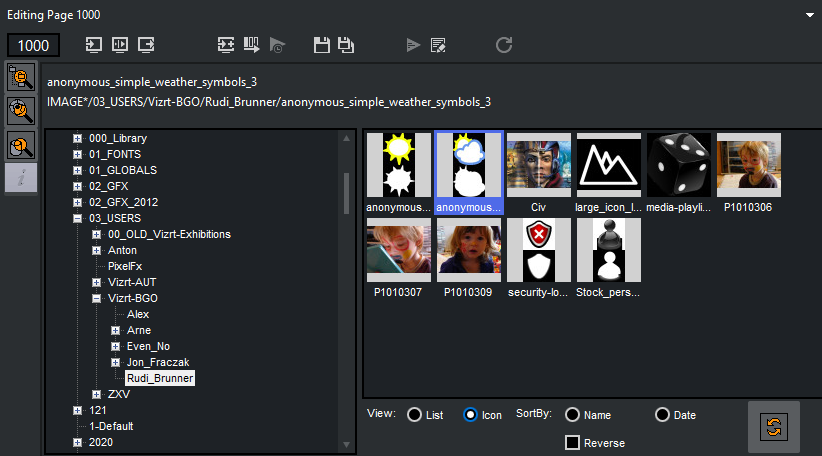
The Image Property Editor appears within the Page Editor (as shown above) when selecting an image or item in a page’s tab field. When the template contains an image you can load an image from file, Graphic Hub, Viz Object Store or a Vizrt MAM system, if the properties are exposed.
![]()
Browse File: Opens a standard Windows file browser.
![]()
Browse Viz Artist: Opens a browser in the Page Editor for browsing images on the Viz Engine. It's possible to sort by name and date. For convenience both sorting actions can be reversed and refreshed.
![]()
Browse: Opens the Search Media pane for browsing images, video clips and person information. Note that additional Browse buttons will appear if other image repositories are used.
![]()
List and icon view: Allows users to view images imported into the image editor as either small thumbnails or in a list displaying only the name of the file. Items are arranged alphabetically in both cases.
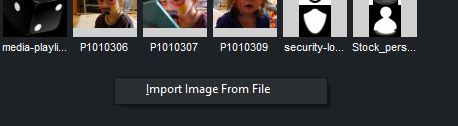
Upload multiple images at a time: Right click in the image property editor and select Import Image From File. Hold either the Shift or Ctrl key and left click multiple images to import or Ctrl + A to select and import all images in a folder. Click Open and the images will appear in the editor ready to be imported into a page.
Transformation Properties
It's possible for scene designers to expose transformation properties for a tab field, as well as an active or inactive toggle. The following properties can be edited if enabled. They are displayed as buttons on the left side of the editor, from top down:
-
Position
-
Rotation
-
Scaling
-
Active
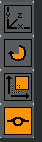
Clicking the Position, Rotation or Scale buttons opens an editor that can be used to set transformation properties.
Setting Transformation Properties
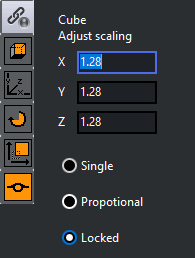
-
Enter the new values with the keyboard, or
-
Left-click the value field and drag in horizontal directions. Move between the fields using the CTRL + TAB keys.
-
To return to the previous selection mode, click the top button.
Note: The selection mode icon varies according to the type of object exposed, such as image, text and so on. The screenshot above shows a Geom.
Tables
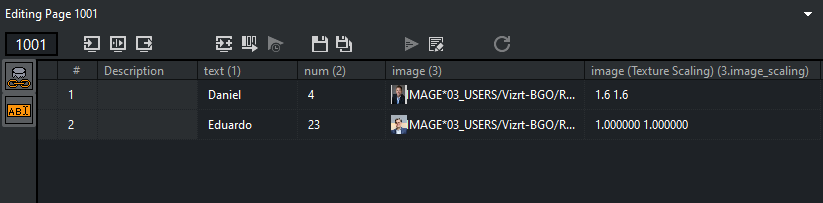
If a scene contains a Control List plugin, a table editor will be shown for that tab field when the scene is edited in Viz Trio.
The cells contain different editors depending on the data type they display. Changes made in the table editor are instantly updated in the preview window. In addition to text fields, the table editor can show the following special editors in the table cells:
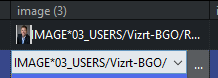
-
Image Cells: The drop-list shows all images currently available for a specific column. This provides a quick way of choosing images when many cells are to show the same image. The browse button to the right opens the image pool.
-
Number Cells: Scenes with exposed numbers, with and without decimals, feature a small text editor with spin button functionality. Click the spin buttons or use arrow keys, or enter numbers directly on the keyboard to change value.
-
Checkbox Cells: For Boolean values, such as hide and show, a checkbox will be displayed.
-
Table Keyboard Navigation: To move between the cells, use the arrow keys on the keyboard.
-
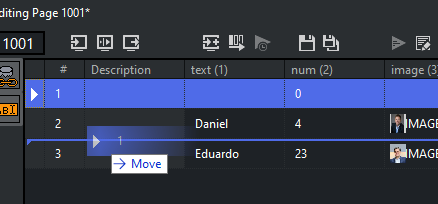
Sorting: The table can be sorted manually by clicking on the header bar of the column to sort by. Rows can be rearranged manually by drag and drop. Click on the row once and hold the mouse button to drag and drop it to its new location.
-
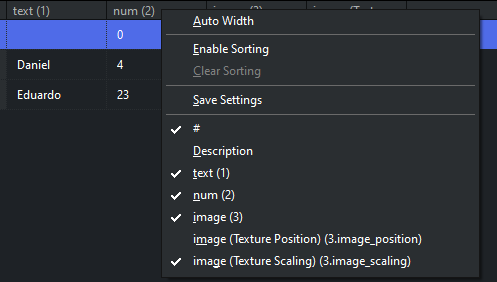
Customizing a Table View: Right-click on the table header bar, to make a context menu appear. Columns can be hidden or shown by selecting or unselecting the column. The table editor context menu contains the following columns:
-
#: Shows the row number (#).
-
Description: Shows the description field. Descriptions can only be edited in Viz Artist by the designer.
-
Auto Width: When disabled the column width can be set manually.
-
Enable Sorting: Enables manual sorting of the table.
-
Clear Sorting: Clears any sorting and take the table back to its initial state.
-
Save Settings: Saves the column setting for an active template.
Right clicking a row will display this context menu:
-
Insert Row (Ins): Inserts a single row.
-
Insert N Rows ...: Opens a small input dialog for multiple row insertion. The number of rows you can add is limited by the scene design.
-
Edit Row: Edit the row data.
-
Delete Selected Rows (DEL): Deletes selected rows. For multiple select use CTRL + Left mouse key or SHIFT + Arrow keys up or down.
-
Select All (CTRL + A): Selects all rows.
-
Cut (CTRL + X): Cuts rows out of the table. Press CTRL + V to re-add the row(s).
-
Copy (CTRL + C): Copies rows from the table. Press CTRL + V to add the new row(s).
-
Paste (CTRL + V): Adds the cut or copied rows to the table.
Note: The number of rows that can be inserted or deleted depends on the configuration of the plugin. See the Chart and List plugins in the Viz Artist User Guide.
Populating Tables Using Macro Commands
You can use Viz Trio’s macro language to populate a table with data through a script, or through an external application that connects via a socket connection. To populate a table, the macro table:set_cell_value is used. The macro takes 4 arguments:
-
The field identifiers for the table (string) and the column (string), the table’s row number (integer: starts at 0), and the data to be inserted.
-
The example shown below will insert the text string test, in row 4, in the column with id 1, in the table with id 1.
table:set_cell_value113test
Clock
If the template contains a clock object that is made editable with the Control Clock plugin, a clock editor opens when tabbing to the clock’s tab field.
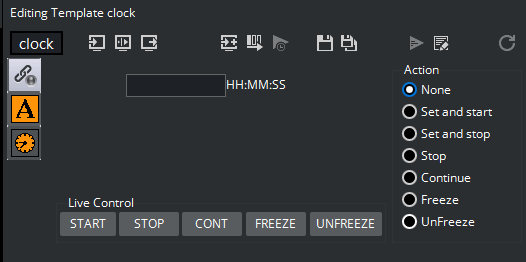
The clock editor has two main functions:
-
Normal editor: Specify what should happen when the page is taken on-air.
-
Live Control: With a page on-air, a clocks counting can be started, stopped, continued, frozen, or unfrozen.
The clock editor’s properties are:
-
Start At: Sets the starting time for the clock.
-
Stop At: If enabled, a stop time for the clock can be set in the template.
-
Up/Down: If enabled, the direction the clock should run can be chosen in the template.
-
Action: Select what the clock is to do when the page is taken on-air. Either:
-
None: The time is just set and the clock must be started with the Live Control Start button.
-
Set and start: The time is set and the clock is started.
-
Set and stop: The time is set and the clock is stopped.
-
Stop: The clock is stopped when the page is taken on-air. This can be used to create a shortcut that stops the clock. Just create a page that stops the clock and link it to a key shortcut.
-
Continue: Similar use as with stop.
-
Freeze: The clock is frozen when the page is taken on-air.
-
Unfreeze: The clock is unfrozen when the page is taken on-air.
-
Maps
Viz World Client is available to Viz Trio in both a simplified and a full version. The simplified version is enabled in the configuration window, see General settings under the User Interface section. The full version launches the selected Map client, either in Classic Edition or the new Second Edition (SE).
Select the preferred Map client in File > Configuration > General > Viz World Maps Editor:

Note: Make sure that the Viz Maps Client is installed on the Trio client and make sure that the Viz Engines (both local preview and On-Air render Engines) connect to the same Viz World Server. To configure the Viz World Server address in Viz Engine go to Config > Maps on the Viz Engine server.

Edit Map: If the map’s tab-field property has more than one property exposed, clicking this button will open the corresponding editors (for example text and text kerning).

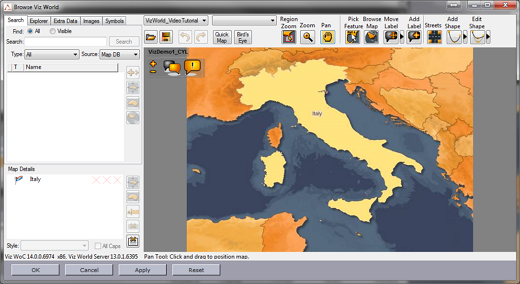
Browse Viz World: Opens the full version of the Viz World Client. To use the full version, disable the small version. You can also click the Select Map button to launch the selected Map client.
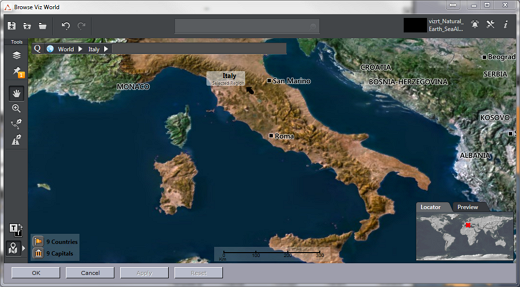
Maps Classic Client
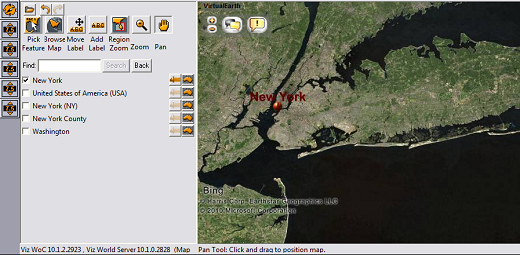
Maps Second Edition Client
Maps Lite Edition (inline)
Control World Plugin Interface
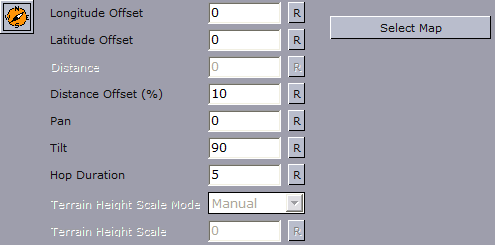
In addition to the Viz World Client editor, Viz World also provides an easy to use control interface when using the Control World plugin. The control is a replacement for the Control Map plugin with much more options and on-the-fly feedback from Viz.
Note: The two controls are not compatible. The new control will not work with Viz Pilot, and is only a part of Viz 3.3 and later.
The control can expose different fields based on the container it resides on. When tabbing to the control (in a navigator scene) the camera will jump to the map location and all feedback (exact camera position) will be immediate.
-
Longitude Offset: Sets the longitude offset.
-
Latitude Offset: Sets the latitude offset.
-
Distance: Sets the distance.
-
Distance Offset (%): Sets the distance offset in percentage.
-
Pan: Sets the pan.
-
Tilt: Sets the tilt.
-
Hop Duration: Sets the hop duration.
-
Terrain Height Scale Mode: Sets the scale mode of the terrain height.
-
Terrain Height Scale: Sets the scale of the terrain height.
-
Select Map (button): Opens the Viz World Editor. If the control is configured to use the simple Viz World Editor, Viz Trio must be configured to do the same.
See Also