
Viz Trio User Guide
Version 4.1 | Published September 25, 2023 ©
Create New Scroll
Creating a scroll allows the user in an easy way to create credit lists or any other scroll, either vertical, horizontal, with ease points and so on. When creating a scroll from scratch, Viz Trio automatically creates a scroll scene on Viz which the user can redesign.
Note: New scrolls must be created using the scroll function.
This section covers the following topics:
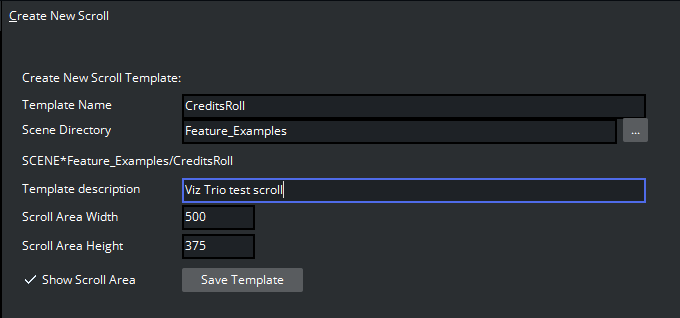
Create New Scroll Editor
-
Template Name: Enter a name for the template.
-
Scene Directory: Specify the path to a scene in which to save the template, or select a show by pressing the Browse button.
-
Template description: Enter a description for the template.
-
Scroll Area Width: Sets the width of the scroll area.
-
Scroll Area Height: Sets the height of the scroll area.
-
Show Scroll Area: Enable this option to show the scroll area in the preview window.
-
Save Template: Saves the template in the specified scene directory.
The Scroll Elements editor opens automatically when saving or opening an already saved scroll template. A scroll is created by compiling a set of templates or pages.
Scroll Elements Editor
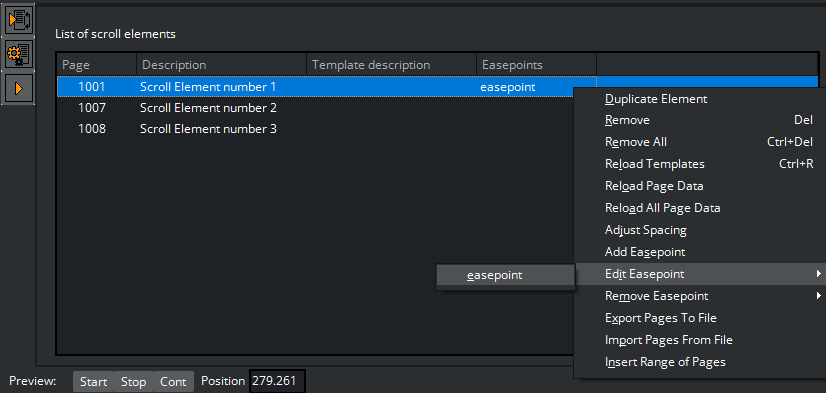
Right-click on any element in the scroll list and a menu appears where actions can be performed and parameter settings defined.
The Scroll list context menu options are:
-
Duplicate Element: Makes a copy of the selected scroll element and adds it to the scroll list.
-
Remove: Removes the selected element from the scroll list.
-
Remove All: Removes all elements from the scroll list.
-
Reload Templates: Reloads the original templates.
-
Reload Page Data: Reloads the original page data of the selected scroll element.
-
Reload All Page Data: Reloads the original page data of all the elements in the scroll list.
-
Adjust Spacing: Opens the Element Spacing editor which allows the user to adjust the distance before and/or after the selected scroll element.
-
Add Easepoint: Opens the Easepoint Editor which allows the user to add an easepoint to the selected scroll element.
-
Edit Easepoint: Opens the create new scroll editor to adjust the easepoint settings of the selected scroll element.
-
Remove Easepoint: Removes the ease point from the selected scroll element.
-
Export Pages To File: Exports all scroll elements in the currently selected scroll to an XML-file.
-
Import Pages From File: Imports a set of scroll elements from an XML-file to the scroll. Note that this option will erase the scroll elements currently in the scroll.
-
Insert Range of Pages: This option allows the user to insert one or more pages in the scroll. Specify the range of pages to be inserted in the appearing dialog.
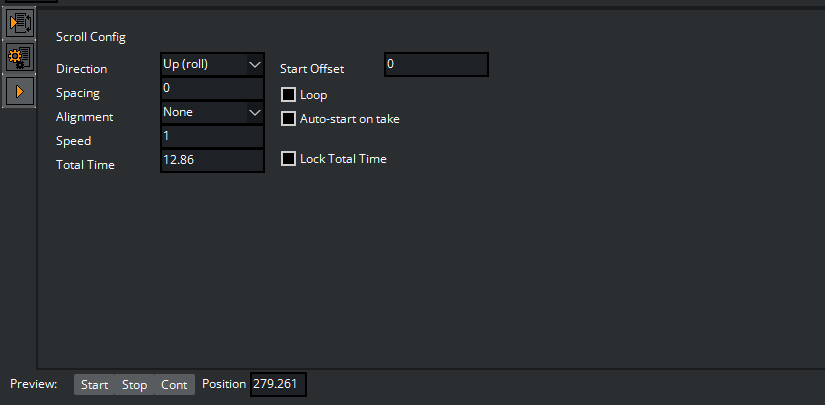
Scroll Configuration

Click the Scroll Config button to open the scroll main property page.
-
Direction: Sets the direction of the scroll.
-
Spacing: Adjusts the distance between the pages in the scroll.
-
Alignment: Aligns the elements of the scroller to each other. The bounding box of the elements is used for aligning the objects.
-
Speed: Sets the speed of the scroll.
-
Total Time: Shows the total scroll time in seconds.
-
Start Offset: Set an offset position from where the scroll should start.
-
Loop: If enabled, the scroll elements will be looped.
-
Auto-start on take: If enabled, the scroll will start automatically on take.
-
Lock Total Time: Lock the total time the scroll is running. This option distributes the time evenly for all pages. Pages with more or less content are not taken into account. See the Scroll Elements Editor section for how to add and edit ease points.
Scroll Live Controls
![]()
Clicking the Scroll Live Controls button, opens the Scroll Live Controls sub page, which controls the start, stop, and continue actions of a scroll on-air.
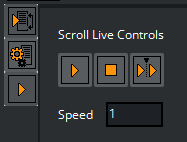
To activate the Scroll Live Controls, click the Take button in the Scroll Editor. When active, the Live Control buttons are green and can be used as follows:
-
Start: Takes and starts the scroll that is currently displayed in the local preview on-air, assuming that the client is set in on-air mode.
-
Stop: Stops the scroll.
-
Continue: Resumes the scroll.
-
Speed: Adjusts the speed of the scroll while on-air.
Scroll Control
![]()
The Start, Stop and Continue buttons in the lower left corner of the Scroll Elements editor enables a preview of the scroll in the local preview renderer window.
-
Start: Starts the current scroll in the local preview window.
-
Stop: Stops the scroll.
-
Cont: Resumes the scroll.
-
Position: Use the Position slider to manually run a preview of the scroll. Click the value field, keep the button pressed and move the mouse horizontally. The cursor will change to an arrow to indicate that the position value can be changed.
The Scroll Elements editor has two sub-pages, Scroll Configuration and Scroll Live Controls. Set parameters for the scroll using the Scroll Configuration editor, and control the scroll while on-air through the Scroll Live Controls editor.
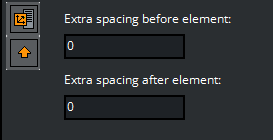
Element Spacing
Open the adjust element spacing editor from the context menu of the scroll elements:
-
Extra spacing before element: Sets the extra distance before the element.
-
Extra spacing after element: Adjusts the extra distance after the element.
Easepoint Editor
The Easepoint editor allows ease point parameters to be set for a scroll element.

The Easepoint editor’s properties are:
-
Slow down length (EaseOut): Specifies the slow down length of an ease point.
-
Speed up length (EaseIn): Sets the speed-up length of an ease point.
-
Continue Automatically: When enabled, the scroll continues automatically after the specified pause-time.
-
Pause Time in Seconds: Sets the pause-time in seconds.
-
Element Alignment (%): Aligns the bounding box of an element relative to the position of an ease point.
-
The default element alignment is 50%, which aligns the center point of the element’s bounding box with the ease point.
-
When creating rolls, selecting an element alignment of 0% aligns the bottom of the element’s bounding box with the ease point, while 100% adjusts the bounding box’s top with the ease point.
-
When creating crawls, an element of 0% aligns the left side of the bounding box with the ease point, while 100% adjusts the bounding box’s right side to the ease point.
-
-
Scroll Area Alignment (%): Adjusts the position of an ease point relative to the screen’s center point. Scroll area alignment is defined as a percentage of the scroll area.
-
The default scroll area alignment is 50%, which aligns the ease point with the center point of the screen.
-
For rolls a scroll area alignment of 0% aligns the ease point with the scroll area’s lower side, while 100% adjusts it to the upper side.
-
For crawls, a scroll area alignment of 0% corresponds to the scroll area’s left side, while 100% aligns it at the right side.
-
When in ease point edit mode, the current position of the ease point is indicated by a line in the local preview window.
-
-
Rename Easepoint: Click the button to rename the ease point.
Working with Scrolls
Creating a Scroll
-
Select Create New Scroll from the editor’s drop-list menu.
-
Enter a Template Name.
-
Select a Scene Directory.
-
Enter a Template description.
-
Set the Scroll Area Width and Height.
-
Check the Show Scroll Area to show the scroll area in the preview window.
-
Drag and drop templates and/or pages into the Scroll Elements Editor.
Note: Since different templates are required for different scroll elements, the graphics designer should create templates for all scroll elements required.
Configuring a Scroll
-
Click the Scroll Configuration button to adjust layout and animation speed parameters.
-
Adjust spacing before or after a single scroll element using the Element Spacing editor.
-
Add and configure easepoints using the Easepoint Editor editor.
-
Click Save (CTRL+S) to save.
Editing a Scroll Element
-
Double-click a scroll element in the Scroll Elements Editor list to open the editor.
-
Click the Read Parent Page (arrow) button to switch back to the Scroll Elements Editor.
Copying an Element in the Scroll Elements List
-
Right-click the list of scroll elements, and select Duplicate Element, or
-
Drag and drop an element into the scroll list while pressing the CTRL button.
Testing a Scroll
-
Click the Scroll Control buttons in the lower left corner of the scroll, or scrub the Position value with the mouse or arrow keys on the keyboard.