Viz Channel Branding User Guide
Version 5.1 | Published October 26, 2023 ©
Playlists
This section covers:
The Playlists panel displays the playlist(s) created for the selected channel. There is supports for two types of playlists types:
-
Continuous playlists
-
Broadcast day playlists
In addition, the panel contains a location named Channel Pool to store prepared non-scheduled events.
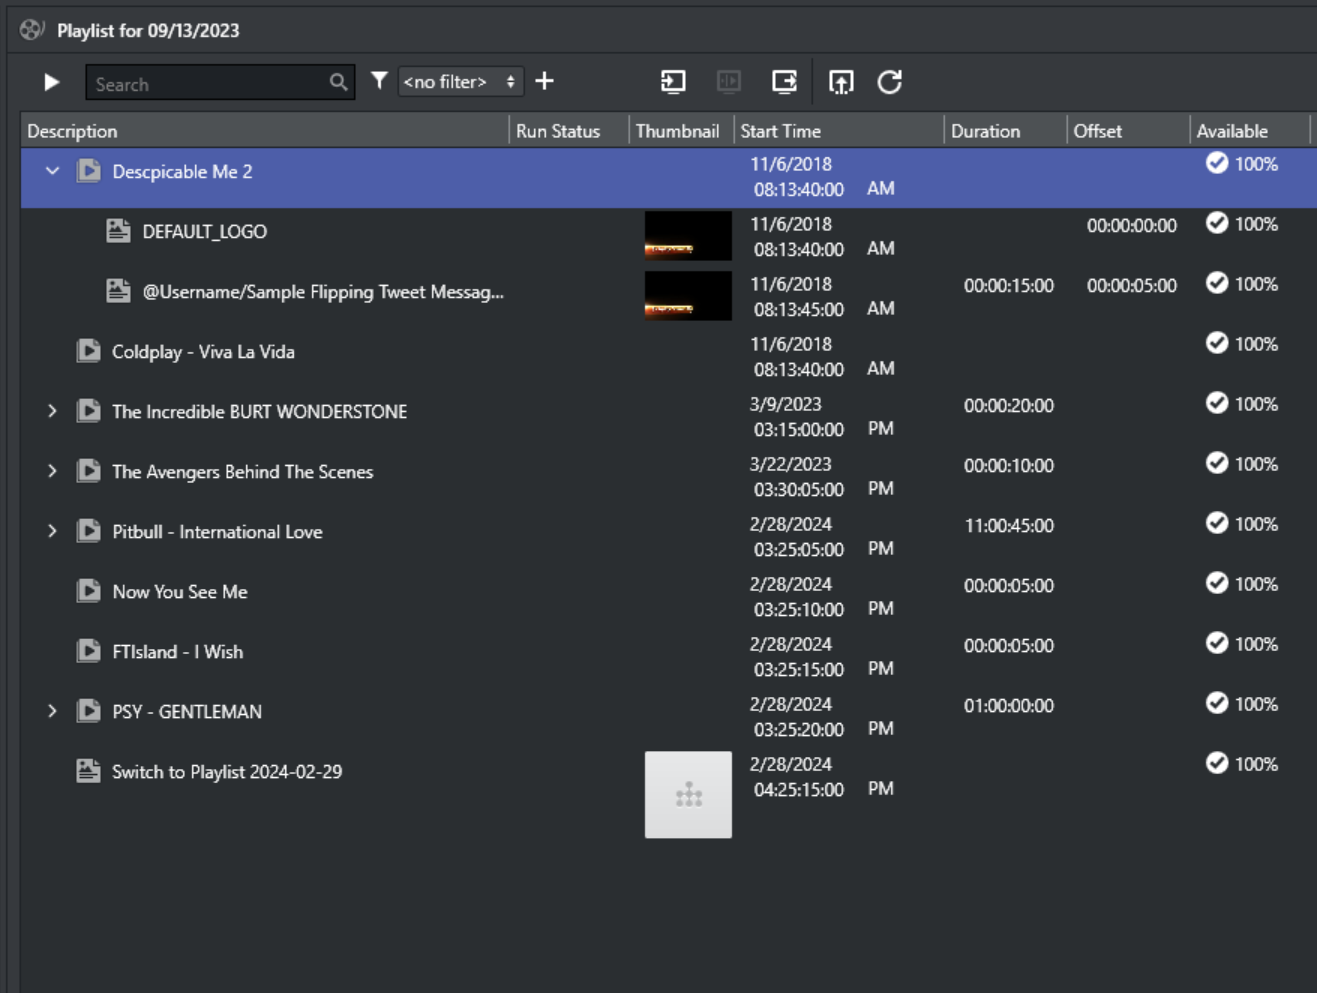
When a playlist is opened, the primary and secondary events are displayed in the right pane. In the Playlist pane you can view all the playlists you have for a specific channel.
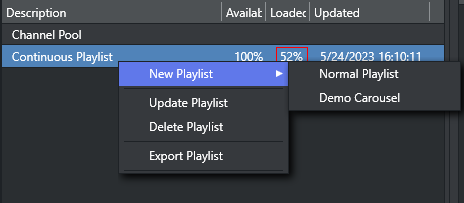
Right-clicking on a playlist in the left pane displays a context menu of playlist commands:
-
New Playlist: Opens a sub-menu where you can select which blank playlist to create.
-
Normal Playlist: Creates a blank Broadcast Day or Continuous playlist.
-
Demo Carousel: Creates a blank non-timed playlist intended for quick demos or simple play-out.
-
-
Update Playlist: Opens a dialog to select a schedule file to Update Playlist using the Playlist Importer.
-
Delete Playlist: Deletes the playlist.
-
Export Playlist: Exports the playlist to a native Viz Channel Branding Client XML format. You can also export the Graphics and Data as part of the export.
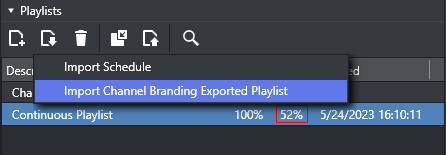
Import a Channel Branding Exported Playlist
A playlist that has previously been exported from Viz Channel Branding Client, as an XML file can be imported back using the Import Channel Branding Exported Playlist menu item.
This will import the XML playlist to Viz Channel Branding without performing any mapping settings. Playlist data is set as it appears in the imported file.
Note: If the broadcast date specified already exists, the imported data will not replace the existing playlist. You must first delete the existing playlist.
-
Click the Import icon and select Import Channel Branding Exported Playlist.
Channel Pool
The Channel Pool playlist is used for those elements that may require special handling, such as a series of animated logos, an advanced trouble slide, or a specially pre-prepared legally mandated breaking news event. These elements can be accessible to and used by external control applications in order to trigger elements that are not scheduled in a normal playlist, for example.
Pages added to the Channel Pool will have the page name set as the Media ID by default. The Media ID can be changed manually by editing the Media ID column (individually for each element). Enable editing by checking the Edit Events option for Media IDs in Mapping Settings.
A separate channel pool is added for each channel.
Playlist Toolbar
The following table describes the different buttons, modes and status icons available to the playlist.
|
Icon |
Description |
|
|
When green, the playlist is running. When gray, the playlist has stopped. |
|
|
When a playlist is active it is added to the Media Sequencer, which starts checking that all resources (such as videos and imagery) are available (see Available status) to Viz Engine for playout. This means that videos are transferred from Viz One to Viz Engine, for example. |
|
|
100% available means that full screen video clips are available to Viz Engine for playout. |
|
|
100% loaded means that all pages (the actual graphics including embedded video clips and imagery) are loaded and ready for playout. |
|
|
Enables you to run and stop the playlist. Note that in order to run the playlist successfully your elements must have a begin and end time. |
|
|
Searches the description field of your playlist elements. To see the next result, press Enter. |
|
|
Predefined filters allow you to filter the playlist. Click the funnel icon to create, edit or delete filters. See To add a playlist filter. |
|
|
Takes the selected playlist element (or group of elements) on air. |
|
|
Continues the animation of the playlist element. |
|
|
Takes the current playlist element off air. |
|
|
Initializes the playlist’s pages on the preview and program renderer. When complete, the loaded status is set to 100%. See the Playlist Context Menu on how to initialize the playlist and individual elements from the context menu. |
|
|
Refreshes the data in use by the pages. |
|
|
Performs a Playlist Continue if the playlist is in a Hold state due to playing an element with no hard set duration, such as a LIVE show. Will also perform a Refresh of data upon continuing playout. |

Playlist Keyboard and Mouse Shortcuts
|
Function |
Key |
Mouse |
|
Move one or more secondary events to another primary event (up or down) |
Drag and drop. Combine mouse-drag with |
|
|
Move selected entries to previous group in the playlist |
Alt + Arrow Up |
|
|
Move selected entries to next group in the playlist |
Alt + Arrow Down |
|
|
Collapse the group |
Arrow + Left |
Double-click left mouse button |
|
Expand the group |
Arrow + Right |
Double-click left mouse button |
|
Expand all groups |
Ctrl + Numpad + |
|
|
Collapse all groups |
Ctrl + Numpad - |
|
|
Select all events |
Ctrl + A |
|
|
Open search |
Ctrl + F |
|
|
Select individual events |
Ctrl |
Left mouse button |
|
Remove the selected event(s) |
Delete |
|
|
Make an event’s Description field editable |
F2 |
Double-click left mouse button on the Description field |
|
Move the focus to the top of the playlist |
Home |
|
|
Move the focus to the end of the playlist |
End |
|
|
Move the focus one section down |
Page Down |
|
|
Move the focus one section up |
Page Up |
|
|
Select events (up or down) |
Shift |
Left mouse button |
|
Display the context menu |
|
Right mouse button |
Playlist Columns
When the right pane displays the playlist, all events along with pages and actions scheduled together are displayed.
To edit the playlist columns
-
Check the Edit Events check-box in your mapping table (see Table Columns) for each column.
-
The layout and visibility of the playlist columns can be customized by drag-and-drop and by right-clicking one of the columns to select or de-select them.
Secondary events that have been edited will have a color indicator in the left side of the edited row.
Note: If there are any errors found in the playlist, the primary element(s) causing the error will be shown in red. Hover your cursor over the red no-entry icon of the error element(s) for more information.
The following default columns are available, by default order:
-
Description: Shows a description of the element. An arrow-head next to a description indicates other elements are group together with the event. This may be a primary event with pages and/or actions scheduled for it as secondary events. Click the arrow-head to expand and show the secondary events.
-
Thumbnail: Shows a snapshot/thumbnail of the template used in a Secondary Event.
-
Start Time: Shows the element’s begin time.
-
Offset: Shows the offset of the secondary event relative to its primary event.
-
Duration: Shows the duration of the element.
-
Available: Shows if a video clip is available to your playout device.
-
Loaded: Shows the loaded status of pages on the Viz Engine program device channel.
-
Info I.H.: Displays timestamp and action-annotation for any events added or updated via Integrations Hub
-
Info P.S.: Displays timestamp indicating most recent moment the secondary event's Page Content Value was evaluated
-
Page Content Value: Shows a generated summary of the current values for Page Field's, no-matter if manually set or grabbed from dynamic sources via Promo Server.
Other columns, not shown by default, in alphabetical order:
-
End Time: Calculated moment in time (Start Time + Duration) a Primary Event will end.
-
Run Status: Holds the current run-information for this event as annotated by Media Sequencer.
-
Take Count: Number indicating how many times this event has been taken since playlist was last Activated.
-
Event Id: The internal id for this event, as addressable via Integrations Hub REST API or seen in VDom in Media Sequencer.
-
Trigger Id: Shows the string-value to use as look-up property or trigger id for remote execution via Media Sequencer (depending on protocol used).
-
Layer: Shows the value this element will run in, either a hard layer (annotated with [ ] ) or a virtual TL layer.
-
Concept: Current or override setting as what Concept to use as default playout if no Concept is set in Playout Configuration dialog.
-
Mark In: Special start-time marker for video clips.
-
Mark Out: Special End-time marker for video clips.
-
Ignore: Indicates if a flag is set to skip over this event for evaluation of content for Page Content Filling. Can hold values True or False.
-
Created By: Annotates what component or method that created this element. An entry saying 'manual' indicates it was done by hand via the Channel Branding Client.
-
Template Name: Shows the original master template name that this page relies upon.
-
Template Description: Shows the description as set on the master template in the template pool, either default from Viz Artist or hand-written in template pool.
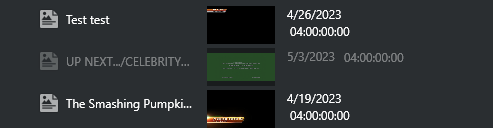
Elements in the playlist that are disabled are shown with a darkened style, as shown in the screenshot below:
Playlist Context Menu
Right-clicking the playlist opens the following context menu:
-
Direct Take: Takes the playlist element directly to air. If the element is available and/or loaded it will play immediately. If not, the element will be taken on air as soon as it is.
-
Continue: Continues the animation of the graphics if the graphics has a continue point.
-
Out: Takes the element off air (i.e. hard cut).
-
External Preview: Previews the element on your configured preview channel (see section Configuring Device Channels and Configuring Playout Devices).
-
Regenerate payload: Only for secondary events. Option to Forcefully regenerate the payload for the element.
-
Enable or Disable Element: Only for secondary events. Allows you to either enable or disable a secondary element.
-
Initialize (see section Playlist Toolbar).
-
Playlist: Initializes the entire playlist.
-
Element: Initializes the selected playlist element.
-
-
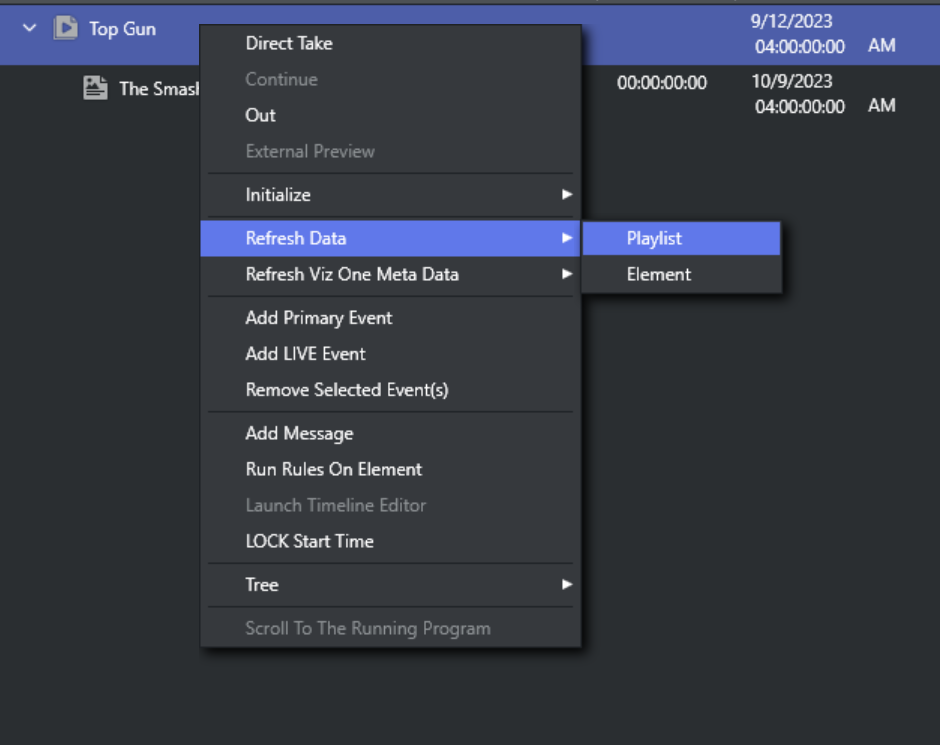
Refresh Data: Request a refresh of automatic page content or primary event Viz One metadata, as shown in the screenshot below:
-
Playlist: Clicking here iterates through the entire playlist and update all elements.
-
Element: Clicking here updates page data or Viz One metadata for the selected element of the playlist only.
-
-
Refresh Viz One Meta Data: forcefully re-read meta data from this event in Viz One, if applicable, and generate Event Meta Data from it.
-
Playlist: Do this for full every event in the playlist.
-
Element: Do this for this single event.
-
-
Add Primary Event: Adds a primary event to the playlist.
-
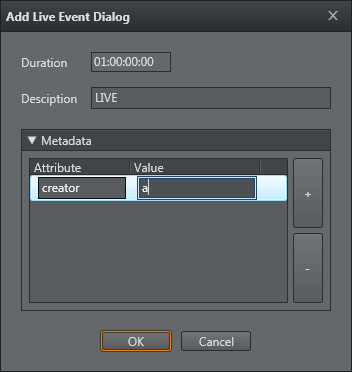
Add Live Event: Adds a live event.
-
Remove Selected Event(s): Removes one or several selected events from the playlist. This action cannot be undone.
-
Add Message: Add a Message Event, that is in-playlist annotations that have no impact on the playout - only intended to share information with other operators.
-
Run Rules On Element: enabled for group and video primary events only. When selected, defined Rules will be run for the selected primary element only.
-
Launch Timeline Editor: Launches the Timeline Editor, see Working with Video Clips.
-
LOCK Start Time: Lock the event. Note that you can modify live or locked events in the playlist column.
-
Tree:
-
Select All: Selects all events.
-
Select Inverse: Inverts your current selection, selecting all other elements.
-
Select None: Cancels all selections.
-
Expand All: Expands all primary events to show secondary events.
-
Collapse All: Collapses all primary events to hide secondary events.
-
Hide Empty Groups: Hides all empty groups.
-
Wrap Text: Wraps the text according to column width.
-
Font...: Allows you to set your own system font for the playlist.
-
-
Scroll To The Running Program: Scrolls the playlist view to show the current running primary element at the top.
Playlist Filters
The Playlist lets you add filters to quickly sort the list of events.
Adding a Playlist Filter
To add a playlist
-
Click the funnel icon, and click New....
-
This opens the Edit filter window.
-
-
Enter a Filter name.
-
Select whether the filter should apply if:
-
All conditions match.
-
One of the conditions matches.
-
None of the conditions match.
-
-
Select whether or not to Filter on Group.
-
Continue to define your filter by adding one or multiple conditions. The list of events is filtered as you define your conditions, allowing you to verify that the filter is configured correctly.
Managing a Playlist Filter
To manage a playlist filter
-
Select your filter.
-
Click the funnel icon, and from the menu click Edit... or Delete.