Viz Vectar Plus User Guide
Version 1.2 | Published April 12, 2022 ©
The Home Page
About 30 seconds after you start-up Viz Vectar Plus, the Home page appears.
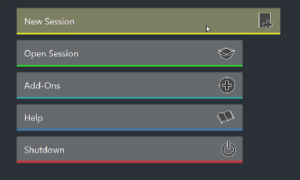
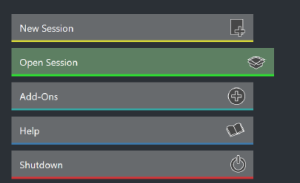
For most operations, you choose a link from the primary menu on the left. The Home page is where you create and manage your sessions.
Session Menu Options
New Session
To create a new session
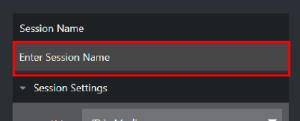
Clicking New Sessions populates the pane on the right with input menus Session Name and Settings, and Video Settings.
Session Name: A Name box for your session appears. Click in this field to modify the default name (the current date).
Session Settings
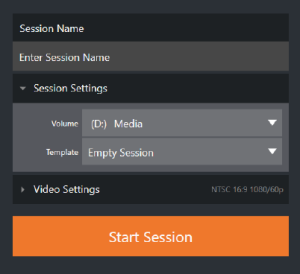
Volume: Displays the primary hard drive assigned for the session. Media and other content created during the session will be stored here by default.
Note: When using internal IsoCorder™ capture modules to record multiple sources, you may assign more than one volume for capture tasks. Sessions also automatically manage clips and other media, providing easy access to them for live use.
Detected storage volumes are listed in a drop-down menu when you click Volume.
You can select any volume shown as the session drive, though external drives are not recommended for active use as session drives.
Template: Lists all sessions currently available on the system. If you select one of these existing sessions, all session characteristics are used as a basis for your new session.
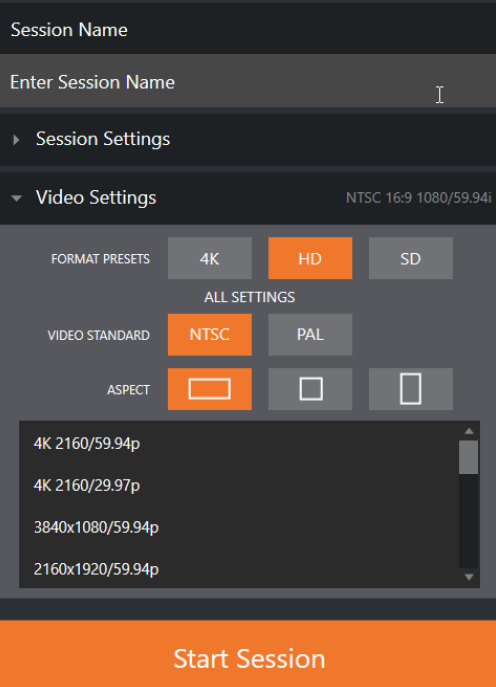
Video Settings
Set the following Standards:
-
VIDEO STANDARD: Define your local video standard. NTSC or PAL video according to your locale.
-
ASPECT: Aspect ratio, landscape, square or vertical aspect for the session.

-
FORMAT PRESTS: Select a video format, and then from the listing (for example 1080/59.94p).
-
To begin your production, click Start Session.
Open Session
If there are existing sessions on the system, clicking Open Session lists all sessions stored on the currently mounted storage media.
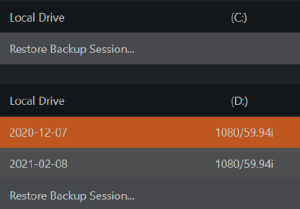
Available sessions are grouped under the names of the storage volume. The listing shows the session name and format for each session, on each drive.
Auto-Launch Session
By default, a few seconds after launch, Viz Vectar Plus automatically reloads the last session you were in. You can interrupt this selection by choosing another session or pressing any key.
Advanced users can modify this behavior, either by designating a specific session to auto-launch irrespective of the most recent manual selection, or by disabling the feature entirely.
Important: Modifying this feature requires changes to the Registry. We strongly recommend that edits to the registry be performed only by experienced persons, as the system can be rendered inoperable if this is done improperly.
To change the default startup behavior
-
Locate HKEY_LOCAL_MACHINE\SOFTWARE\VIZRT\XD\ADMIN SCREEN
-
Add a new key: auto_launch_session
-
Set the value for this key to the name of an existing session.
This session will then automatically opens on launch (instead of the last open session). -
If the specified session does not exist, the auto-launch feature is disabled..
Similarly, by setting auto_launch_session to _Disabled (or some other suitable string) rather than a real session name you can effectively disable auto-launch.
Session Name Context Commands
Right-clicking a session name opens a context menu.
Rename: Give the session a more meaningful name.
Delete: Beware! Cannot be undone.
All content stored in the named session’s folders are deleted, including imported clips, images and titles, any clips captured to the default session folders.
Note: Content that is not local to the session but which was used in it is not deleted. For example, you may have added still images to your playlist directly from a USB thumb-drive, without importing the files into the session. These external files are not deleted.
Opening a Session
To open a session
-
Click or tap a name in the Session list to launch that session and display the Sessions screen.
Other Menu Options
Title Bar Tools
These tools are always available on the top of the Viz Vectar Plus screen.
Eject
The Eject button at the top-right corner allows you to safely disconnect external drives. (Drives can also be ejected from the Live Desktop during a production session).
Note: Media configured as Read-only is not shown on New or Open (session) menus, since they cannot be used for session. Read-only media can be used for importing media to a session.
NDI KVM

The NDI KVM (keyboard, video and mouse) menu is left of the Eject button. This feature leverages the NDI® protocol to provide superb KVM functionality, giving you full control of your system from anywhere on the network where you run the Windows version of NDI Studio Monitor.
To enable this feature, see section NDI KVM.
Shutdown
This selection provides Restart, Shutdown, and Administrator Mode operations.
Administrator Mode
Selecting Administrator Mode from the Shutdown exits the live production environment, and opens a new screen with system maintenance and management features and settings.
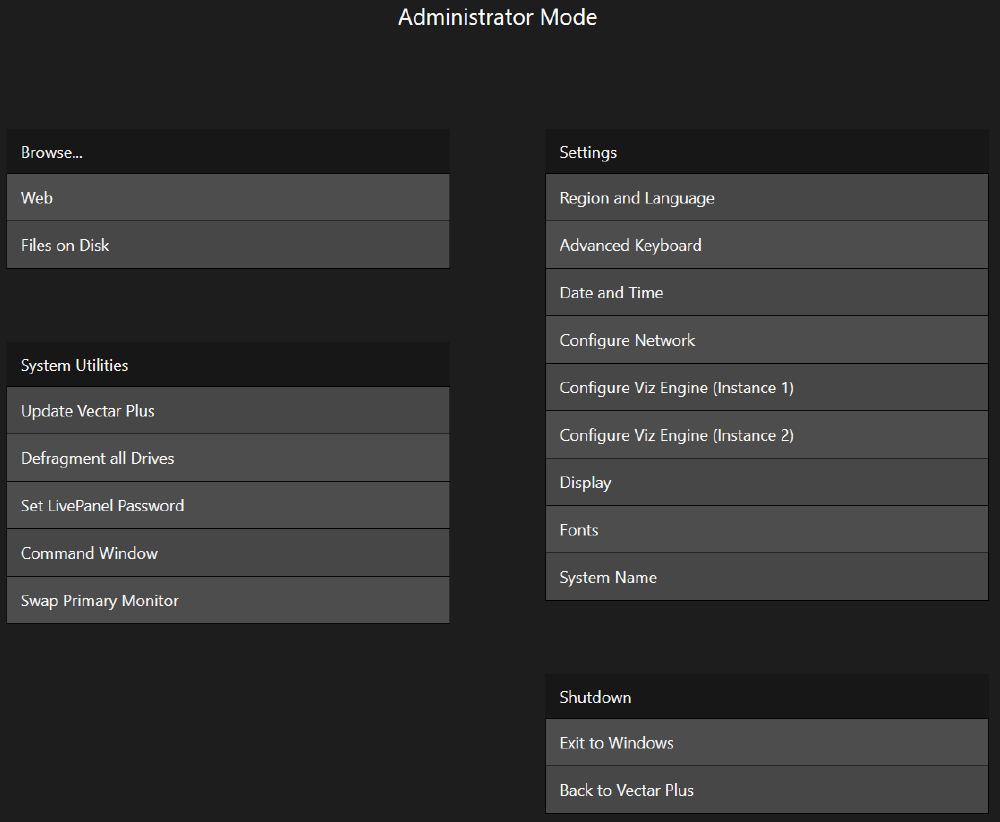
Browse
-
Web: Opens the default system Internet browser.
-
Files on Disk: Opens a system file window.
System Utilities
-
Display License Key
-
Update: Vizrt may periodically provide software updates. Updates can enhance performance, security or even add useful new features. If the system is connected to the Internet, clicking Update takes you to the Updates and Downloads webpage where you can locate the most recent software version.
Having done so, you can download and run the Auto Updater for the new version, or use the Download Tool option, which allows you to store the related files on another system for later transfer to your Vizrt live production system. -
Defragment all Drives: Over the course of lengthy use, data on hard drives devoted to audio and video storage tends to become fragmented, which degrades playback performance. Defragmenting corrects this condition.
Tip: Defragmentation can sometimes take considerable time, so it’s not something you want to begin just before an important event.
-
Set LivePanel Password: Configures the password for access to the web pages and network control features provided by the unit.
-
Command Window: Opens a Windows system command session.
-
Swap Primary Monitor: Shows the Live Desktop on the monitor designated as primary.
Settings
-
Regions and Language: Opens the Time and Language settings panel.
-
Advanced Keyboard: Opens the Time and Language settings panel.
-
Date and time: Opens the system Keyboard settings panel.
-
Configure Network: Opens the system Network settings panel.
-
Configure Viz Engine (Instance 1): Launches the Viz Configuration UI.
-
Configure Viz Engine (Instance 2): Launches the Viz Configuration UI.
-
Display: Opens the system Display settings panel (useful for configuring multiple monitors, among other things).
-
Fonts: Opens the system font management console, allowing you to add that new font your client wants you to use for their title pages.
-
System Name: The name by which your system is identified on the network.
Clicking here opens the System Properties console’s Computer Name tab.
You can modify the current name with the Change button. It is useful to modify the default name when more than one unit is on the same network.
Note: If using both Viz Engines, configure them separately before using.
Shutdown
-
Exit to Windows: Leave Administration Mode and display the standard system desktop.
-
Back to Vectar Plus: Exits Administration Mode, and return to the Launch screen.
Help
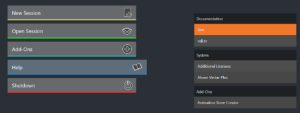
Select the Help icon to reveal links to open manuals and other information. The primary User Guide is found here, as well as documentation for other software.
Click the Additional Licenses Agreement link to review end user license requirements, or the About link to list software version information, credits and acknowledgments.
Add-ons
Additional software tools expand the power of your Viz Vectar system. The icon labeled Add-Ons on the Home Page provides access to some of these tools.
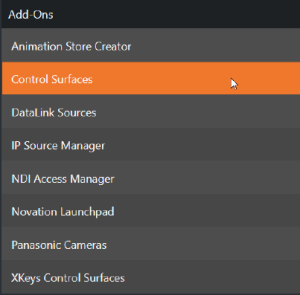
When you select the Add-Ons icon, links are displayed at right to launch installed software applications. For example, you see links to the included Animation Store Creator utility as well as the DataLink Configuration applet, and much more.