
Viz Multichannel basically two types of content editors: a page editor and a Timeline Editor. The page editor, which this section will describe, allows you to edit secondary events such as graphics and graphics with embedded video clips. The available options for editing the content will change depending on the design of the graphics and the functionality it exposes.
This section covers the following topics:
Page Editor Tab Fields
The panel at the left of Page Editor shows the available tab fields (editable elements of the graphics) for the page or template currently loaded.
Click on a tab field to display the available options.
When a tab field for video elements is selected you will be able to search for, filter, and add Clips to your graphics. A page containing video elements will automatically search for the video and preview it.
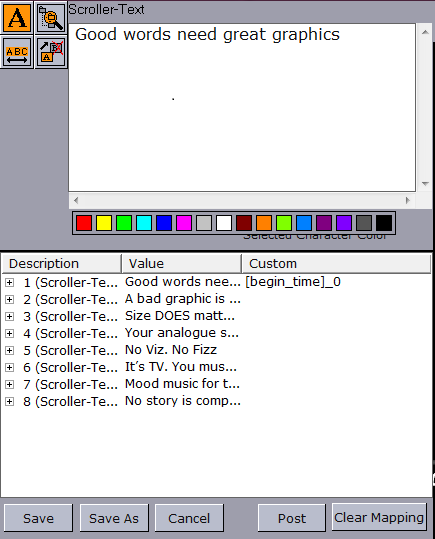
- Save: Overwrites the page using the existing save name.
- Save As: Saves the template or page as a new element.
- Cancel: Cancels all changes.
- Post: Switches to Post Rendering mode (only visible in page editing mode).
- Clear Mapping: Removes any Page Content Filling mapping done for each tab-field as well as any DB mapping for the page. You must press Save afterwards to save the page.
Graphics Control Buttons
The preview window shows a WYSIWYG (what you see is what you get) representation of the graphics and video clip. In addition, it shows the defined title and safe area and the bounding boxes. Bounding boxes are related to the graphics scene’s editable elements (see the Page Editor Tab Fields section). For a full screen video preview there is also a Timeline Editor.
Preview window buttons
Icon | Description |
|---|---|
 | Starts the scene animation currently loaded in the local preview |
 | Continues the scene animation currently loaded if it contains any stop points |
 | Stops the scene animation |
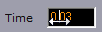 | With the Time slider it is possible to scrub the timeline manually by clicking in the value field, keeping the button pressed and moving the mouse horizontally back and forth. The cursor will change to an arrow to indicate that the time value can be changed |
 | Shows or hides the Title Area in the Preview window |
 | Shows or hides the Safe Area in the Preview window |
 | Shows or hides the Bounding Box for the tab field currently selected in the Preview window |
   | These three buttons can be used to preview graphics in three different modes. Clockwise from bottom left: The first shows an RGB version of the graphics with a default background color (black). The second shows the Key version of the graphics. The third shows the graphics keyed on top of a still image. Currently not supported by Viz Multichannel 2.7 |
 | Press the icon to refresh your view |
This icon indicates the Viz Engine connection; a green check mark indicates that the Engine is connected properly. Click the drop-down for further actions: Show Commands - displays the Viz Engine console window where you can observe all commands sent to the Engine and replies sent from the Engine. Show Status - displays Viz Engine status. Restart Viz - attempts to restart the Viz Engine (a disruptive action). Reconnect Viz - reconnect the Viz Engine. |
Post Rendering
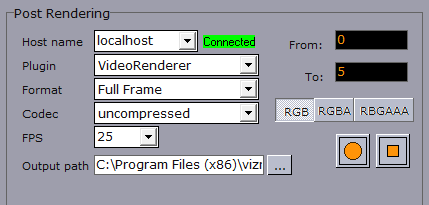
The Post option in the Page Editor allows you to generate videos and images of pages based on standalone scenes (not transition logic based scenes).
- Host name: Host name of the rendering engine. If connected the different post rendering options are made available.
- Plugin: Sets the rendering engine to generate either video or images.
- Available options are: Video-renderer, JpegRenderer, PNGRenderer, QuicktimeRenderer, TgaRenderer, and TiffRenderer.
- The Video-renderer option creates a single video file, whereas any of the image rendering options create multiple images (based on the configured frame rate).
- Format: Sets the output format. Formats vary depending on the option selected.
- Available formats are: Full Frame, Fields Top, Fields Bottom, Full Frame Skip, Full Frame/ Interlaced Top, and Full Frame/ Interlaced Bottom.
- The Video-renderer option supports all formats, whereas the image rendering options do not support the interlace (top/bottom) formats.
- Codec: Sets the codec device to be used. The codec option is available only for creating videos. This option is unavailable if the plugin is set to image renderer.
- FPS: Sets the numbered of frames to be rendered per second. This option is only available for the Video-renderer option.
- Available frame rates are: 25, 30, 50, 60, 29.97, 59.94.
- Setting a frame rate for image rendering is not available. Default is 25 FPS. Hence, rendering a scene for five seconds will result in 250 images.
- Output Path: Requires a full path where the created file will be saved. Default path is,
%Program Files%\vizrt\Viz3\trioclip. - From: Sets the start time in seconds.
- To: Sets the end time in seconds.
- RGB/RGBA/RGBAA: Sets the pixel format to RGB, RGBA and RCBAA, respectively.
- Record button (circle): Starts the rendering process.
- Stop button (square): Stops the rendering process before the configured stop time set by the To field.
See Also