
Mosart Web Applications Guide
Version 1.6 | Published August 10, 2023 ©
Setup and Administration
This section describes setup and post-installation configurations, usually performed by a system administrator.
Before the NRCS operators can work with Viz Mosart templates using the Plugin, the system administrator must complete a one-time setup.
Setting up the NRCS Plugin
Perform all three procedures, Download, Installation and Configuration.
Download
-
Collect the latest software bundle from Vizrt's customer FTP at https://download.vizrt.com/
by navigating to / products/VizMosart/Latest Version/WebApplications/.
Note: If upgrading, make sure an existing instance of the Mosart Web Applications Configuration Tool is not open.
Installation
The Mosart Web Applications bundle shall be installed on the Viz Mosart server.
-
Run the downloaded file MosartWebApplications.Bundle-n.n.n.n.exe.
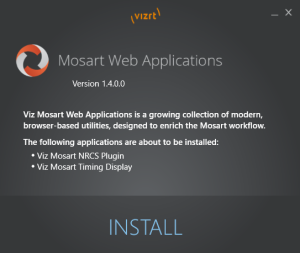
The web applications that will be installed are listed.Note: The Installer places two applications on the local machine
-
Vizrt Mosart Web Applications
-
Vizrt Mosart Web Applications Configuration Tool
-
-
Click Install.
Any previously installed versions of the Mosart Web Applications are automatically upgraded. -
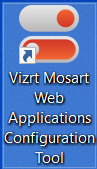
After successful installation, a Mosart Web Applications Configuration Tool automatically displays.

Note: A desktop shortcut to Mosart Web Applications Configuration Tool is added by default.
-
Port settings (optional)
Where security policies restrict ports firewall ports, these are the necessary port numbers for Mosart Web Applications:-
Web Apps REST API
http: 55142.
https: 55143. -
Remote Control Service (Used by the Timing Display and Rundown Viewer)
http: 55167.
https: 55168.
-
-
Follow the Configuration section to continue setup.
Configuration
-
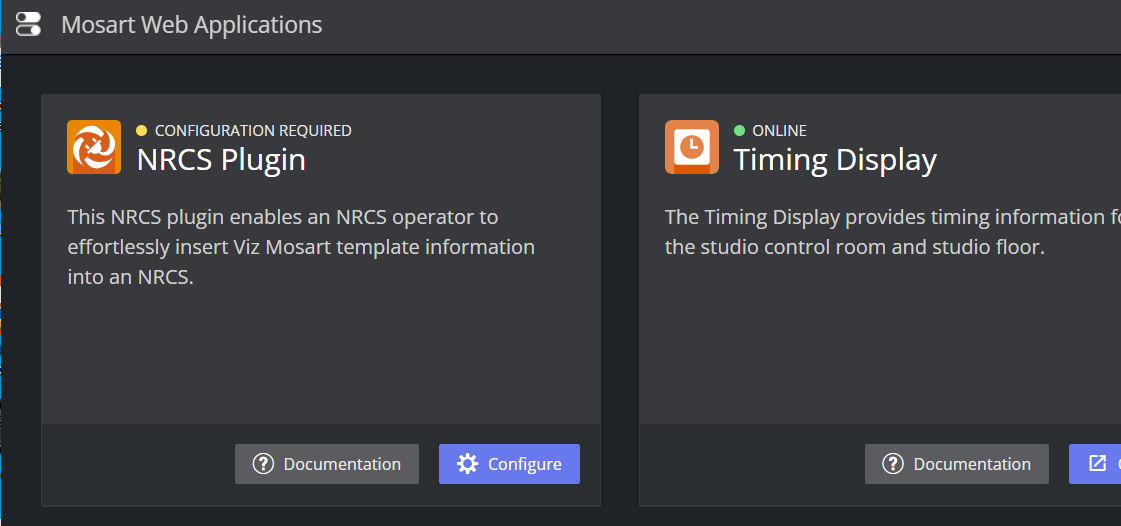
If the warning CONFIGURATION REQUIRED appears in the NRCS Plugin panel, click Configure.
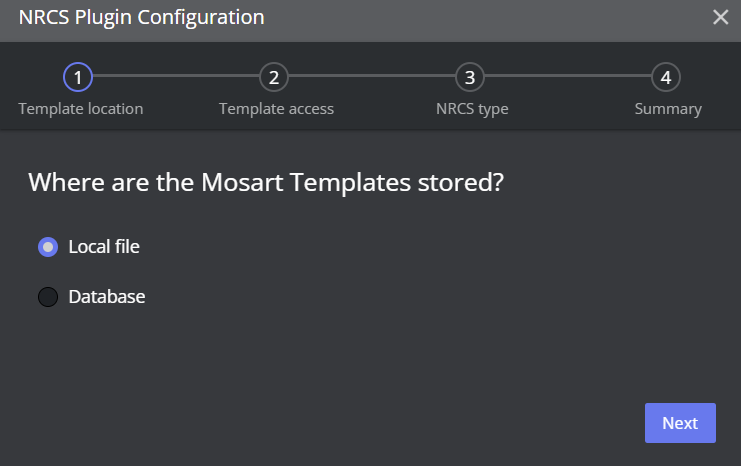
Follow the guidelines below:Step
Description
(1) Template location
Select whether your Viz Mosart templates are defined in a local file or on a separate database.
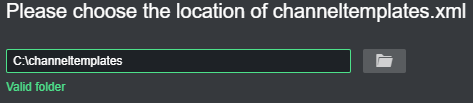
(2) Template access
Local: Usually C:\channeltemplates\
A check is made for existence at the stated destination, for all three files:
-
channeltemplates.xml
-
avconfig.xml
-
newsroomsettings.xml
If all are found, a confirmation text Valid folder is displayed.
Click Next.
Database: URL (Host + DB name) and DB access credentials
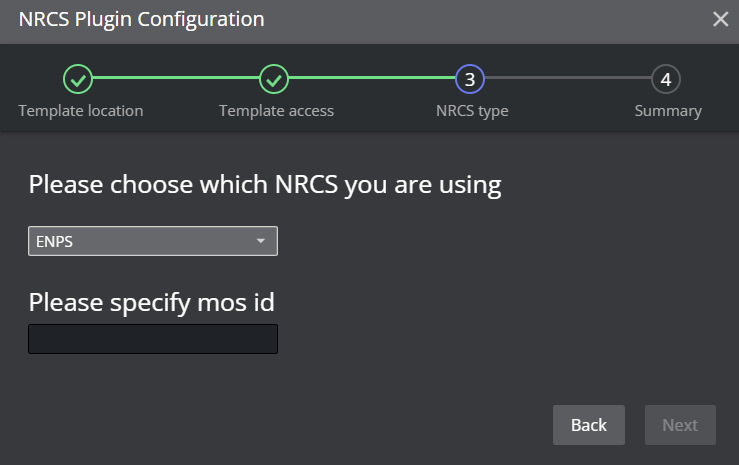
(3) NRCS type
Select the NRCS system you are using.
Supported systems are ENPS, iNEWS, Octopus.Any NRCS that can handle html plugins should work (select Other), but the above 3 are supported.
-
mos id
Mandatory field if you select NRCS type ENPS, Octopus or Other.
(not used in iNews).To find yourMos ID
-
In the Manus Administrator console, type SETTINGS.
-
From the configuration panel that opens, look for MosId.
-
The value is defined in the column to the right (in this example mosart.mos)
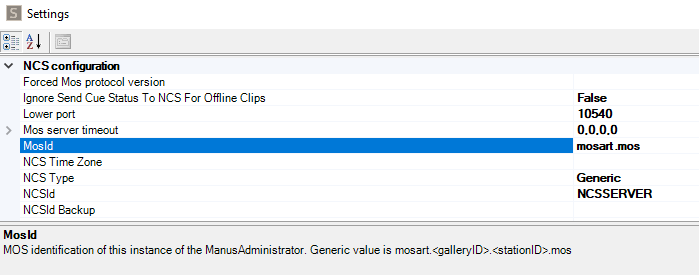
For more details, see the Viz Mosart Administrator Guide, section Manus Administrator > Settings Editor MOS > NRCS Configuration.
-
-
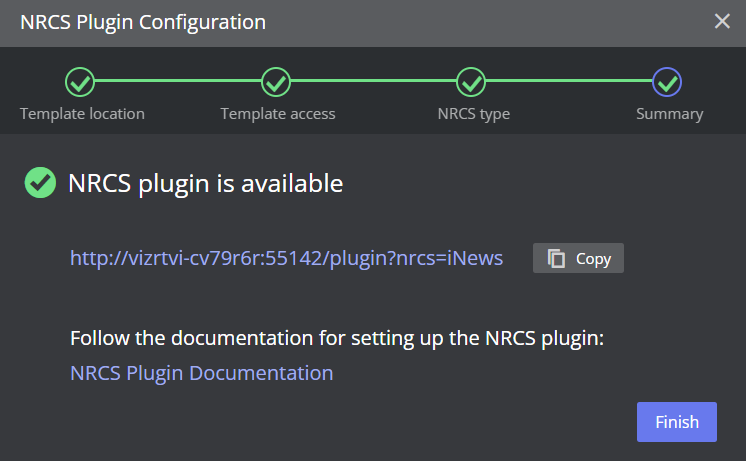
Setup is complete and a confirmation menu summarizes your details.
-
Click Finish.
Additional Server Settings
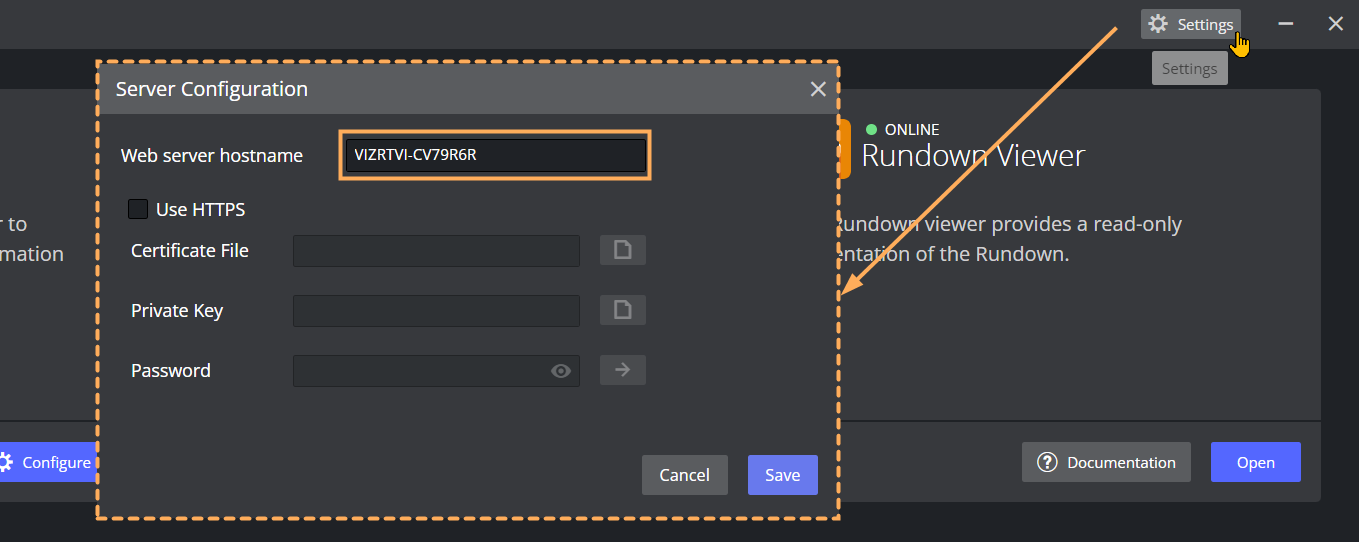
Web server hostname
At startup, the Configuration Tool attempts to autodetect the web server hostname and if successful, pre-populates the field.
For some setups, the Configuration Tool's web server pre-populated hostname will differ from the f ully qualified domain name (FQDN). For example, the hostname gets automatically pre-populated as web-apps, yet the FQDN is web-apps.example.com.
To enable network communication with Mosart Web Apps
You can enable other machines on the network to reach Mosart Web Apps .
-
From the Configuration Tool menu bar, click the Settings (gear) icon.
The Server Configuration menu appears.
-
In Web server hostname, enter the FQDN.
-
Click Save.
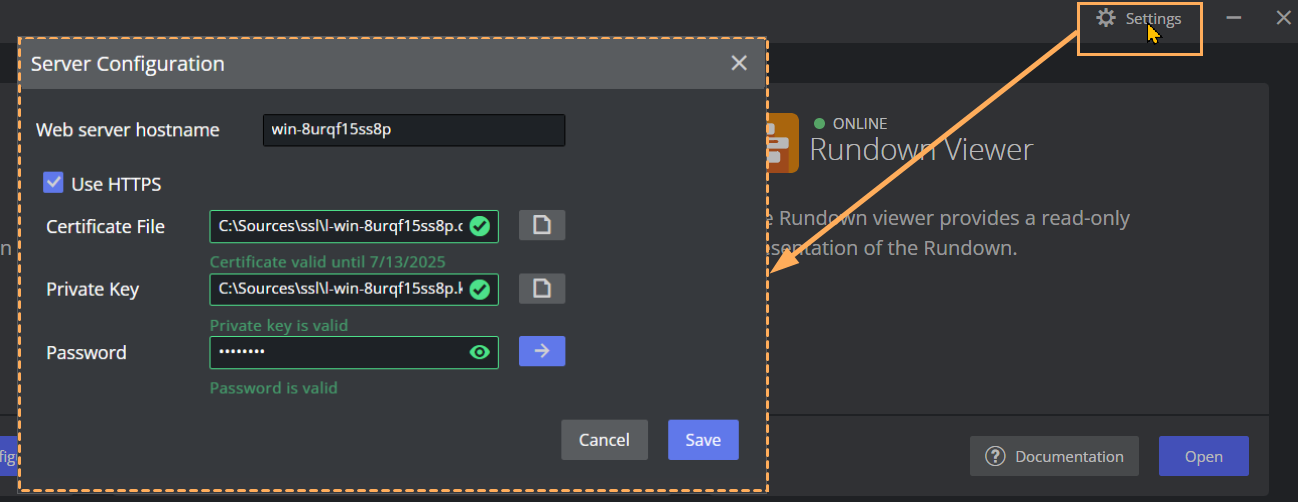
Enabling HTTPS
The Web Applications suite optionally supports HTTPS authentication for the applications running under it, with a centralized interface to help with certificate configuration.
Note: Depending on the application, some additional configuration may be needed in the connected applications (for example Viz Mosart itself) to enable HTTPS communication.
Step 1 - Activate HTTPS in Mosart Web Applications
-
Launch the Viz Mosart Web Applications Configuration Tool (a desktop shortcut is usually available by default).
-
In the top right corner, select the Settings (gear) icon.
The Server Configuration menu appears. -
Select Use HTTPS.
Note: This selection turns on HTTPS for the NRCS Plugin, Mosart Timing Display and Rundown Viewer.
-
Provide certificate, key and authentication details (consult with your IT department to obtain this).
-
Click Save.
Step 2 - Turn HTTPS on in Mosart Remote Dispatcher Service
-
Copy the file "C:\Program Files (x86)\Mosart Medialab\Mosart Server\ConfigurationFiles\RemoteDispatcherServiceConfig.xml" to "C:\ProgramData\Mosart Medialab\ConfigurationFiles".
-
Fill in the following fields, using the same three values from the HTTPS Configuration menu shown above :
-
SignalRUseHttps: true
-
SignalRCertificatePath: <Certificate File entered above>
-
SignalRCertificateKeyPath: <Private Key entered above>
-
SignalRCertificatePassword: <Password entered above>

-
-
Restart the Remote Control Service.
Verifying the Installation
-
After entering NRCS type above, clicking Next starts a background Windows service, Mosart REST API (a combination of the REST API and the NRCS Plugin).
-
You can check that the NRCS Plugin is accessible by either:
-
In the Configuration Tool, clicking Open.
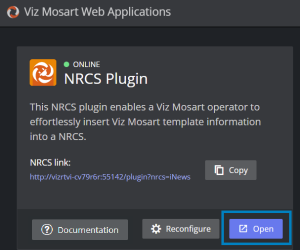
or -
following the URL next to the Copy button.
The Plugin URL comprises the machine name, port number 55142, NRCS type and (when supported) mos id in the form: http://machine-name:55142/plugin?nrcs={type}&mosid={mosid}
-
-
To complete the integration, configure the NRCS side, according to the appropriate NRCS as described in section Integrating with an NRCS, where you will use the copied URL.
Troubleshooting
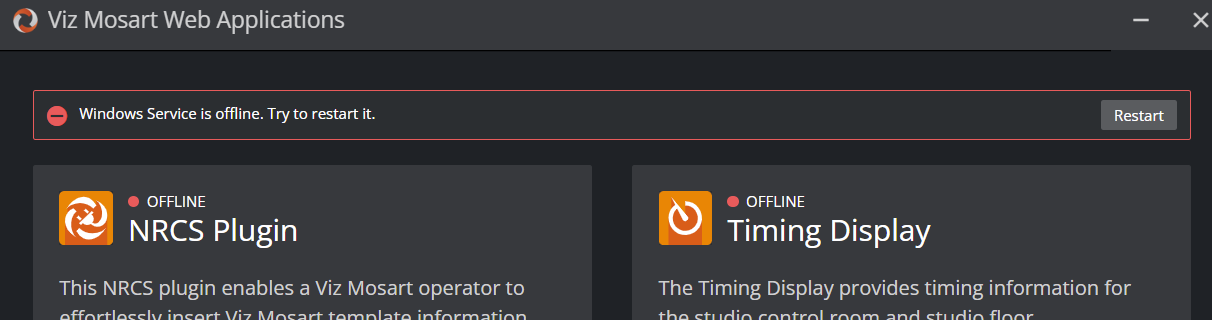
Web Apps Service reports as offline
At any time you can start the Mosart Web Applications Configuration Tool and check operating status.
A common error is when a Windows service has failed.
-
Try restarting the service with the Restart button.
-
You can also rewrite any previously entered values with the Reconfigure button.
Bypass the Mosart Web Applications Configuration Tool to access Web Apps
In failure situations, you can use your web browser to communicate with the Mosart Web Apps (instead of the Configuration Tool).
NRCS Plugin
-
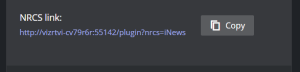
From the Configuration Tool, copy the NRCS link (click Copy).
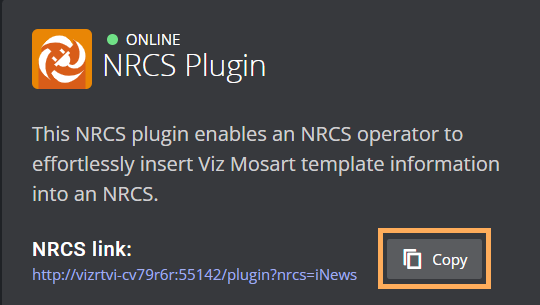
The URL has the form similar to: http://<your-hostname>:55142/plugin/?nrcs=ENPS&mosid=mosart -
Open you web browser and paste the URL in to see the NRCS Plugin.
Rundown Viewer
-
Edit the URL to: http://<your-hostname>:55142/rundown
Timing Display:
-
Edit the URL to: http://<your-hostname>:55142/timingdisplay/editor