
Viz Artist User Guide
Version 5.1 | Published October 31, 2023 ©
Script Editor
This section explains how to work with the Script Editor. To switch to the scripting perspective, select Scripting from the workspace menu.
Viz Artist can be scripted on two levels - using Scene Scripts or Container Scripts. In addition you can write Viz Engine Shaders within the scripting environment. The following chapters mainly refer to Viz Scripting. For information on how to write Viz Engine Shaders, see Viz Engine Shaders.
Before adding scripts and code, the designer needs to think about where the logic should reside.
This section contains the following topics:
Scene Scripts
-
If there are functions that act like an interface to the scene, it's a good idea to add this logic as a scene script.
-
If functions or variables are used throughout several other scripts within the scene, the scene script is the proper location for those.
On the other hand, if the script code is container-specific or planned for a container prototype-instance(s) approach, the script code should be hosted in a container script.
Script Editor Properties
Although the Scene Script Editor and the Container Script Editor have the same properties and functionality, a script created in one editor can not be placed in the other editor's folder. This section provides details on the Script Editor's properties and context menu.
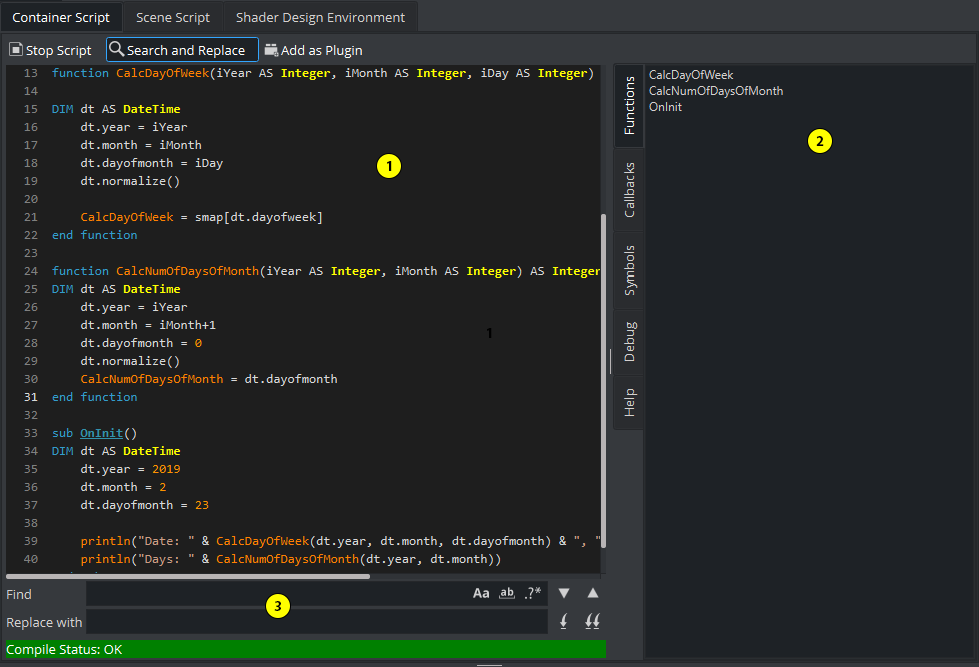
The Script editor is divided into the following sections:
-
Editing Area
-
Function, Callbacks, Symbols, Debugging and the Scripting Reference
-
Search and Replace
Editing Area
Select which type of script you wish to edit by clicking the tabs at the top of the menu:
Container Script: Container scripts reside on containers and are mainly responsible to add logic onto single container(s).
Scene Script: All global functionality or logic that apply to the whole scene can be defined as a Scene script.
Shader Design Environment: Introduced in Viz Engine 4. See Viz Engine Shaders for more information.
![]()
A script can have three states: running, editing mode or error mode.
To toggle between run mode and edit mode, click on the ![]() respective the
respective the ![]() button. A script that has been successfully compiled and runs without any errors, can be saved as a Script plug-in. This is done by clicking on the
button. A script that has been successfully compiled and runs without any errors, can be saved as a Script plug-in. This is done by clicking on the ![]() button. For more information, please see chapter Create Script-based Plug-ins. The status of the compile status is shown under the editor area:
button. For more information, please see chapter Create Script-based Plug-ins. The status of the compile status is shown under the editor area: ![]()
To toggle the search and replace window click on the  button. Within the editing area, F3 repeats the last search and F4 searches for the current word under the cursor. Continue pressing F3/F4 to search for the next occurrence.
To start editing your script, start by typing one of the keywords, for instance dim or Sub. The Editor automatically offers you a list of possibilities and auto-completes your selection. Example: Start adding a new sub by typing Sub O. A list of valid options immediately shows up:

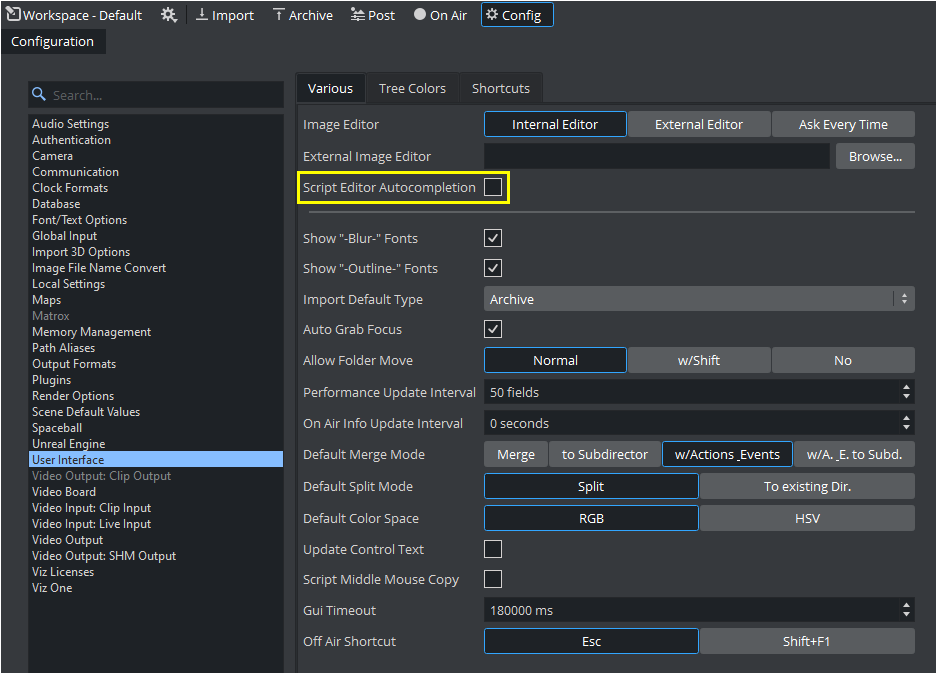
Autocompletion can be enabled/disabled under Config > User Interface > Script Editor Autocompletion.
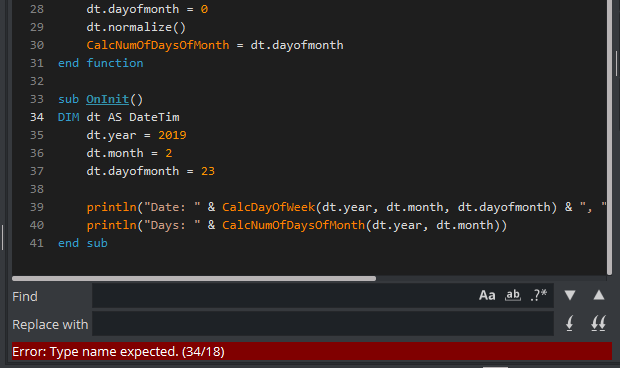
The script editor automatically colorizes keywords for a better reading. Once an error occurs (when pressing the Compile & Run), the editor shows an error and automatically jumps to the line the (first) error occurs.
Right clicking inside the Editor opens the Context menu:
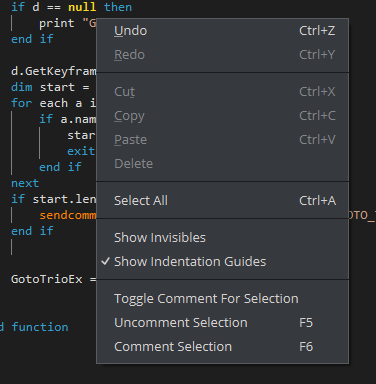
Changing the font size: The font size of the script can be changed using CTRL + mouse wheel.
Function, Callbacks and Symbols
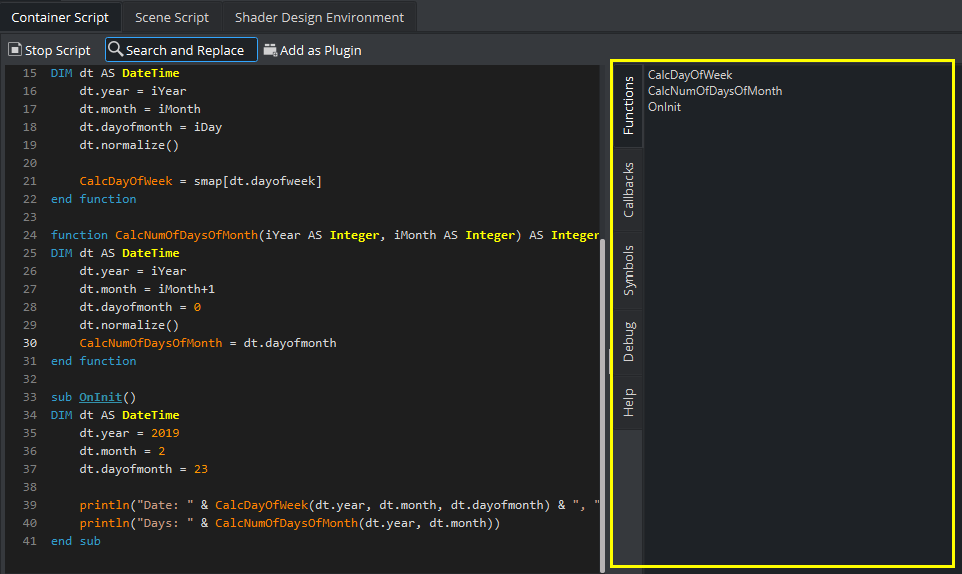
The function tab shows a list of pre-defined functions within your script, including the built-in Callbacks and self-defined functions. Clicking on a function automatically moves the view of your editor to this selected function:
The callback tabs shows a list of all built-in callbacks Viz is using. For example the OnInit is called whenever the script get initialized. Callbacks written in Bold are used by the current script. Click on one of the entries to directly jump to the location within your script.
Note: Callbacks differ between Scene and Container Scripts.
Symbols represents a list of fixed values and Enums, for example the fixed values for the Texture quality levels like TX_QUAL_MIPMAP. These values are pre-defined in Viz Engine.
Search and Replace

The search functionality allows you to search for terms or even replace them automatically.
Add the term you want to search for and press either:
-
 : Shows the next or the previous occurrence of your search term.
 -
 : Replaces a single or all occurrences of your search term with your replace term when a replace term has been entered.
To better define your search criteria, specify your options on the right:
-
 : Switches between upper and lowercase search.
 -
 : Searches for whole words (separated by a white space character) or by a sequence.
 -
 : Allows to search by a Regular Expression, based on Perl's regexp language.
Example
To match strings containing 'test' or 'my' or 'search' but only match whole words (not 'searches'), enter \\b(test|my|search)\\b in the Find field.
Tip: You can also search for the occurrence of a word within scripts from the Scene Tree. For example, to show all scripts that contain an "onExecPerField" procedure.
Scripting Reference
The Scripting documentation is usually located on your hard drive in C:\Program Files\Vizrt\VizEngine\Documentation\viz-script-doc-webhelp. This view allows you to browse the documentation without opening a browser window and switch between Viz Artist and the documentation.
![]() Lets you open the scripting reference in a browser window.
Lets you open the scripting reference in a browser window.
Navigation buttons:
![]()
Navigate through the documentation by clicking on the home button to return to the main page or use the back and forward buttons to browse through your navigation history.
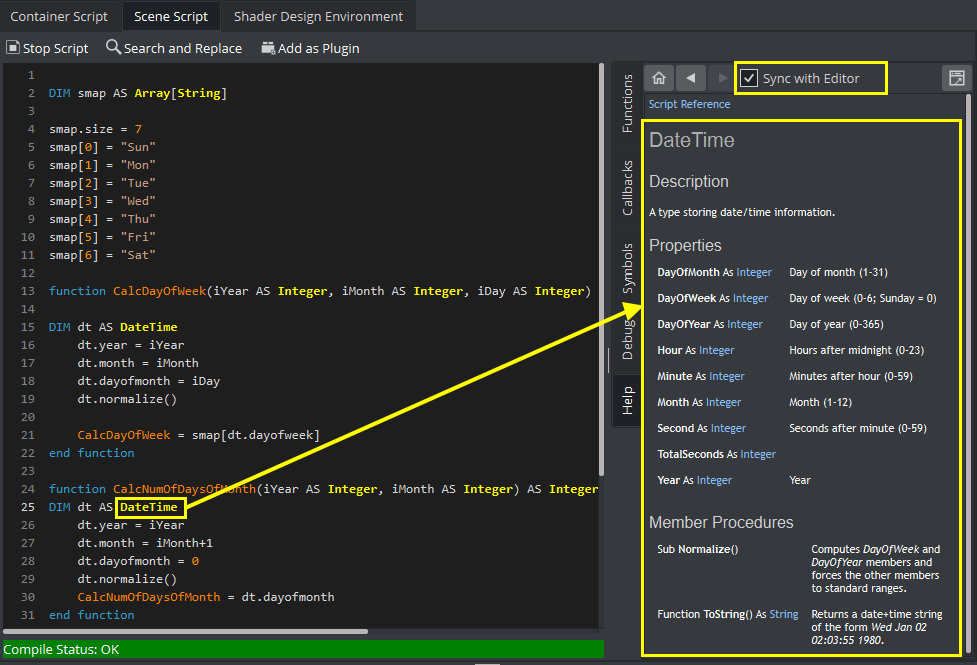
Tip: Sync your documentation view with the script editor. Click on a keyword within the editor and the Scripting Reference automatically shows you the correct chapter within the scripting documentation. For example, if you click on "scaling", the Script reference automatically shows you the chapter about scaling, as in the screenshot below:
Debugging
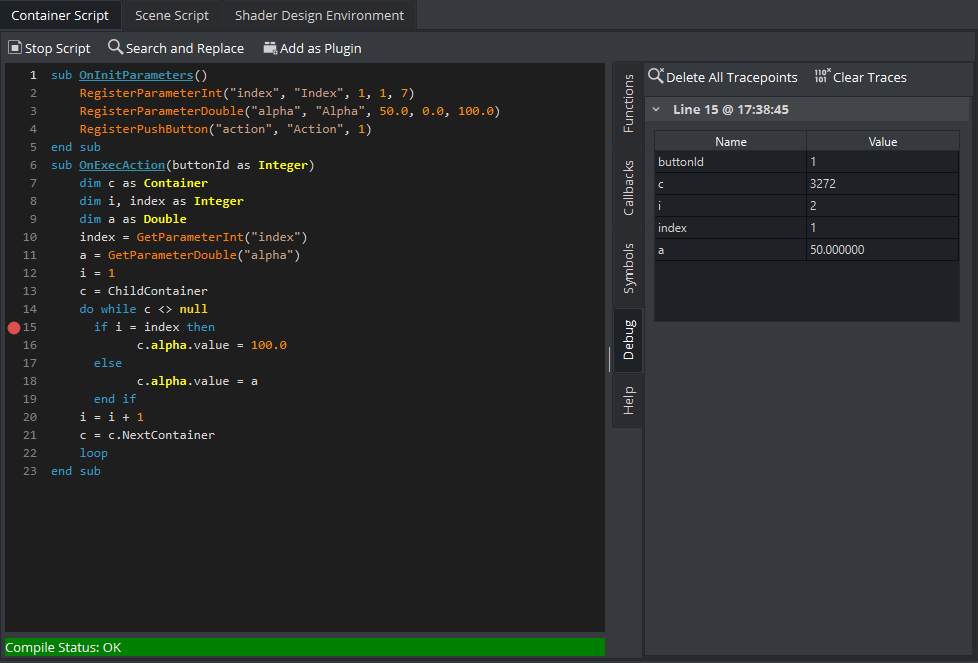
The script editor supports setting tracepoints which provide insights into the state of the variables at a certain point of the execution.
Whenever the program execution hits a line with a tracepoint set, a snapshot of all variables calculated up to this point and can be inspected.
Note: In contrast to breakpoints, the execution does not stop when reaching a tracepoint.
Please be aware that only variables that have been calculated up to this line are shown correctly. Put your tracepoint onto the next line to get a correct result:
|
Incorrect |
Correct |
|
|
|
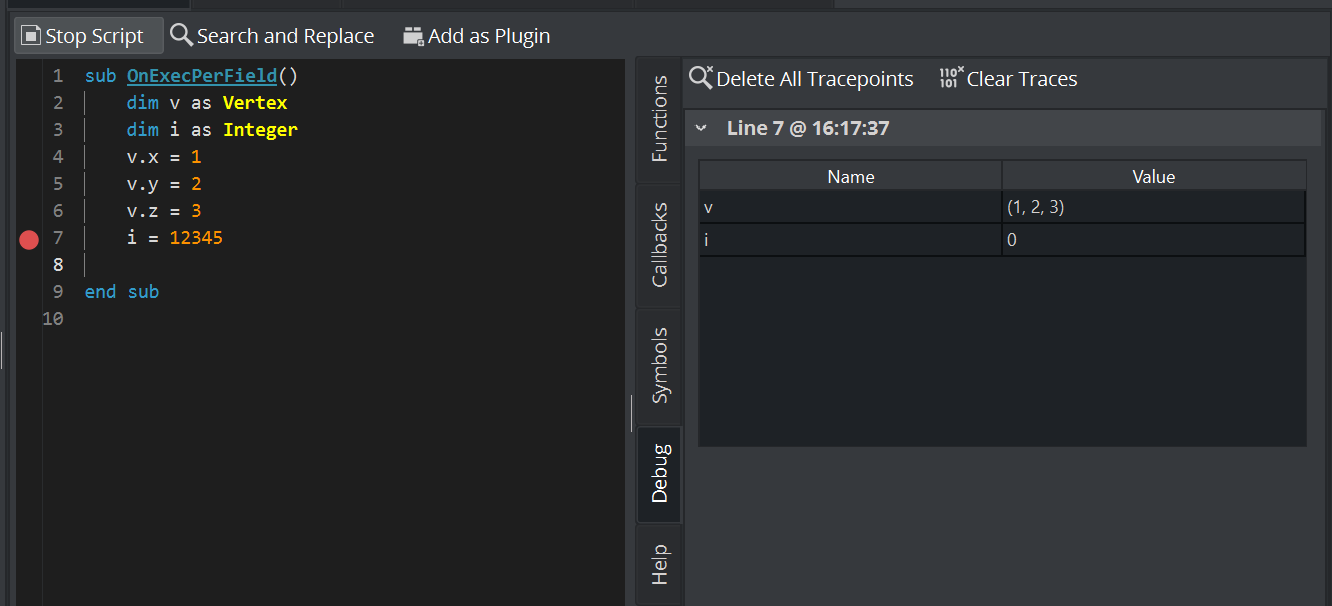
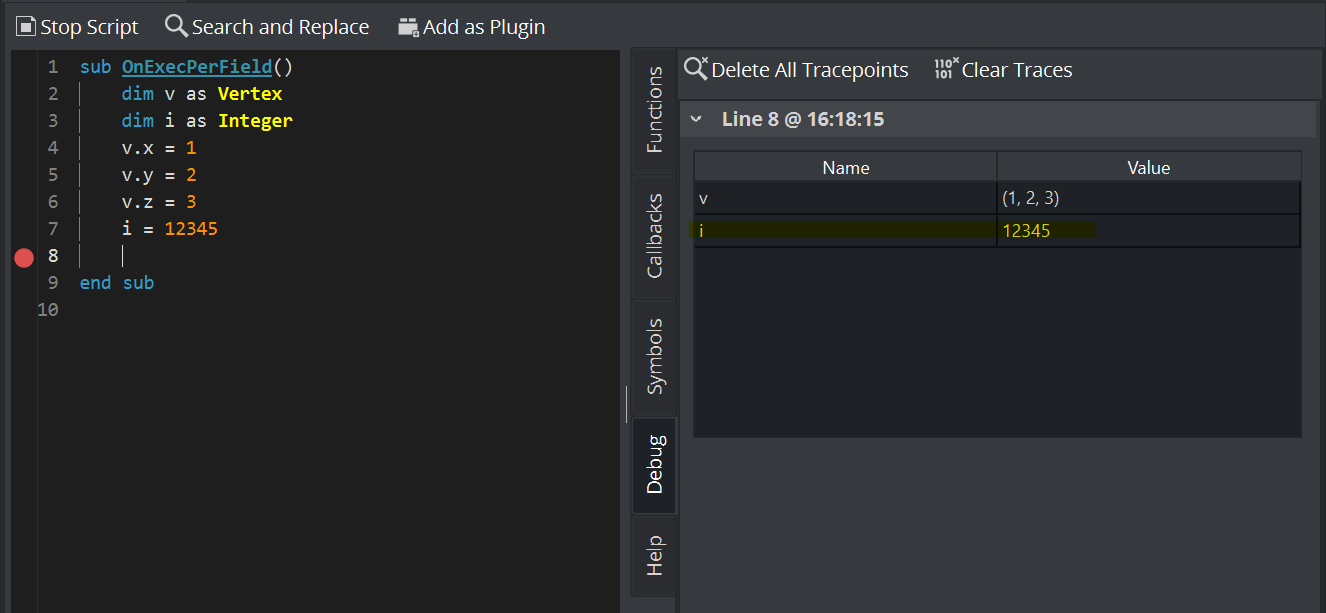
A tracepoint can be toggled by clicking in the column left of the line numbers. The variables snapshots can be seen in the Debug tab.
There are entries for each tracepoint that was hit with its line number and a timestamp.
To stop tracing your variables, press Delete all Tracepoints. This keeps the list of your traces. Press Clear Traces to also remove the list of your traces.