
Viz Pilot Edge User Guide
Version 1.3 | Published September 27, 2018 ©
Find Graphics
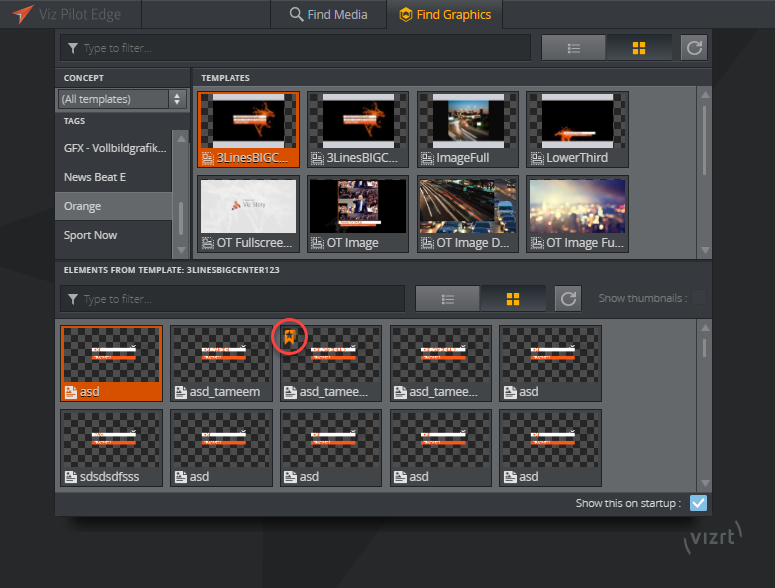
Clicking the Find Graphics tab or icon in the welcome page, a dialog opens where the user can search for available templates and saved data elements.
The TEMPLATES pane located in the top half of the dialog shows available templates based on the selection made for CONCEPT, TAGS and/or typed search.
Data elements are already saved templates available in the Pilot Data Server. They are located at the bottom of the dialog and are also based on the CONCEPT, TAG and TEMPLATE selection and/or typed search.
Data elements available in the library are marked with an orange tag, see the red ring in the image below.
Double click a template or data element to open it in a new window to add or edit content, or use as is.
Note
It is currently not possible to detect whether an element is in its original saved state. For example, if the user edits an element and changes it back to its original saved state, the save button will still be active even though there is actually no new changes to the element.
Add Content to Templates and Elements
Once double-clicking a template or data element it will open in a new window which consists of two main parts, the Fill In Form (left) and the Preview Window (right), see image below. Content can be added and edited on the left, while on the right a preview will load every time the user makes a change.

Fill In Form
The window to the left is a Fill In Form for the graphics. It displays fields that are exposed by the designer in Viz Artist where the user can add content to the graphic. It can be text, choices in a drop-down list or media placeholders for media assets found in the Find Media tab. Once changes are made in the Fill In Form, the Preview Window immediately updates to display them (as long as Auto-refresh is enabled).
Playout Instructions
Payout Instructions are located at the bottom of the Fill In Form. The In and Out fields specify the start and end time for the graphic relative to the rundown that the element will be a part of.
Save
To save a template as an element click the Save as button  . Type in the name of the new element in the dialog that appears. Once the template is saved as an element the given name will appear on the top of the Fill In Form.
Add to library: The data element will be saved to the library. Enable this option if the data element will be used often and you want to prevent it from being changed or deleted.
To save any changes to an existing data element that is currently open, use the Save button  . If the data element is in the library, a confirmation dialog will appear to avoid accidentally overwriting it.
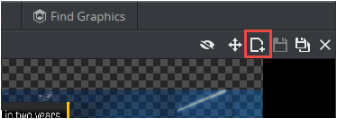
Only when a graphic is saved as an element the user is allowed to drag-and-drop it to the newsroom system using the Drag item to Newsroom button  . If the template is not saved this button is grayed out.
WARNING
Remember that if the element title is too long it will be reduced to 128 characters in the MOS XML file, which again will affect the element title in the newsroom system.
Send Item button
Clicking the Send Item button will send the item to the newsroom rundown. The button is used to update an already existing item in the newsroom.
Preview Window
The Preview Window displays snapshots of the graphics in an ongoing preview process and provides the user with an idea about how the graphics will look when played out in high resolution on a Viz Engine. The Viz Engine generate snapshots requested by the Preview Server.
Clicking the show/hide preview window button ![]() , or the split-bar separating the Preview Window and the Fill In Form, will collapse the Preview Window to make more space for the Fill In Form. Clicking the button or sidebar again will restore the Preview Window.
, or the split-bar separating the Preview Window and the Fill In Form, will collapse the Preview Window to make more space for the Fill In Form. Clicking the button or sidebar again will restore the Preview Window.
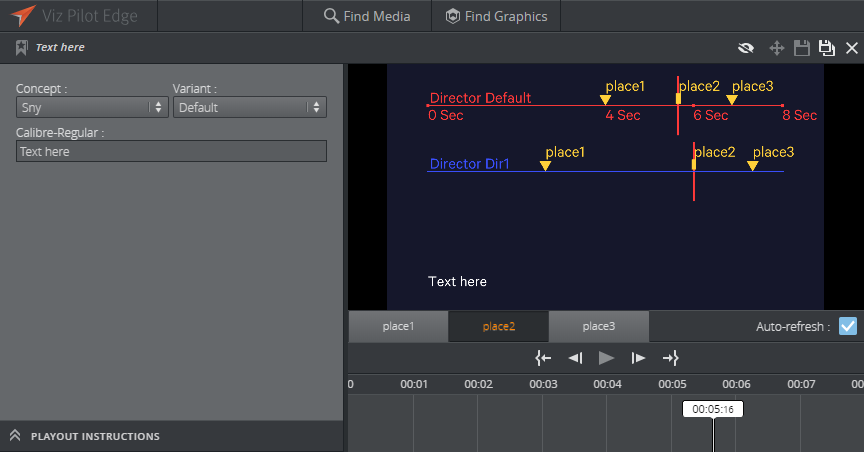
The toolbar at the bottom of the Preview Window allows the user to adjust how to view the preview of the graphics.
-
Preview points: If the scene contains named preview points, such as stop points and/or tags in the Default director, these are shown as buttons on the toolbar. If there is not enough space for the buttons, they appear in a drop-down list instead. Selecting a preview point shows a preview of the scene at the given point, and the playhead jumps to the point in time where the preview point is set.
-
Scrub the timeline back and forth by clicking on it or moving the playhead. If the scene does not have a director called Default, or the Default director does not have a duration, the timeline will be disabled.
-
Auto-refresh: Auto-refresh is located at the bottom of the Preview Window and is by default enabled which means that the Preview Window updates once there are any changes in the Fill In Form.
Disable Auto-refresh to turn this functionality off. To refresh the Preview Window in this mode click the Refresh button or click inside the Preview Window.