
Viz Pilot User Guide
Version 8.0 | Published May 30, 2017 ©
Object Store Information Panels
This section explains how to add, view and edit information about still images (stills) or persons in Object Store.

By default, the information panel consists of the tabs Image Information and Person Information. These can be enabled or disabled through the Object Store Settings window
The Object Store Export and Import tab appears in the information panel when doing an Export/Import by clicking the export or import buttons on the Object Store Toolbar.
This section contains the following topics:
-
Image Information
-
Image Preview
-
Working with Images
-
Person Information
-
Working with Person Information
See Also
Image Information
The Image Information panel displays the currently selected image and its meta data. Some fields are auto-generated by the system, others are auto-filled based on meta data appended to the image itself while some data is added manually. The latter can be keywords which is often manually added to categorize the image and to filter the search. Required fields are highlighted with a pale yellow color.
Object Store reads image meta data attributes defined by the International Press Telecommunications Council (IPTC) and automatically adds it to the appropriate information fields.
Below, a default set of fields are shown. It is possible to add new fields to the Image information panel in the settings for Keywords, Additional Fields, Organizations and Countries.
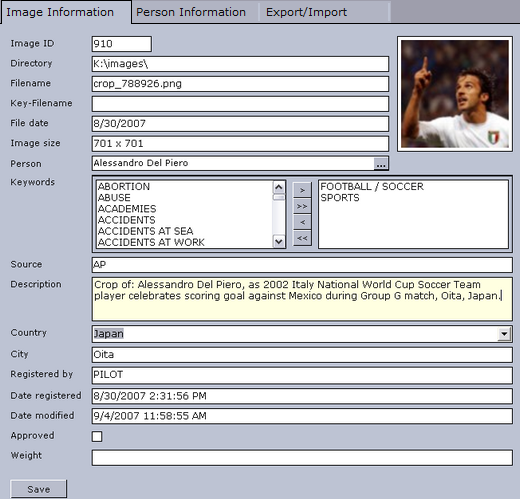
Auto-generated fields:
-
Image ID: Sets the ID for the file in the database.
-
Directory: Sets the file location based on the Save Paths setting.
-
Filename: Shows the actual file name.
-
Key-Filename: Sets a separate filename for matching stills that are keyed.
-
File date: When the image was last modified.
-
Image size: In pixels.
-
Description: Sets the filename by default if no other information is embedded with the file.
-
Date registered: Sets the date for when the still was first registered.
-
Date modified: Sets the date for when the still was last modified.
Required fields:
-
Keywords: Sets the keyword for the still image. One keyword is required. If no appropriate keywords are available, new ones can be added in the Object Store Settings window.
Optional fields:
-
Person: Sets the link to Person Information. Only one Person can be linked.
-
Source: Sets the name of the copyright holder or image origin.
-
Country: When selected, gives the still a geographical location by country.
-
City: When entered, gives the still a geographical location by city.
-
Registered by: Sets the logged in user is as the registrant when information is saved.
-
Approved: When set, indicates that the still is ready for use.
-
Additional fields: Displays additional fields added in the Object Store Settings window.
-
Image: Displays the uploaded image. Double-clicking the image will open the Image Preview.
Image Preview
Once an image has been selected and is displayed in the Image Information panel, it can be previewed by clicking the Preview button (CTRL+P) in the Object Store Toolbar, or double-clicking the thumbnail in the Image Information panel.

-
Clipboard: Puts the image on the clipboard allowing the image to be pasted into other applications.
-
Key & RGB: Shows the key and RGB version of the image. If the image has no key an all white image (full key) is shown. When clicking the Key button the button is replaced by the RGB button.

-
Blended: Shows the key image blended with a white background.
-
Crop: Opens the Crop image window.
-
Save: Saves a copy of the image on the computer. The following formats are available: Bitmap, JPEG, RGB, Targa, TIFF and PNG. By default the format is set to TIFF.
-
Close: Closes the Preview dialog box.
Note: The RGB, Key & Blended views are also available as part of the Image Information.
To preview an image
-
Search for an image.
-
Double-click the thumbnail to open the Information panel.
-
To preview the image click the Preview button (CTRL+P) in the Object Store Toolbar, or double-click the thumbnail in the Image Information panel.
Note: Stills are shown in full size unless it is larger than the screen resolution.
See Also
Working with Images
To add a new image
-
Click the New Image button on the Object Store Toolbar, or use the keyboard shortcut CTRL+N.
-
Browse for and select an image from a local drive or a network drive, and click Open.
-
Fill in image information.
-
When done, click the Save button (CTRL+S).
To edit image information
-
Search for the image using Still Search.
-
Double-click to open the selected image in the Image Information panel.
-
Click the Edit button (CTRL+E) on the Object Store Toolbar to enable editing.
-
When done, click the Save button (CTRL+S).
To link a person to an image
-
Open an image and make it editable.
-
Click the ellipse button
 to search for a new person using Person Search.
 -
Double-click the list item representing the new person to replace the old Person information link.
-
When done, click the Save button (CTRL+S).
Note: Only one person can be linked to an image at a time. This is a limitation that relates to how portrait images are linked to person information.
Person Information
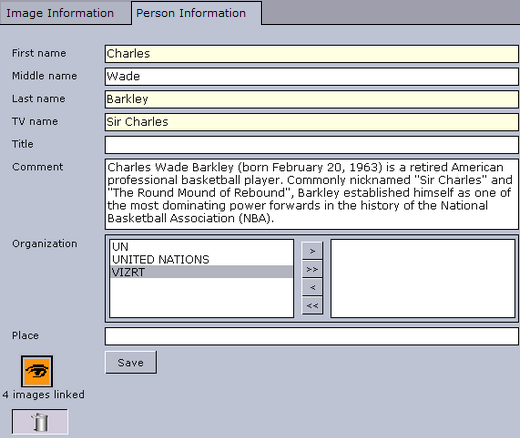
Required fields:
-
First name
-
Last name
-
TV name: The name the TV station uses.
Optional fields:
-
Middle name
-
Title: Can be used to add a title to the person (for example Lady, Sir, Dr, Mr, Mrs etc.).
-
Comment: Can be used as an open text field describing the person.
-
Organization: Can be used to link an organization to the person.
-
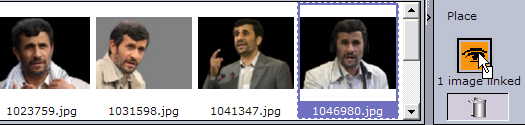
Place: Can be used to place the person geographically.
-
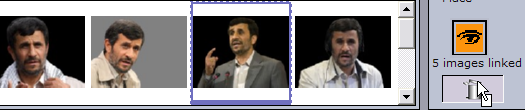
Images Linked: Can be used to link images to a person.
-
Bin (icon): Removes images that are linked to the person.
-
Save: Saves new or updated person information to the database.
Working with Person Information
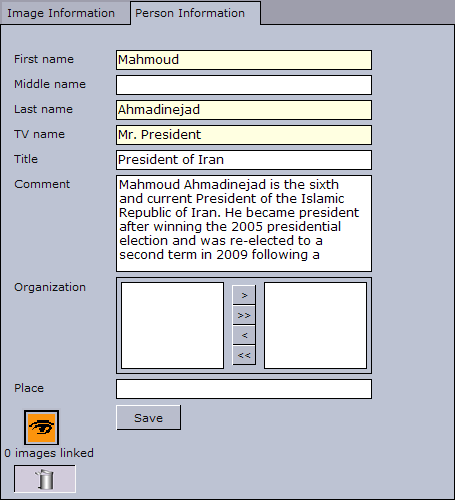
To add person information
-
Click the New Person button on the Object Store Toolbar.
-
Fill in the person information.
-
When done, click the Save button (CTRL+S).
To edit person information
-
Search for a person using Person Search.
-
Double-click to open the selected person in the Person Information panel.
-
Click the Edit button (CTRL+E) on the Object Store Toolbar to enable editing.
-
When done, click the Save button (CTRL+S).
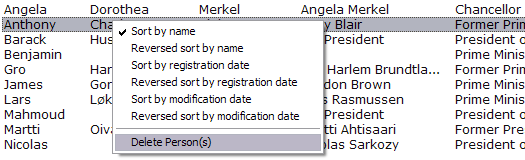
To delete person information
-
Search for a person using Person Search.
-
Right-click the person list entry, and select Delete Person(s).
-
Click Yes to confirm the delete operation.
Caution: Deleted persons from the database cannot be restored. Images linked to the person will also be permanently deleted.
To link images to a person
-
Search for a person using Person Search.
-
Double-click to open the selected person in the Person Information panel.
-
Click the Edit button (CTRL+E) on the Object Store Toolbar to enable editing.
-
Search for images using Still Search.
-
Drag and drop images onto the eye icon visible in the Person Information panel.
-
When done, click the Save button (CTRL+S).
To unlink images to a person
-
Search for a person using Person Search.
-
Double-click to open the selected person in the Person Information panel.
-
Click the Edit button (CTRL+E) on the Object Store Toolbar to enable editing.
-
Drag and drop images that are to be unlinked onto to bin in the Person Information panel.
-
When done, click the Save button (CTRL+S).
To add an image to a person
-
Search for a person using Person Search.
-
Double-click to open the selected person in the Person Information panel.
-
Double-click the eye icon to open the file browser.
-
Browse for and select an image from a local drive or a network drive, and click Open.
-
Fill in image information, and click the Save button (CTRL+S) to return to the Person Information panel.
-
When done, click the Save button (CTRL+S).
See Also