Vizrt 2110 I/O Module User Guide
Version 1.1 | Published May 18, 2021 ©
The Desktop
The Viz 2110 I/O IP default Desktop interface provides very useful remote monitoring options in addition to configuration and control features.
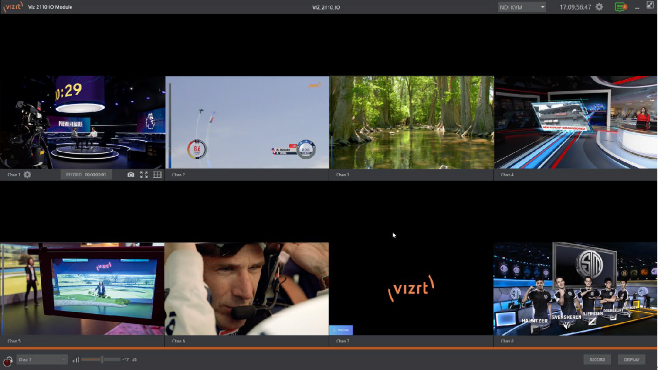
The Desktop interface includes a titlebar running across the top of the screen, and a Dashboard at the bottom. By default, the large middle section of the Desktop shows eight viewports, each displaying one video channel. Each channel’s viewport is labeled in the toolbar beneath.
Note: Some viewport toolbar controls are hidden when not in use, or until you move the mouse pointer over a viewport.
Continue reading for an overview of Viz 2110 I/O IP Desktop features.
2.1.1 CONFIGURE CHANNELS
![]()
Viz 2110 I/O IP allows you to select different audio and video sources for each input or channel via the Configure panel. Click the gear next to the channel label below a viewport to open its Configure panel.
TIP: Alternatively, you can quickly access the Configure Channel pane by double-clicking the viewport.
The tabs shown in a Configuration panel vary according to whether you wish to configure an input (from a SMPTE 2110 source) or an output (sending a SMPTE 2110 stream to a downstream receiver).
Input Tab
Let’s consider configuring an input channel first. An input supplied by a SMTPE 2110 source is automatically converted to an NDI stream. The editable Channel Name under the viewport identifies output the channel to other NDI-enabled systems on the network.
Note: NDI Access Manager, included in NDI Tools (available without charge from https://ndi.tv/tools/), can be used to control access to NDI source and output streams.
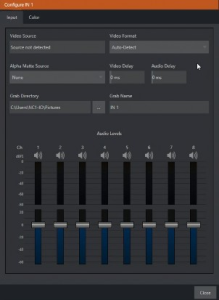
The tabbed Input pane allows you to the video sources for this channel and set its format. The Video Source information display identifies the specific input you have chosen to configure. The nearby Video Format menu allows you to match the input to the format of the incoming SMPTE 2110 video stream.
Tip: Remember that the video standard selections shown in these menus is determined by the Frame Rate setting in the Administration panel’s Genlock options – see Section 1.6.2.
Note: The Alpha Matte Source menu allows you to configure key/fill inputs, where the transparency and fill color information for a 32-bit NDI output with embedded alpha are supplied via two separate SMTPE 2110 inputs (the video format of both sources must match).
A Delay setting is provided for both audio and video sources, allowing precise A/V synchronization where a/v source timing differs.
Capture
This tab is also where you assign the path and filename for captured still images.

The initial Grab Directory is the default Pictures folder on the system, but you can choose to use a network storage volumes or external drive connected to one of the USB ports on your Viz 2110 I/O’s rear panel instead.
Audio Levels
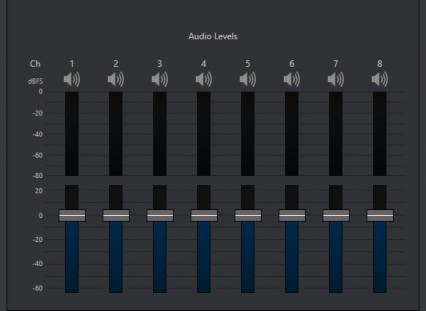
Faders in the Audio Levels section of the Configure Channel > Input tab let you modulate the audio levels for up to eight audio channels incoming from SMPTE 2110. The VU meters above the faders are calibrated in dB FS (Full Scale). Click the Speaker icon above an audio channel to mute the associated audio stream.
If you open the Configure Channel pane for an output, instead, there are settings related to output from the channel to SMPTE 2110.
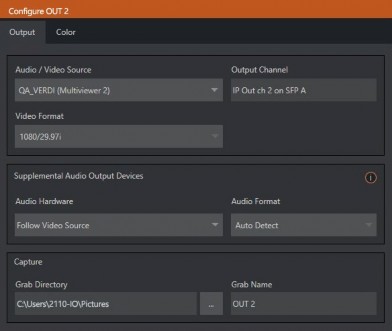
The first choice you will usually make is which audio/video source you wish to output as SMTPE 2110. Often, you use the Audio/Video Source menu to select an NDI A/V stream from your network, but there are other possibilities, too. Selecting a Video Format at right determines the video output format applied.
Clips and IP Sources
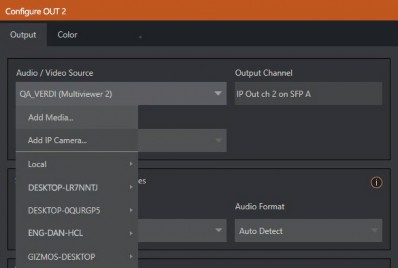
As mentioned in the previous section, NDI® sources (such as a PTZ camera with native NDI network video output) can be directly selected. The Video Source drop down menu also contains an Add Media item to let you select a video file to play. The Add IP Camera menu item requires a little more explanation.
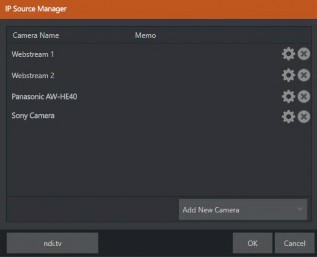
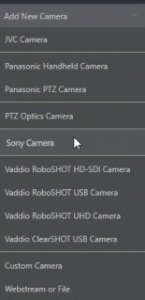
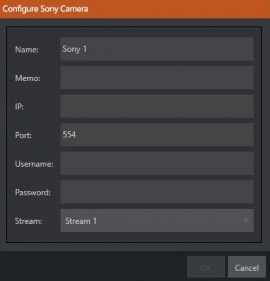
Clicking the Add IP Camera entry opens the IP Source Manager. Adding entries to the list of sources shown in this panel causes corresponding listings to appear in the Local group shown in the Video Source menu of the Configure Channel panel (along with the SMTPE 2110 inputs from SFP A and B). To use, click the Add New Camera menu, select a source type from the dropdown list provided. This opens a dialog suited to the particular source device you wish to add, such as one of the numerous supported PTZ camera brands and models.
Note: After adding an IP source, you must exit and restart the software for the new settings to be applied.
Supplemental Audio Device
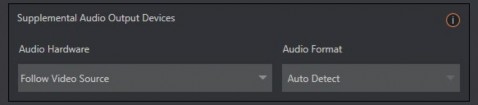
The Supplemental Audio Device allows you to direct audio output to system sound devices as well as well as any supported third part audio devices you may connect (typically by USB). As required, Audio Format options are provided in a menu at right.
Color Tab
Both input and output channels provide a Color tab.
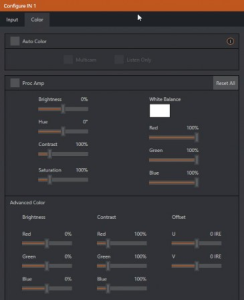
This panel provides an extensive set of tools for adjusting the color characteristics of each video channel. Choosing Auto Color automatically adapts color balance as lighting conditions change over time.
Note: Proc Amp adjustments follow Auto Color processing.
By default, each camera with Auto Color enabled is processed by itself. Enable Multicam to process multiple cameras as a group. To apply Multicam to a source without its own colors being evaluated, check Listen Only. Typically, you enable Listen Only for all Multicam group members except one to make that source the master color reference.
Note: Custom settings in the Color tab trigger a COLOR notification message that appears in the footer below the viewport of the channel ![]() .
.