
Vizrt iNEWS Command Plug-in Administrator Guide
Version 3.0 | Published January 26, 2021 ©
Configuration
This section describes how to successfully configure the integration between your Vizrt graphics workflow and Avid MediaCentral® | Command:
Configuration for iNEWS® and Viz Pilot Plug-in
This chapter contains configuration for Star CG Syntax elements and elements dragged from Viz Pilot (MOS Syntax elements).
Note: The configuration for SYSTEM/MAP is common for both Star CG Syntax and elements dragged from VCPTemplateFiller.
SYSTEM/MOS-MAP
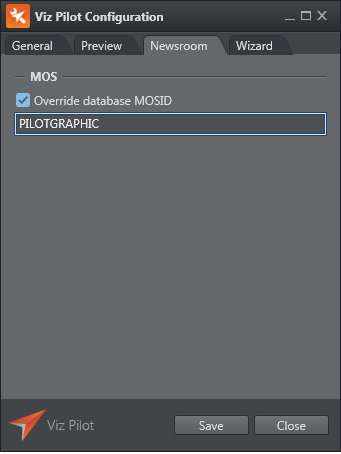
Using Viz Pilot from iNews requires you to configure the device name the elements that are dragged and dropped from this control should be attached to.
Do this by mapping the MOS ID. The MOS ID used is configured using the Viz Pilot configuration. If no MOS ID is specified, it defaults to PILOT.
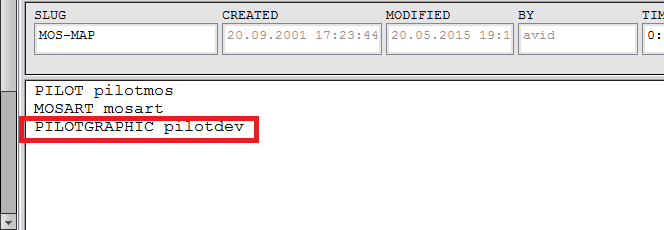
After setting the MOS ID the VCPTemplateFiller uses, mapping from MOS ID to device name is done in iNews SYSTEM/MOS-MAP. The illustration below shows a SYSTEM/MOS-MAP that maps the MOS ID PILOTGRAPHIC to pilotdev.
SYSTEM/MAP
Configuration in SYSTEM/MAP is required to use an iNews rundown with Avid MediaCentral®| Command. In the illustration below we see that for rundown show.cfl.rundown the device named pilotdev is configured, using the default channel for *cg elements.
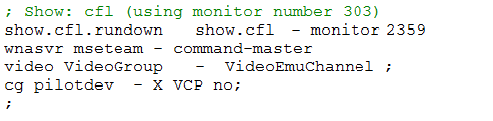
The style in the example is set to VCP. This bases star cg elements entered into this rundown on the templates of the Pilot external ID feed.
To instead base the hand-entered elements of the rundown on templates from a Viz Trio show, set the path of the show, including the shown name.
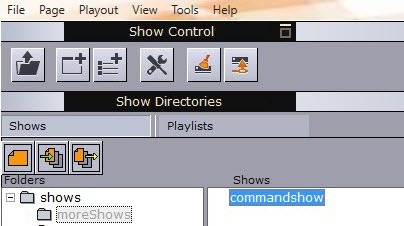
The example shown below shows Viz Trio with the show commandshow in the folder /shows/moreShows/. The style to set in iNews SYSTEM/MAP is then /shows/moreShows/commandshow
In the illustration below we see that for rundown show.cfl.rundown4 the above mentioned show is configured as the ‘template pool’ for star cg syntax elements.

Note: ‘No’ denotes that style check is off. Please refer to the Configuring Style section for details on this setting.
Configuration of Viz Pilot Edge
If Viz Pilot Edge is used as plug-in in the newsroom, then the MOS ID can be set as a query parameter to the URL. This URL is set when installing Show Edge. In the following example, mosid is set to pilotgraphic: http://bgo-msecommanddev:8177/app/pilotedge/PilotEdge.html?mosid=pilotgraphic
Note: The query parameter name mosid is case sensitive and must be written in lowercase letters.
Configuration of the Playout Profile in Viz Pilot and Viz Trio
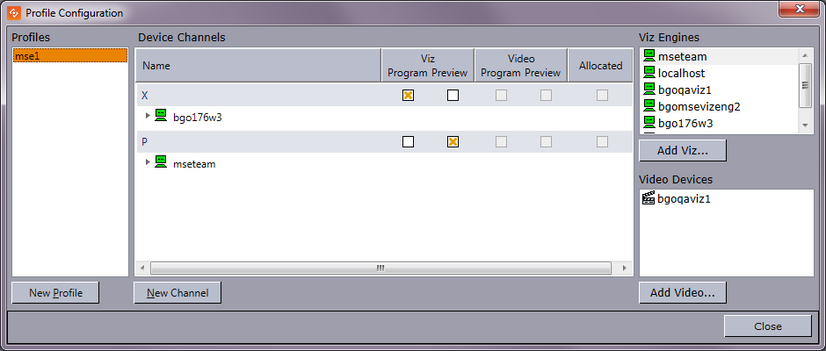
The playout profile you want to use for the Vizrt iNEWS Command Plug-in must be configured in Viz Pilot or Viz Trio. In the illustration below, a profile named mse1 is configured with channel X for program and channel P for preview.
It is possible to configure the system for MultiChannel playout, see Avid MediaCentral® | Command Channel Switching and Playout.
Configuration of the Vizrt iNEWS Command Plug-in
The Vizrt iNEWS Command Plug-in can be configured using the Avid Service Configuration application.
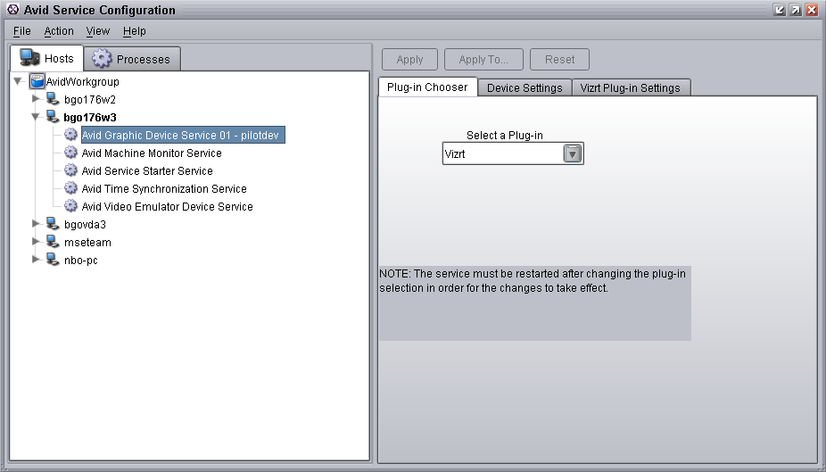
Open Avid Service Configuration > MACHINE NAME (with the graphic service) > Graphic Device Service.
On the Plug-In Chooser page, make sure the plug-in selected is set to Vizrt.
On the Graphic Settings page, choose device profile Vizrt (note that this tab is only available when the graphic device service has been recently installed).
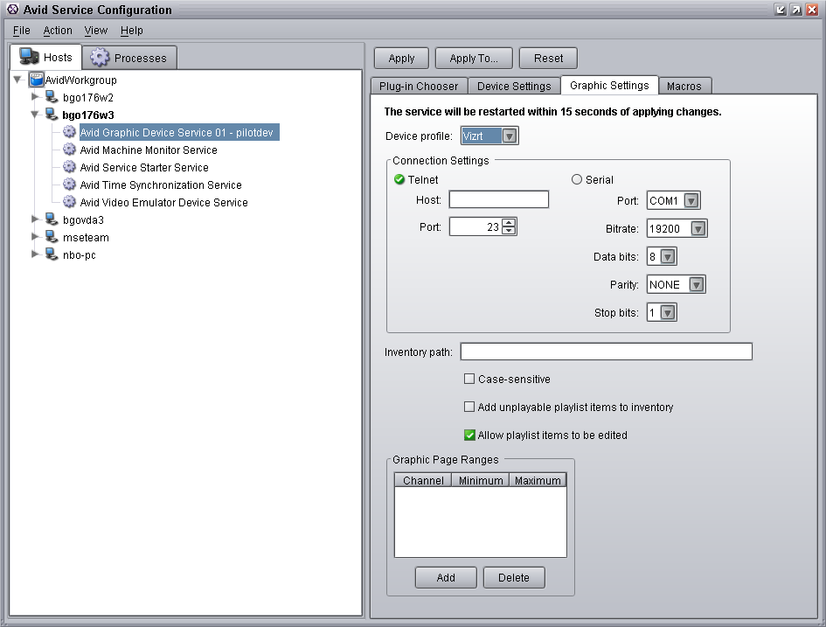
Click Apply. The service/plug-in restarts for the changes to take effect.
Note: If the service does not restart automatically (usually within 15 seconds), open the Avid Workgroup Properties application and restart all services by clicking Stop, and then Start.
Setting the Device Name and Channel Count
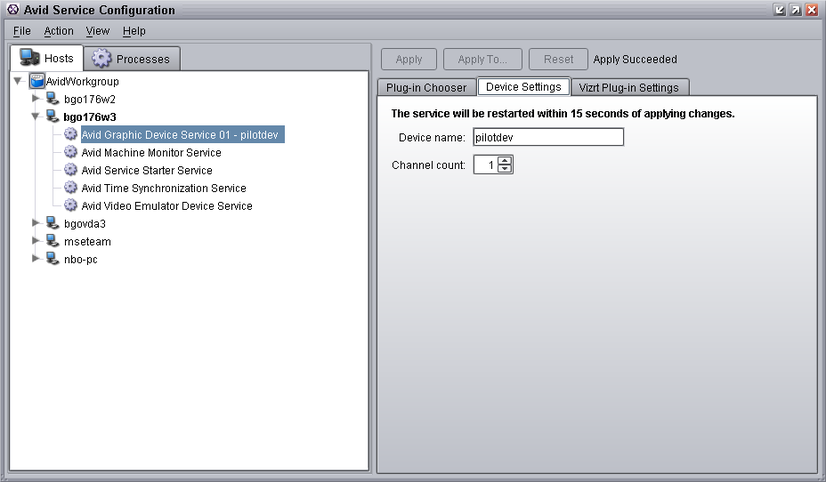
Open the plug-in configuration again (Open Avid Service Configuration > MACHINE NAME (with the graphic service) > Graphic Device Service). Select the Device Settings tab.
Specify the Device Name. The device name is the value we specified in SYSTEM/MOS-MAP and/or SYSTEM/MAP. In this example ’pilotdev’. In Avid Service Configuration the selected graphics device service is also post-fixed with the device name (in this example Avid Graphic Device Service 01 - pilotdev).
Specify the number of channels. This number is the number of program channels.
Click Apply. The service/plug-in restarts for the changes to take effect.
Specifying the Media Sequencer and the Profile
-
Open the plug-in configuration again (Open Avid Service Configuration > MACHINE NAME (with the graphic service) > Graphic Device Service.).
-
Select the Vizrt Plug-in Settings > Connection Settings tab.
-
Specify the URL to the Media Sequencer service document from the Media Sequencer REST interface. This URL is http://HOSTNAME:port/ where the port is 8580 (unless the Media Sequencer has been set up using a port other than the default).
-
Click Look up.
-
Select the profile from the Profile drop-down.
-
Map the channel indices to the correct channel name. The indexing begins on 0. In this example, we specified 1 and only one channel will be available, the channel with index 0. Select X for this channel.
-
Click Apply.
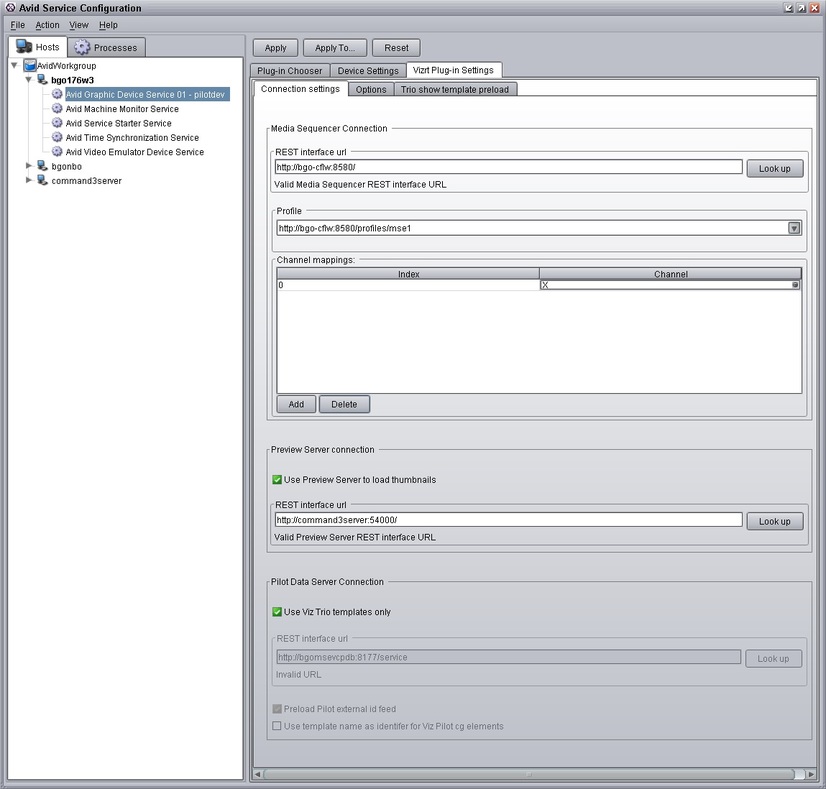
Note: The number of channels in the Channel mappings list must equal the Channel count number specified on the Device Settings tab.
Configuration of Avid MediaCentral® | Command workstation
Avid MediaCentral®| Command must be set up with correct settings.
Configuring Playout Channel
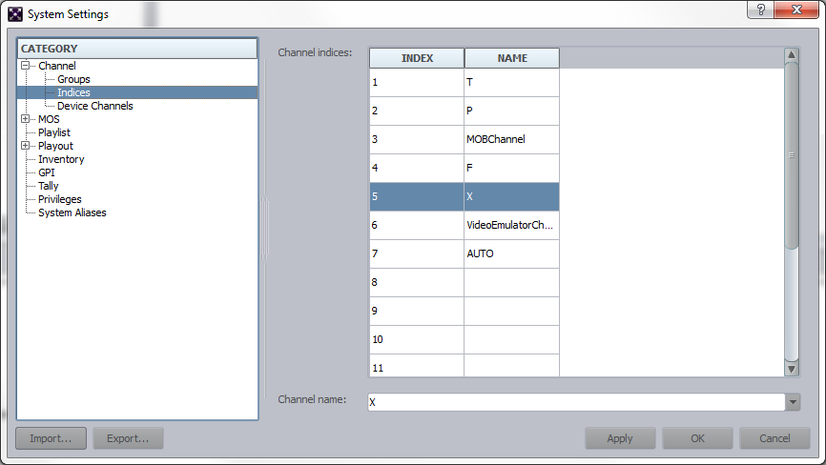
Select Tools > System Settings > Channel > Indices. Add one or more playout channels to this list.
In the illustration below, the playout channel X has the index 5.
Click Apply.
Configuring Device Channel
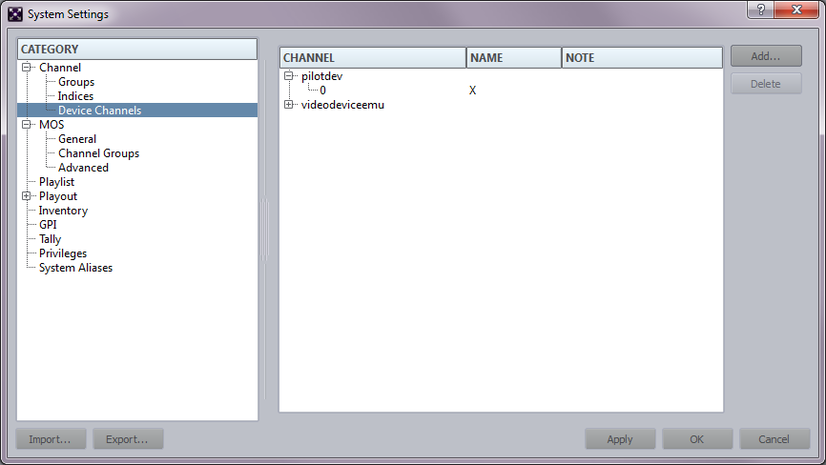
Open Avid MediaCentral®| Command. Select Tools > System Settings > Channel > Device Channels.
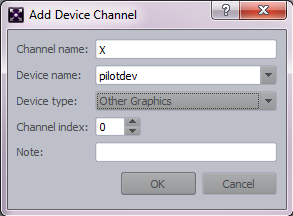
Click the Add button and add the playout channel to the device name. Remember that the device name is the name of the Graphic Device Service (in our example, the device name is pilotdev). Enter the device name (you can write into the drop-down component). The channel we want to add is X. Use Other Graphics as Device type.
Click OK. Click Apply.
If you want to add more channels to the device name, the channel index must be incremented.
The illustration below shows the playout channel X added to device pilotdev on index 0.
Configuring Channel Group
Open Avid MediaCentral®| Command. Select System Settings > Channel > Groups, and click the Add button. Provide a name for the channel group.
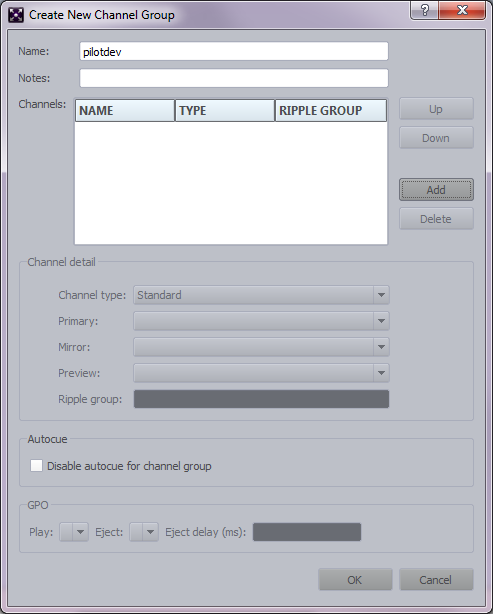
Click the Add button for adding a playout channel to the channel group. In the illustration below the channel X (on device pilotdev- using index 0) is selected.

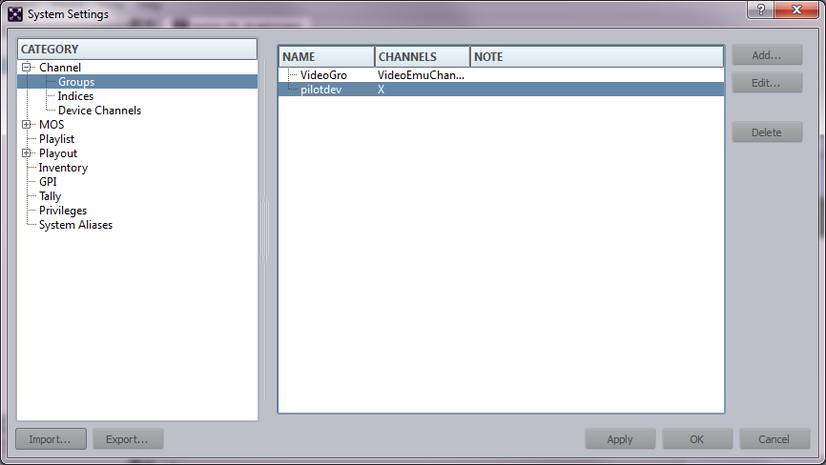
Click OK. Then click the Apply button in the System Settings window. The illustration below shows that the group pilotdev is added and has one channel named X.
See Also