Viz World User Guide
Version 22.0 | Published December 15, 2022 ©
Photoshop Plug-in
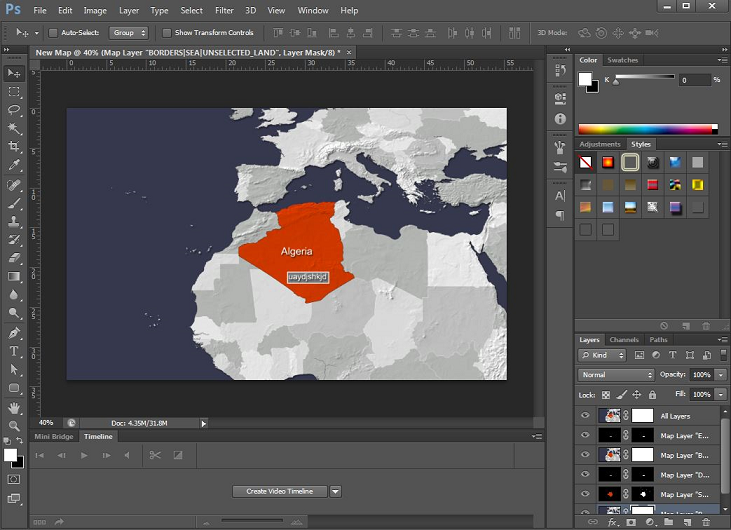
The Viz World Photoshop plug-in is used to integrate Viz World and Adobe Photoshop files. Maps created with the Photoshop plug-in creates a new file with separate layers for every feature and detail on the map.
Note: The Photoshop plug-in must be installed separately, see Installing Photoshop Plug-in.

This section contains the following topics:
Working with the Photoshop Plug-in
Once the plug-in is installed, you are able to open Map Editor Classic from within Photoshop.
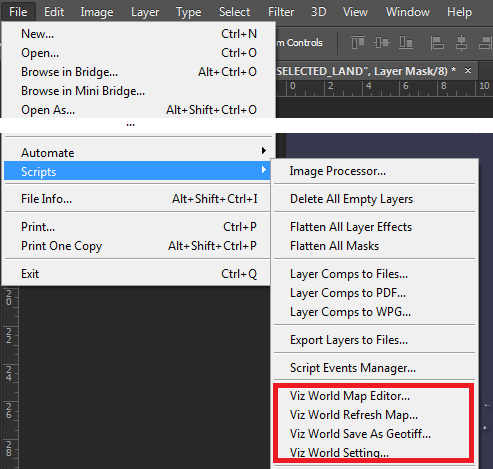
In Photoshop, go to File > Scripts and you see the Viz World options.

The options that the plug-in adds, are:
-
Viz World Map Editor
-
Opens Map Editor Classic.
-
Select a TPL, style, and so on, then browse and add details to your map.
-
After making your selections and clicking OK, a new Photoshop file is created with all the layers of the different features and details on the selected map.
-
-
Viz World Refresh Map
-
Opens Map Editor Classic with the selections and map from the previously generated Photoshop file.
-
Modify your selection, add details to the map, and so on.
-
After making your selections and modifications and clicking OK the changes are applied to the existing Photoshop file instead of creating a new file.
-
-
Viz World Save As Geotiff: Save the file as a GeoTIFF file (a TIFF file which includes georeferencing information).
-
Viz World Setting: Opens the settings window.
Photoshop Layers
The Photoshop plug-in creates five layers in your Photoshop file. The following two layers are always created:
-
All Layers (a raster image of the final selected map).
-
Base Map (a raster image of the land and sea without any selections).
The remaining three layers can be configured in the Viz World Settings in Photoshop window.
Viz World Settings in Photoshop
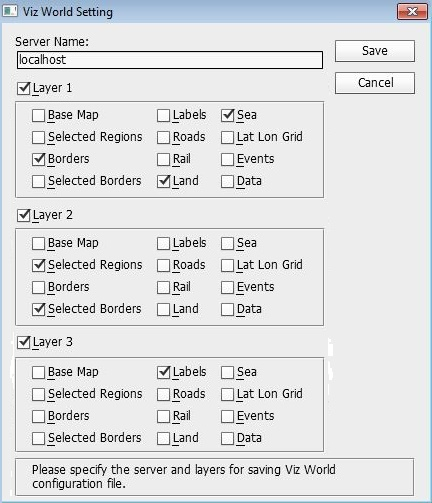
To open the Viz World Settings, go to File > Scripts > Viz World Setting.

-
Server Name: Viz World Server Host name.
-
Layer 1/2/3: The Photoshop plug-in creates five Photoshop Layers. Three of these layers can be configured here by selecting the features that should be included.