The opening view of the Template Editor provides access to all tools needed to browse, edit, and manage Mosart templates. Key operations like template selection, command editing, and property configuration are gathered in one workspace.
Each panel serves a specific phase of your template editing workflow. For example:
- searching and managing templates
- editing commands
- configuring properties.
The layout is intended to offer a visual and intuitive experience, with tools like timeline visualization, structured command organization and real-time property editing.
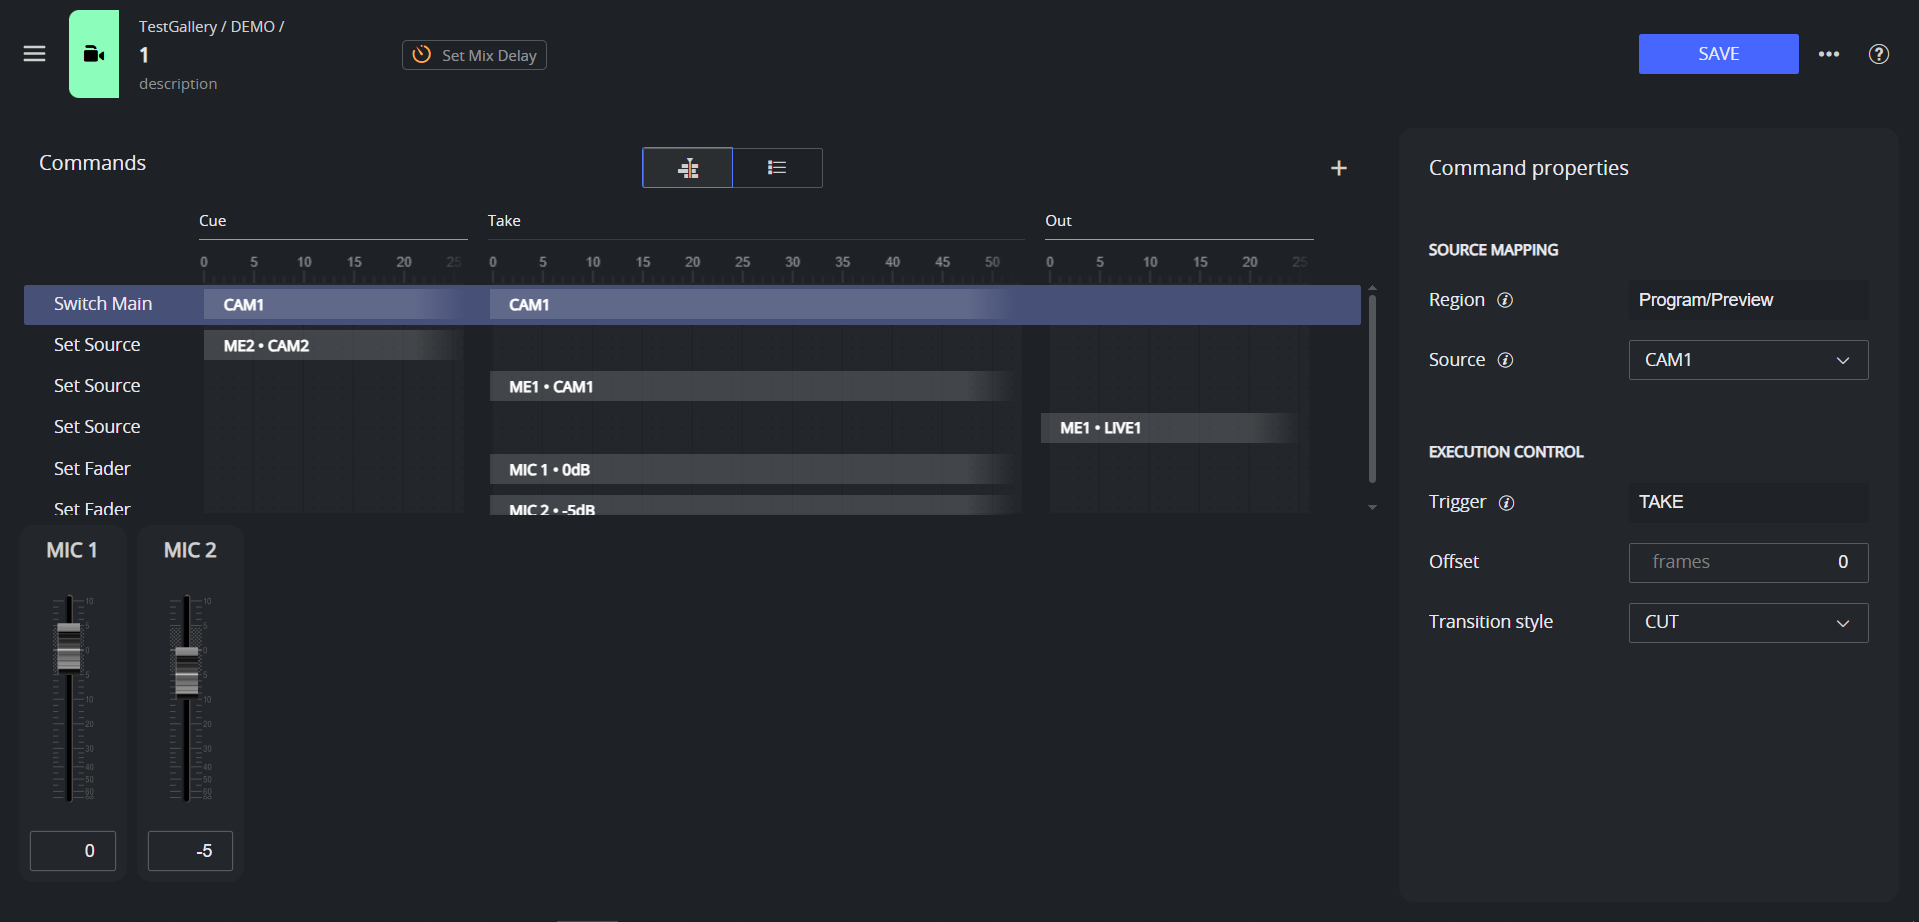
Overview of Template Editor
Each numbered panel is described below.
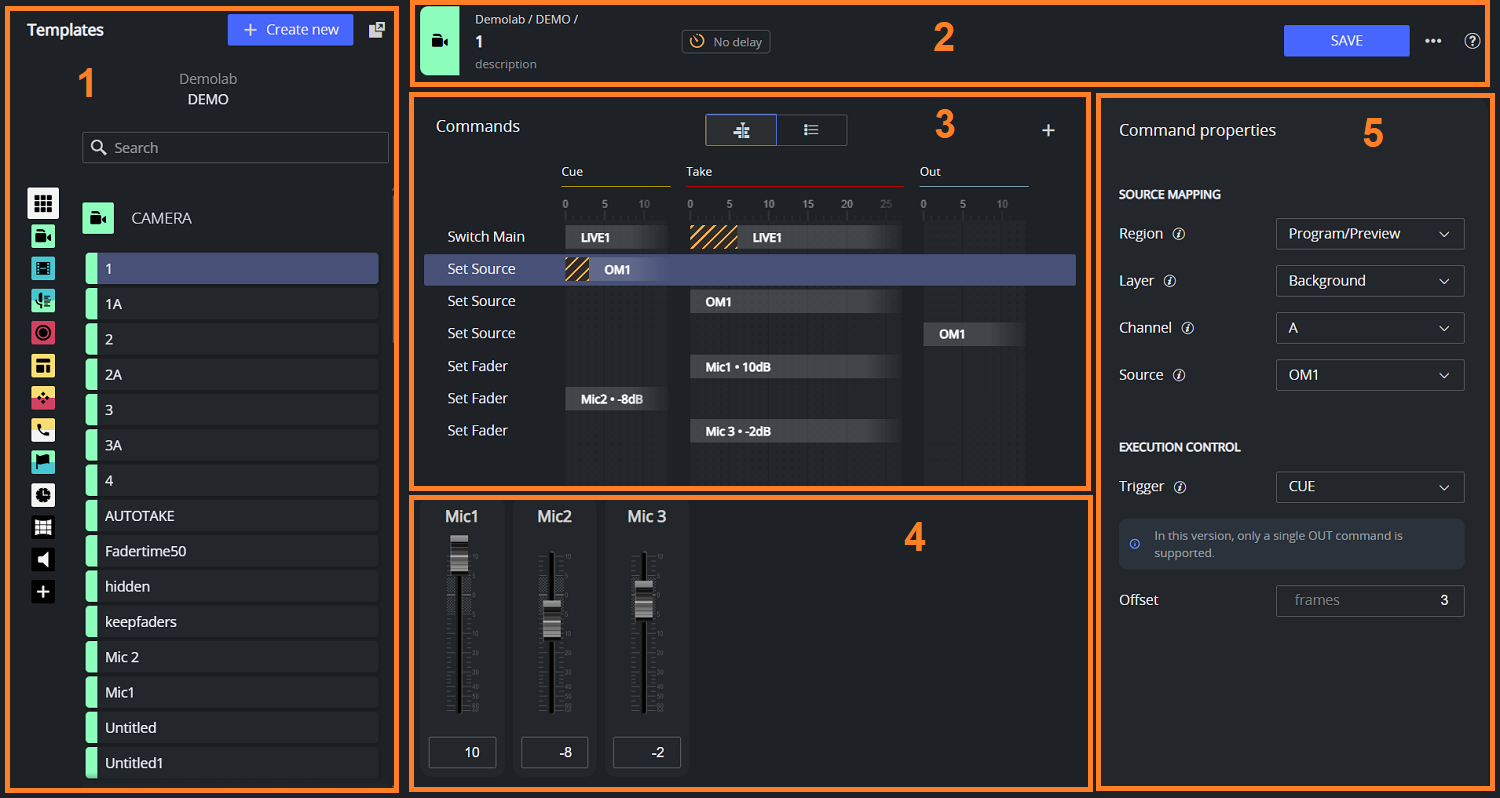
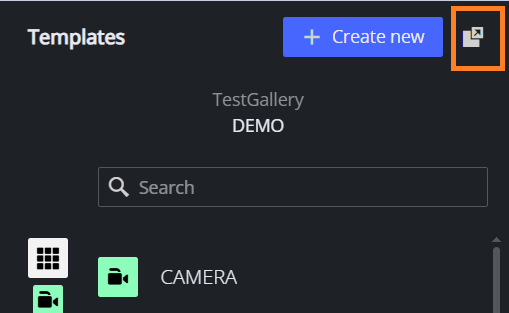
(1) Template Search and Creation
Searching for Templates
The Template Editor provides a fast and responsive search experience similar to what you may be familiar with in the Mosart NRCS Plugin.
Select a Template set from the drop-down selector, to view its templates.
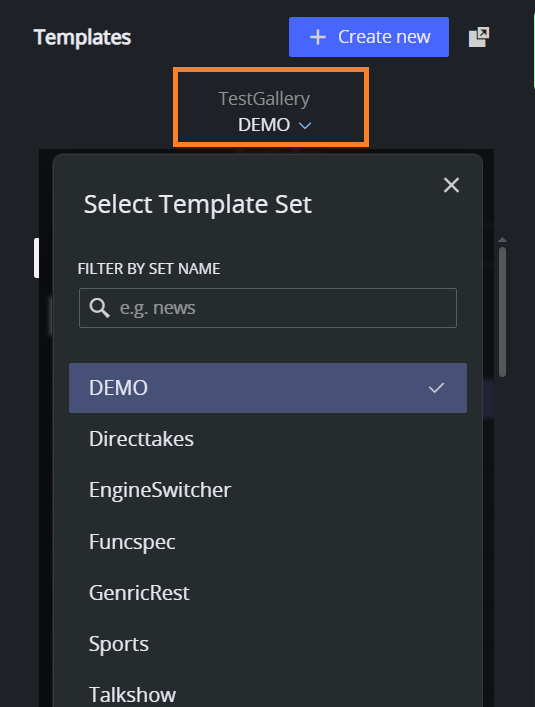
Use FILTER BY SET NAME to locate a template set.
Having selected a template set, type in the Search box to locate templates by name or variant.
As you type, the list will automatically filter and highlight matching results.Templates are grouped by type, such as CAMERA, PACKAGE, or GRAPHIC, making browsing straightforward even without searching.
When you select a template from the list, its implementation is instantly loaded and displayed in the Commands and Command properties panels on the right. This allows you to preview its configured commands, transitions, and audio fader levels at a glance—without needing to open each one manually.
Use the Arrow keys on your keyboard to quickly scroll through the templates within your selected set. As you move through them, each template’s configuration is shown instantly, offering a fast and efficient way to review templates in sequence.
Info: In this version, only file-based templates are supported. This means you won’t need to select a gallery, as only one template source (the file) is available. Support for gallery-based template databases will be introduced in a future release.
Creating a New Template
To create a new template
Click the + Create new button at the top of the template list.
In the dialog:
Title – Enter a name for your new template.
Type – Choose a template type from the drop-down menu (for example, CAMERA, PACKAGE).
Description (optional) – Optionally, provide a short description for clarity.
When creating a new template, the combination of template Type and variant name (Title) must be unique within the selected template set.
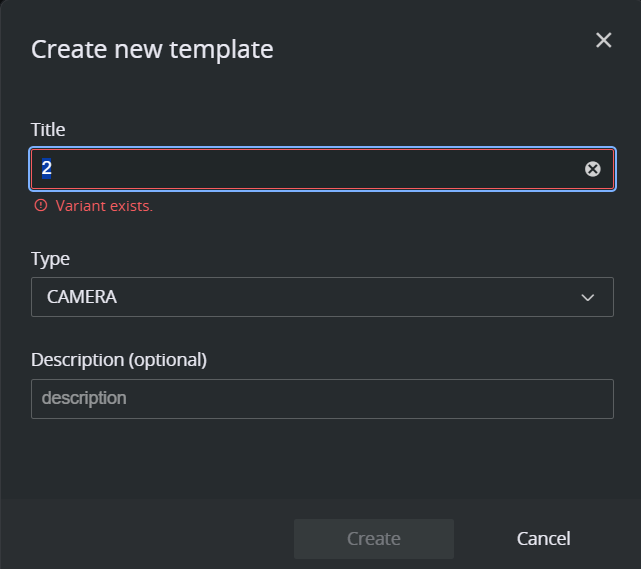
Click Create to add the new template.
It is added to the selected set and immediately opened in the main editor view.Once created, you can begin adding commands, adjusting their properties, and configuring timing in the visual timeline editor.
Collapsing the Search panel
Once you’ve found a template to view or edit, or created a new one, you can collapse the Templates panel using the Collapse icon in its top-right corner.
(You may need to move your mouse to hide the panel).
Collapsing the panel provides more workspace and visibility for editing the template body and viewing command details. This is especially useful when working with complex templates or multiple commands, as it allows you to focus on the command timeline and property panels without distraction.
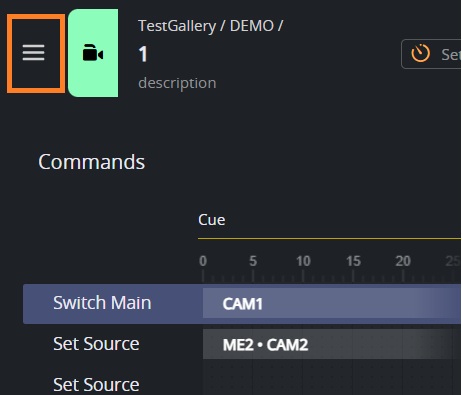
You can re-expand the Templates panel at any time by clicking the menu icon in the top-left corner, allowing you to browse template sets or search for additional templates without leaving the current view.
(2) Template Title Bar
The header section of Template Editor displays key information and actions related to the currently selected template. This panel provides access to template metadata, delay configuration, and management tools.
What you’ll find in this section:
Template Information
Displays the selected template's name, variant, description and location. This makes it easy to keep track of what you're editing, especially when navigating across multiple templates.Mix Delay Configuration
Clicking Set Mix Delay opens a dialog where you can apply a frame-based delay to specific command types (for example, main source switches, region source switches, audio fades). This helps with fine-tuning on-air action timings.
If Mix Delay is enabled, individual command offsets will be ignored.
Template Actions – Save, Edit, Delete
On the right side of the header:The Save button stores any changes made to the template.
The Three-dot menu opens options to Edit or Delete the template.
Edit opens a dialog where you can rename the template, change its type, update its description, or modify its Mix Delay value.
Keyboard Shortcuts and About
The Question mark icon (?) opens a drop-down menu with:Documentation
Keyboard Shortcuts – view or memorize shortcuts to speed up common actions like creating, editing, and navigating templates.
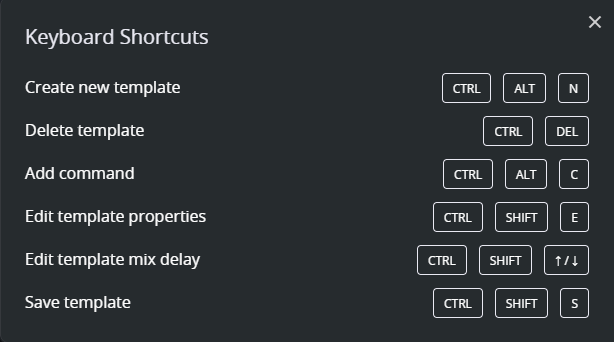
About Dialog – includes product version, date, and a link to third-party license information used by the Template Editor.
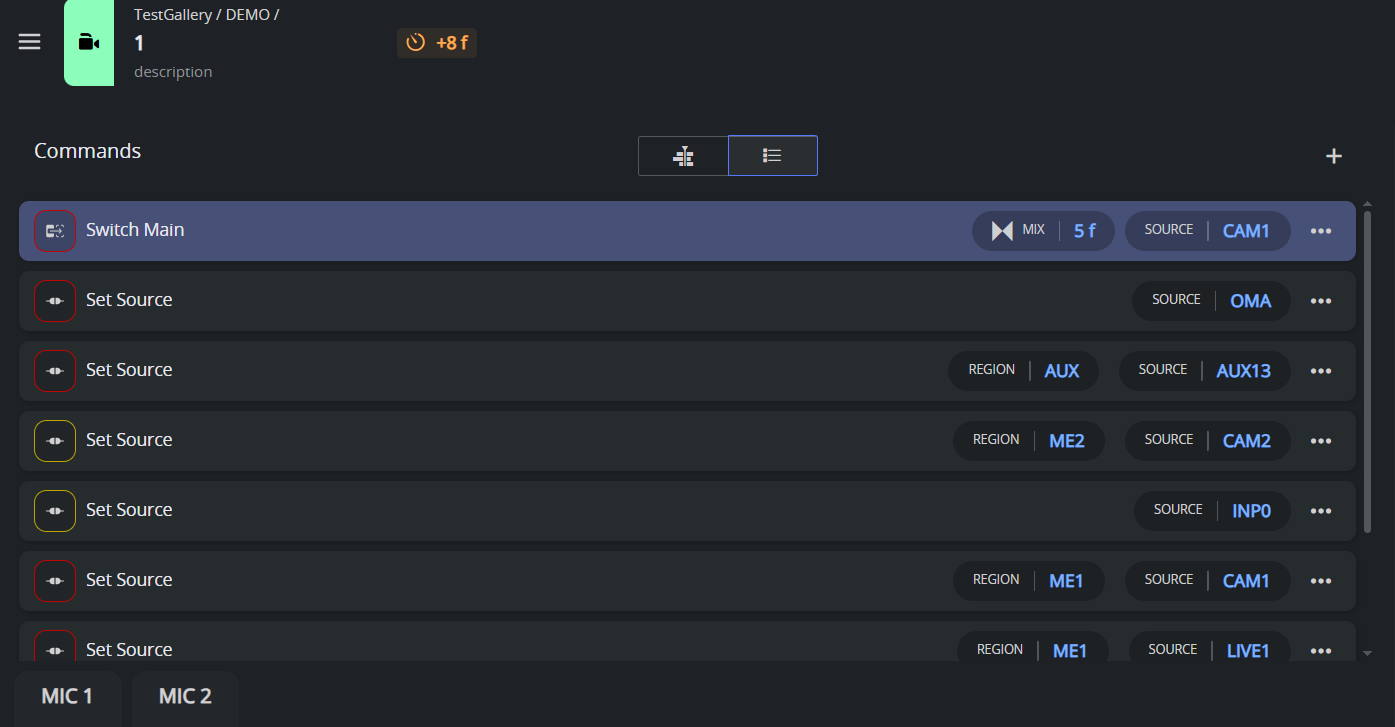
(3) Commands List and Timeline View
The Commands panel presents two complementary methods for exploring and managing commands in a template.
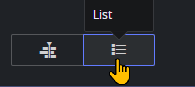
Select Timeline or List view to switch between views.
Both views are interactive and synced with the Command properties panel.
Info: Commands are currently grouped by device category (for example, switcher commands, audio mixer commands) and not by execution sequence.
This reflects the structural grouping within a template, but not necessarily the order that Viz Mosart executes them at runtime.
Additional sorting options may be introduced in future versions.
Timeline View
A visual representation that shows when each command is executed during the Cue, Take, or Out phases. It provides an intuitive overview of execution timing, offset frames, and transition lengths.
In addition, this view helps illustrate multi-phase commands, such as Switch Main or Switch Region—that trigger actions when the template is cued and when it is taken on-air. These distinct phases are easily identified on the timeline by their placement across Cue, Take, or Out segments.
List View
A compact format that displays the same commands and their core properties in a simplified linear layout.
This is useful for quick review or editing when precise timing visualization is not required.
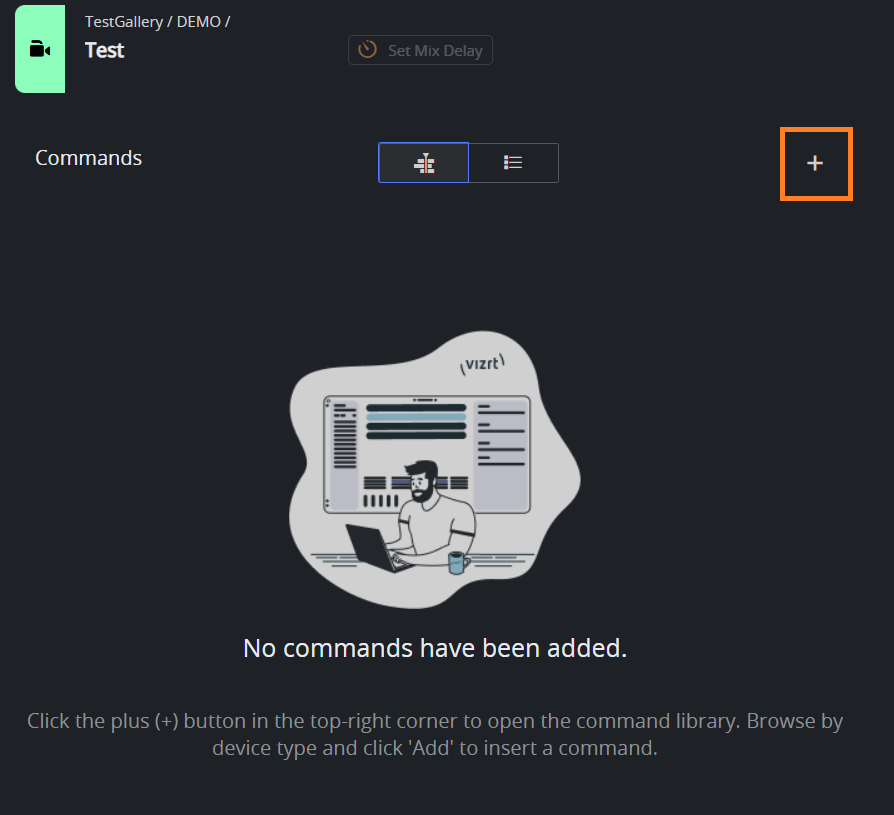
Adding Commands to a Template
To add a new command
Click the Plus button (+) located at the top-right corner of the Commands view.
This opens a dialog that lets you browse available device types (for example, Switcher, Audio Mixer) and choose specific commands to insert into the template.
Each command entry in the dialog provides a short description.
Click Show more for additional information.
Select the desired command and click Add to include it in the active template.
You can continue editing the newly added command in the Command properties panel, immediately after adding it.
(4) Audio Fader Panel
The Audio Fader panel provides a quick overview of all Set Fader commands included in the template.
Displayed for each configured audio channel are:
The source name (for example, MIC 1, MIC 2)
The fader level, in dB.
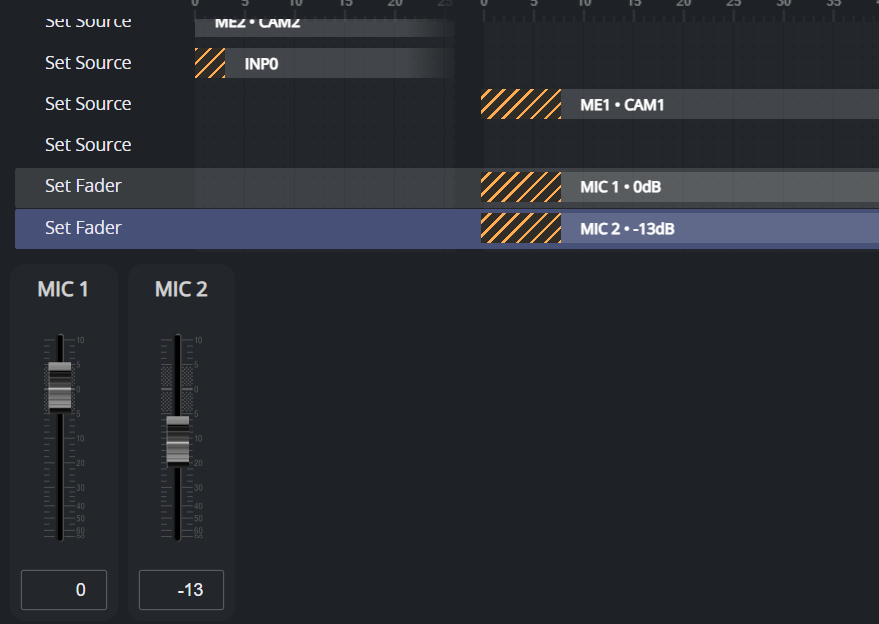
You can adjust the audio level directly by dragging the fader slider up or down. This allows quick tuning without navigating to the Command properties panel.
To modify other command parameters like Trigger type, select the corresponding audio command from the Command list or Timeline view.
(5) Command Properties
The Command Properties panel displays configurable options for the selected command. Properties vary depending on the command type and device type (for example, a video switcher or an audio mixer).