- Creating a New Template
- Using a Template
- Adding Templates to a Master Scene
- Using Templates on a Scene Containing Multiple Top Level Control Objects
- MSE (Transition Logic) Templates
- Unreal Templates
- Flowics
- DataMap Explorer
- Standalone Templates on REST Service
- Importing Director Templates (Experimental)
Viz Arc lets you create custom templates for both Viz Engine scenes and Unreal Engine levels. The templates are fully customizable and a script can be used for even more flexibility, including data integration and custom logic.
Note: Before creating a new template, you must ensure that Graphic Hub has the required Add-Ons to store the templates, see Configuring Graphic Hub.
Creating a New Template
Under the Tools section, select DESIGN.

Next, click Create New Template.

A browser window appears where you can select either a Viz or an Unreal scene:
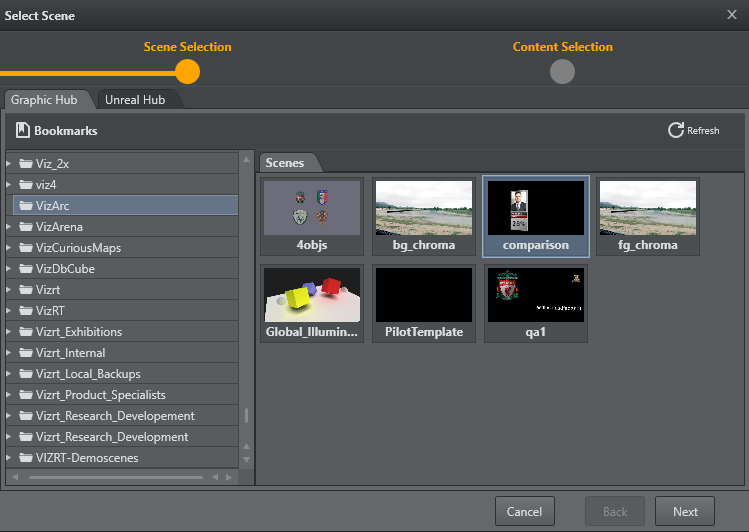
Click Next to view Control Objects found within the scene. Select the Control Objects for which a default UI is to be created:
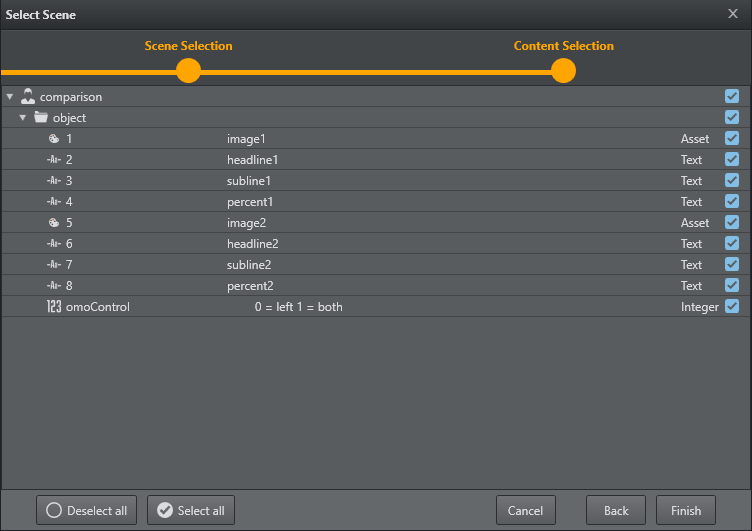
Click Finish. A default UI based on the selected Control Objects has now been created:
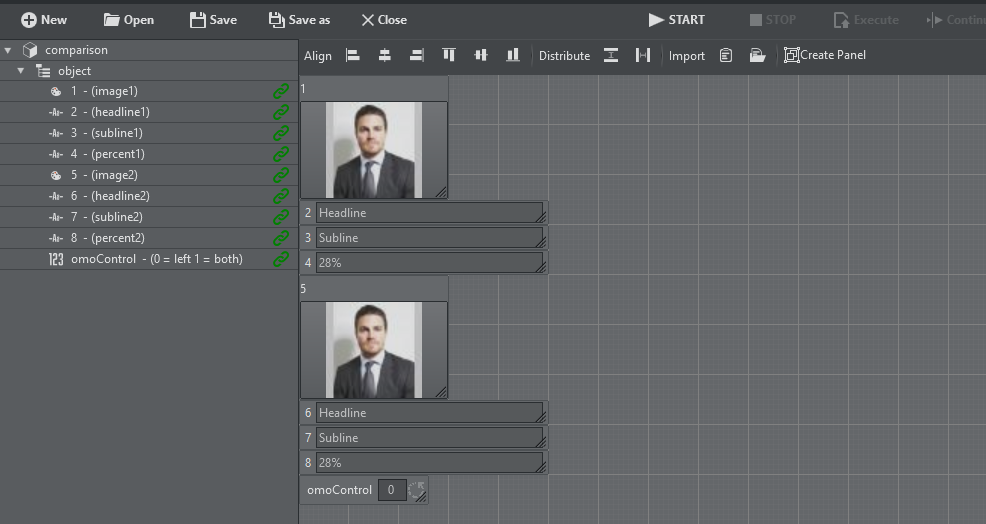
The left hand side contains a list of the Control Objects' ID's along with their description. A green link icon indicates whether the Control Object is linked to a UI element.
A property panel on the right shows editable properties of the selected UI element, or, in case of multi-selection, the properties that are common to the selection. A sample of a text parameter property:
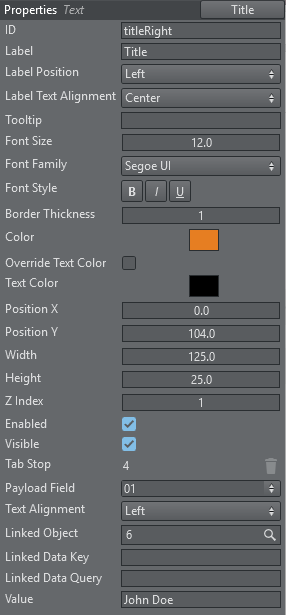
ID: The unique internal ID of the parameter that can be used in the script code to reference the parameter.
Label: The label of the parameter.
Label Position: Where the label sits (Left / Top / Right / Bottom (default Left)), for Text parameters only.
Label Text Alignment: Alignment of the label text, for Text parameter only.
ToolTip: An optional ToolTip.
Font Size: The size of the font used in the textual parts of the component.
Font Family: The font used in the textual parts of the component.
Font Style: Bold / Italic / Underline (combinable).
Border Thickness: The border thickness of the parameter.
Color: The background color of the parameter.
Override Text Color: When off, text color is derived automatically from the field color; when on, use Text Color.
Text Color: Explicit text color (used only when Override Text Color is on).
Position X: The horizontal pixel position of the upper left corner of the parameter.
Position Y: The vertical pixel position of the upper left corner of the parameter.
Width: The width of the parameter.
Height: The height of the parameter.
Z Index: The z sort index of the parameter. In case of overlap with other parameters this value can determine whether the parameter is in front or behind the overlapping component.
Enabled: Whether the parameter is usable for user interaction.
Visible: Whether the parameter is visible to the user.
Tab Stop: The order of the tab-stop.
Payload Field: Determines which MSE payload field feeds this parameter (independent of the control-object it is linked to). Useful when using MSE mapped Viz Trio playlists.
Linked Object: In case the parameter is linked to a ControlObject ID or a Blueprint variable.
Linked Data Key: The name of the DataMap key (see DataMap Linking).
Linked Data Query: The query for the DataMap value (see DataMap Linking). Can be empty for simple data mapping.
Value: The actual value of the parameter.
Finding a Field (Parameter Search)
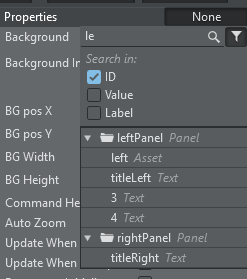
Templates with many fields (especially combo templates or large forms) can be hard to navigate on the canvas. The template editor has a parameter search that lets you jump straight to a field by typing.
Type in the Search… box and a dropdown list of matching parameters appears. The list is a tree, so fields inside panels and tabs are shown in their proper place, with the path expanded down to each match. Matching is case-insensitive and matches any field whose text contains what you typed.
Choosing What to Search
Click the filter button next to the search box to open the Search in: options. The search is additive: A field matches when your text is found in any of the enabled fields:
ID: The parameter’s identifier.
Value: The parameter’s current value.
Label: The label shown next to the field.
These choices are remembered between sessions. If you turn all three off, the search falls back to searching by ID so it never goes dead.
Keyboard
Type to filter the list (updates as you pause typing).
DOWN ARROW moves focus from the search box into the list; use the arrow keys to move through results.
ENTER jumps to the selected field. If your search has narrowed the list to a single field, ENTER jumps to it directly.
ESC closes the search.
Click a result to jump to it.
Selecting a result selects that field on the design canvas and brings it into view, so you can immediately edit its properties.
Using a Template
Templates are available in the action panel.
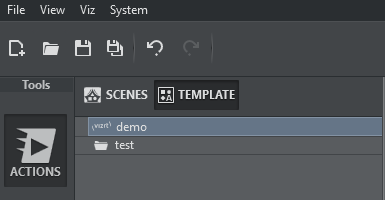
The list of templates can be refreshed by right-clicking on the template list canvas and selecting Refresh from the context menu.
To create an instance of a template, drag and drop it to the action canvas.
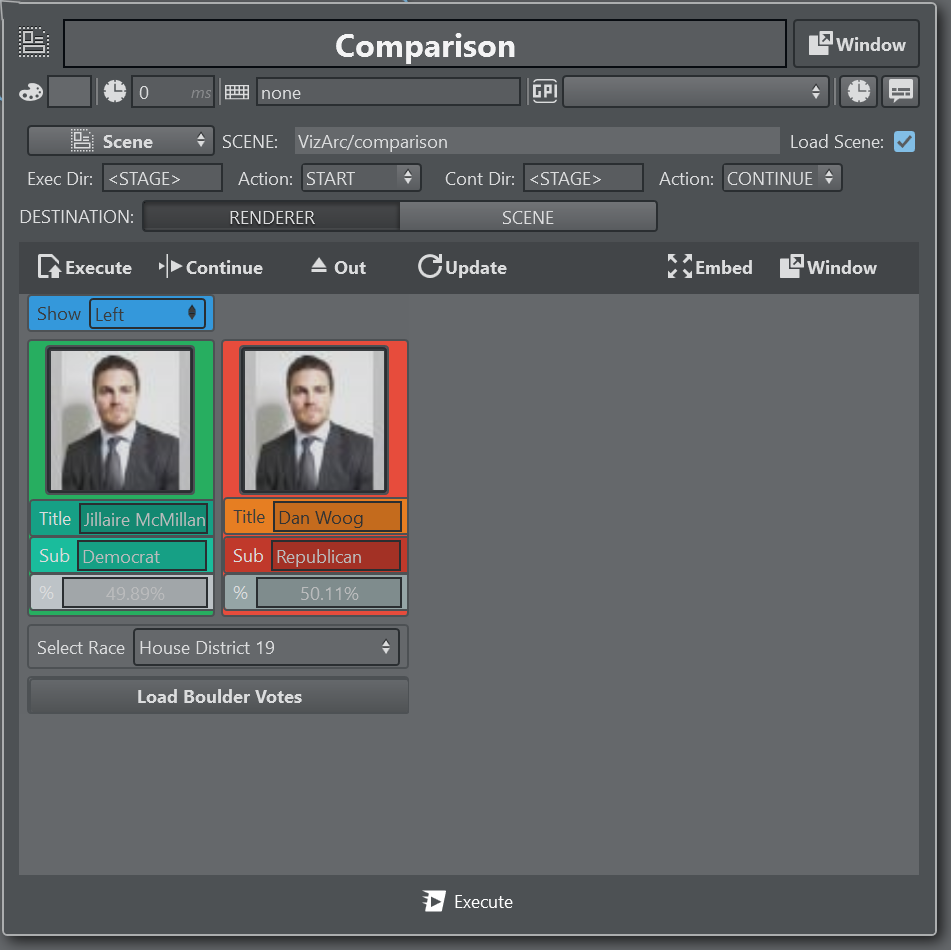
For Viz Engine based templates, you can control to a certain extent the behavior of what happens on Execute and Continue. When executing the template, it loads the specified scene (by default the scene on which the template was based on). The scene is only loaded when the Load Scene check box is checked.

The Exec Dir is the name of the directory to be triggered on execute. Use <STAGE> to animate the entire stage. By default START is used to start the animation, but it can be changed to anything else available in the drop down list or a custom string (for example, CONTINUE or as a customized string to animate between two keyframes you cut, like GOTO $stopA $stopB). The same logic applies to the Cont Dir text input and the respective Action text field for when the template’s Continue is triggered.
The template action can be opened in the same way as all other actions in a popup window. It can detached as a window that always stays on top, or embedded into the action canvas using the Embed or Window buttons  .
.
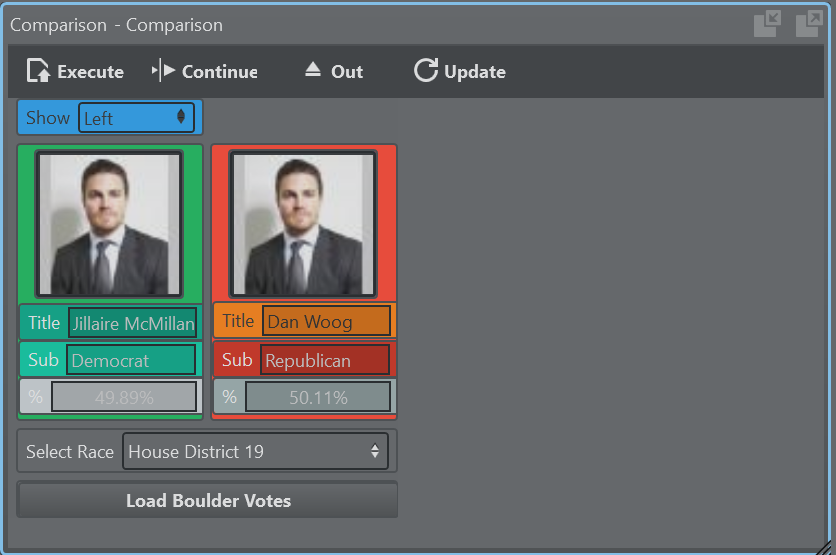
Template action as an embedded window is shown above. The embedded window can be resized by percentage or by using the resize grip in the bottom right corner of the action.
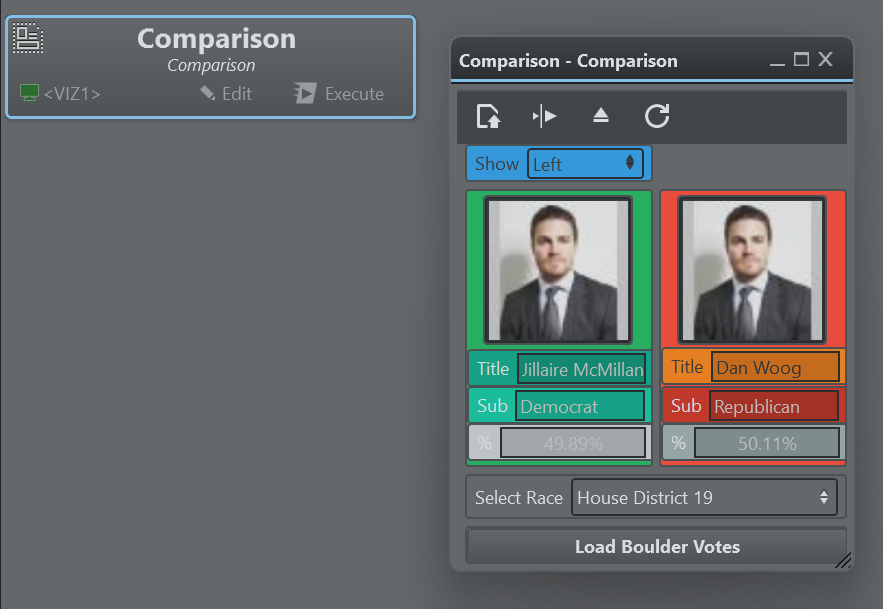
Template action as a detached window is shown above.
When Auto Zoom is enabled, you can zoom in and out of each template action using the shortcuts CTRL + to increase size, CTRL - to reduce size, and CTRL + 0 to restore the original size.
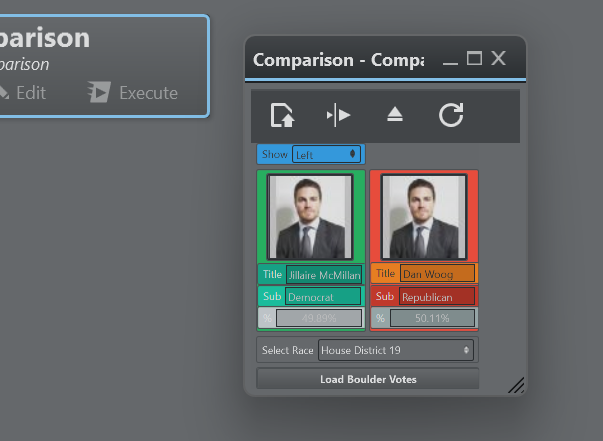
A zoomed out version of a template action window is shown above.
Opening a Template in Window Mode
To open a template in window mode directly, hold CTRL and click the Edit button on the template action. This skips the inline pop-up and opens the template's controls in a resizable window instead.
Note: Window mode is ideal for operators who want a template's fields permanently available on a second monitor, or who need more room than the inline pop-up offers.
Global Template Properties
When creating or modifying a template and when in the UI editing mode, click on the background canvas to access a template's global properties:
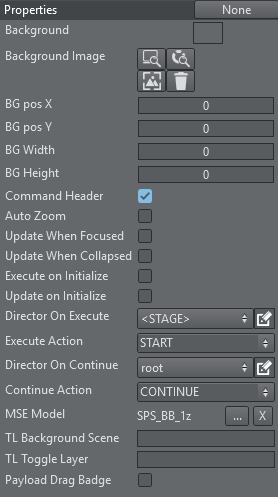
Background: Sets a default background color. When dragging the template onto the action canvas, the action color is the background color.
Background Image: Lets you choose a background image for the template either from a local file system, the GH or the Media Service. The snap button grabs the current frame of the editing Engine.
BG pos X: The horizontal pixel position of the background image.
BG pos Y: The vertical pixel position of the background image.
BG Width: The pixel width of the background image.
BG Height: The pixel height of the background image.
Command Header: Whether the template displays the default command header (Execute, Continue, Update, Out).
Auto Zoom: When enabled, the template UI resizes in window and embedded mode according to the window size or the embedded space.
Update When Focused: When enabled, the template receives callbacks only when the template is selected, has focus, and is opened in either embedded or window mode. Relevant callbacks are: OnTimer, OnStreamDeckKey, OnDataMapValueChanged. When disabled, the template receives those callbacks when instantiated on the action canvas in any form (embedded, windowed or closed and without being explicitly selected).
Update When Collapsed: When enabled, the template can receive callbacks when the template is collapsed as action button. Relevant callbacks are: OnTimer, OnStreamDeckKey, OnDataMapValueChanged. When used in combination with the flag Update When Focused unchecked, the template always receives the relevant callbacks, when not selected and collapsed to a standard action button.
Execute on Initialize: Executes the template when the global Initialize button is triggered.
Update on Initialize: Updates the template when the global initialize button is triggered.
Director On Execute: This dropdown menu contains the list of directors of the scene. Select a director that should be triggered when executing the template. By default the entire Stage is animated when <STAGE> is selected.
Execute Action: The type of director command to call when executing the template. By default it is START but can be changed by either selecting from the predefined dropdown values o by entering a specific command.
Director On Continue: This dropdown menu contains the list of directors of the scene. Select a director that should be triggered when continuing the template. By default the entire Stage is animated when <STAGE> is selected.
Continue Action: The type of director command to call when executing the template. By default it is CONTINUE but can be changed by either selecting from the predefined dropdown values o by entering a specific command.
MSE Model: The MSE model this template maps to. This can be used to execute the action through the MSE.
TL Background Scene: The name of the TL background scene.
TL Toggle Layer: The name of the TL layer associated to the template.
Payload Drag Badge: Shows the draggable payload badge on the template.
Template Controls

Execute
A template action can be triggered using the Execute button above the template or through the system keyboard shortcut Execute Selection. When the action is collapsed, the regular Execute button on the action does the triggering. When executing, the scene that is associated with the template is loaded, the Control Objects are being updated and the stage is being played. In case an engine of the associated channel has a Concept configured, the scene in that concept is loaded.
Continue
The Continue button or the Continue Selection keyboard shortcut sends a continue command to the scene stage. When the action is collapsed, the Execute button executes a Continue when clicked with the right mouse button.
Out
The Out button or the Out Selection keyboard shortcut removes the scene associated to the template from the renderer, thereby causing a hard out.
Update
The Update button or the Update Selection keyboard shortcut sends the currently set Control Objects to the renderer and update the values accordingly. This can be useful for updating live data while a scene is on-air.
Info: The system Execute Selection, Continue Selection, Out Selection and Update Selection shortcuts only work when a single action is selected.
Adding Templates to a Master Scene
By default, a template action is triggering a stand-alone scene and is thus useful for simple lower third graphics, tables etc. When editing the template action, it's possible to toggle the destination of the template's action to a container path of another scene.

The container path can be entered manually or can be obtained from the scene tree by right clicking the desired container and selecting Copy full path to clipboard.
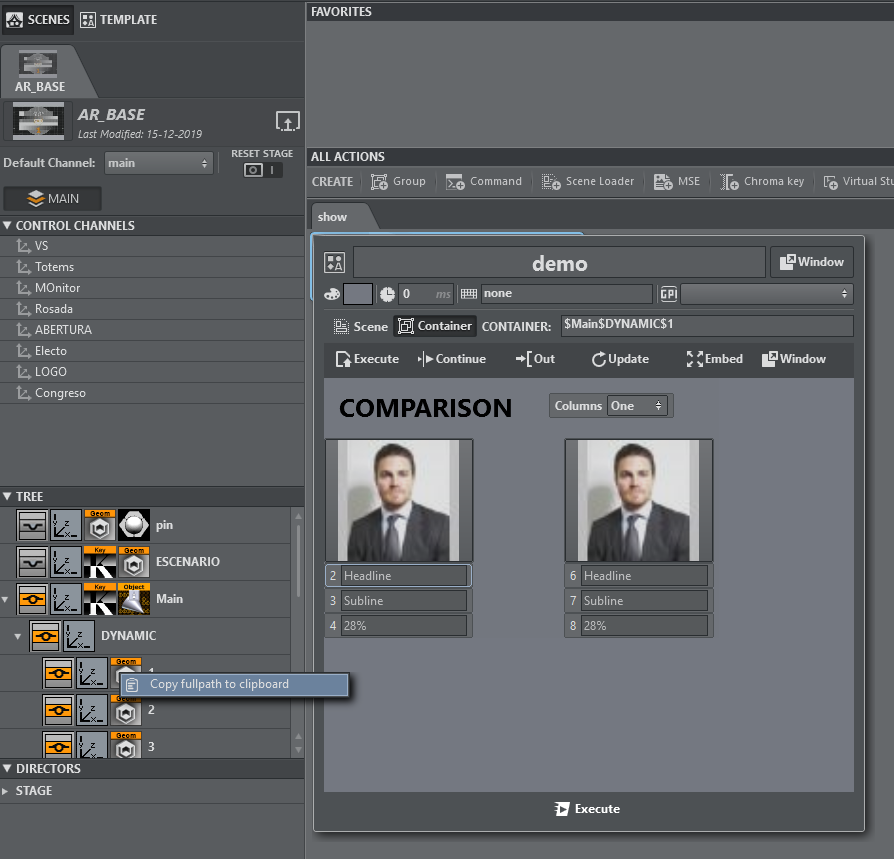
Executing those actions results in the objectified object being loaded into the destination container path and the respective Control Objects being updated.
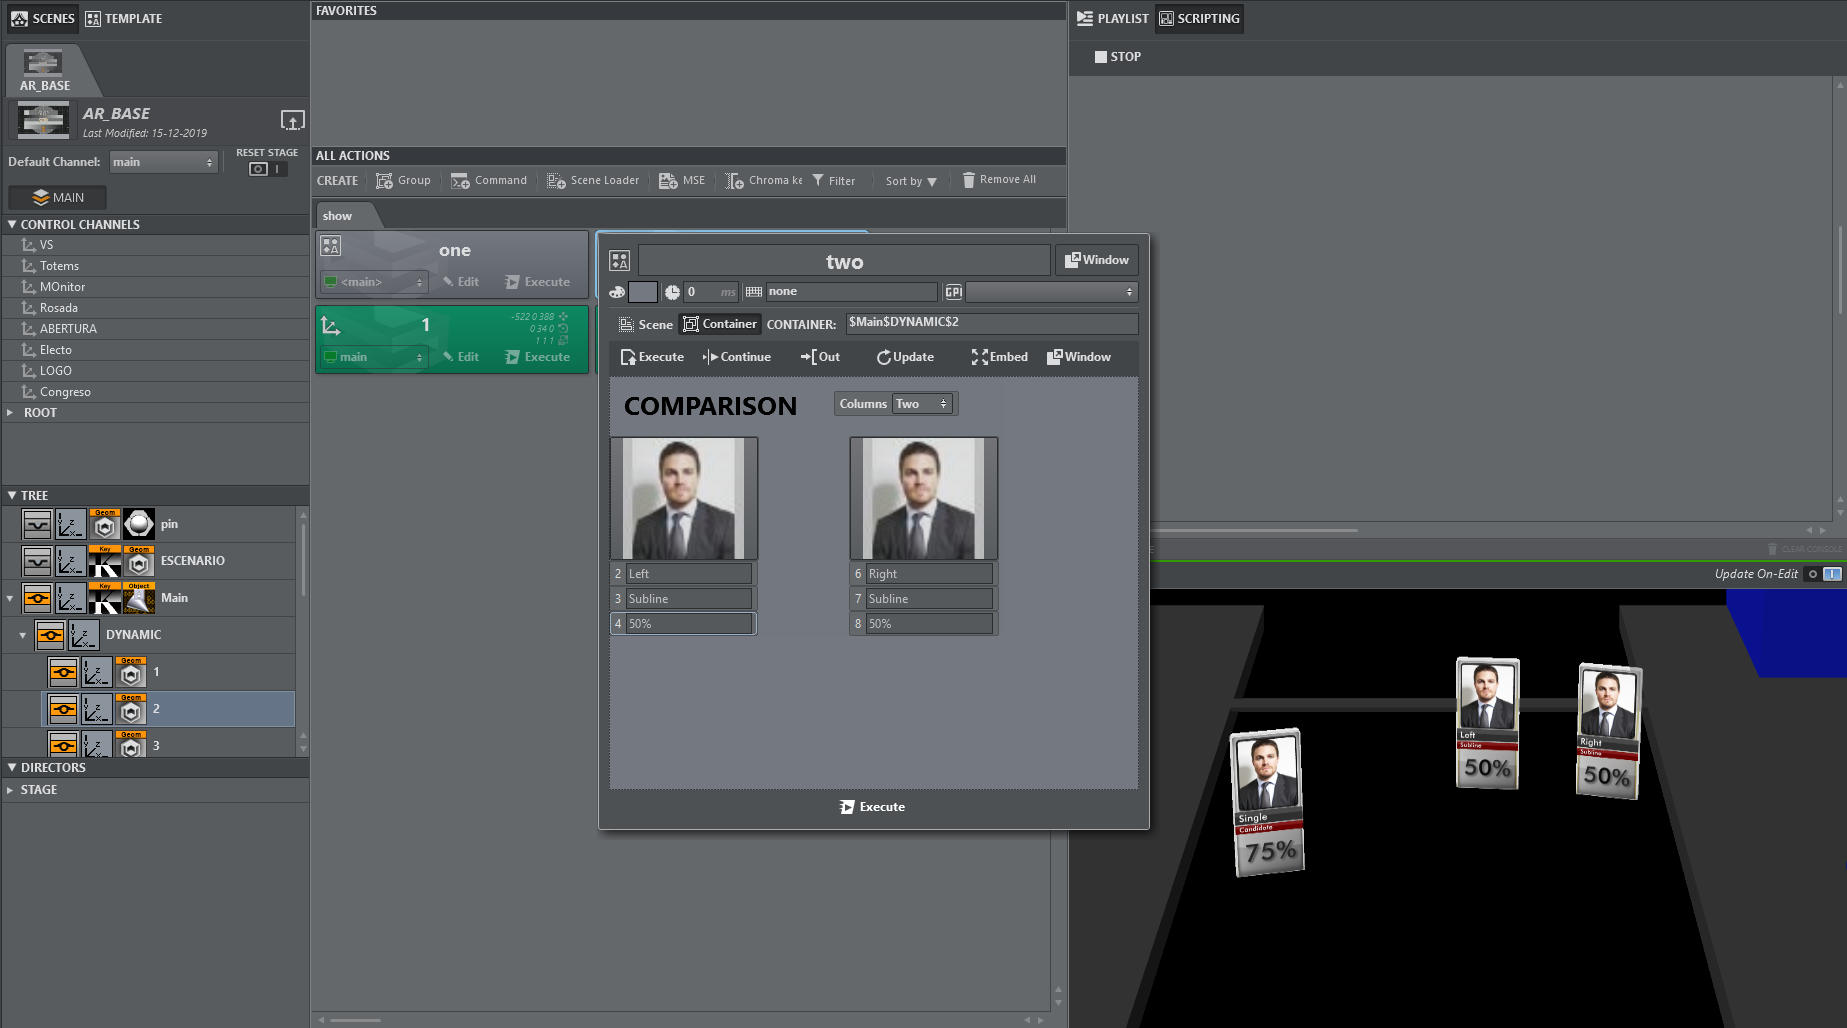
Another way to insert template scenes into a master scene is the following:
Create your template based on a separate scene.
Insert manually the objectified geometry into you master scene.
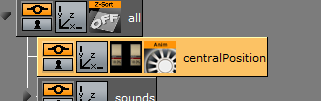
Split the merged geometry.
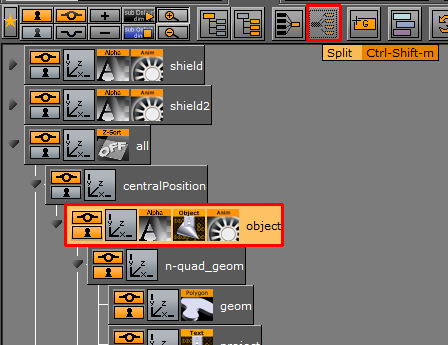
You'll obtain a container containing your top ControlObject as in the stand-alone scene.
Locate the director and re-arrange and rename in the Viz Artist stage, if necessary.
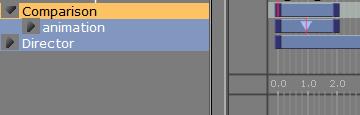
Save the scene and reload it in Viz Arc.
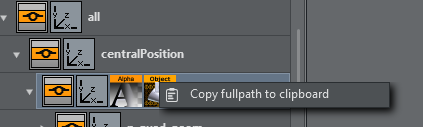
Copy the full path of the container containing the Control Object.
In the template select Control Object, paste the container path to Control Object and the path to its Director to Director.
Optionally adapt the Exec Dir and Cont Dir fields with appropriate directors for the sub tree scene.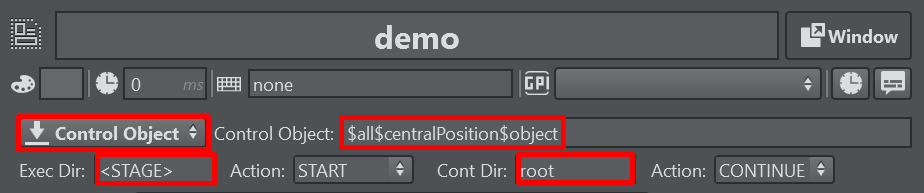
You'll be able to operate your template with execute/continue, while the scene is embedded in the AR/VR master scene.
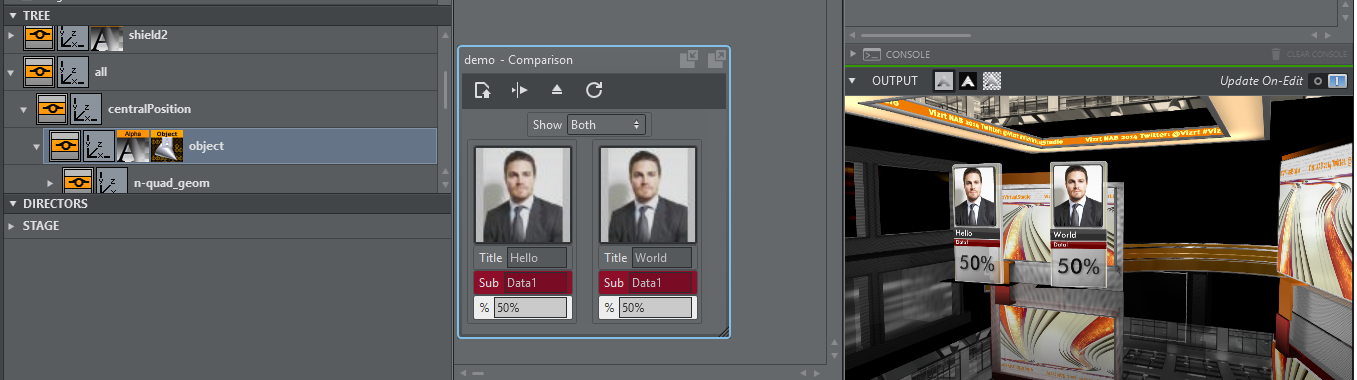
Using SubScenes
In the template action select SubScene in case a SubScene shall be controlled from the template.

The subscene can be located anywhere in the containing scene.
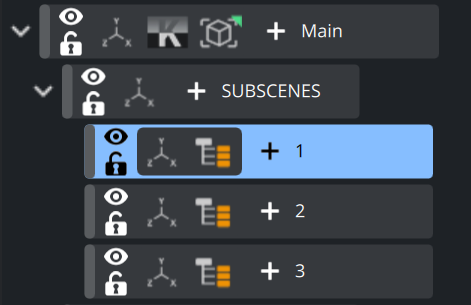
When executing the template in this mode, the scene associated to the template is loaded on the SubScene engine plugin (in case Load Scene is enabled). The director Exec Dir is executed with the specified Action (START by default). The director typically takes the name of the container, once the SubScene is loaded, refresh the master scene in Viz Arc and copy the Director to the action.
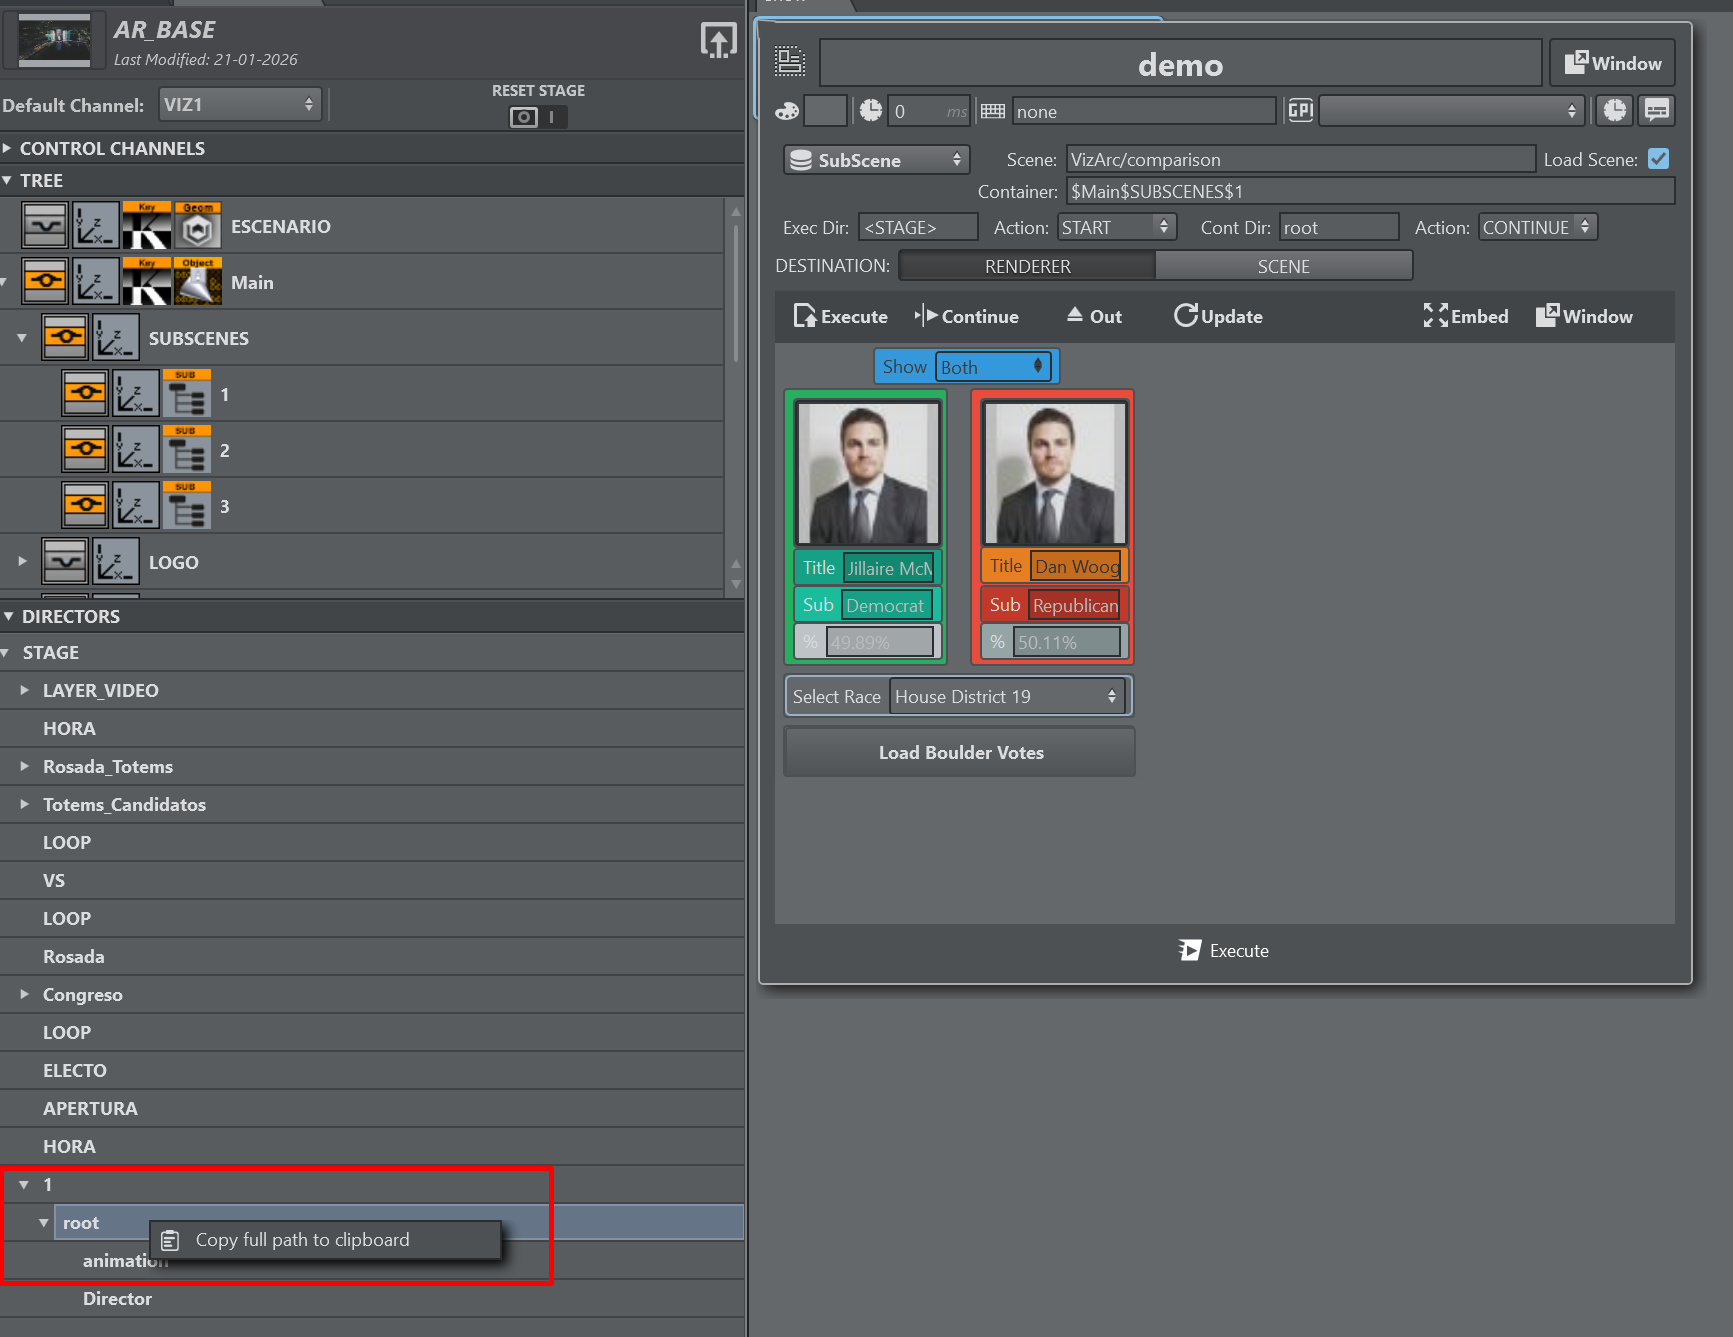
After copying the director path to the Exec Dir and Cont Dir input field.

Using Templates on a Scene Containing Multiple Top Level Control Objects
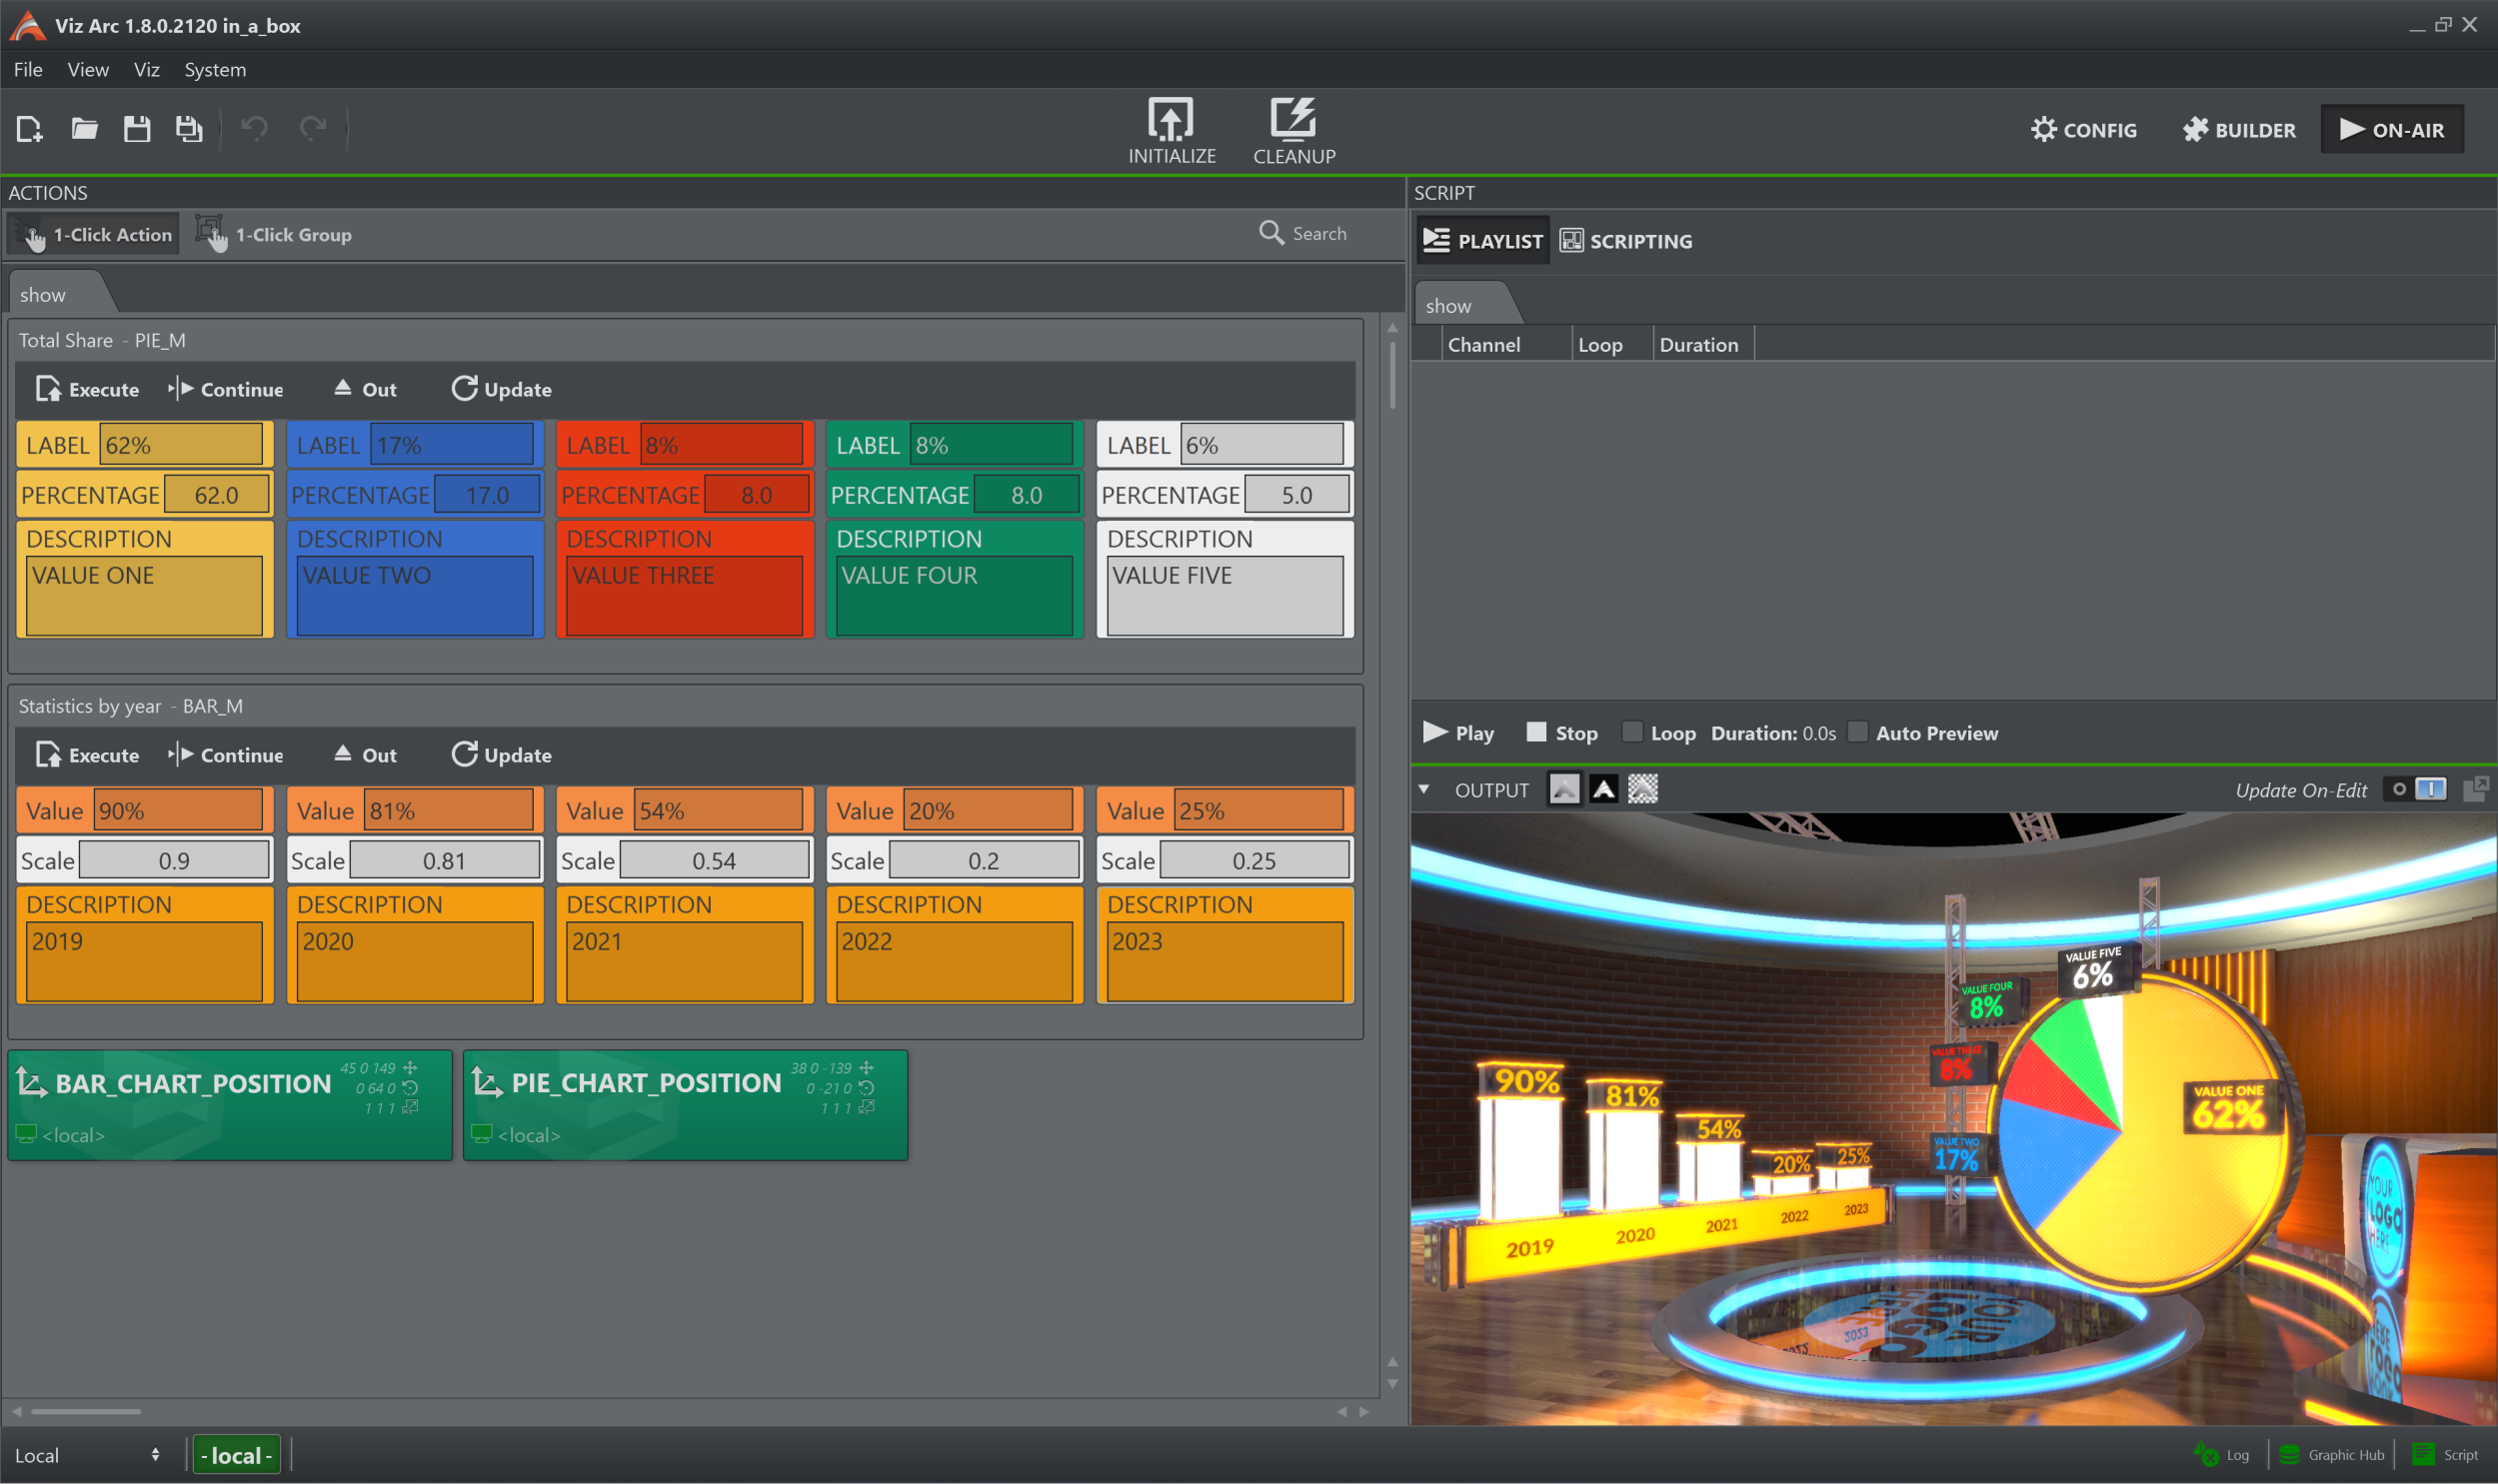
Within a large AR scene, you might want to create subtrees separating different graphics elements. For example, a subtree containing a bar chart and another subtree containing a pie chart graphics.
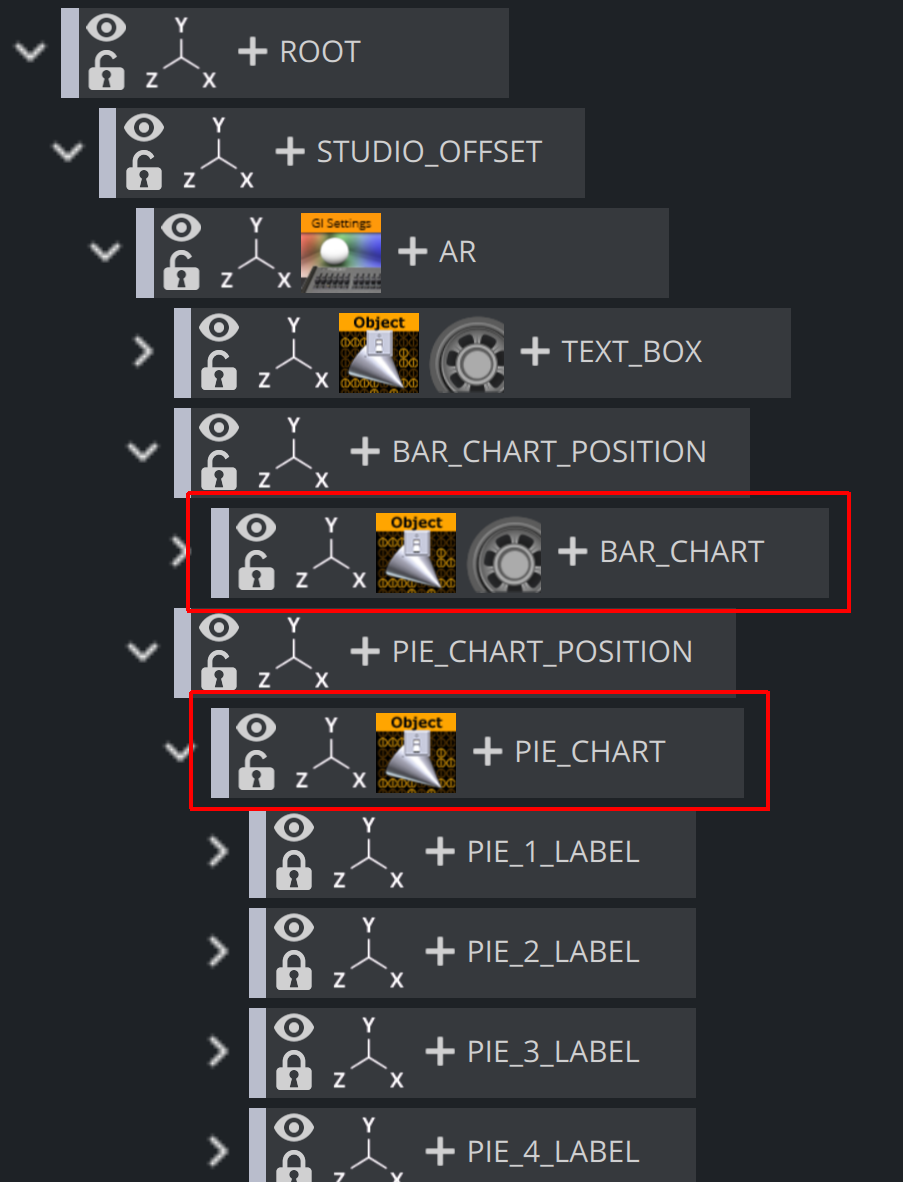
When using this kind of tree structure having Control Objects spread around the scene as sibling nodes, it is possible to directly create templates for each individual top level Control Object.
While creating a new template by selecting the scene from the Graphic Hub, you'll be able to select either one of the top level controls. You cannot control multiple top level control objects from within a single template.
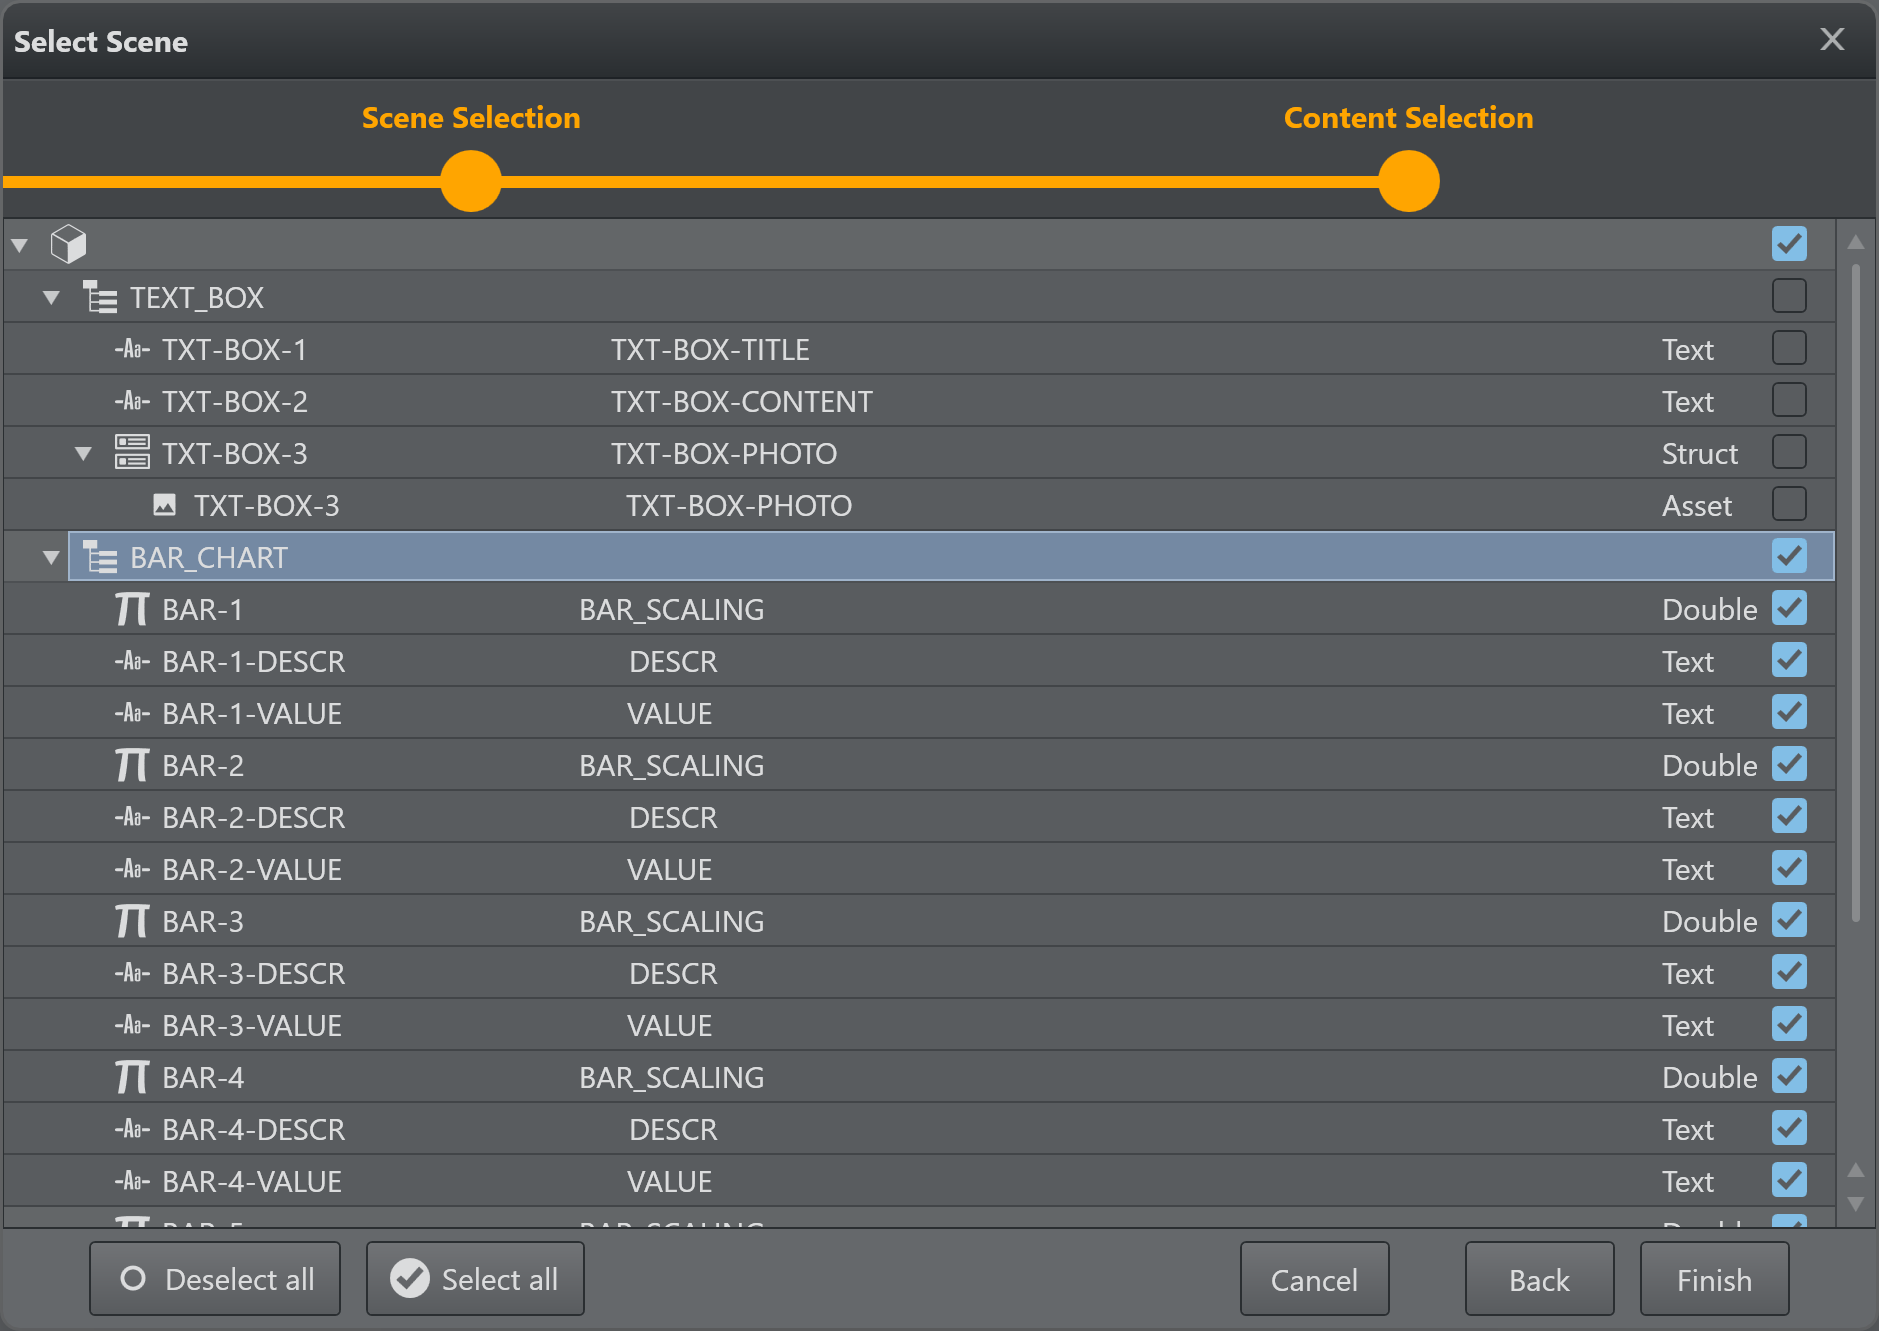
Once a Control Object is selected for the template, choose which director should be used when executing the Execute and Continue buttons of the template. The selection can be found on the template background property when clicking any empty space on the template canvas. The subscene director has to be built in such a way that there is a stop point when the graphics are fully animated in and that a continue command animates the graphics out again.
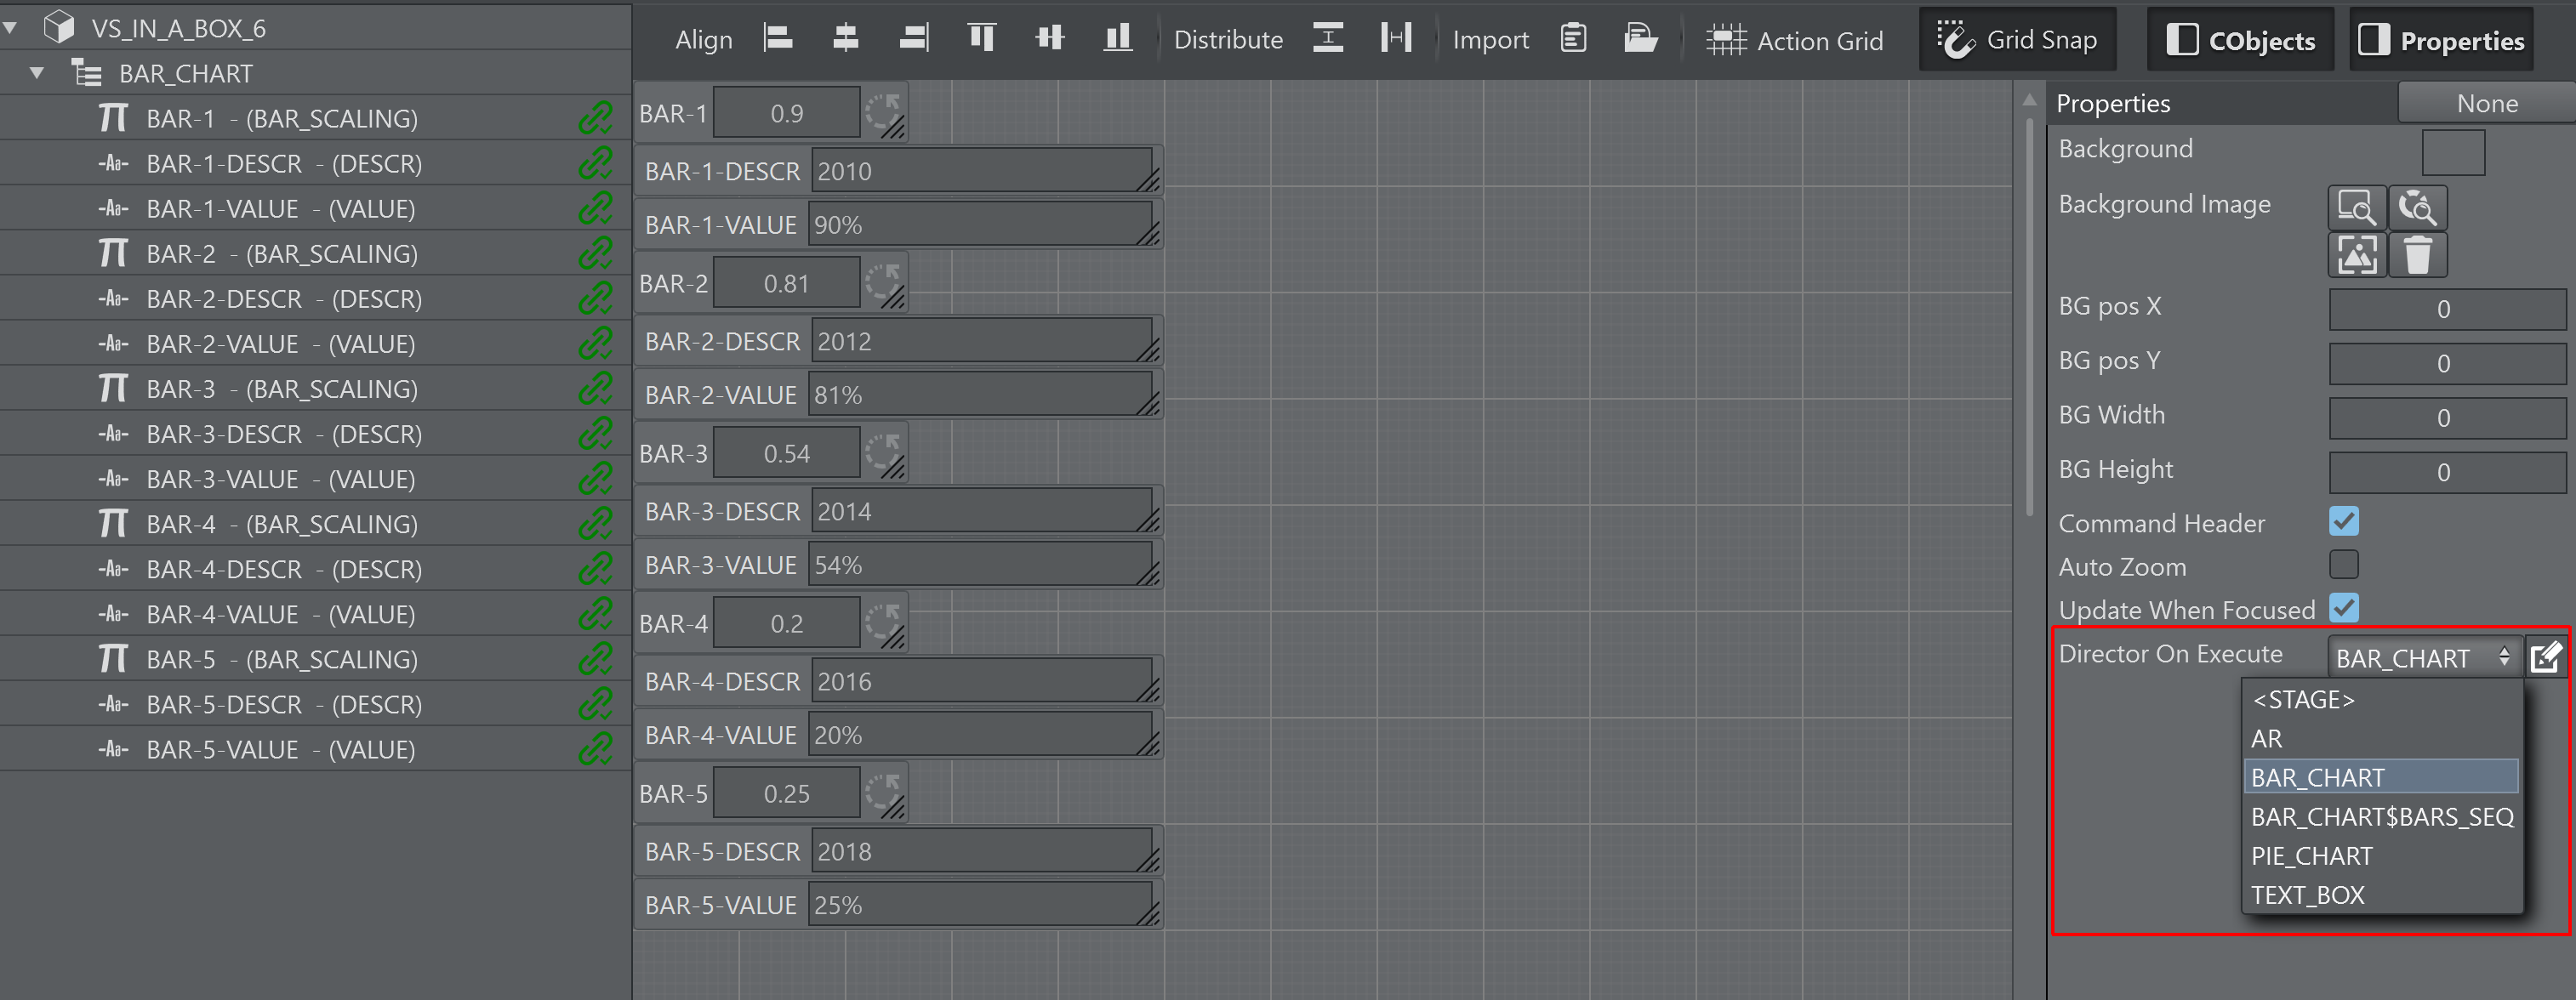
Once the templates are finished they can be uses as embedded templates on the action canvas. The operator can trigger the different elements individually.
MSE (Transition Logic) Templates
A template can be played out through the Media Sequencer (MSE) instead of driving the Viz Engine directly. Use it when the graphic is a Transition Logic scene that must be played out On Air via a Viz profile channel, so that MSE owns the state, layering and concept/variant. For the normal case (Viz Arc driving the Engine directly), use the Scene / Control Object / SubScene modes.
How a Template Becomes a Transition Logic Template
You do not normally set Transition Logic mode by hand. When you create a template with the template wizard, Viz Arc queries each selected Viz scene for its Transition Logic information — the background scene it belongs to and its toggle layer. If both are returned, the scene is treated as a Transition Logic scene and that information is stored on the template, where it stays visible and editable as the TL Background Scene and TL Toggle Layer properties.
Configuring a Transition Logic template
Field | What it does |
|---|---|
Layer | MSE renderer layer (MAIN / FRONT / BACK; MAIN if empty). |
Concept | Per-action concept override. Free text; leave empty to use the channel’s default concept. |
Variant | Per-action variant override. Free text; empty = channel default. |
Channel | The MSE channel, chosen from the global default profile’s channels (builder mode only). |
Note: Concept and Variant are free-text fields because concepts/variants come from the Graphic Hub folder structure, not a list that can be queried. A typo silently falls through to “no override”. The MSE profile is the global default profile; only the channel is per action.
Combo Templates (Combining Several Scenes)
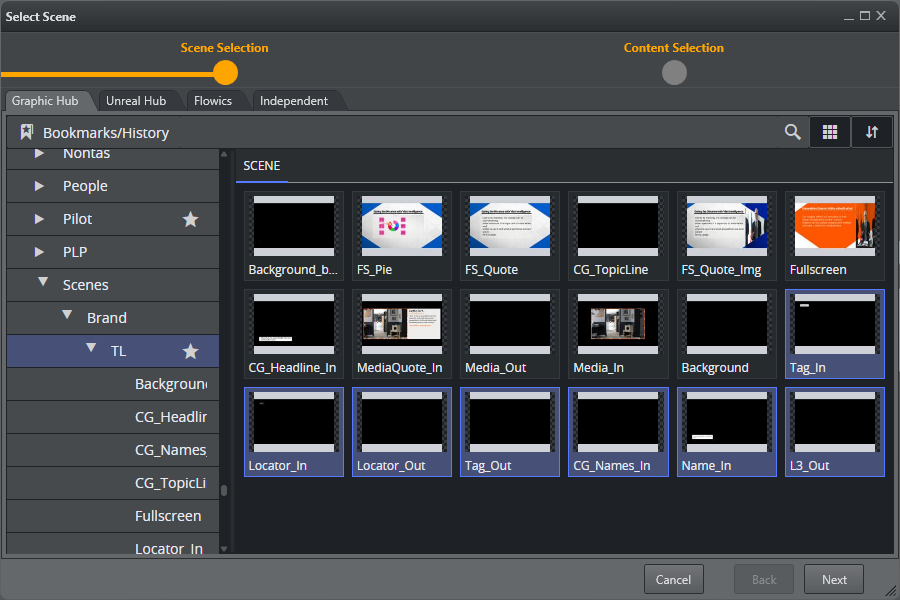
A single Transition Logic template can drive more than one scene at once (a combo template). In the template wizard, select several Transition Logic scenes instead of one. Each scene becomes one layer of the combo, mapped to a toggle layer of the shared Transition Logic background scene, and all of the scenes’ fields are combined into a single template.
Note: All scenes in a combo must share the same Transition Logic background scene. Scenes that do not match are skipped during creation and reported in a warning, so a combo is always internally consistent.
The Auto-generated Layer Dropdown
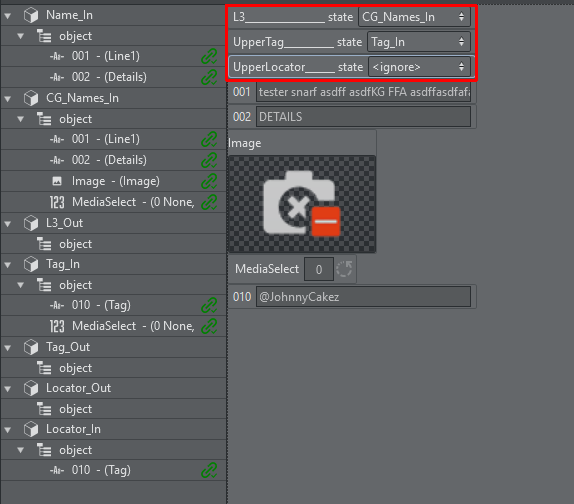
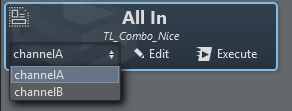
When a toggle layer has more than one alternative scene, Viz Arc automatically adds a Dropdown field to the template for that layer. The operator uses it to choose which scene fires on that layer for the take; it always includes an <ignore> option so the layer can be left untouched. At take time the selection is sent to MSE as the layer’s alternative, so the correct scene is played out.
One dropdown is generated per toggle layer that has two or more alternatives. Layers with a single scene get no dropdown.
The dropdown is system-owned but fully editable: you can rename, move and restyle it like any field, and it is not duplicated on re-creation.
If you delete the dropdown it is not recreated automatically (there is a manual re-create option). If a layer later drops below two alternatives, its dropdown is removed automatically.
Execution through MSE
The four commands map to MSE operations: Execute > direct take (with the field payload), Continue and Out > channel-level state operations (no payload – they advance whatever is on that channel/layer), and Update > direct update (applies fields without re-firing the in-director).
Which of the two routes an action takes is shown by its Template mode dropdown. You rarely need to touch it, because an action created from a template that carries Transition Logic information, or combo layers, already starts in Transition Logic mode, so the dropdown simply reflects that. Templates from scenes without Transition Logic information start in Scene mode instead, or in Control Object mode when the template has a director other than <STAGE> selected. Switching the dropdown by hand is what changes the routing: Transition Logic sends the take to MSE, while Scene, Control Object and SubScene address the Viz Engine directly.
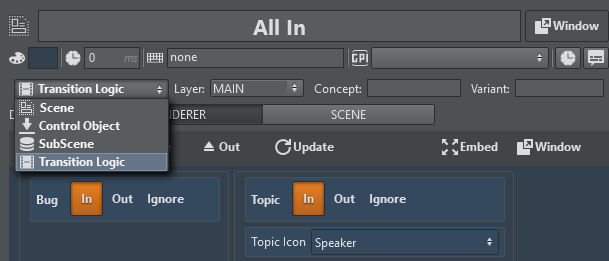
Selecting Transition Logic also swaps the row next to the dropdown to the MSE settings (Layer, Concept, Variant) and turns the action's channel cell into an MSE channel selection, where you pick the channel of the configured MSE profile.
The Dedicated MSE Action
Aside from templates, Viz Arc has a dedicated MSE action for firing an already-authored asset through the Media Sequencer (either a Viz Trio page or a PDS data element) with Take / Continue / Take Out. Choose the element type, then either browse (via the MSE Browser) or type the page number / PDS element ID by hand. Manual PDS entry stores the ID even if it cannot be resolved right now, so the payload is re-fetched at execute time (useful when working offline). As with template MSE output, the profile is the global default and the channel is selected per action.
Unreal Templates
Creating a New Unreal Template
The process of creating an Unreal template is almost the same as that for creating Viz templates, with a few slight differences.
Creating an Unreal Template
Go to the DESIGN section.
Click Create new template to open the wizard.
Select the Unreal Hub tab and select a level.
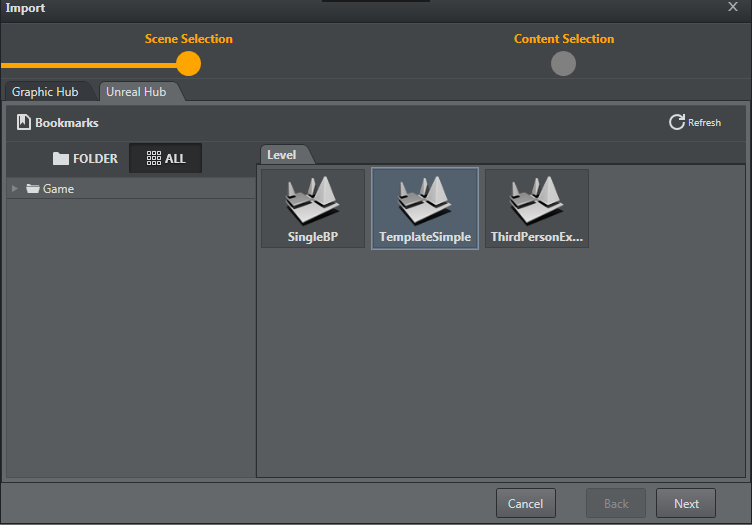
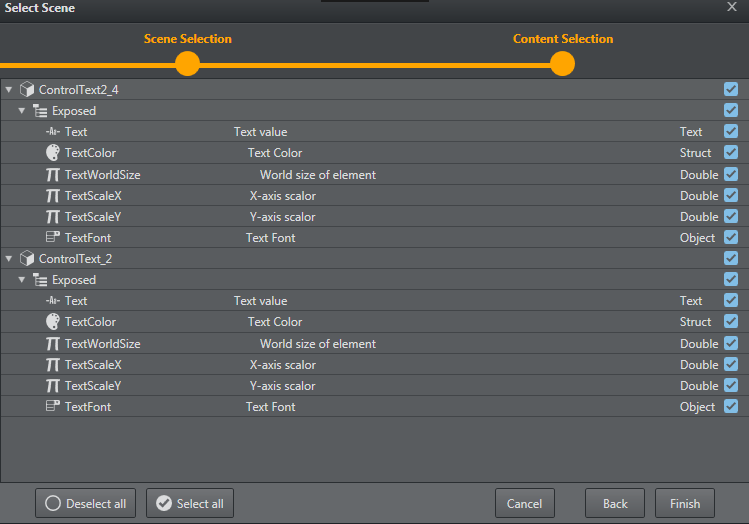
Upon selecting a level and clicking Next, the level is set on the configured Unreal editing Engine and all of the blueprint actors and the level blueprint are parsed and displayed on the following screen (as shown below).
The list displays all the blueprint actors found and a list of their categories and exposed objects. You can then select which are to be created when finalizing the template creation.
Unreal-specific Features
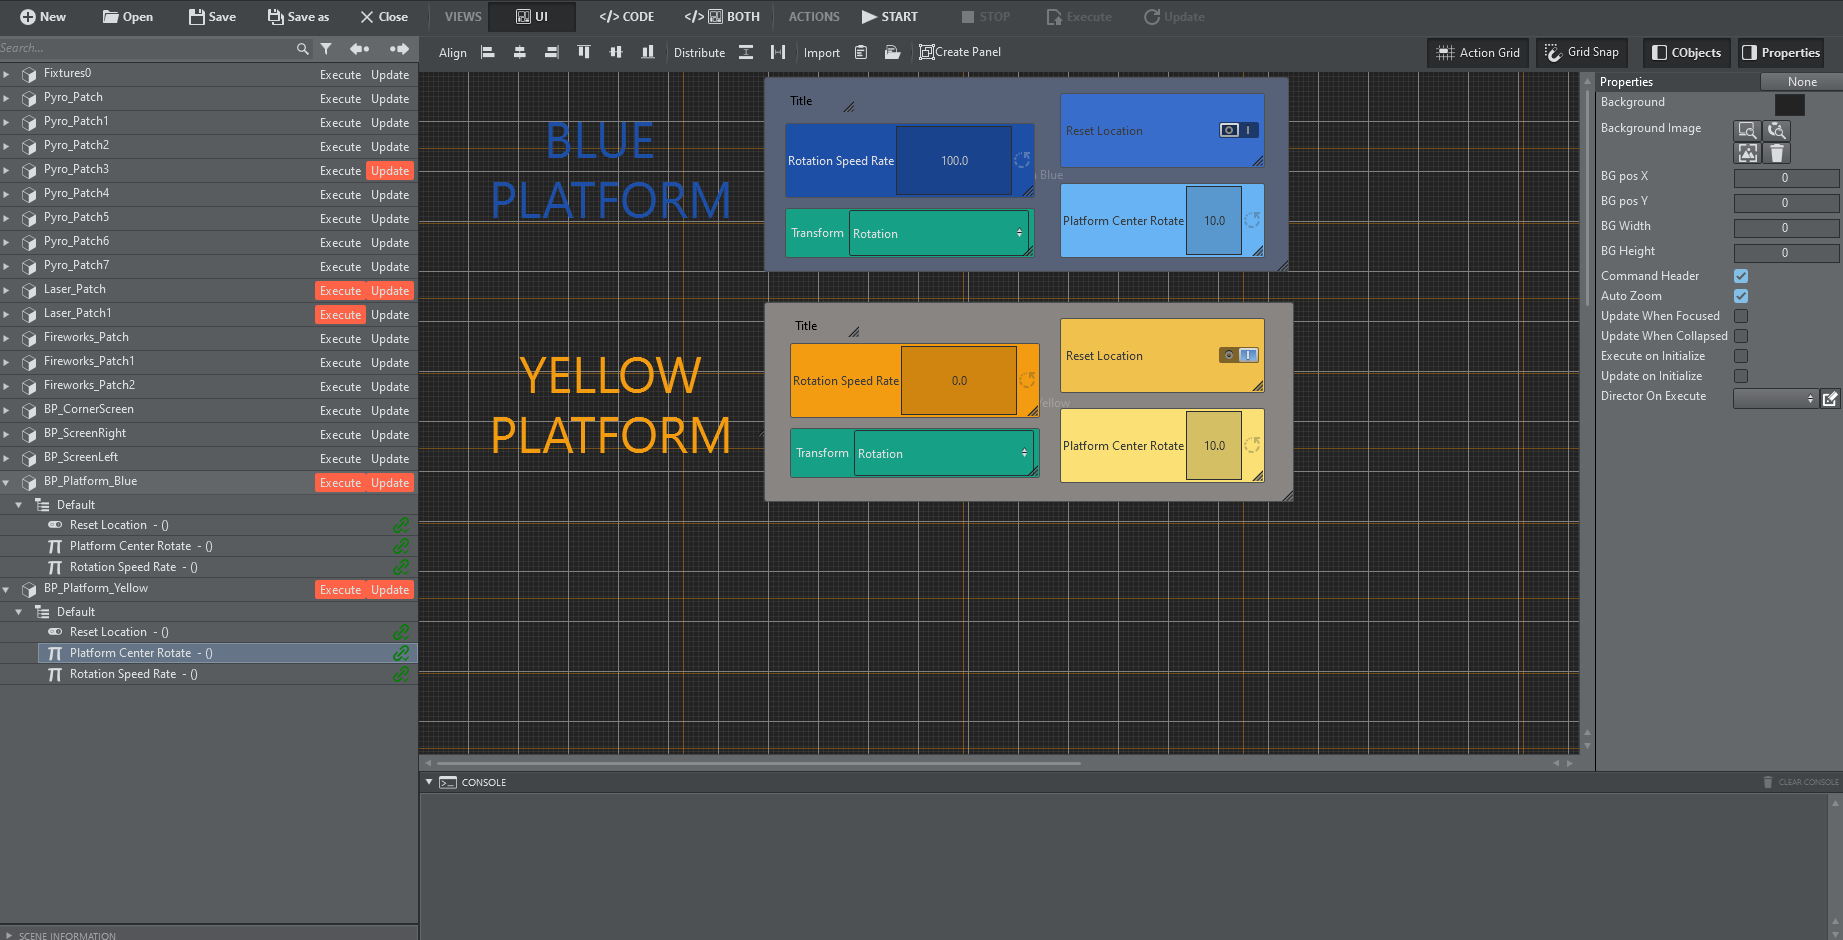
The Unreal template in the screenshot above contains the following Unreal-specific features:
Template Controls
Only Execute and Update are available for Unreal templates.
Unreal Function Integration
On the left side of the parameter canvas, there is a tree-view containing all the existent blueprint actors. Clicking the Execute or Update button triggers a popup, allowing you to choose whether the template should call a function and, if so, which one to call (as defined in the Unreal blueprint).
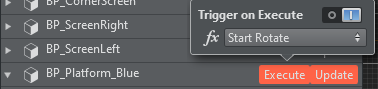
Note: The list of blueprint functions (function drop-down) only displays those functions that have no input parameters.
Using a Template
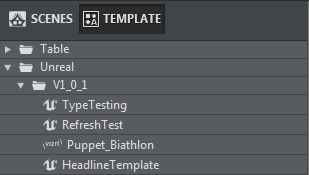
You can access all saved templates on the action panel. Unreal templates can be identified by the UE4 icon that precedes the template name.
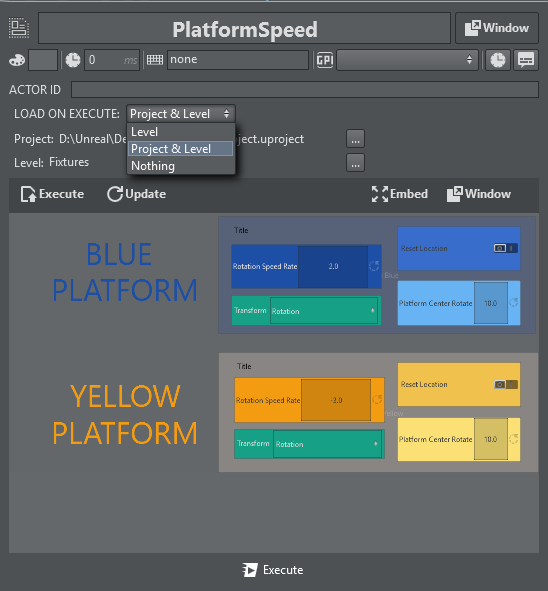
Similar to Viz templates, the edit popup for an Unreal template contains settings for loading the level or project on execute.
Flowics
Preparing Flowics Graphics for Use in Viz Arc
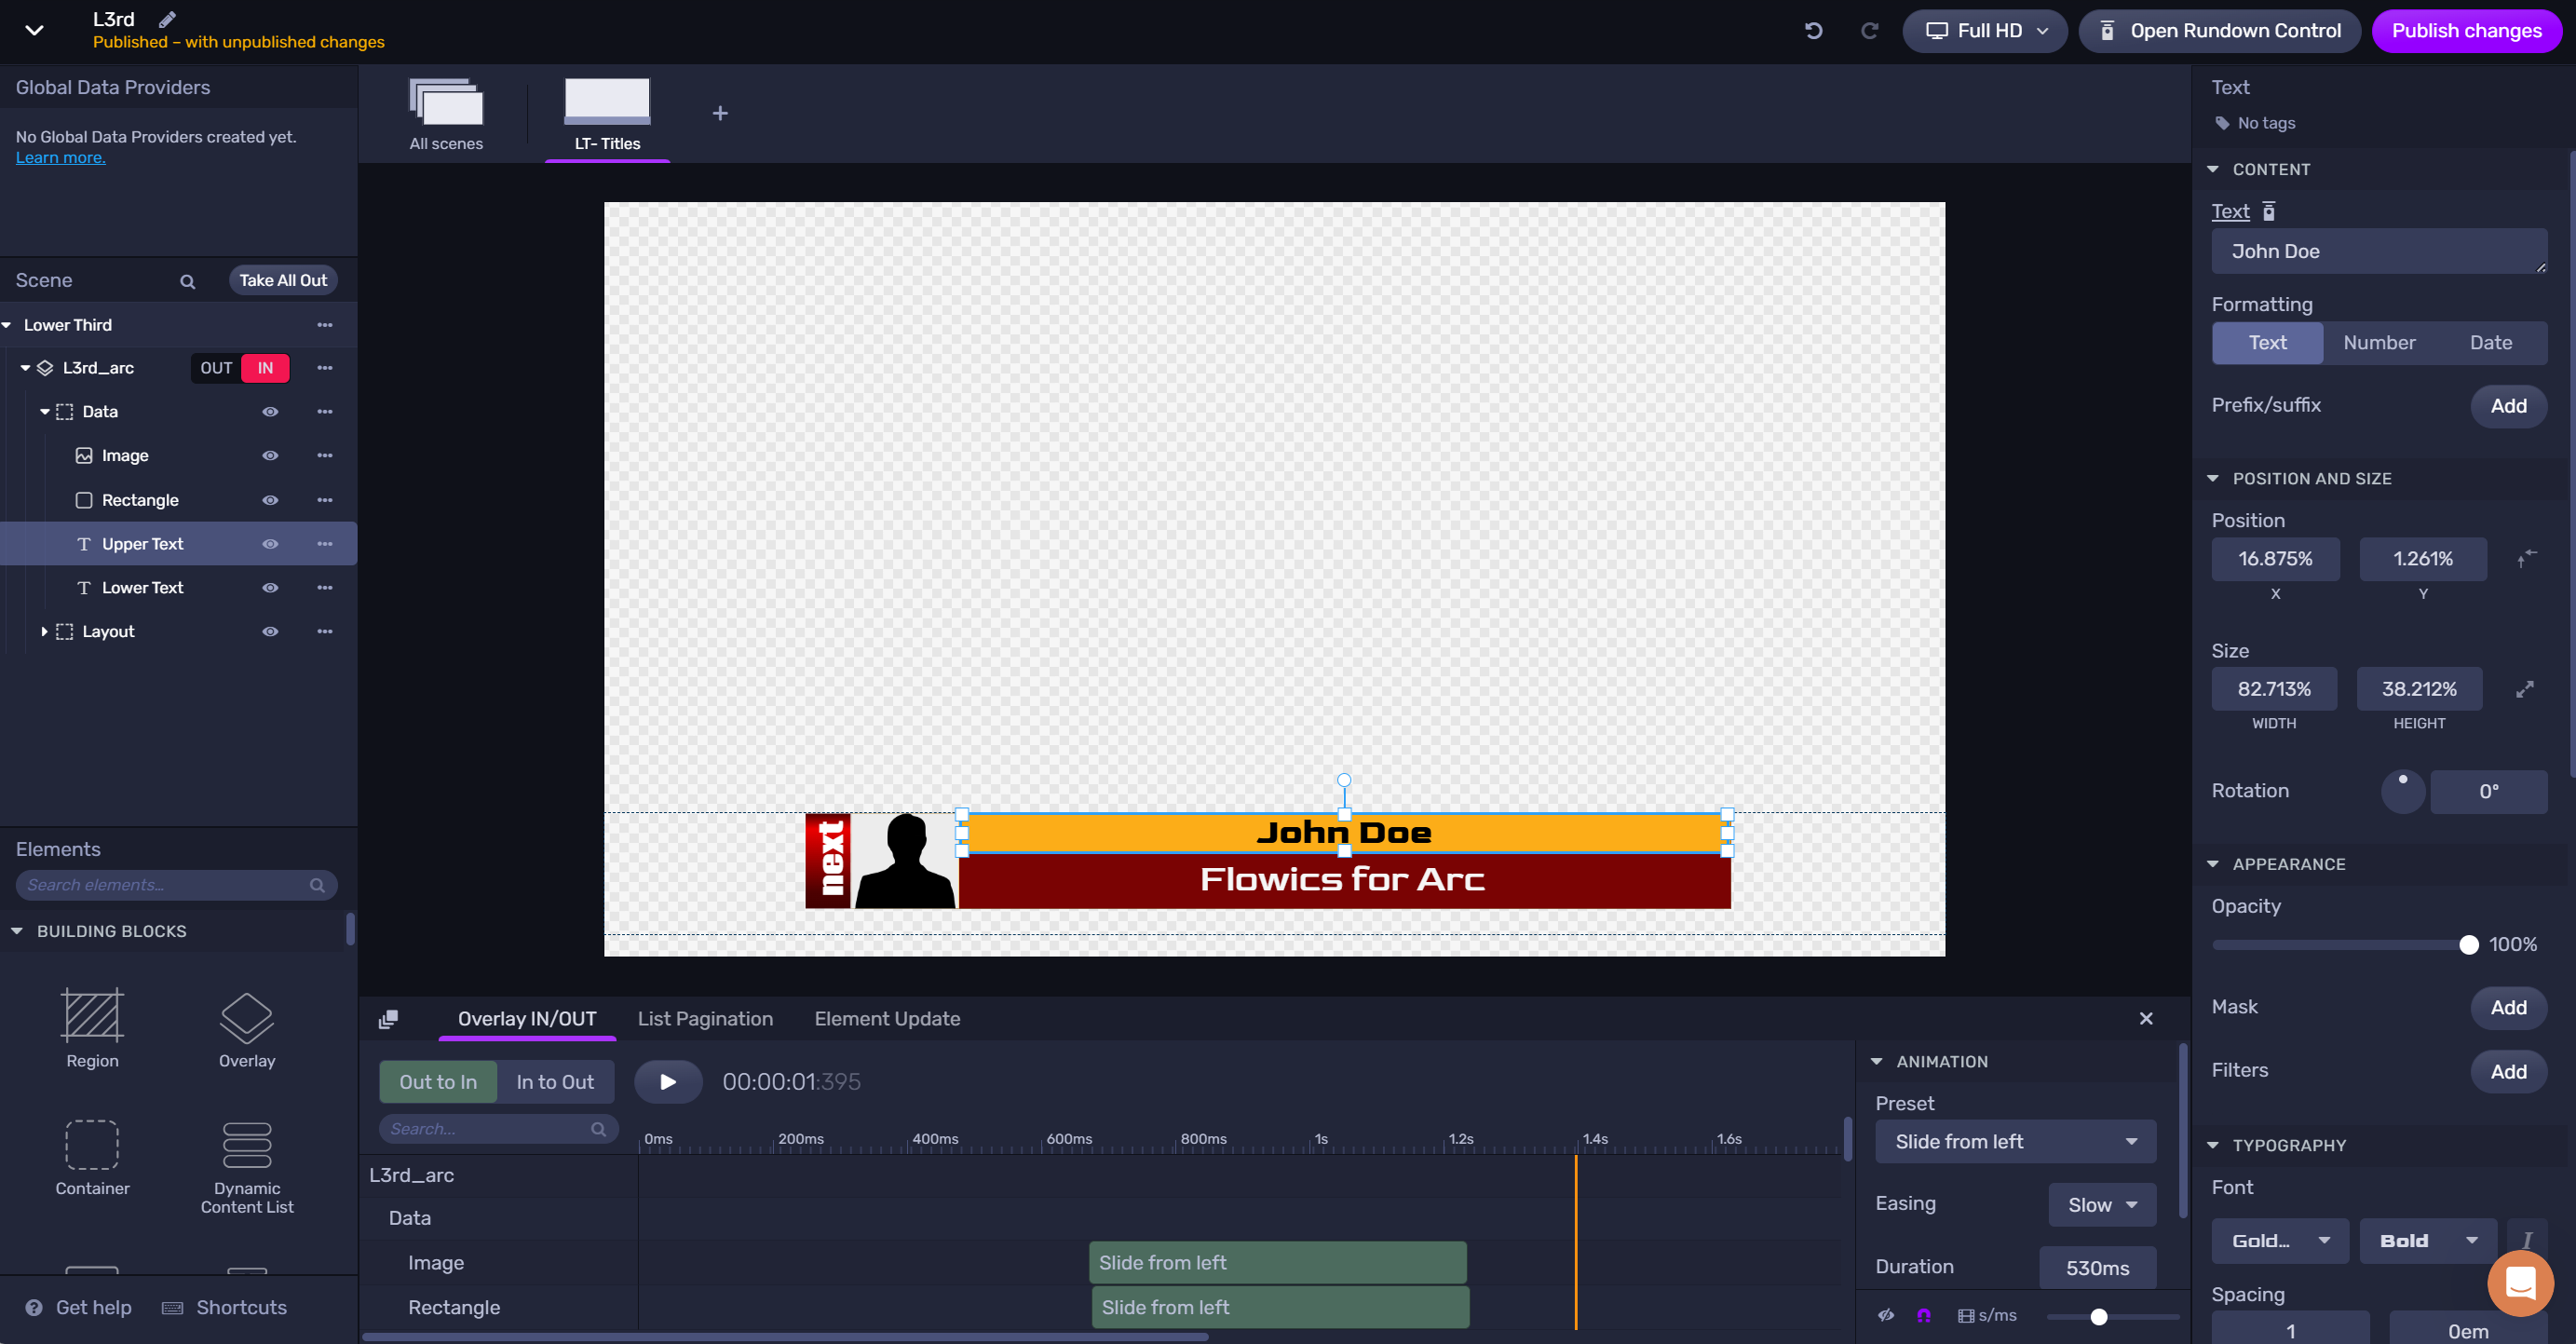
As a first step, the Flowics graphics package needs to be prepared for being controlled by Viz Arc. The steps are the same as they are for controlling the graphics Flowics Remote Control or Rundown Control. The fields that need to be exposed, in this sample the two text lines of the lower third graphics and the image:
Select the graphics element to be exposed.
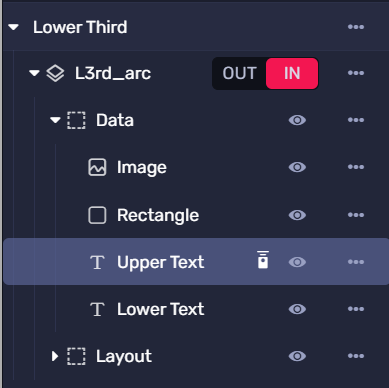
Enable the Show on Remote Control checkbox and add a Integration ID.
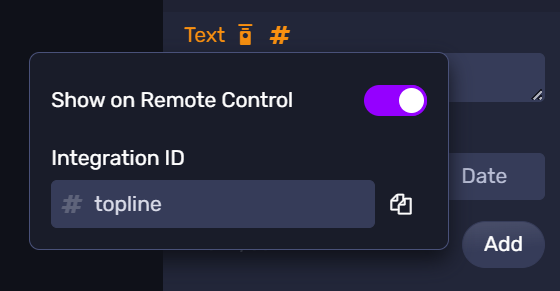
Repeat those steps for all elements that need to be controlled. When done, make sure the modifications are Published  .
.
Creating a New Flowics Template
Make sure the editing engine in your profile is configured to use the graphics token of your graphics package.
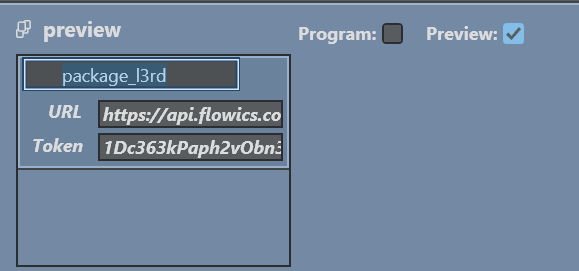
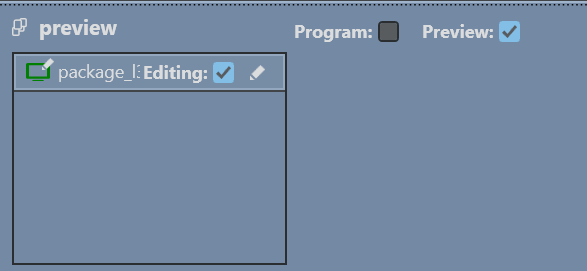
It must match the API Token specified in Flowics:
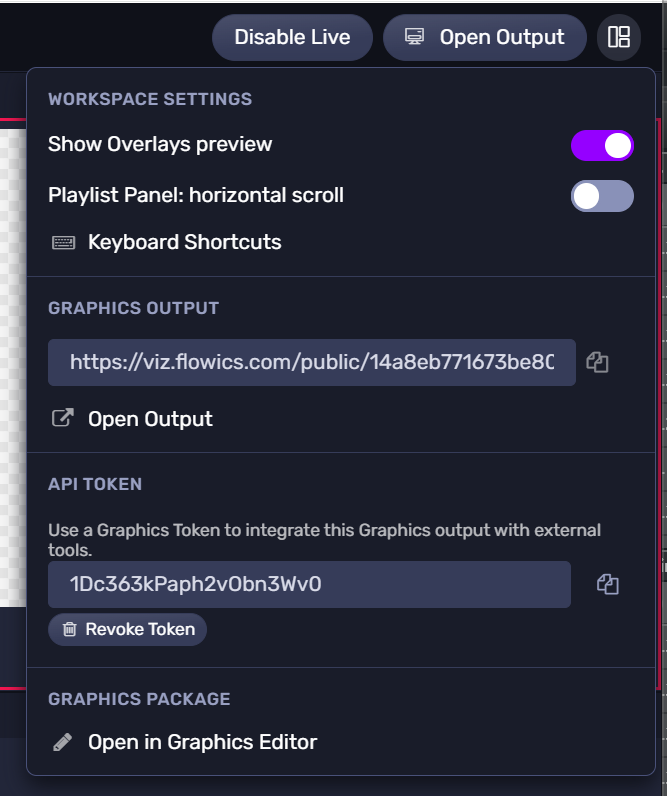
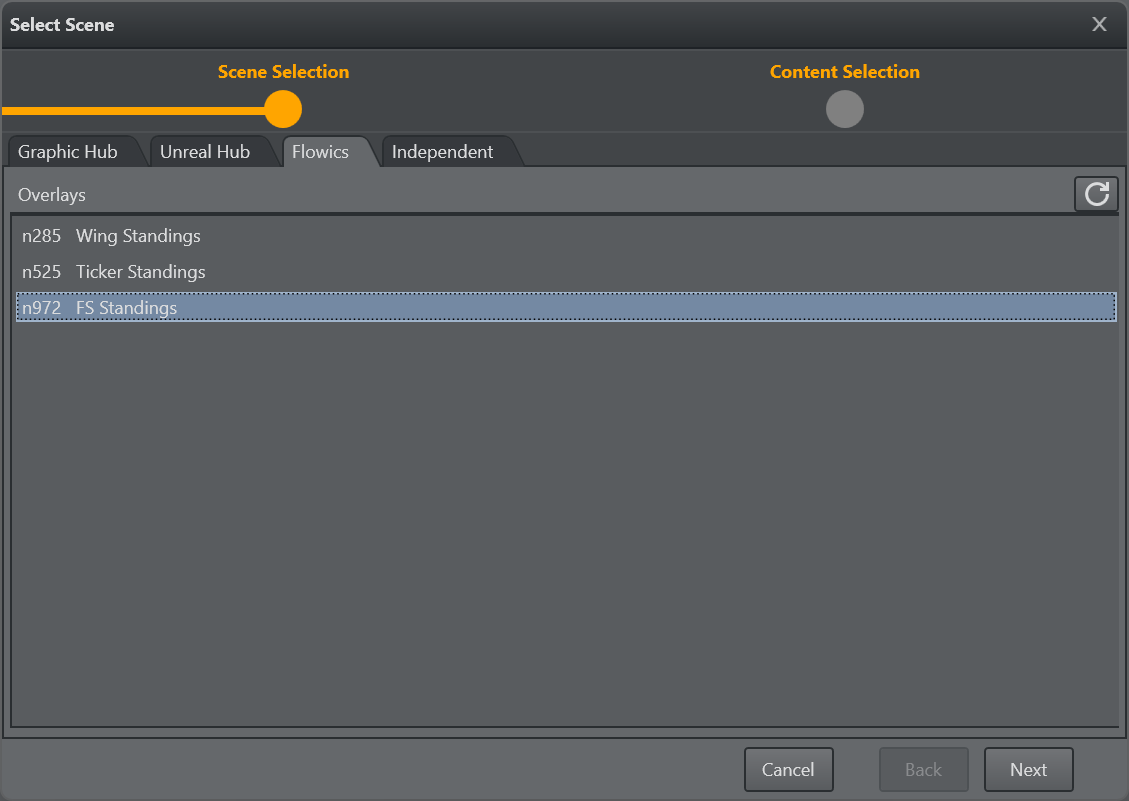
Next, go to the Viz Arc Design tab and create a new template. Select the Flowics tab an select the overlay to be used.
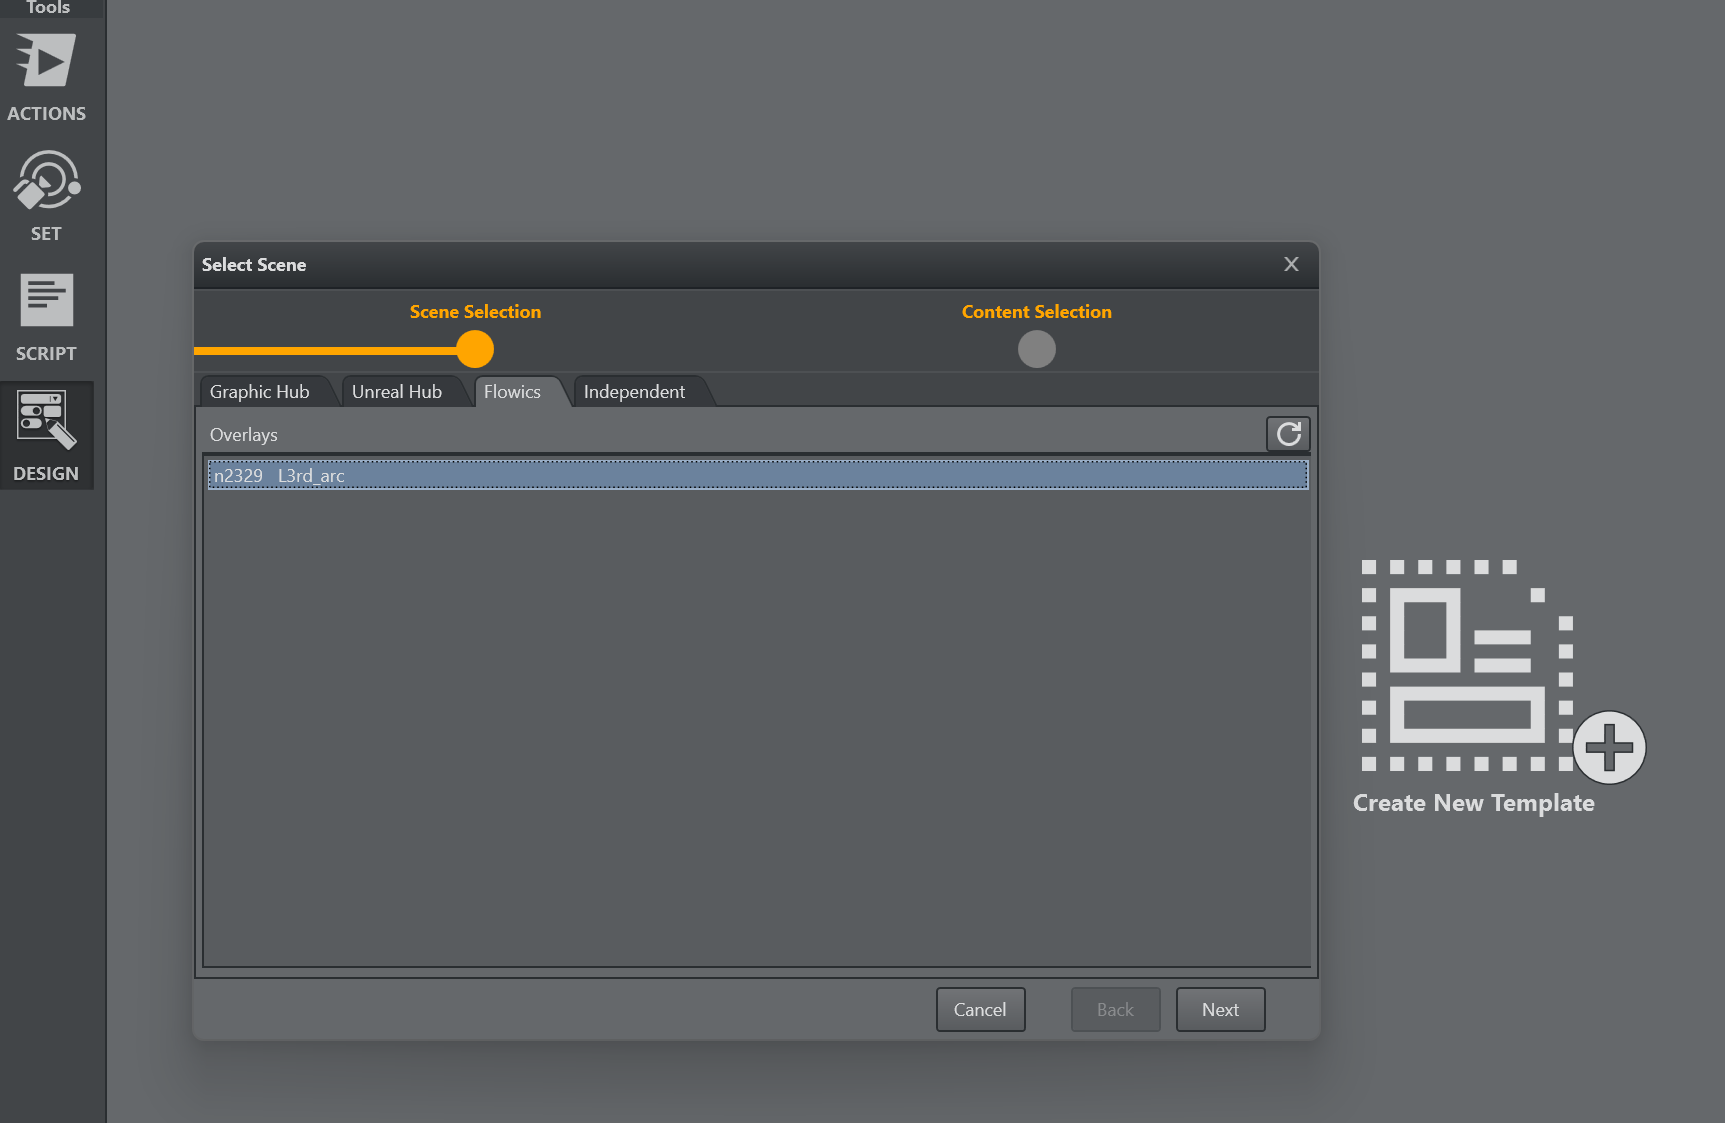
Click next and select the Integration ID’s of the overlay to be generated into an initial template UI.
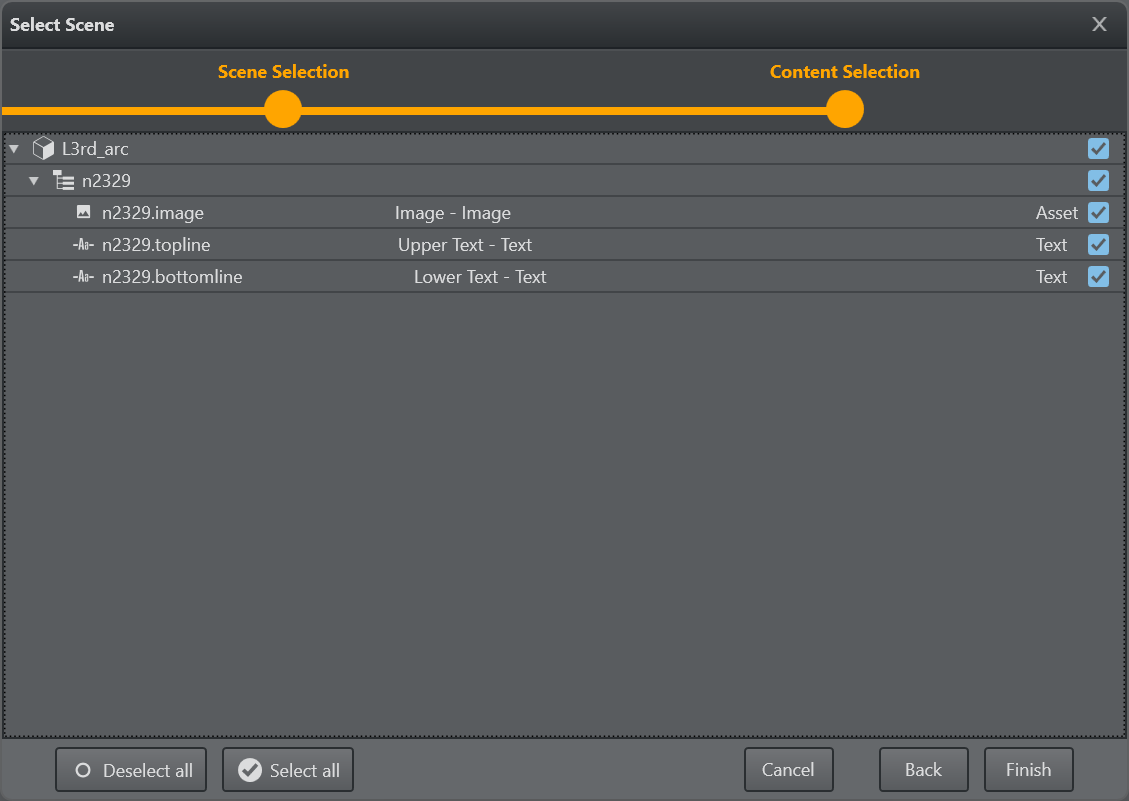
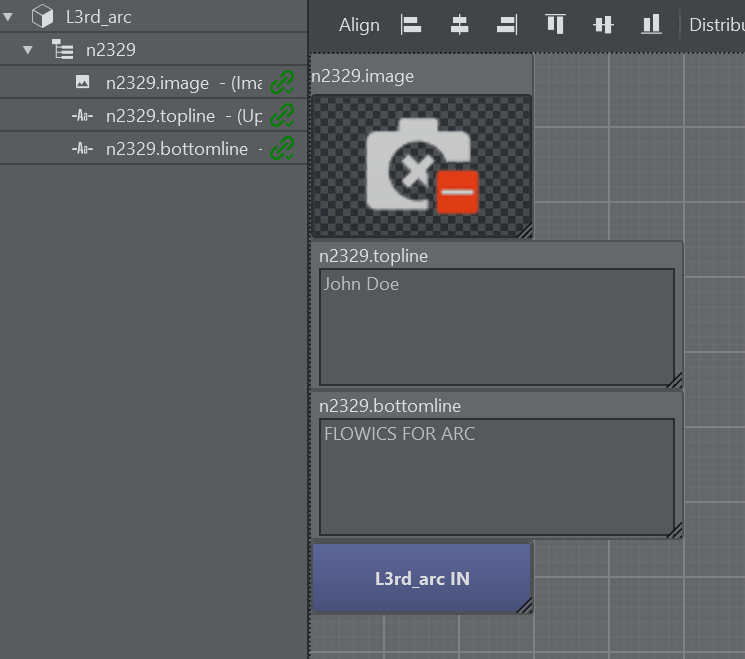
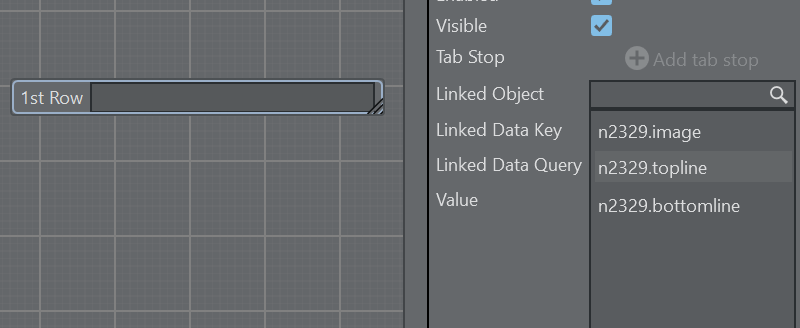
You can also create new UI parameters and link the Integration ID’s afterwards. The ID's are available the drop down menu as Linked Object property.
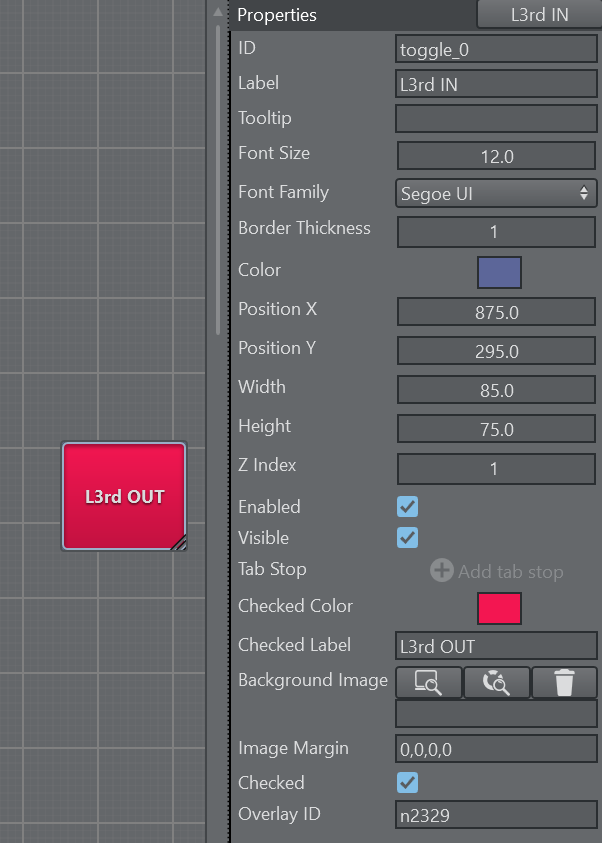
The toggle button responsible to animate the overlay in and out can be customized, the Overlay ID can be specified as well as the on/off colors and labels.
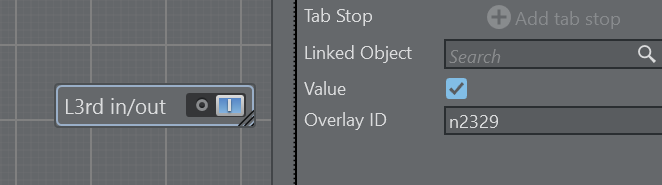
The overlay can be also controlled by a bool parameter, just enter the Flowics overlay ID in the Overlay ID property.
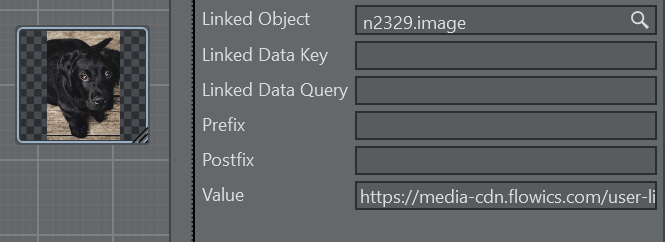
The image Integration ID’s can be only assigned manually or through scripting.
The asset URL can be copied from the Flowics asset library using the Copy URL button of the asset
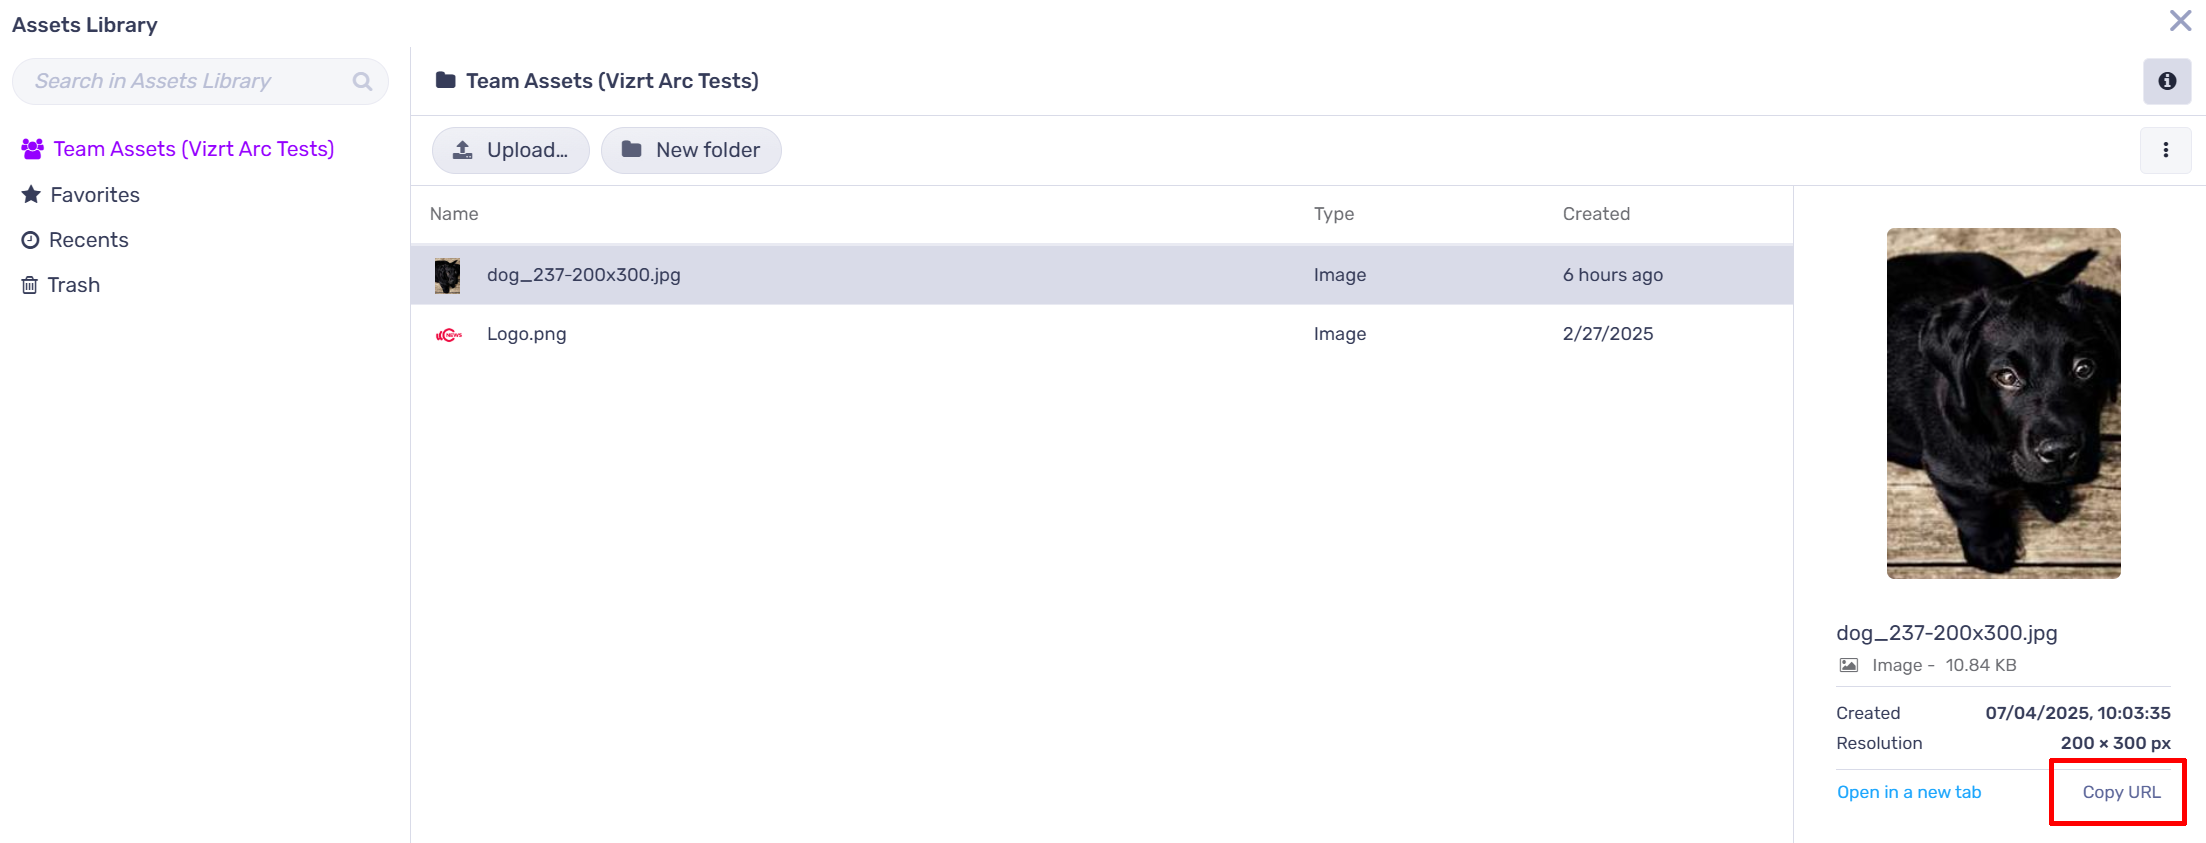
Note: The Flowics Asset library cannot be browsed from Viz Arc at the moment. Please also note that assets from the Graphic Hub or the local file system will not work. The assets need to come from the library or any other public http endpoint.
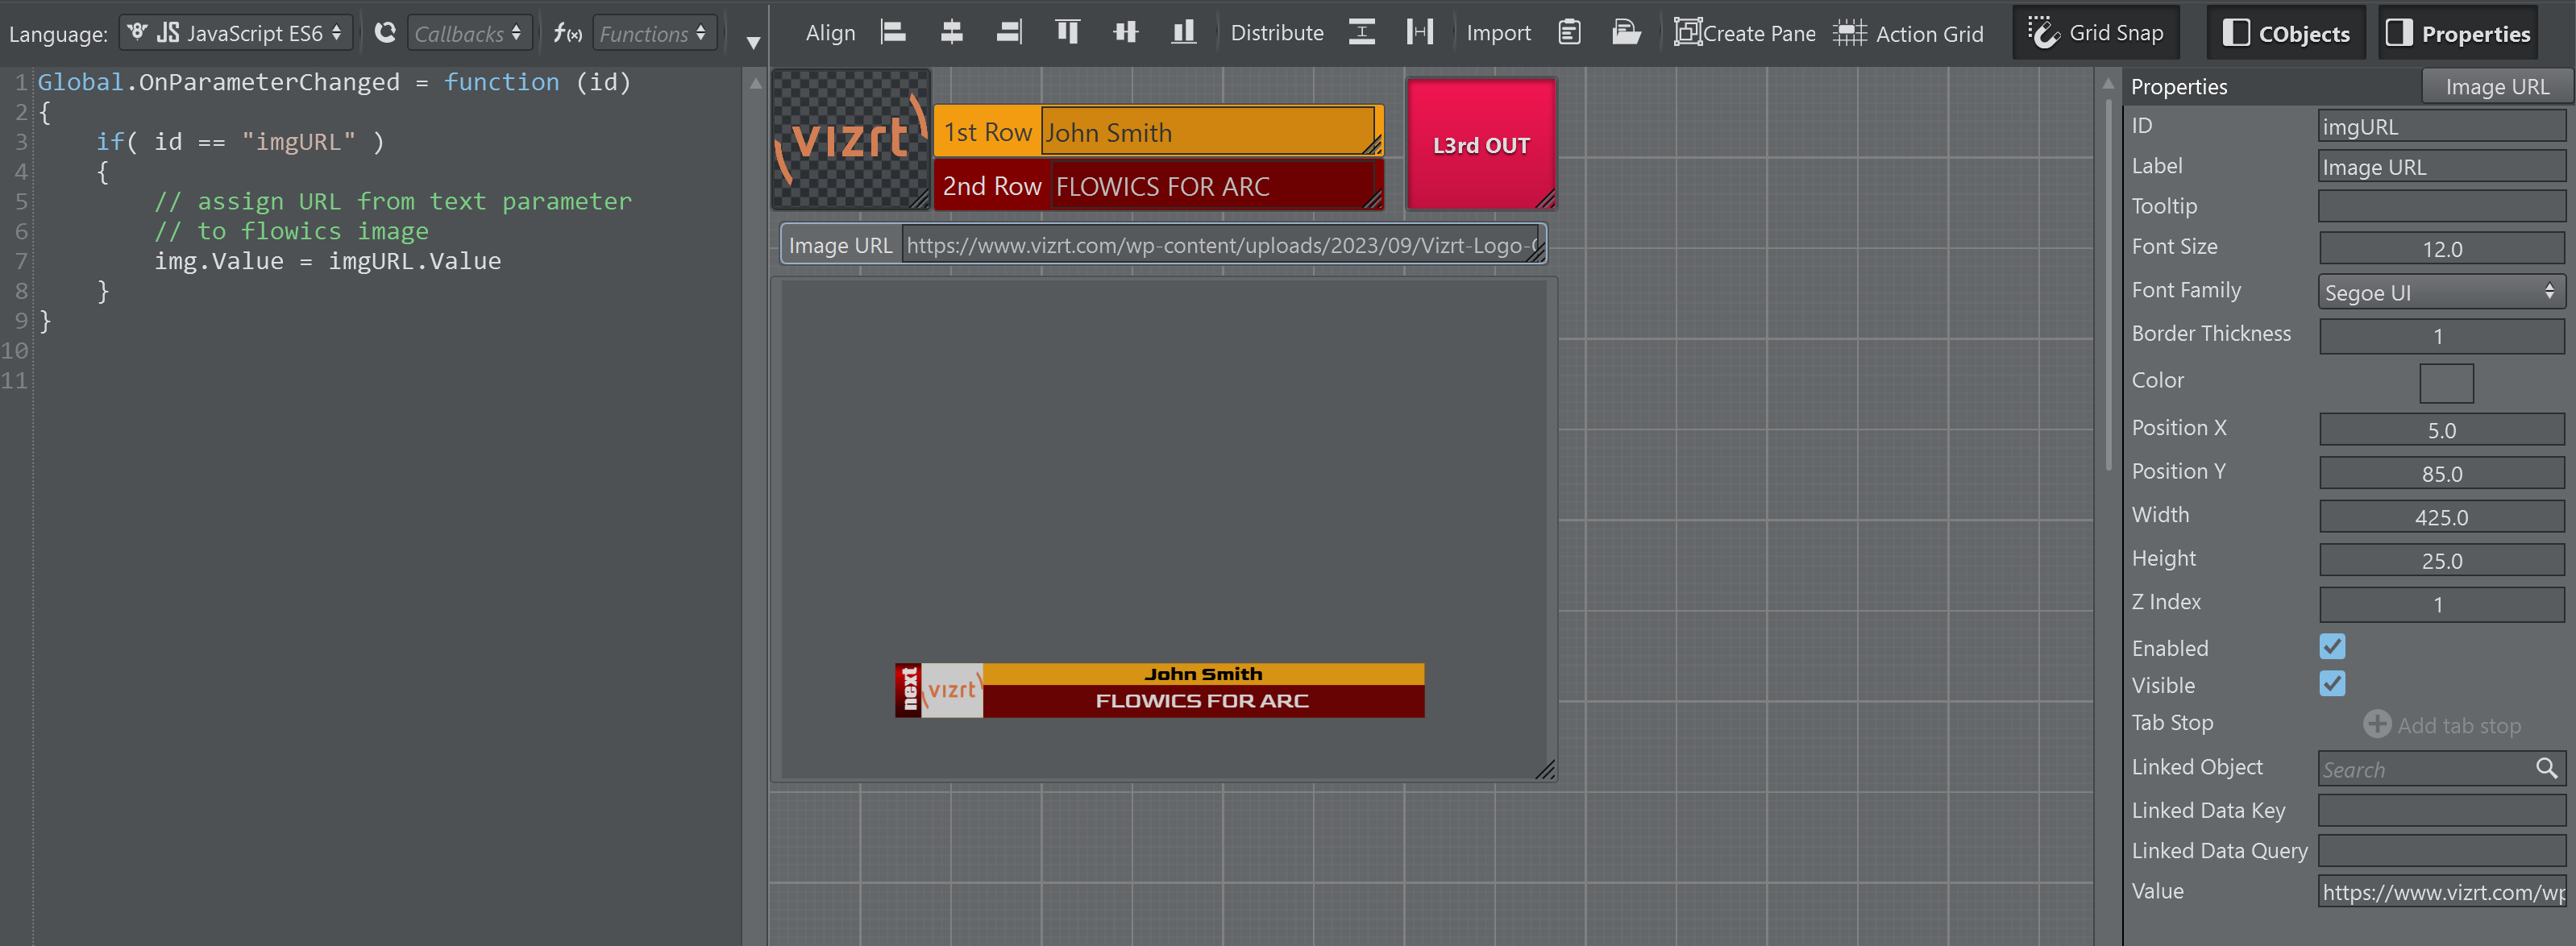
A simple script demonstrating how an image URL can be assigned to an asset parameter programmatically.
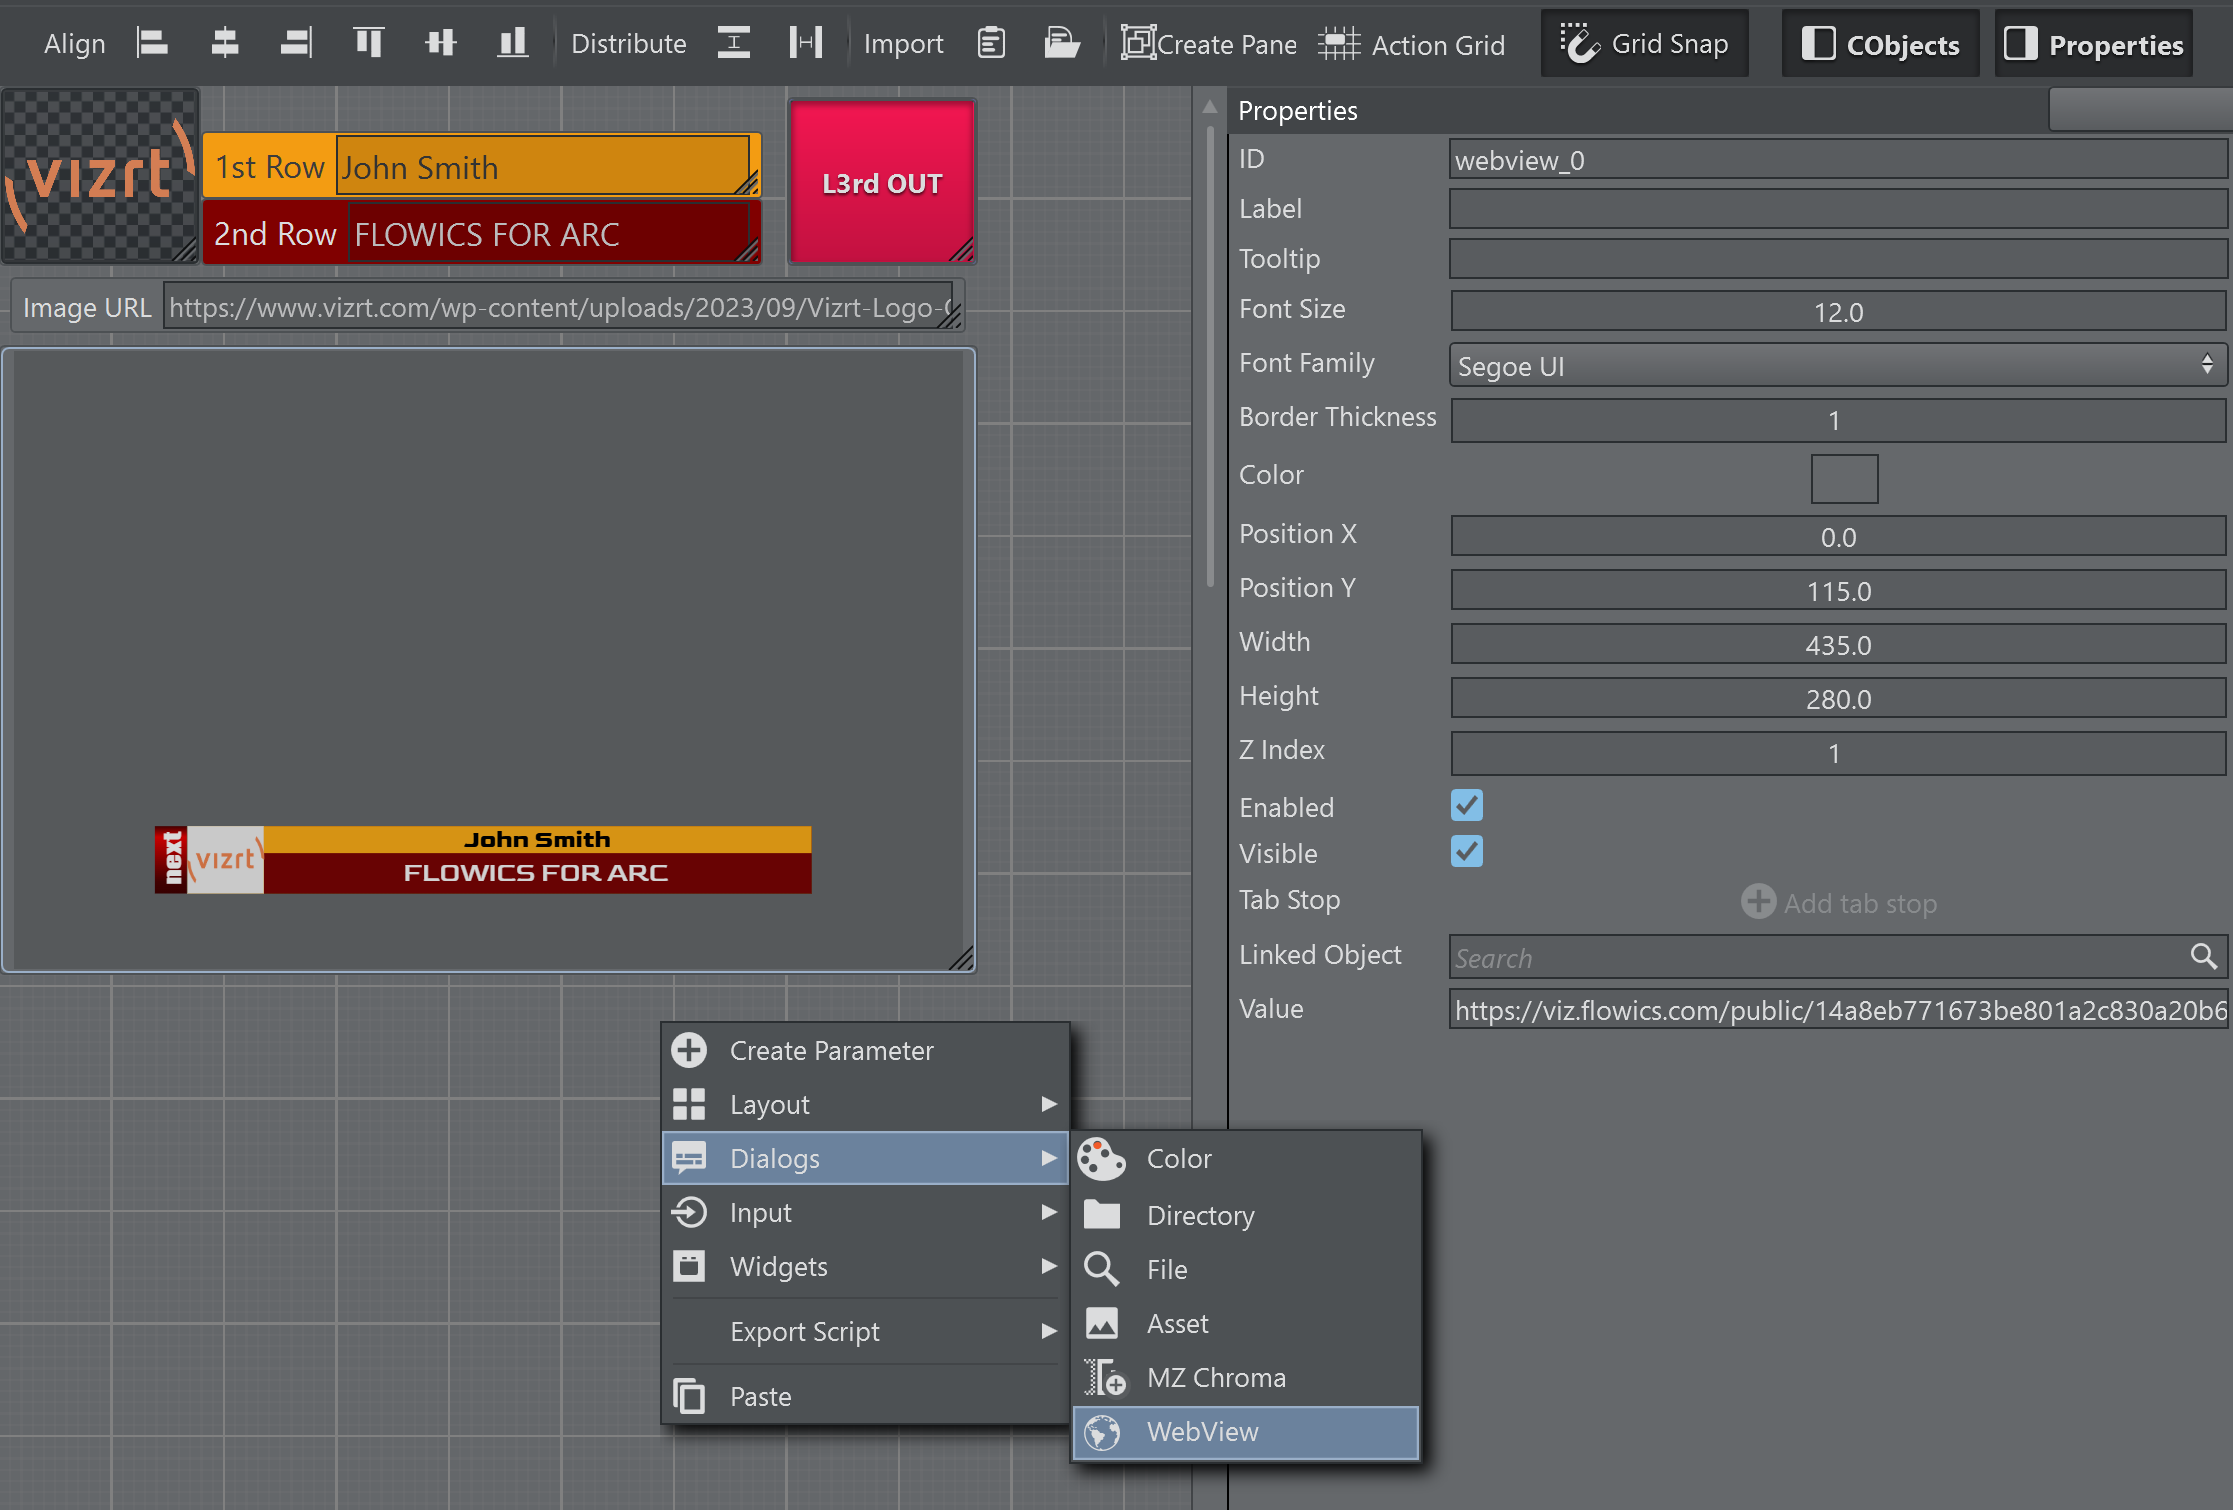
A WebView parameter can be added with the respective output of the Flowics output.
Execution and Update Logic
When a Flowics template gets executed through the Execute button or through shortcuts, the Integration ID’s mapped in the template UI and the toggles mapped in the UI are updated on the Flowics output.
When the template gets updated through the Update button or its respective shortcut, only the Integration ID’s are updated on the Flowics output.
Data can be updated selectively using the UdpateTemplate scrpting method. When the function is called without parameters, all Integration ID’s mapped in the template UI are updated on the output. When a space separated list of Integration ID’s is used, only those ID’s are updated on the output.
Extending the sample above, the output is updated as soon as the text is validated on the template UI (though lost focus or when ENTER is pressed in the text parameter).
Global.OnParameterChanged = function (id){ if( id == "imgURL" ) { // assign URL from text parameter // to flowics image img.Value = imgURL.Value } else if( id == "text_2nd" || id == "text_1st") { // text_2nd and text_1st are the internal Viz Arc script id's of the text parameter's // linked to the Floics Integrtion ID's n2329.bottomline and n2329.topline // only update the 1st and 2nd row text UpdateTemplate("n2329.bottomline n2329.topline") }}Global Data Provider - Custom Data
The Global Data Provider in Flowics is a powerful tool to control graphic settings throughout the GFX package. A setting (for example, a text string or a color) can be linked multiple times throughout one or multiple overlays.
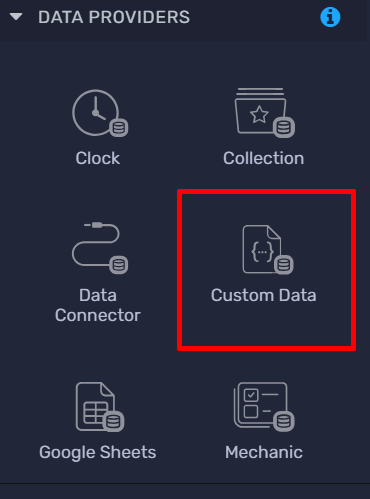
In particular the Custom Data provider can be used to expose controls to Viz Arc templates.
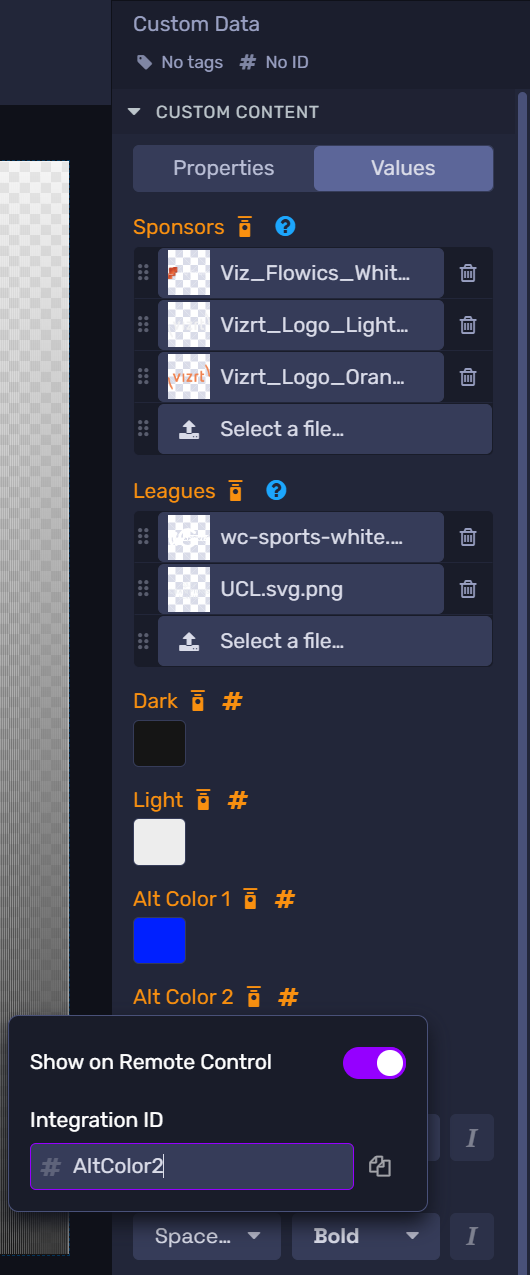
The respective control needs to have an Integration ID assigned to be exposed to Viz Arc. Currently only Text, Image and Color properties are supported.
Create a new template and select the Overlay(s)
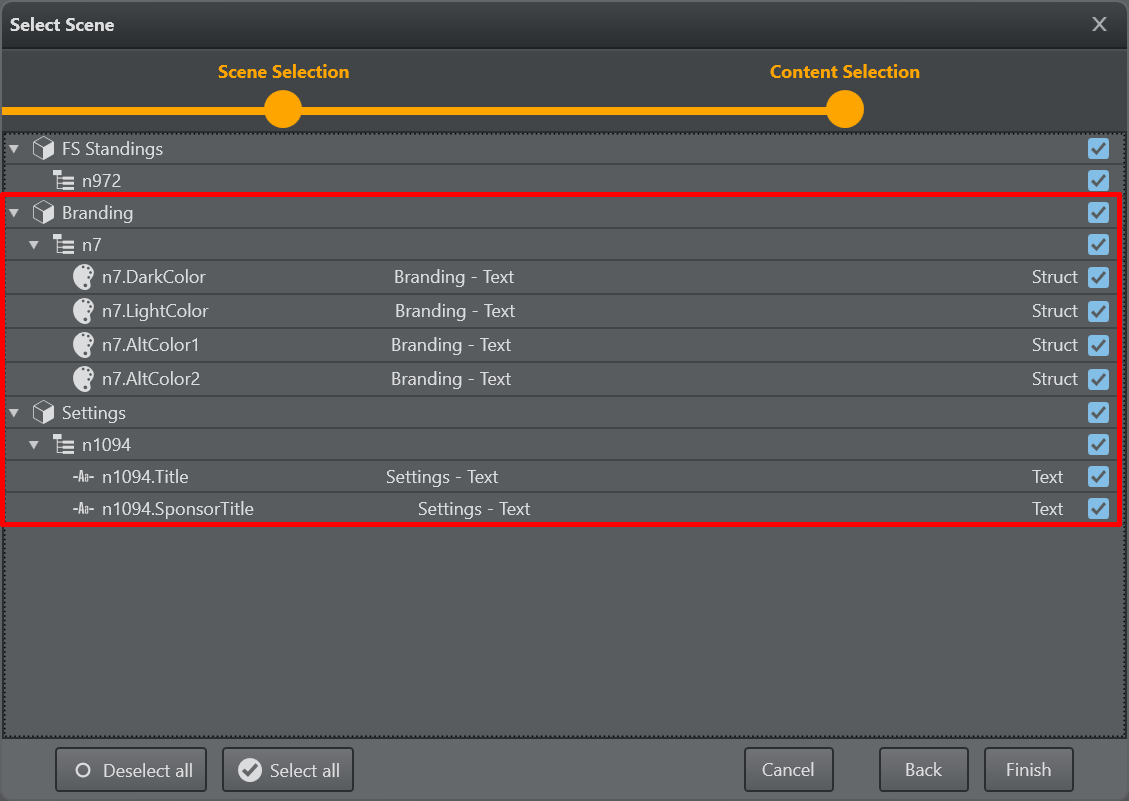
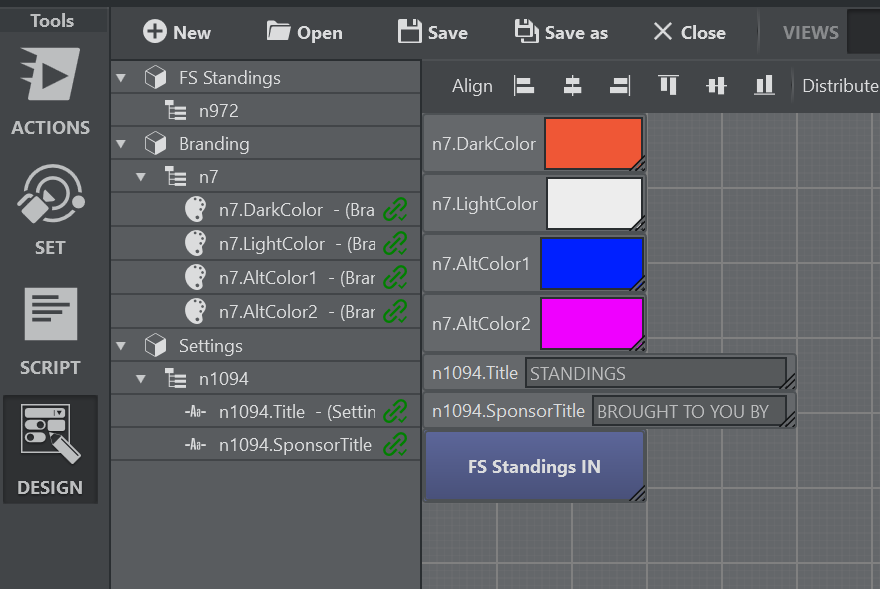
In the next step of the template wizard the Global Data Providers show up where the single elements can be selected/deselected for automatic UI generation.
The UI generated might then look like this:
The Logic of Execute and Update
Once the template is finished it is ready to be used.
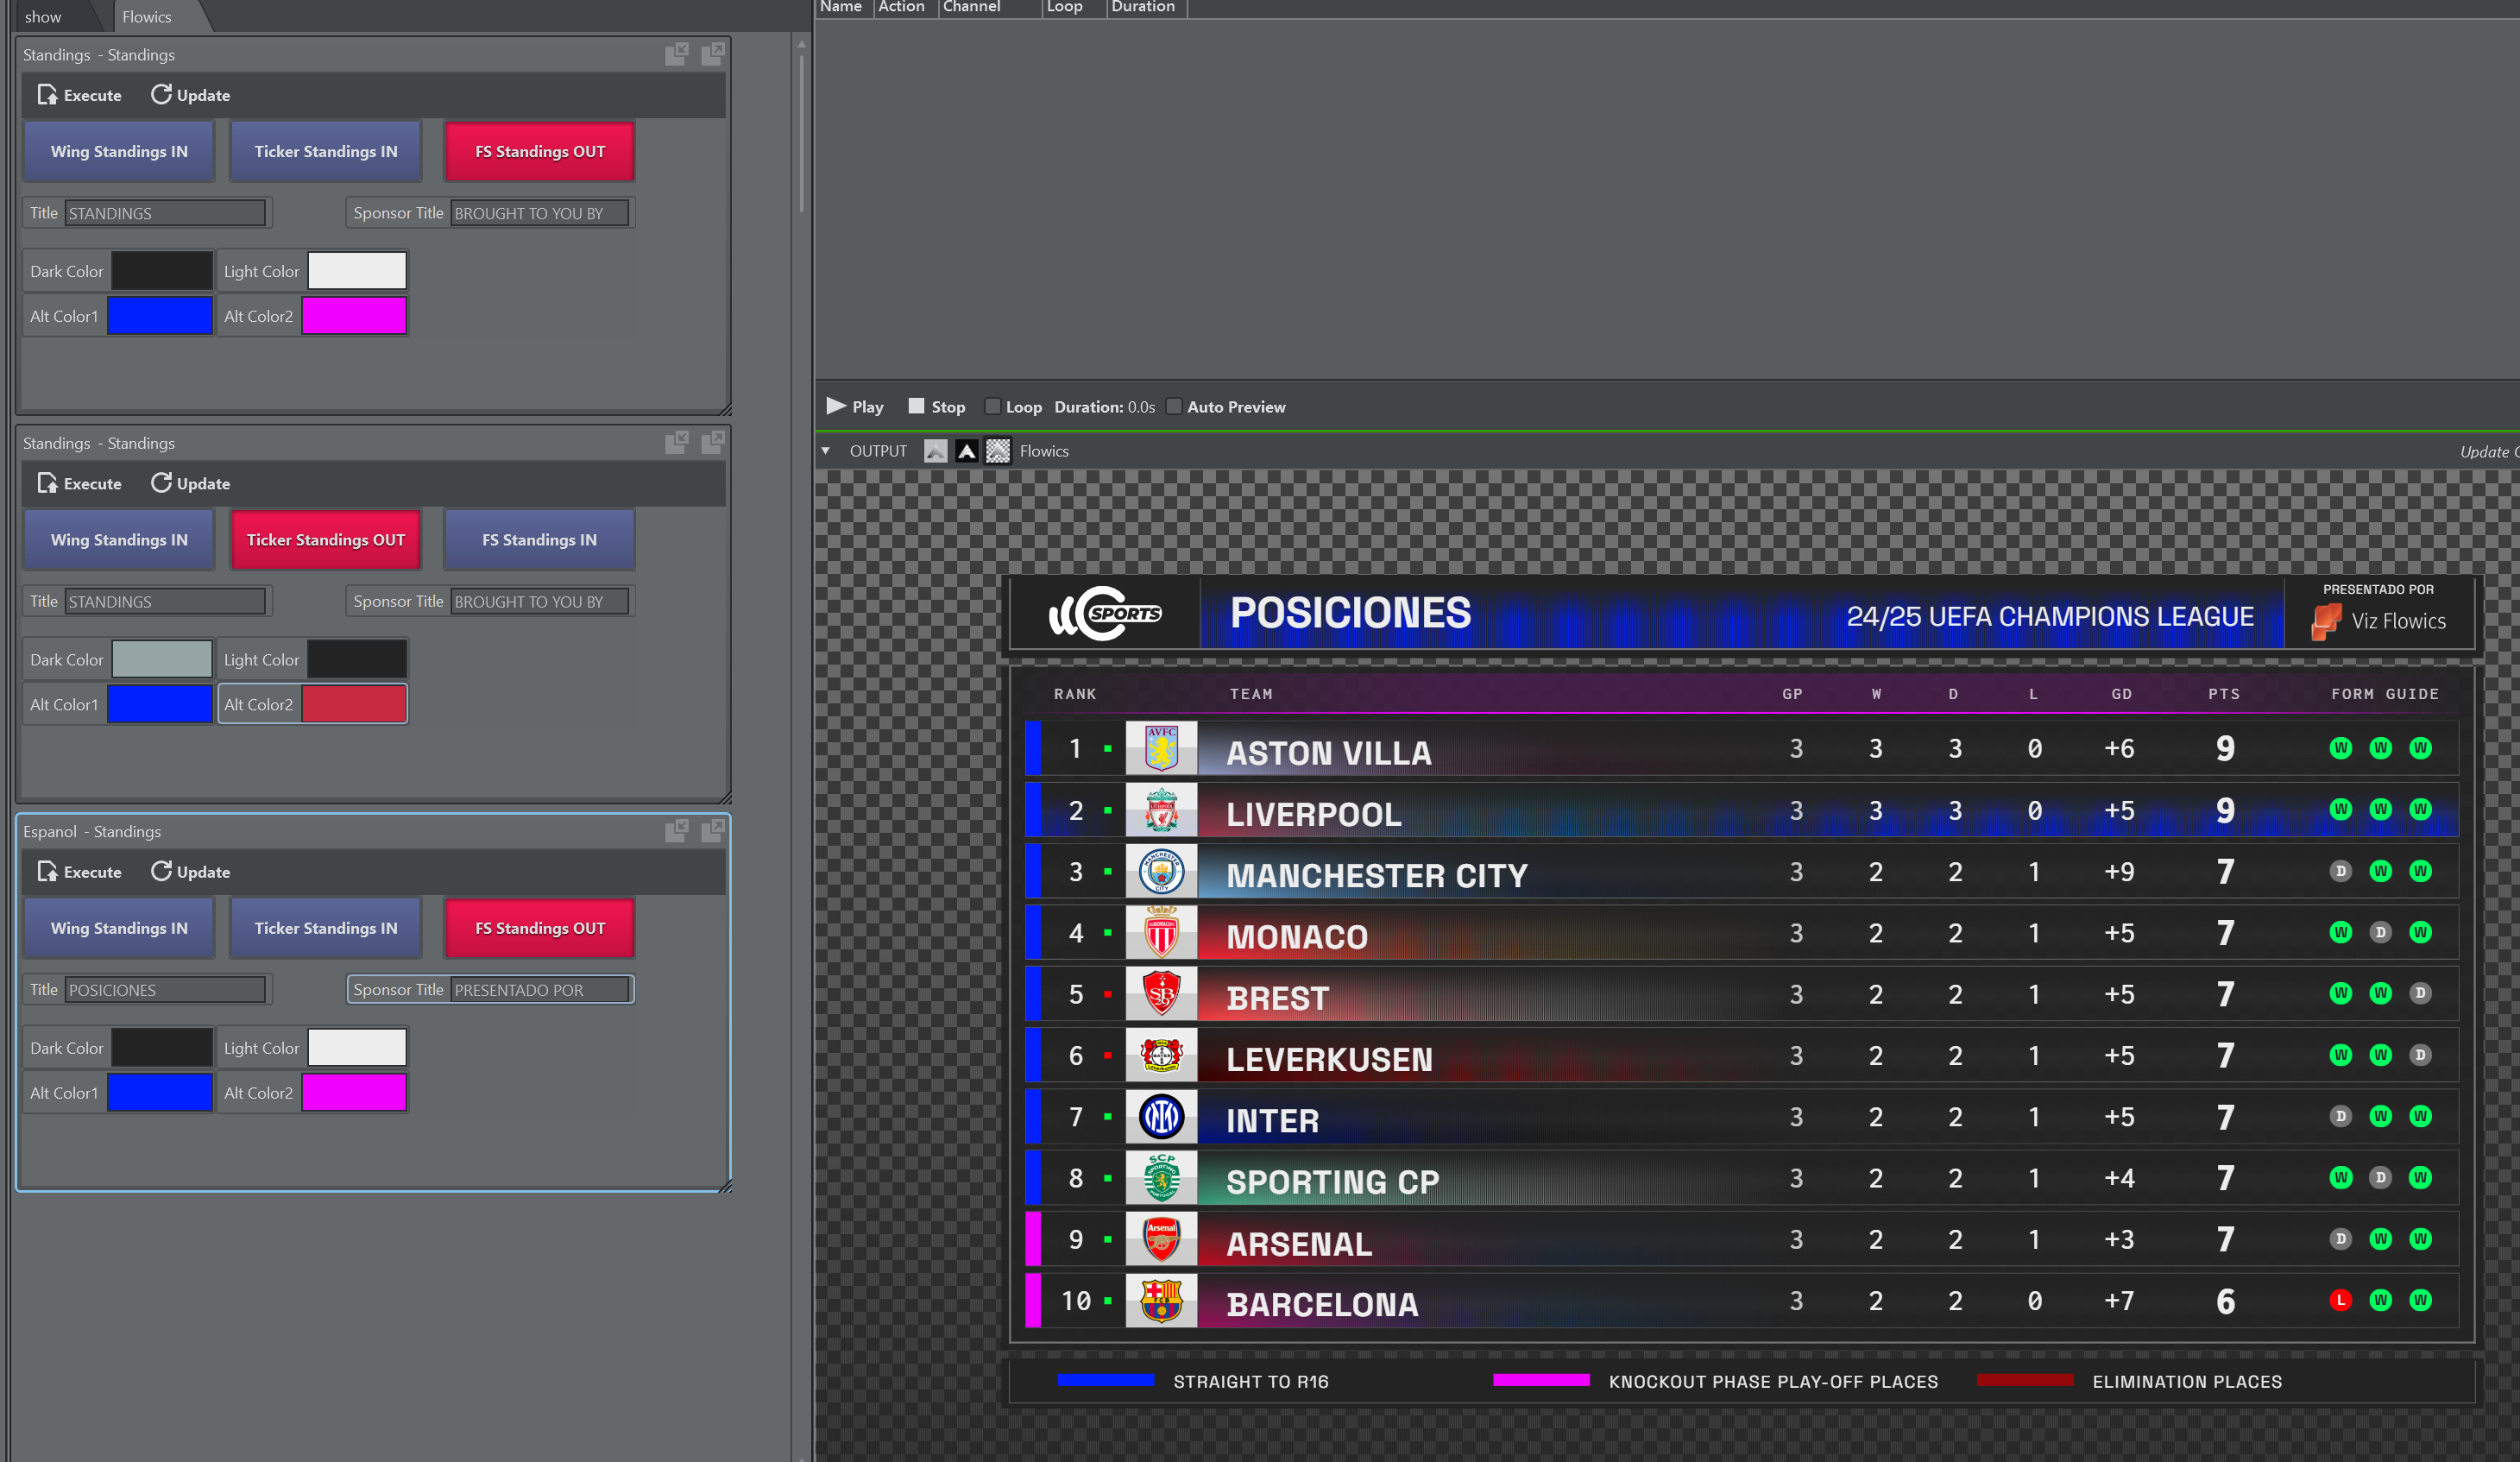
When a template is Executed all the linked data in the template is updated on the Flowics graphics and all the toggle buttons present in the template are going to be matched in the graphics. Overlays are animated in or out according to their status in the template UI.
When a template is just Updated, only the linked data items are updated on the Flowics graphics.
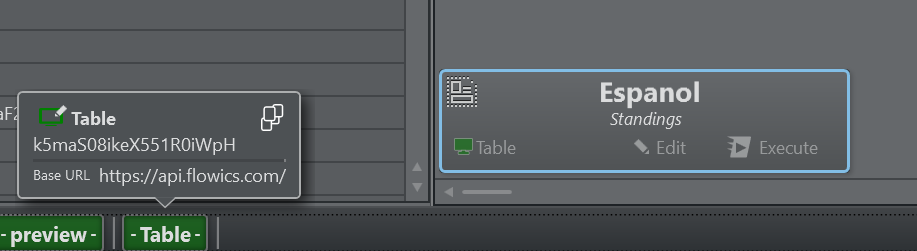
Make sure the templates are linked to the correct output channel/Engine matching the correct Flowics API token.
Executing Custom Commands
It is possible to send custom commands to Flowics engines. They need to be wrapped in a JSON structure, as shown below, and sent to the engine as a stringified JSON.
{ "command" : string, "method" : string, "postfix" : string, "content" : string, "doArrayWrap" : bool}command: Needs to be “custom”.
method: Can be PATCH, GET, PUT, POST, DELETE.
postfix: The postfix to be added to the URL.
content: The JSON content to be sent as a payload to Flowics.
doWrap: Use true to wrap the content into JSON array brackets ‘[' and ']’.
Info: The Flowics API documentation can be found here.
The clock as it appears in the Flowics remote control:
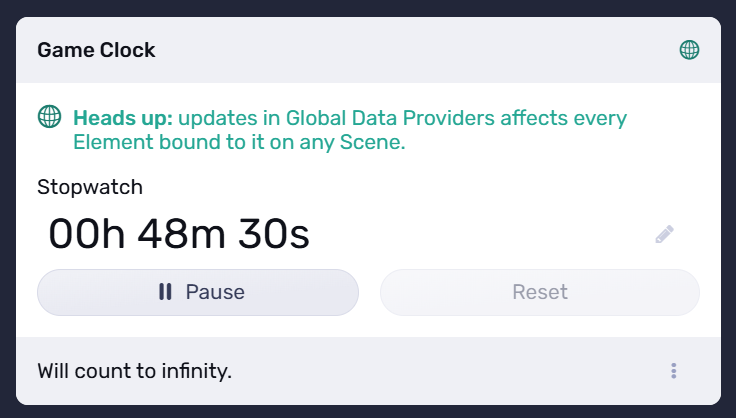
The following example shows a convenience function for a Viz Arc JavaScript, that sets and starts a soccer clock (for example, it can be triggered when a match starts at 00:00 or the second half at 45:00).
function SetClockAndPlay(clockVal){ var flowicsCommand = new Object() flowicsCommand.command = 'custom' flowicsCommand.method = 'PATCH' flowicsCommand.postfix = '/control/global-data-providers' flowicsCommand.content = "{\"id\":\"n1818\",\"controls\":{\"stopwatch\":{\"value\":{\"startFrom\":\"" + clockVal +"\",\"timeReference\":\"" + Date.now() + "\",\"current\":\"" + clockVal + "\",\"state\":\"play\"}}}}" flowicsCommand.doArrayWrap = true GetSelectedChannel().SendSingleCmd(JSON.stringify(flowicsCommand)) Console.WriteLine("SetClockAndPlay " + flowicsCommand.content)}The function above can be invoked as:
SetClockPlay("00:45:00")The content as a JSON:
{ "id":"n1818", "controls":{ "stopwatch":{ "value":{ "startFrom":"00:45:00", "timeReference":"1753173655377", "current":"00:45:00", "state":"play" } } }}DataMap Explorer
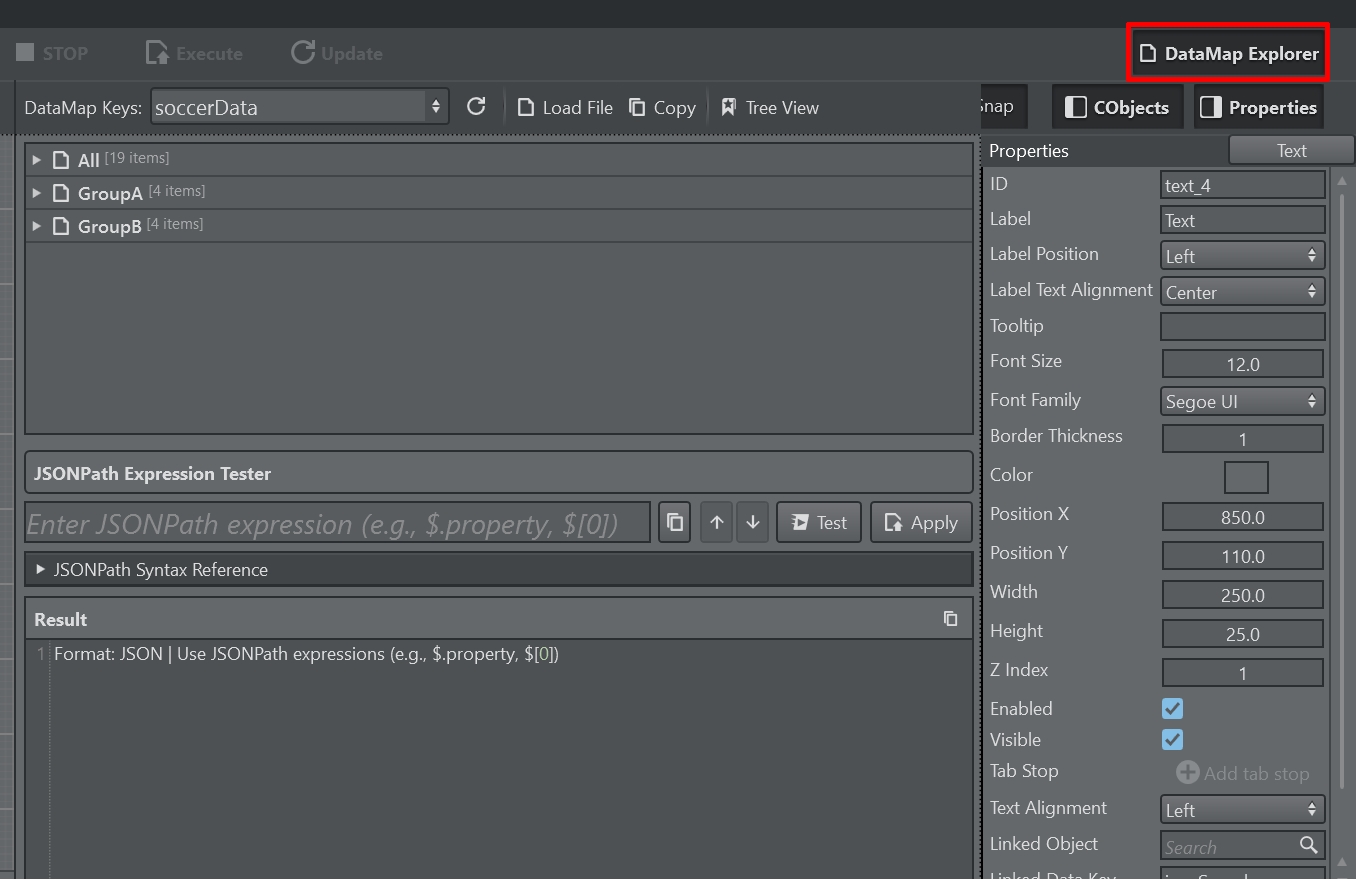
The Data Explorer helps to visualize data present in the DataMap (in particular, JSON and XML formatted data. Access the DataMap Explorer with the button on the top right corner of the template editor. It only opens when the Template Editor is in UI or in BOTH mode.
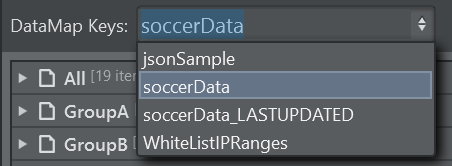
Select from the DataMap Keys dropdown the data to visualize. It auto-detects the formatting.
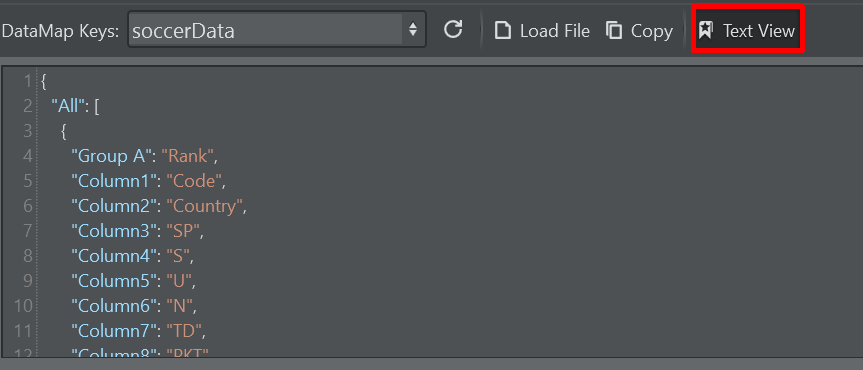
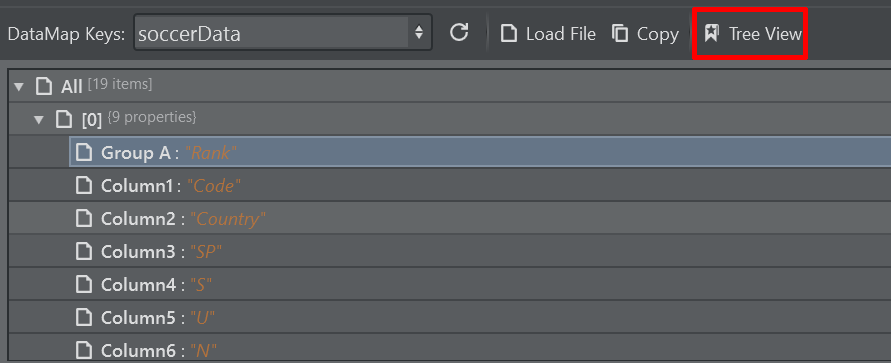
With the Tree View/Text View toggle button you can switch between a tree view style visualization of the data or the plain textual view.
For the purpose of testing, you can use Load File load the content of a file from disc into the selected DataMap key. With the Copy button you can copy the current content into the clipboard.
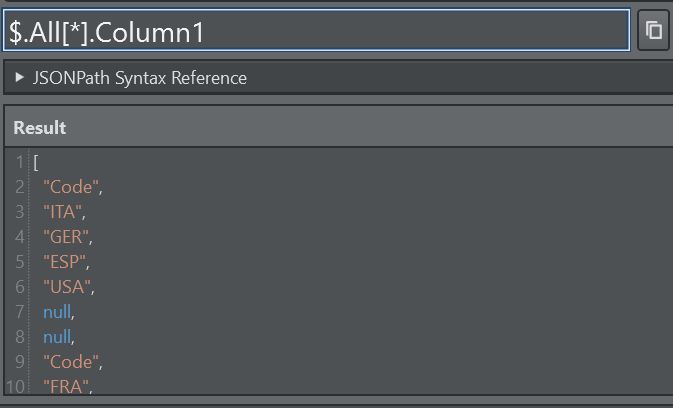
Further down the UI a JSONPath or XPath Expression Tester allows you to make a query on the data. Press the Test button or Return to evaluate the expression.

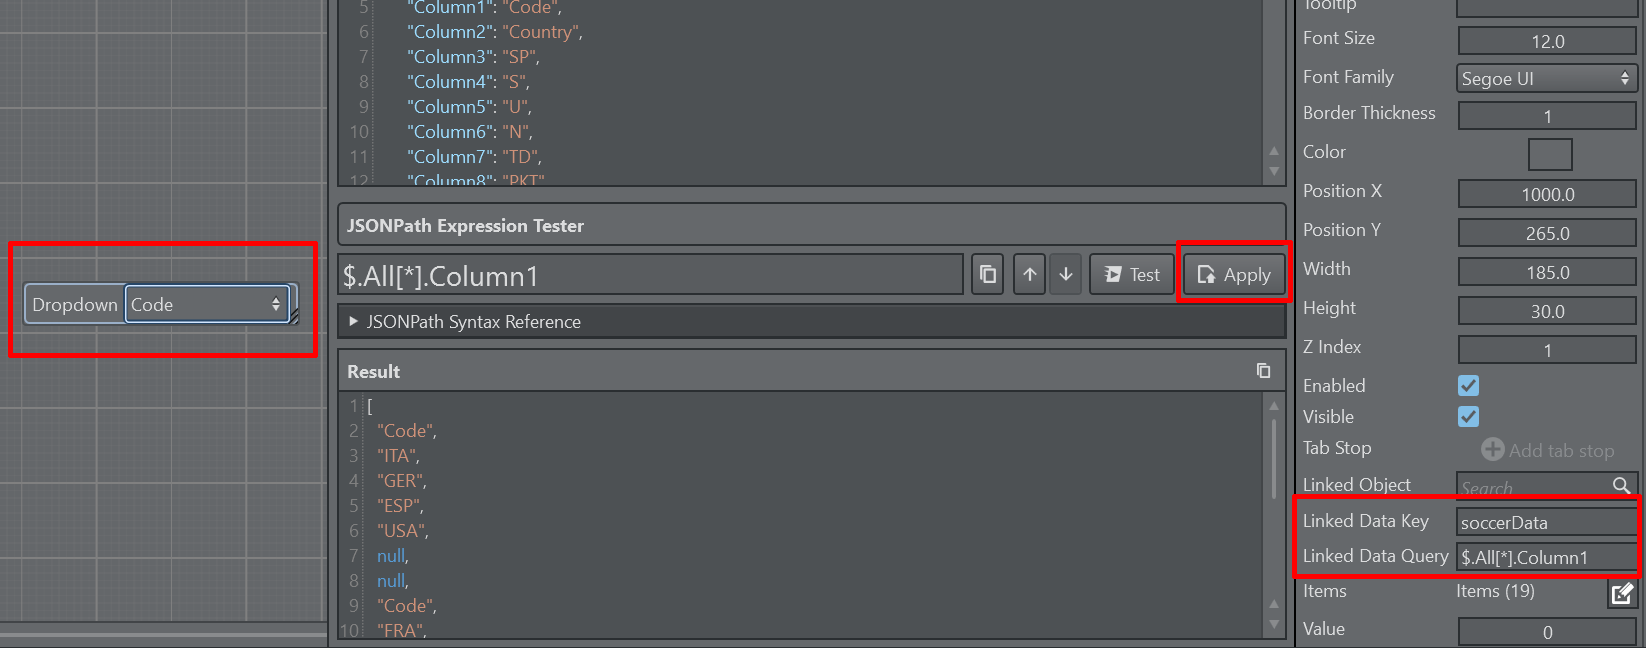
A sample expression that aggregates the field Column1 of all children under All into an array.
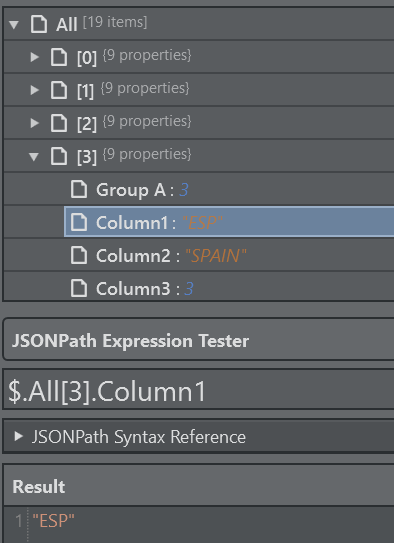
If you are in Tree View mode you can simply select a item in the tree view and double click on it to get an automated expression:
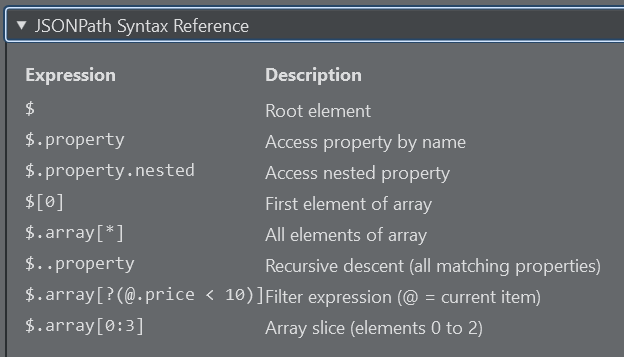
Expand the syntax reference to get a quick guide on the query syntax:
Once satisfied with the expression you can select a UI parameter and hit the Apply button. It assigns the Linked Data Key and Linked Data Query properties accordingly and it attempts to assign the value to the component. Not all values can be applied to all parameters. The dropdown, for example, accepts only string arrays, while the Text Parameter accepts only strings.
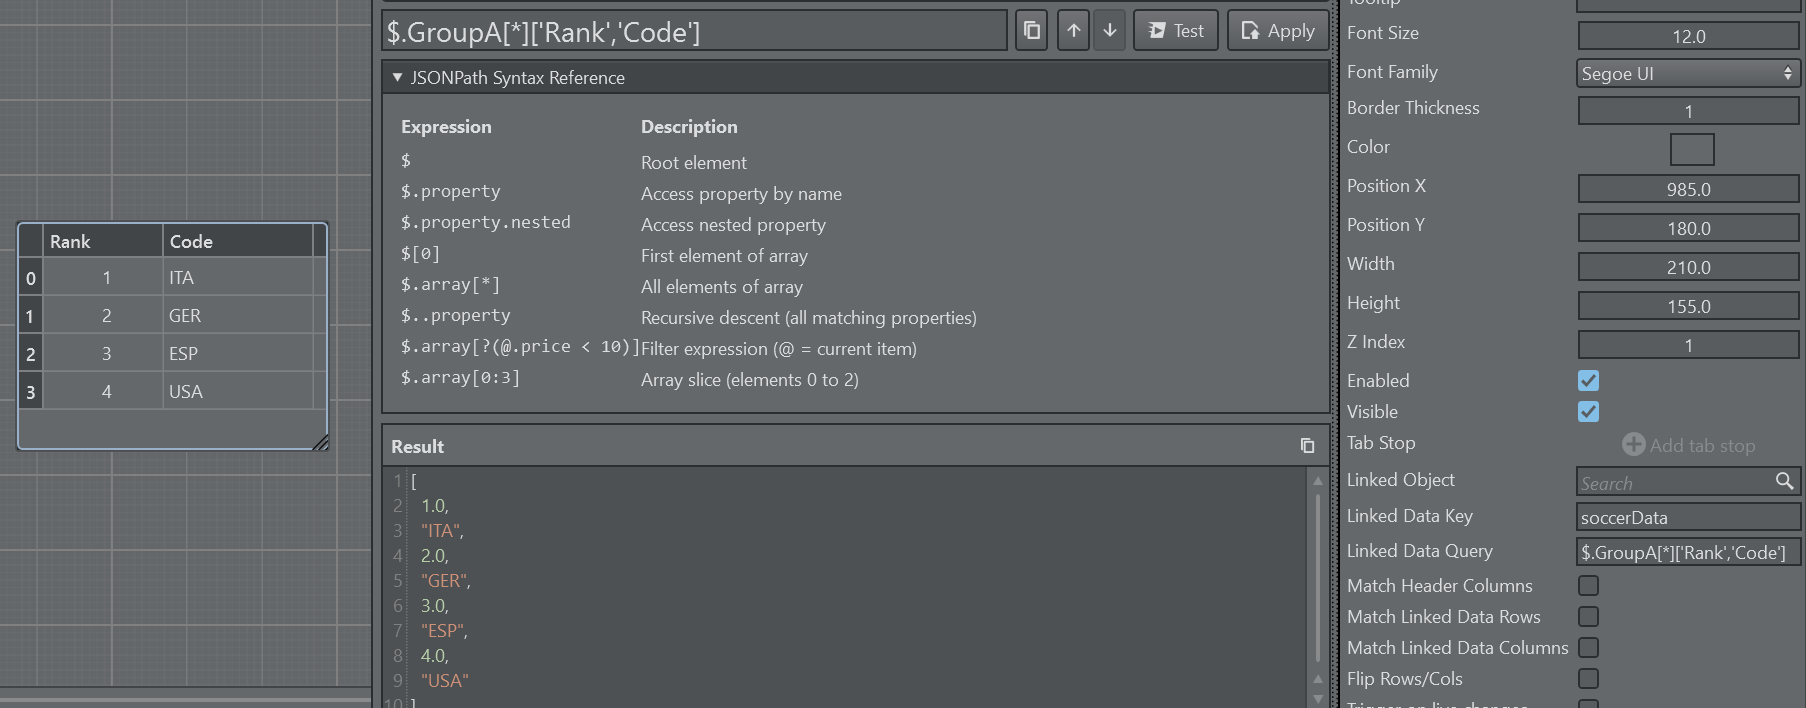
In conjunction with Table Parameters, here are two samples on how to automatically apply data to a table. Here we use the query $.GroupA[*]['Rank','Code'].
The result is a one dimensional array with Rank and Code interleaving, that means that the destination table needs to have the exact same column layout as the queried data.
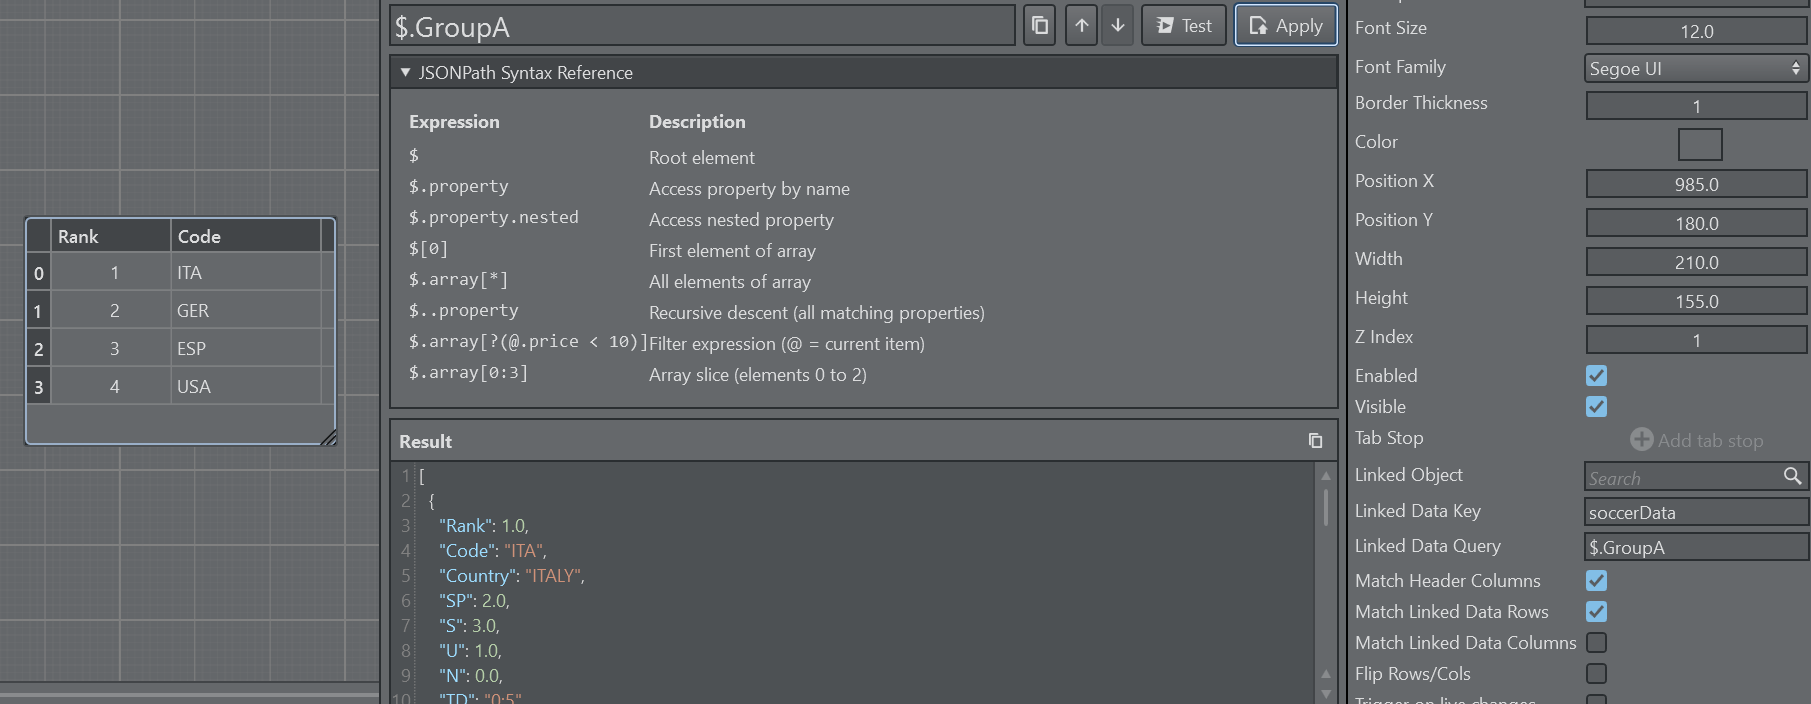
A more robust approach would be to use to simplify the query by just using $.GroupA. We have to make sure though that the table headers match exactly the names in the json structure (Rank and Code in this case). We also need to check the properties Match Header Columns and optionally Match Linked Data Rows to automatically match the number of rows in the table with the data.
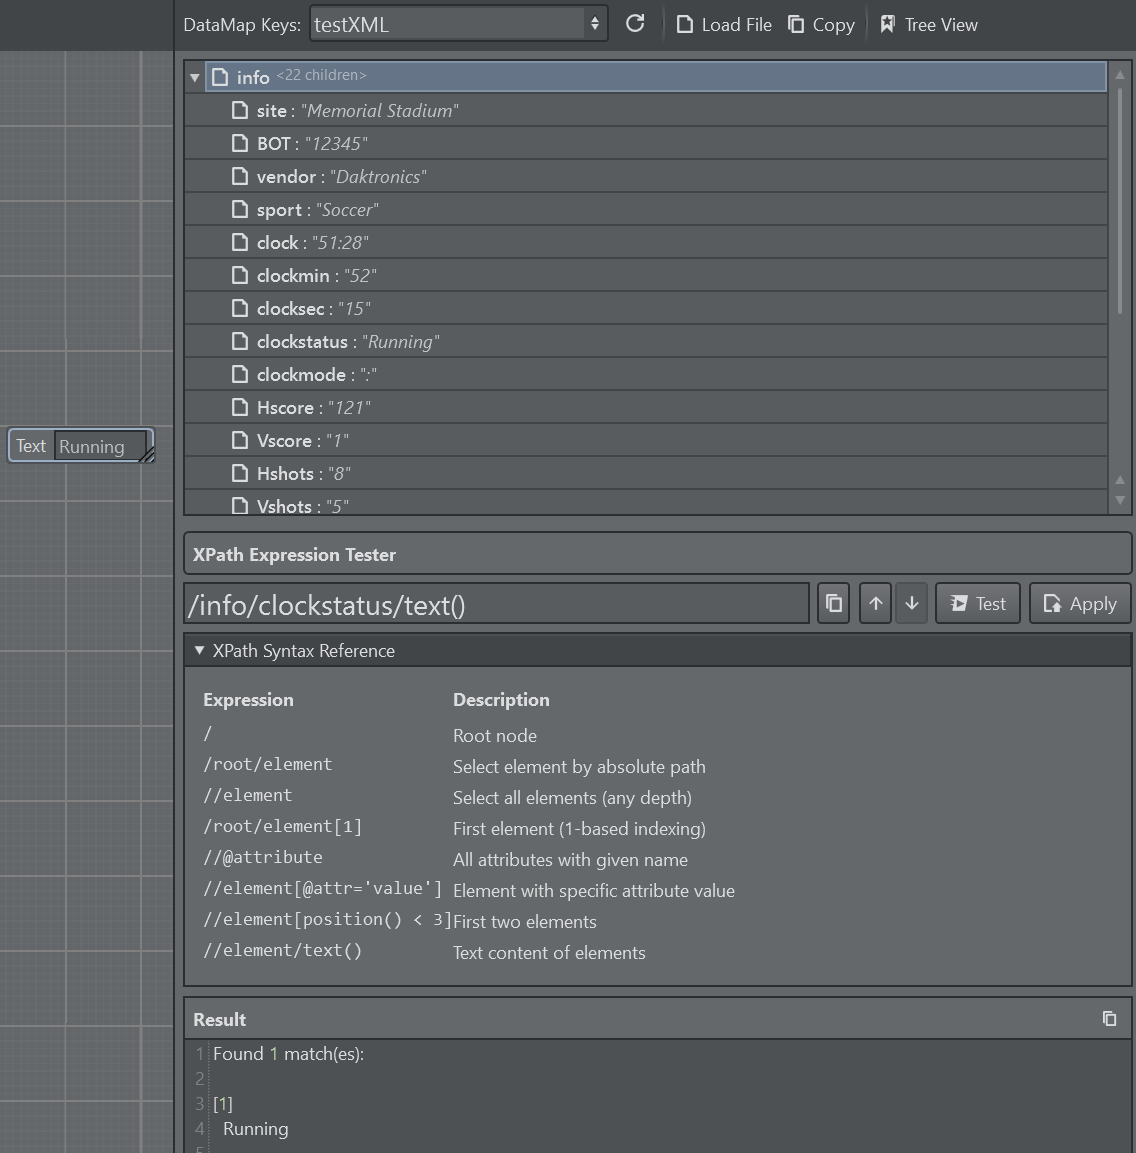
For XML data and XPath queries the same applies as described above, the only difference is the query syntax.
Standalone Templates on REST Service
The REST service can open and drive Viz Arc templates directly, without the Viz Arc application running. This turns the REST service into a headless template runtime for newsroom and web integrations: A client opens a template from Graphic Hub, fills in values, executes it to an output profile and/or generates a payload for later playout.
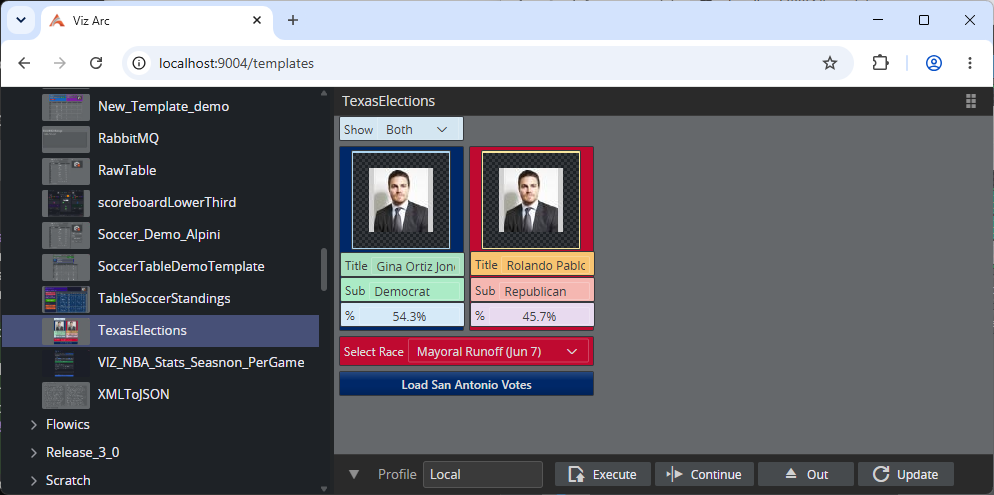
Built-in web application. A fully functional template web application ships with the REST service at http://<host>:9004/templates (or https://<host>:9005/templates when HTTPS is configured, where <host> is the machine running the REST service). It offers the complete workflow out of the box. Browse the templates on Graphic Hub, open one, fill in its values with live script support, execute it to an output profile and copy the resulting payload. It is built entirely on the endpoints documented in the REST API page, making it both a ready-to-use tool and the reference client for custom integrations.
Instances. Every opened template becomes an instance, identified by a UUID returned by the open call. All subsequent calls (changing values, firing script callbacks, executing, generating payloads) address the instance through this UUID, and close releases it again. Opening a template also starts its script: the same V8 engine as in the Viz Arc application runs the template code and fires OnCreated and OnShow, so templates behave through the REST service exactly as they do inside Viz Arc.
A typical integration flow:
POST /Templates/openByPath: Open the template, receive the instance UUID and the full parameter structure.Fill in values on the client side.
POST /Templates/executefor direct playout, and/orPOST /Templates/generatePayloadto hand the filled template to a newsroom system. Both accept the current values in the request.POST /Templates/closewhen done.
Refer to the Templates REST API for more information.
Importing Director Templates (Experimental)
Viz Arc can read an existing Director template and rebuild it as a Viz Arc template. The importer reads the template's control layout and script straight from Graphic Hub, recreates the controls as Viz Arc parameters, rebuilds the matching control object tree and links the two together, so an existing Director template can be opened in the Template Designer and carried forward instead of being rebuilt by hand.
Experimental feature. The Director importer is released as an experimental feature. It gives a working starting point for most templates, and the sections below describe exactly which parts are carried over automatically and which parts are expected to need attention afterwards. Always review an imported template before using it on air.
Requirements
Director enabled and configured under Settings > Viz Systems, pointing at the Pilot Data Server that holds the templates. The Import from Director button stays greyed out until this is set up, and its tooltip says so.
A reachable Graphic Hub configured in Viz Arc's settings, including the Graphic Hub REST user and password. The template's controls and script are read through this connection, so it must point at the same Graphic Hub that backs the Pilot Data Server. The template list in the import browser comes from the Pilot Data Server itself, so with a different Graphic Hub connected the templates are still listed, but the import reports that the template was not found.
Graphic Hub backed Pilot only. The Pilot Data Server offers no interface for reading a template's control layout, so the importer reads it from the Pilot database through the Graphic Hub's Pilot REST interface. On installations where the Pilot Data Server runs against an Oracle database, this data does not live on a Graphic Hub, so these templates can be browsed but not imported in this release.
Importing a Template
Open the Template Designer. With no template open, the start screen shows three buttons.
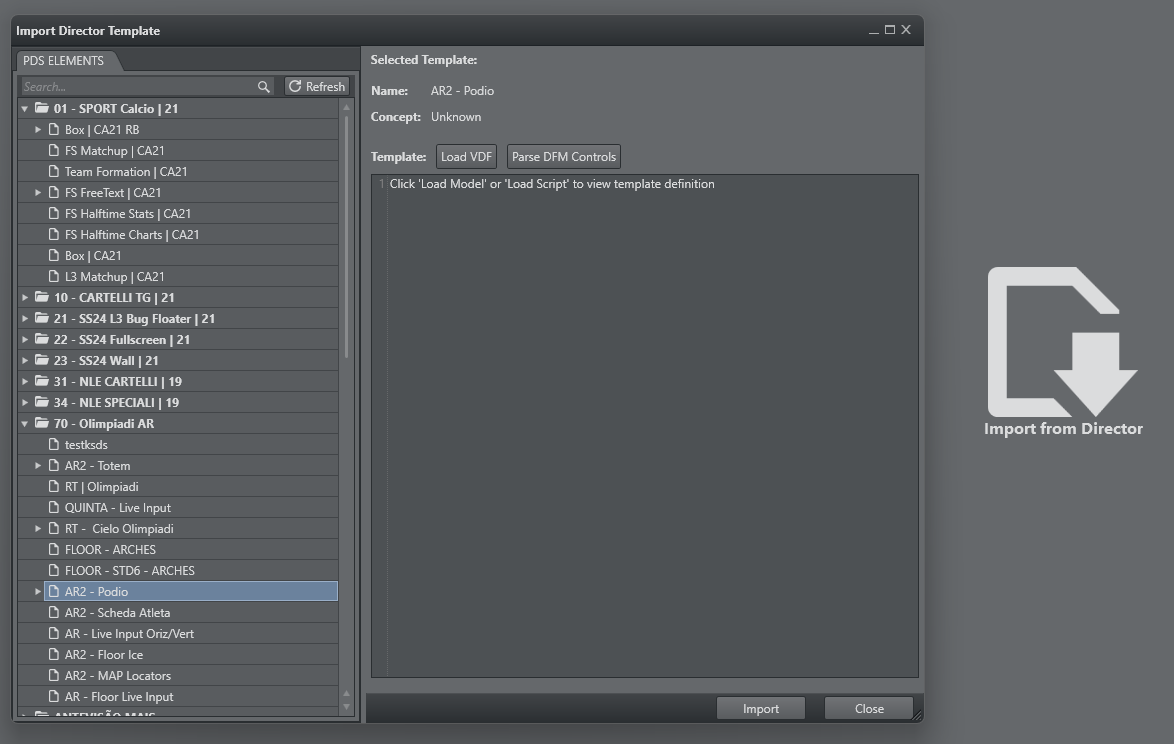
Choose Import from Director. If the template currently open has unsaved changes, Viz Arc offers to save it first.
The browser opens on the PDS Elements tab. Expand a concept and select the template to import.
Click Import.
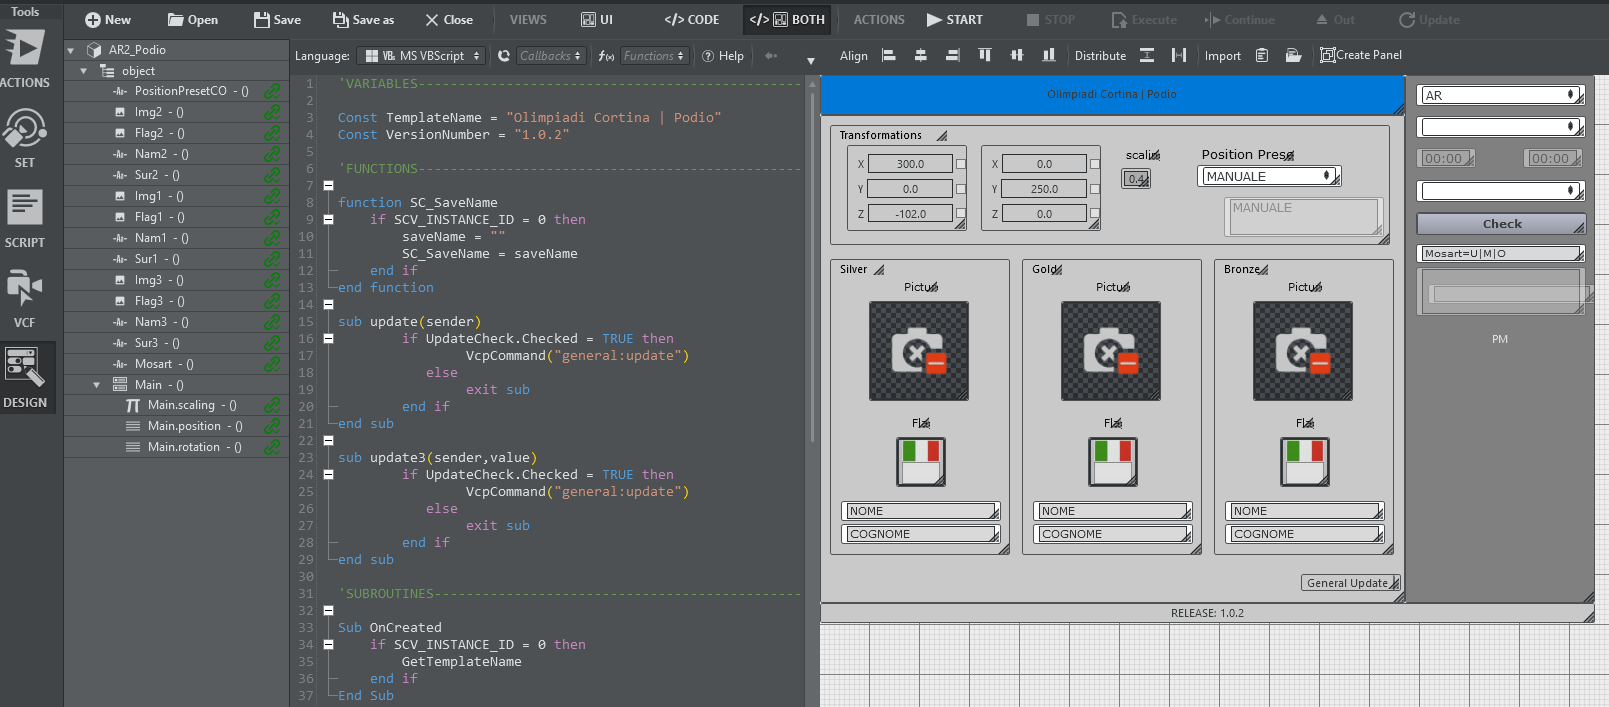
The converted template opens directly in the Template Designer as an unsaved Viz template, ready to be reviewed and saved into Graphic Hub like any other Viz Arc template.
What the Importer Carries Over
Controls
Director controls are matched to their Viz Arc equivalents, including the Template Wizard (TTWUni*) and Unicode (TTnt*) variants of each:
Director control | Viz Arc parameter |
|---|---|
Edit | Text |
Memo | Multiline text |
Combo box | Dropdown, including its list entries |
Check box | Boolean, including its checked state |
Radio group | Radio, including its list entries |
Drag edit | Double, including minimum and maximum |
Triplet editor | Triplet, including all three values |
Image field | Asset |
Button | Button |
Label, static text | Label |
Panel, group box | Panel |
Page control with tab sheets | Tabs, one tab per page |
Non-visual objects such as the script component, timers and menus are recognised and skipped, so they do not appear as parameters.
Layout and Appearance
Position and size are taken over for every control.
Stacking order follows the order the controls have in the Director template, so overlapping elements keep the same front-to-back arrangement.
Colors are converted, covering the named Delphi color constants, direct color values and the Windows system colors. Controls that inherit their color from a surrounding panel keep that behaviour in Viz Arc.
Fonts are converted from the original font height or point size to the matching Viz Arc font size, and the font family is carried over.
Controls that are hidden in the Director template are imported as hidden.
Tabs
A page control becomes a single Tabs parameter, with one tab per page and the page captions as tab names. Every control on a page is placed on the matching tab and keeps its position within it.
Scene and Control Objects
The scene the template drives is resolved from the Director template and set on the imported template, together with its Graphic Hub identifier, so the template is bound to the same scene it drove before.
A control object tree is rebuilt from the fields the controls were bound to, covering text, number, boolean, image and triplet fields, including fields nested inside a structure.
Each imported parameter is linked to its control object automatically, so values reach the scene without any manual linking.
Script
The template's VBScript is imported unchanged and the script engine is set to VBScript, so the original code stays readable and comparable to the original. One adjustment is made: Director's initialization routine InitForm, the procedure Director calls before the form is displayed, is renamed to OnCreated, which is the routine Viz Arc calls when a template initializes. Its calls are renamed with it, so setup code runs on import instead of sitting unused. If the script already contains an OnCreated routine of its own it is left untouched, and if no initialization routine is found at all a note says so, since a template whose setup code never runs is worth knowing about. All of these notes go to the log.
What Needs Attention After an Import
Director and Viz Arc describe templates in different ways, and a few concepts have no one-to-one counterpart. The importer resolves each of these in a defined way and writes a note to the log describing what it did, so the result is predictable and easy to check.
Script Logic Beyond Initialization
The script is carried over as source code, not translated. Any part of it that talks to Director's own scripting objects and control names keeps referring to them, so script logic generally needs to be adapted to the Viz Arc scripting API by hand. The Viz Arc equivalents are described in the Scripting chapter of this documentation. Only the initialization routine is renamed automatically.
Per Control Event Handlers
Director attaches a script routine to an individual control, so a template has one routine per control event: an OnChange routine for an edit field, an OnClick routine for a button, and so on. Viz Arc works the other way round: it calls one callback for the whole template and passes the name of the parameter that was touched. So the routines come across with the script, but nothing calls them yet, and they need to be dispatched by hand from the matching Viz Arc callback:
Director control event | Viz Arc callback to dispatch it from |
|---|---|
|
|
|
|
|
|
| No direct equivalent, the routine has to be triggered another way |
In each case id is the name of the imported parameter, which is the control's field name where it is bound to one.
What the Importer Wires Up Automatically
The importer reads the event bindings out of the template and writes this dispatch for you, as a clearly marked block at the end of the imported script, after the original code:
' --- Imported Director event handlers --------------------------------' Director calls one routine per control event. Arc calls one callback per' template and passes the name of the parameter that changed, so the routines' above are dispatched from here. Rearrange or remove as needed.sub OnParameterChanged(id) ' bound to several controls without naming any of them, so it ran on any change CheckInputValues select case id case "lblPktH", "lblPktG", "lblStrH", "lblStrG" Score_Click case "lblAnzahlSaetze", "lblSatzbis" btnUebernehmenActive end selectend subsub OnButtonPressed(id) select case id case "bClear" bClearClick end selectend subControls that shared one routine are grouped onto a single case, and Select Case stops at the first match rather than testing every parameter name on every change, which matters on a template with a hundred fields.
It applies three rules, all of them deliberately cautious:
A routine is dispatched only when the template script actually declares it. Bindings often point at one of Director's own predefined functions, or at a routine that was deleted from the script, and generating a call to something that does not exist would stop the script from running.
A routine attached to a named control becomes a case on that parameter's name.
A routine attached to several controls without naming any of them, and never attached to a named one, is how a shared "refresh everything on change" routine is stored, so it is called for any parameter change and carries a comment saying why. A routine that also appears against a named control is treated as belonging to that control only, so it does not end up running twice.
Anything the importer will not wire up on its own is named in the log, together with the reason, so the remaining work is a list rather than a search. A routine bound to a double click, for example, is left in the script with a note that Arc has no equivalent callback. If the script already defines one of these callbacks itself, that definition is kept untouched and the calls it would have added are listed in the log instead.
The generated block is ordinary script. Edit it, reorder it, or delete it as the logic gets adapted.
Converting the script from VBScript to JavaScript is not offered in this release. Keeping the original VBScript means the imported template runs the same code it ran before, which makes it far easier to compare the two side by side while the logic is being adapted. Usage of AI tools for conversion is recommended.
Nested Panels
Director allows panels inside panels to any depth. A Viz Arc template groups parameters one level deep: a panel or a tabs parameter sits on the template and holds the parameters inside it. Where the original template nests deeper, the importer keeps every control and repositions it so that the layout still matches:
In the Director template | In the imported template |
|---|---|
A panel inside another panel | The inner panel is placed on the template itself, at the position it appeared at originally. |
A panel on a tab page | The controls on that panel are placed directly on the tab, at the same positions. The panel background itself is not recreated. |
A page control inside a panel | The tabs parameter is placed on the template itself, at the same position, with all of its pages and their contents. |
No fields are lost in any of these cases, and every control keeps the position it had on screen. What changes is the grouping, so a template that relies heavily on nested panels is worth a look afterwards to decide whether the flattened grouping should be rearranged.
Controls Without a Direct Equivalent
A control whose type has no counterpart in the table above is imported as a text field so that its bound scene field is preserved and nothing is dropped silently. A note naming the control and its original type is written to the log, so these can be reviewed and given a more suitable parameter type where needed.
Reviewing the Conversion
Everything the importer decided is written to the Viz Arc log while the template is being imported, and is easiest to follow in the Live Log panel. It is worth opening the log right after an import to see the full list of notes for that template: renamed routines, flattened panels, and controls that were given a text field.
Known Limitations
The Pilot database must be hosted on Graphic Hub. On installations where the Pilot Data Server runs against an Oracle database, templates can be browsed but not imported, see the Requirements section above.
Templates are imported as Viz templates.
The imported template is not saved automatically. Review it and save it into Graphic Hub explicitly.
Script logic other than the initialization routine and the event dispatch needs to be adapted by hand.
Event routines that Arc has no callback for, or that cannot be tied to a single control, are reported rather than dispatched, see above.
Panel grouping is flattened to one level as described above.
Conversion notes are written to the log rather than being shown in a summary window.