Viz Mosart can connect and control NDI audio streams to LAMA Mix, a software audio mixer for broadcast, proAV and streaming.
Setting-up the inputs and outputs to is achieved using LAMA Connect, a software audio router and protocol converter.
Configuration and Setup - LAMA
The procedure below will define the NDI streams in and out of LAMA Mix, and enable Viz Mosart to control the LAMA software.
Requirements and Compatibility
LAMA | Viz Mosart / NDI |
|---|---|
LAMA Mix 1.1.2 | 5.10 or later |
LAMA Connect 1.1.0 | 5.10 or later |
NDI Toolkit: Latest version at https://ndi.video/tools/ |
Prerequisites
Create an account at https://lamamix.com/
Download a compatible version of both LAMA Mix and LAMA Connect, at https://lamamix.com/my-account/site-downloads/
Note: The free versions of LAMA Mix and LAMA Connect contain all features of the licensed version. However the free edition inserts a 10 second audio silence every 10 minutes, as a watermark. This insertion can be experienced as a ‘pause’ in network activity.
Install RtpMidi on both the Viz Mosart server and on the LAMA machine from https://www.tobias-erichsen.de/software/rtpmidi.html .
os size versions
LAMA Mix Basic Setup
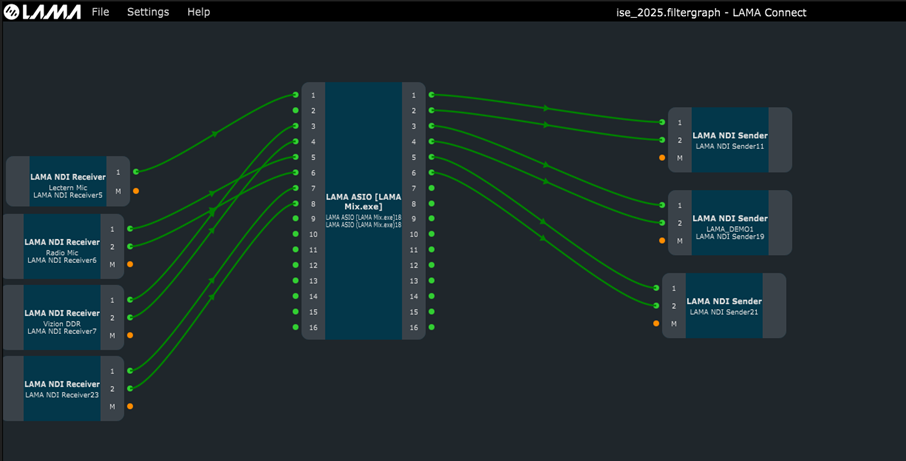
Open LAMA Connect and at the bottom of the UI, instead of the default view, select Graph.
From the File menu, create a connection graph:
Open: An existing LAMA Connect filtergraph
orNew: Create a new one from scratch.
Some default elements are presented.
Inputs:
For NDI audio inputs, add a new audio input by right-clicking on the background and selecting LAMA > LAMA NDI Receiver.
By default, the ingest side is created with 16 channels.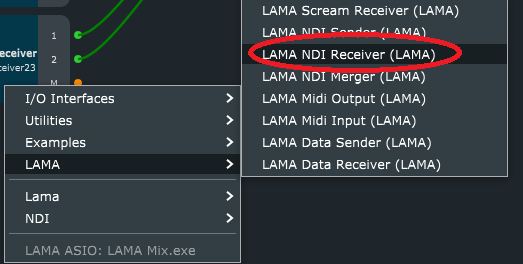
To select your NDI source, double-click on the LAMA NDI Receiver node to open the LAMA NDI Receiver settings menu.
Select the NDI source to map in this receiver.
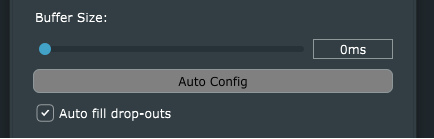
Unlike NDI, LAMA does not use frame synch but instead has its own synchronization using signal buffers that can be configured to automatically adjust their size.
Select Auto Config.Close the LAMA NDI Receiver menu.
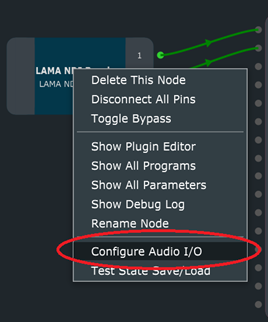
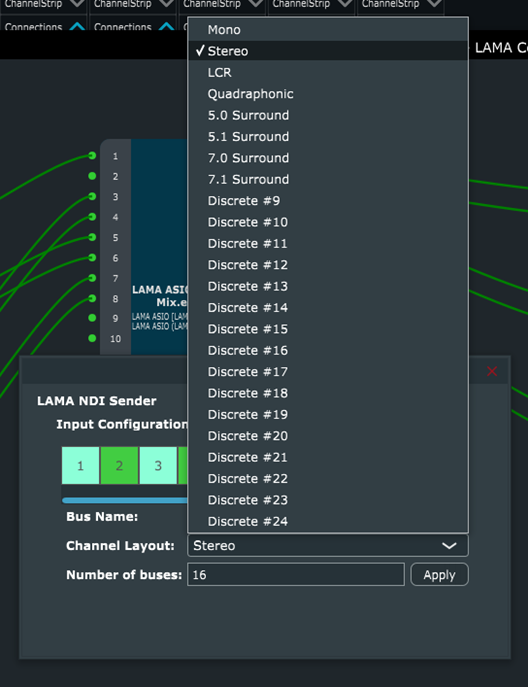
With the receiver created, right-click over it and select Configure Audio I/O.
From the LAMA NDI Receiver menu, select channel layout (Mono, Stereo..).
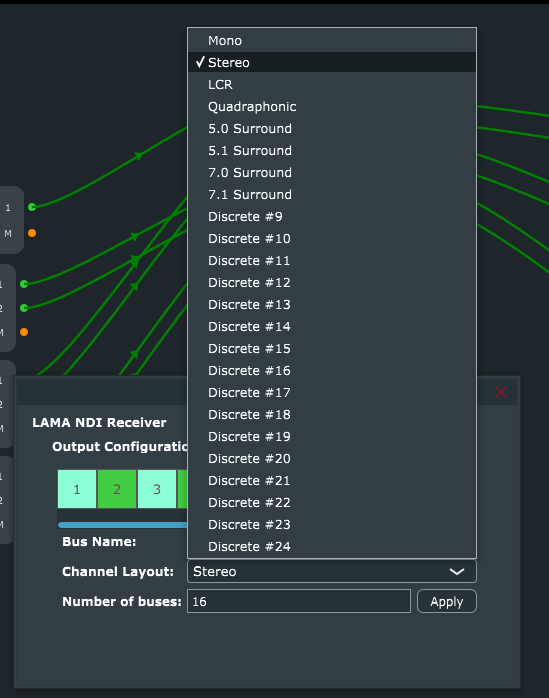
Click Apply.
You should have 2 green dots: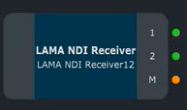
Outputs:
To add a new NDI audio output, right-click the background and select LAMA NDI Sender (LAMA).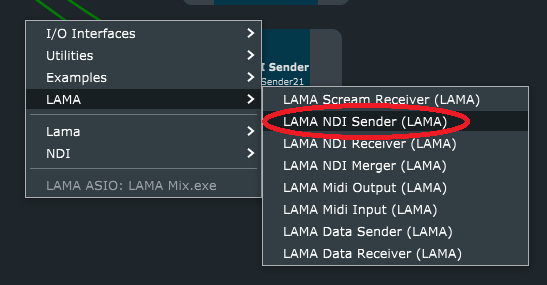
With the sender created, right-click over it and select Configure Audio I/O.
Select required Channel Layout (Mono, Stereo.. ).
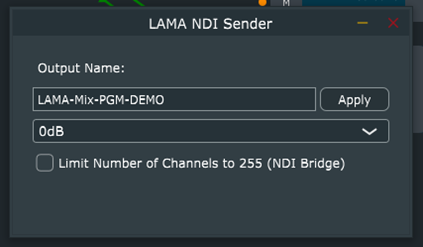
Double-click on your Sender and in the LAMA NDI Sender menu
In Output Name, provide an NDI stream name.
Click Apply.
Note: Both input and output are at this stage both defined. However, there is no processing in between the nodes, so at this point, make sure LAMA MIX is running.
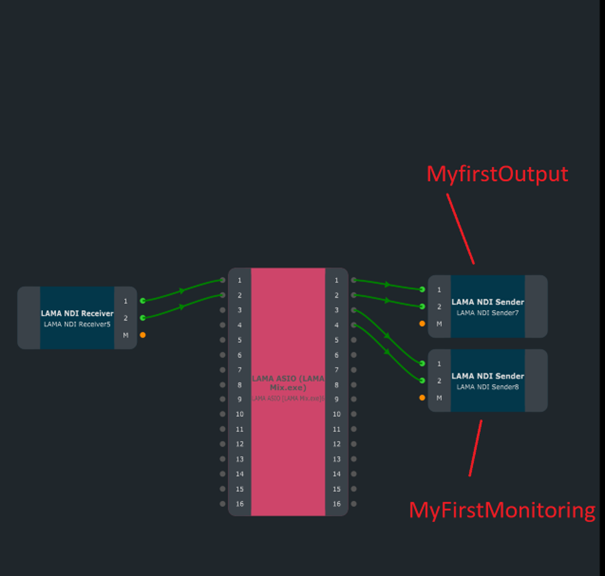
LAMA ASIO:
With LAMA Mix running, from its menu bar start a new session (project) with File > New Session.Change some default settings:
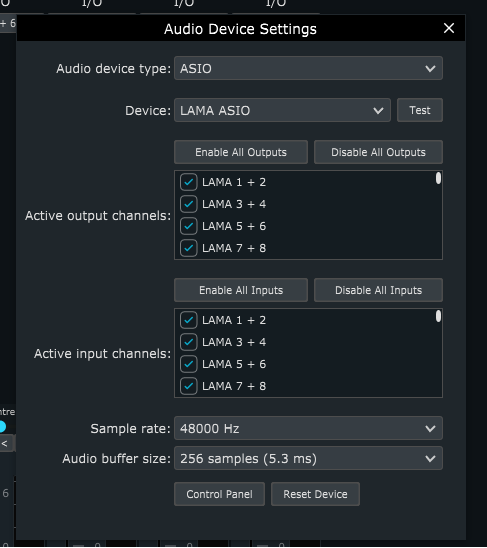
From the menu bar, select Settings > Audio Device Settings and setAudio device type: ASIO.
Device: LAMA ASIO.
Sample rate: 48000 Hz.
Audio buffer size: 256 samples (5.3 mS).
Go back to LAMA Connect.
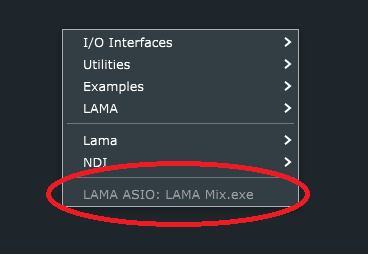
Right-click on an empty background. The LAMA ASIO now appears and this ASIO device can be added as a device connector in your filtergraph:
Note:
LAMA Mix must be started to have this node working in LAMA Connect.
The LAMA ASIO option only appears when Audio Device Settings in LAMA Mix is set to ASIO.
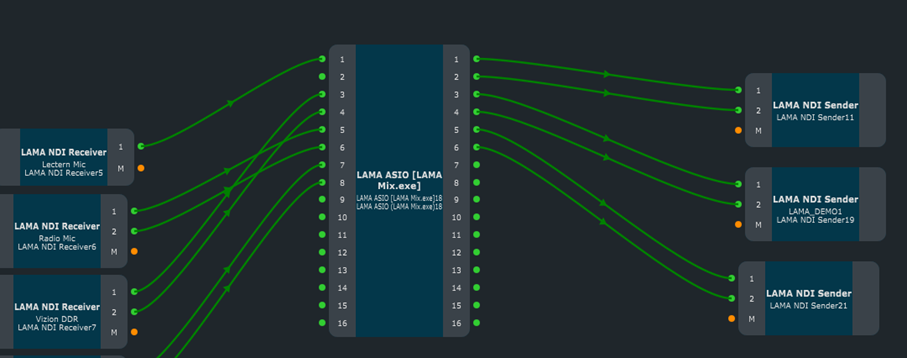
Connect
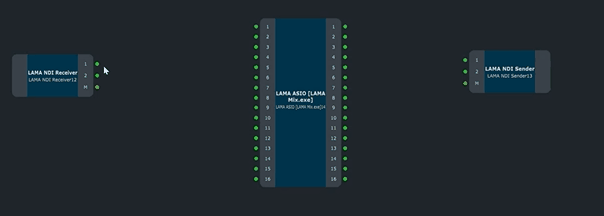
your NDI Receiver nodes to left side of the ASIO device.
your NDI Sender nodes to the right side of the ASIO device.
Create Mix:
To add new faders, at the lower-left of the LAMA Mix window, click Add Channel.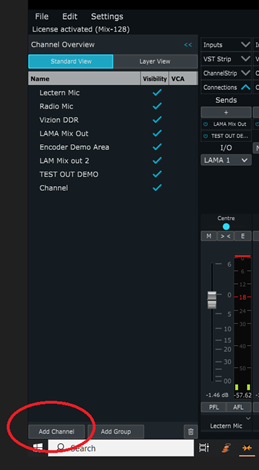
Configure your channel:
In the field Type, use the type Channel for an input, Aux for an output or Bus for monitoring:
- Channel: A standard audio track that can receive an input.
- Aux: Auxiliary tracks that can optionally be created to route any audio through to an output.
- Bus: Bus tracks that can optionally be created. These are particularly useful for creating monitoring groups.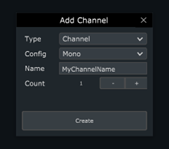
Config: For most cases, use Stereo.
Name: Meaningful name for the NDI stream.
Count: Optionally create multiple channels. In this example we use one.
Click Create.
(Optional) To rename a channel, double-click on the channel Name.
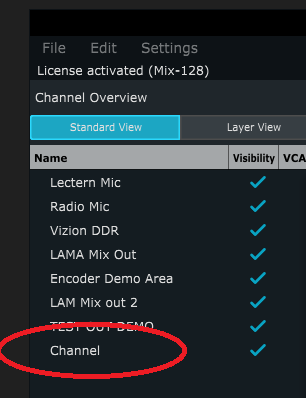
The channel (here named Channel) is automatically added to your LAMA Mix session.
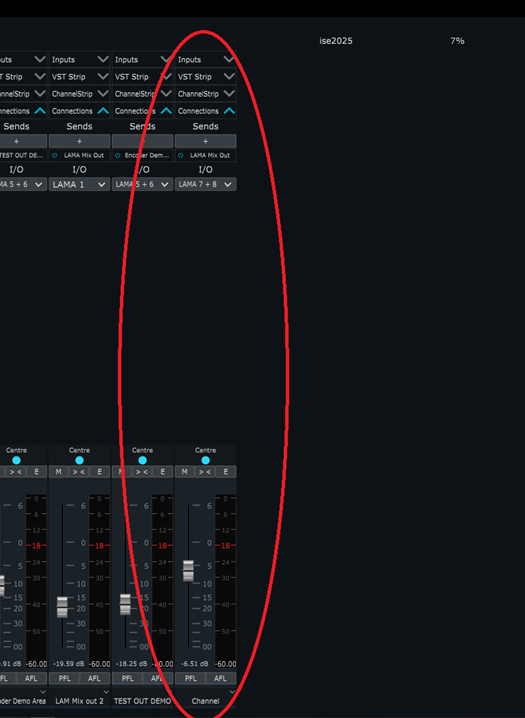
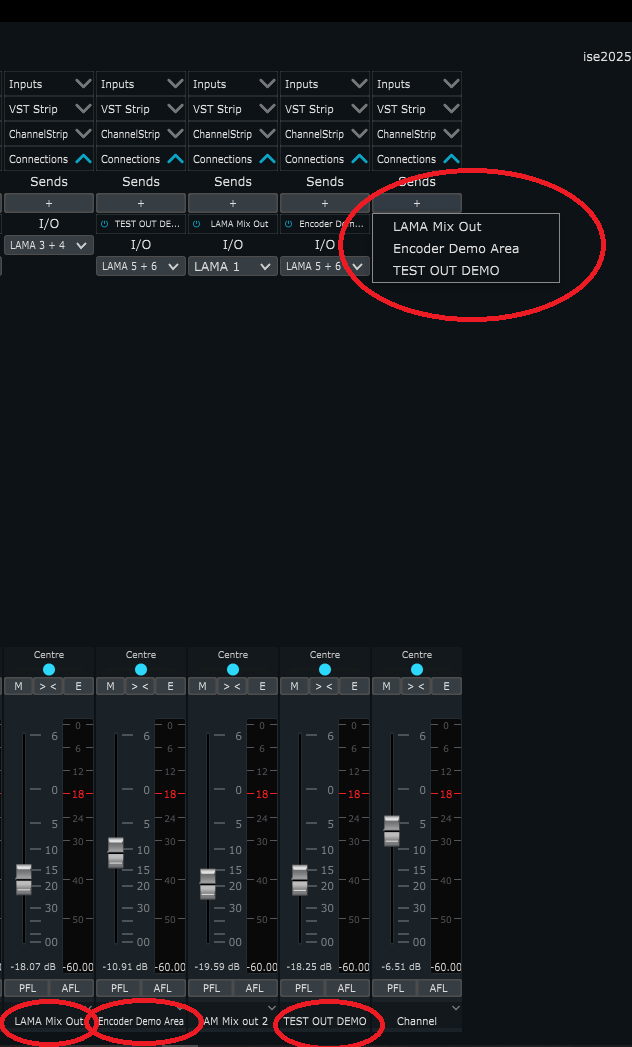
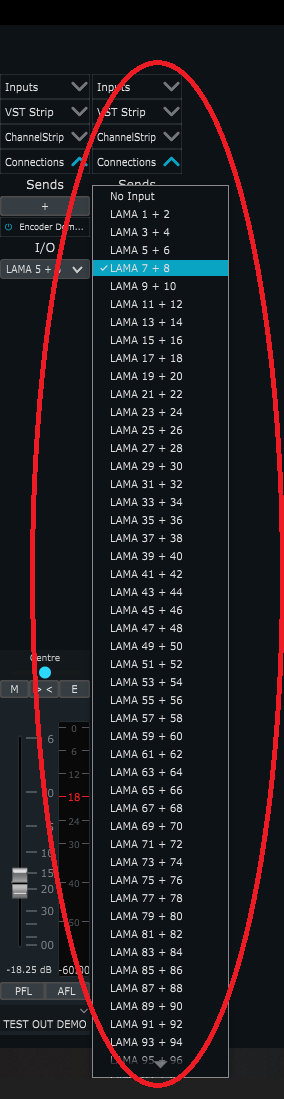
From the connected channels menu (top left), for the input, click the plus sign “+” and choose the output channel where you want to send this input to be sent.
This can be multiple outputs for one channel input.
Warning: Only Aux and Bus channel types can be used, as listed under “+”Configure your channel:
Configure LAMA ASIO I/O for each channel that will be used (Refers to mapping of the ASIO device used in your filtergraph).
Monitoring/PFL
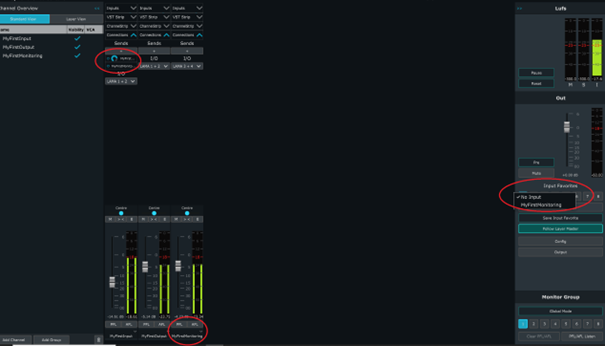
Create a new sender dedicated as a monitor.
Note: The ASIO device is shown in red when your LAMA Mix software is not running.
In LAMA Mix, create a new Channel with type Bus.
On right side Out panel, select your bus channel as an input:
Midi Configuration
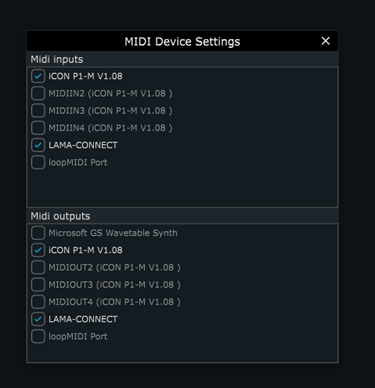
In settings, go to MIDI Device settings.
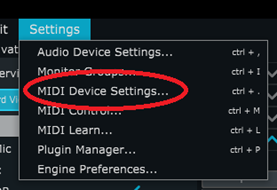
Enable the Midi connections to be used.
In the example below, are
- LAMA-CONNECT (a local RTP midi session for Viz Mosart MIDI control) and
- iCON P1-M Session (used for controlling LAMA via an external audio mixer console).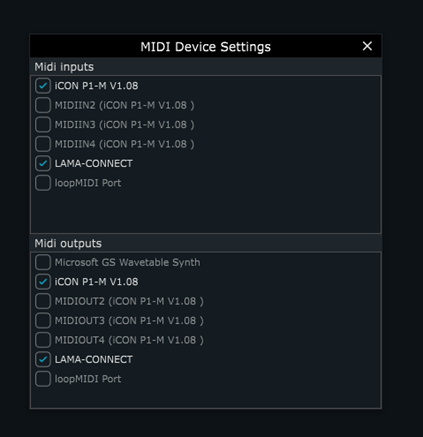
In Settings, select MIDI Control.
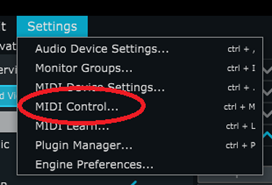
Set the local rtpMIDI session as Input and Midi Learn as Output.

Connect your LAMA rtpMIDI session to your rtpMIDI in Viz Mosart.
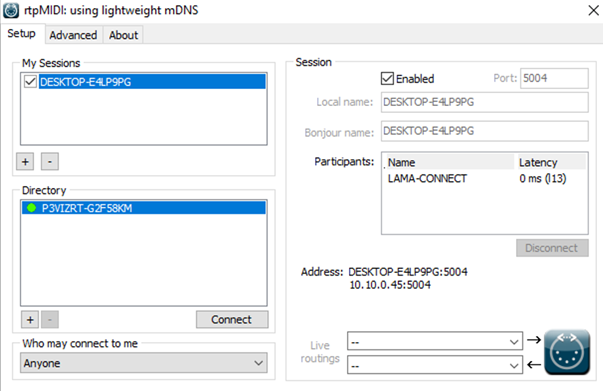
Audio Mixer Main: (tested using loopMidi on local setup)
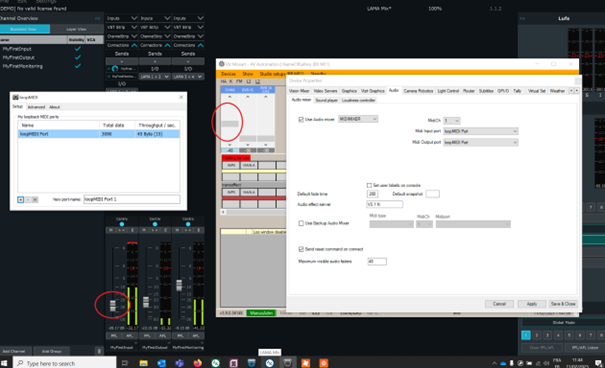
Audio Mixer Backup:

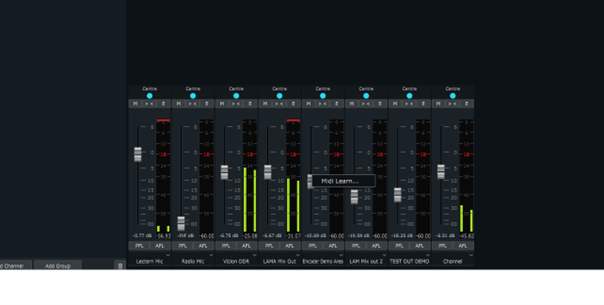
Connect LAMA faders to Mosart faders:
In LAMA Mix, Right click on fader and select Midi Learn …
Already existing Midi mapping will show up with Delete or Learn option to Re-Learn another Midi command for this fader.
Current fader in “Learn” mode will show “Waiting for midi message”
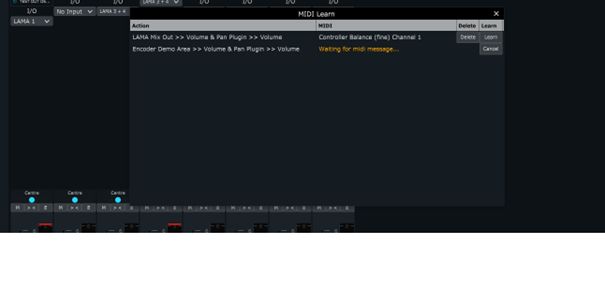
Move in AV Automation, Mosart fader you want to link to LAMA Mix fader
Your LAMA fader is now controllable by AV Automation.
Tested as Main AND Backup Midi audio mixer: WORKS FINE
Connection to Midi audio mixer console:
MIDI Device selection:
Enable Midi connections to be used (below example shows both LAMA-CONNECT (Local RTP midi session for Mosart MIDI control) and iCON P1-M Session, used for controlling LAMA via external audio mixer console.
Midi control configuration:
In settings, go to MIDI Control,
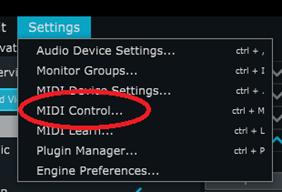
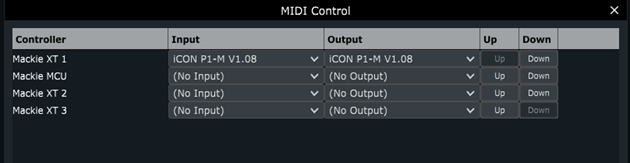
Set local external console MIDI session as Input and Output for Mackie XT 1 in Midi control:
_________________
Unlike NDI, LAMA does not use frame synch but instead has its own synchronization using buffers that can be automatically configured on each input using Auto Config”.
__________________________________________