Viz Arena is Vizrt's image-based sports graphics system: It calibrates broadcast cameras against the playing field and keys virtual graphics (offside, down and distance lines, tied-to-the-pitch logos and other AR elements) into the live image, without sensors on the cameras.
The Viz Arena tool in Viz Arc brings the complete live operation into a single interface: Monitoring the calibrated output, managing camera calibrations and keying presets, refining the keying color model during the game, positioning graphics by clicking directly on the field and automating all of it through actions, scripts and external controllers such as the Stream Deck. This page covers the configuration of the connection to Viz Arena, the tool's panels, the scripting integration and troubleshooting.
Configuration
First of all you have to to enable the Viz Arena panel:
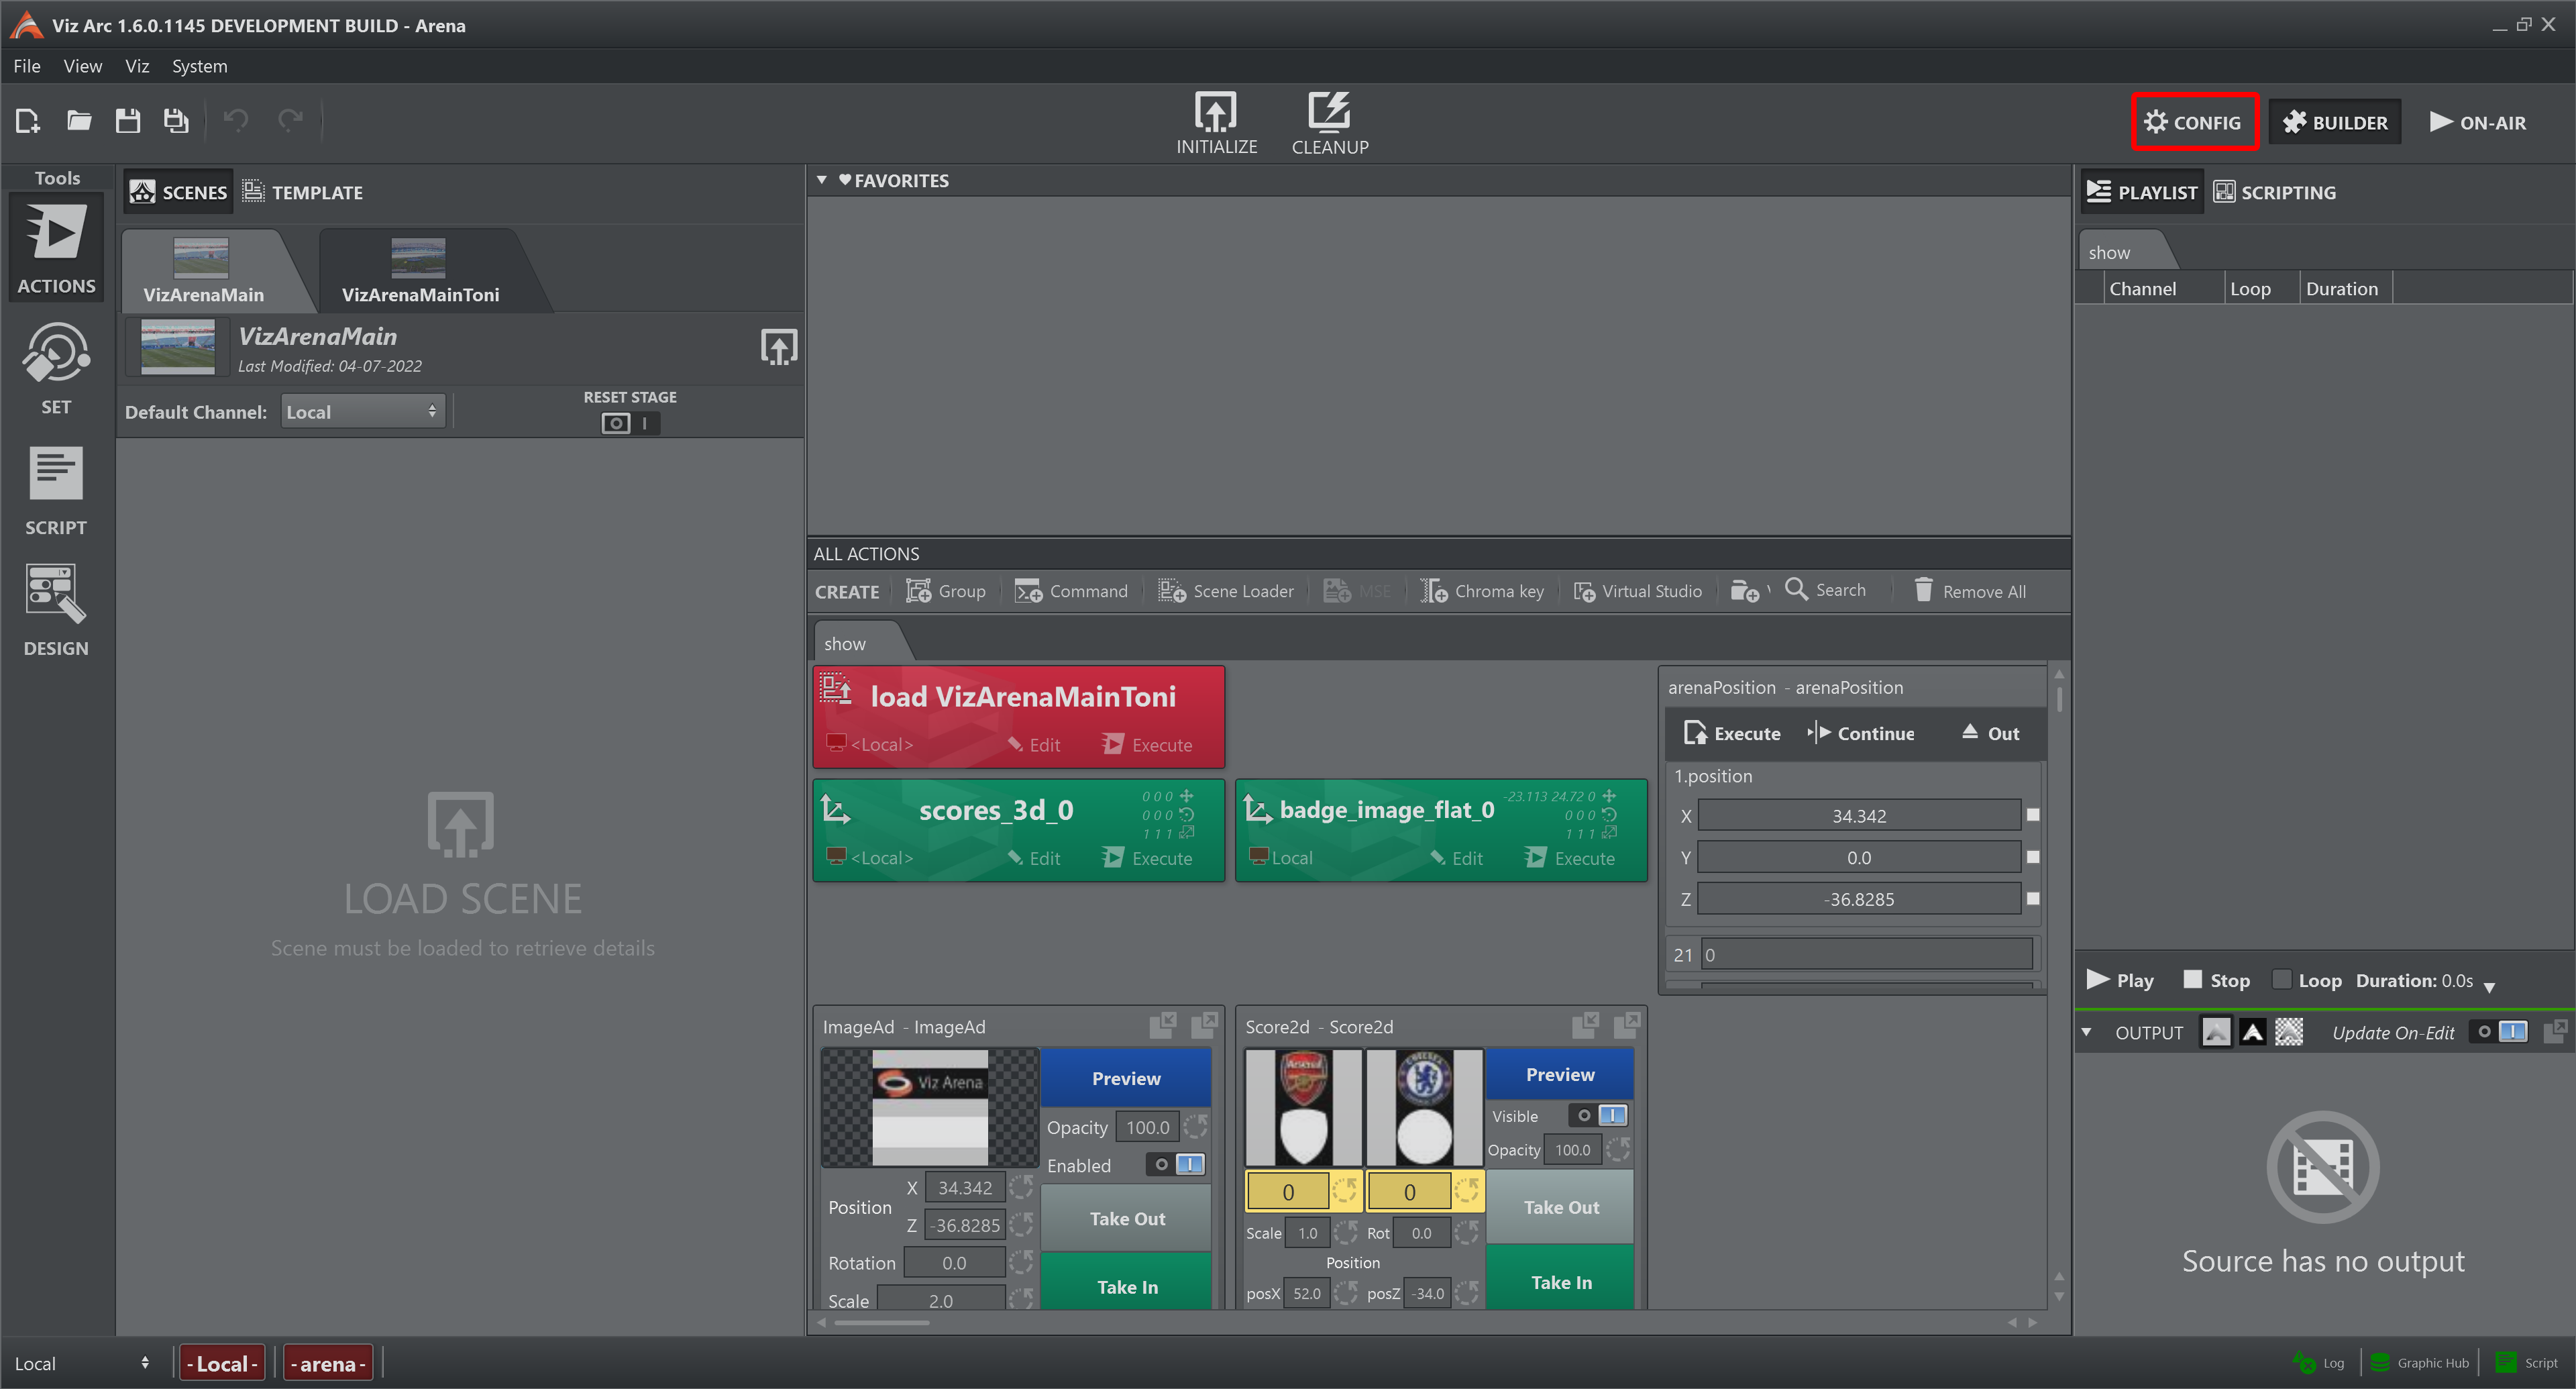
Go to the Viz Arc Configuration.
Select the Vizrt System tab and press Enabled on Viz Arena.
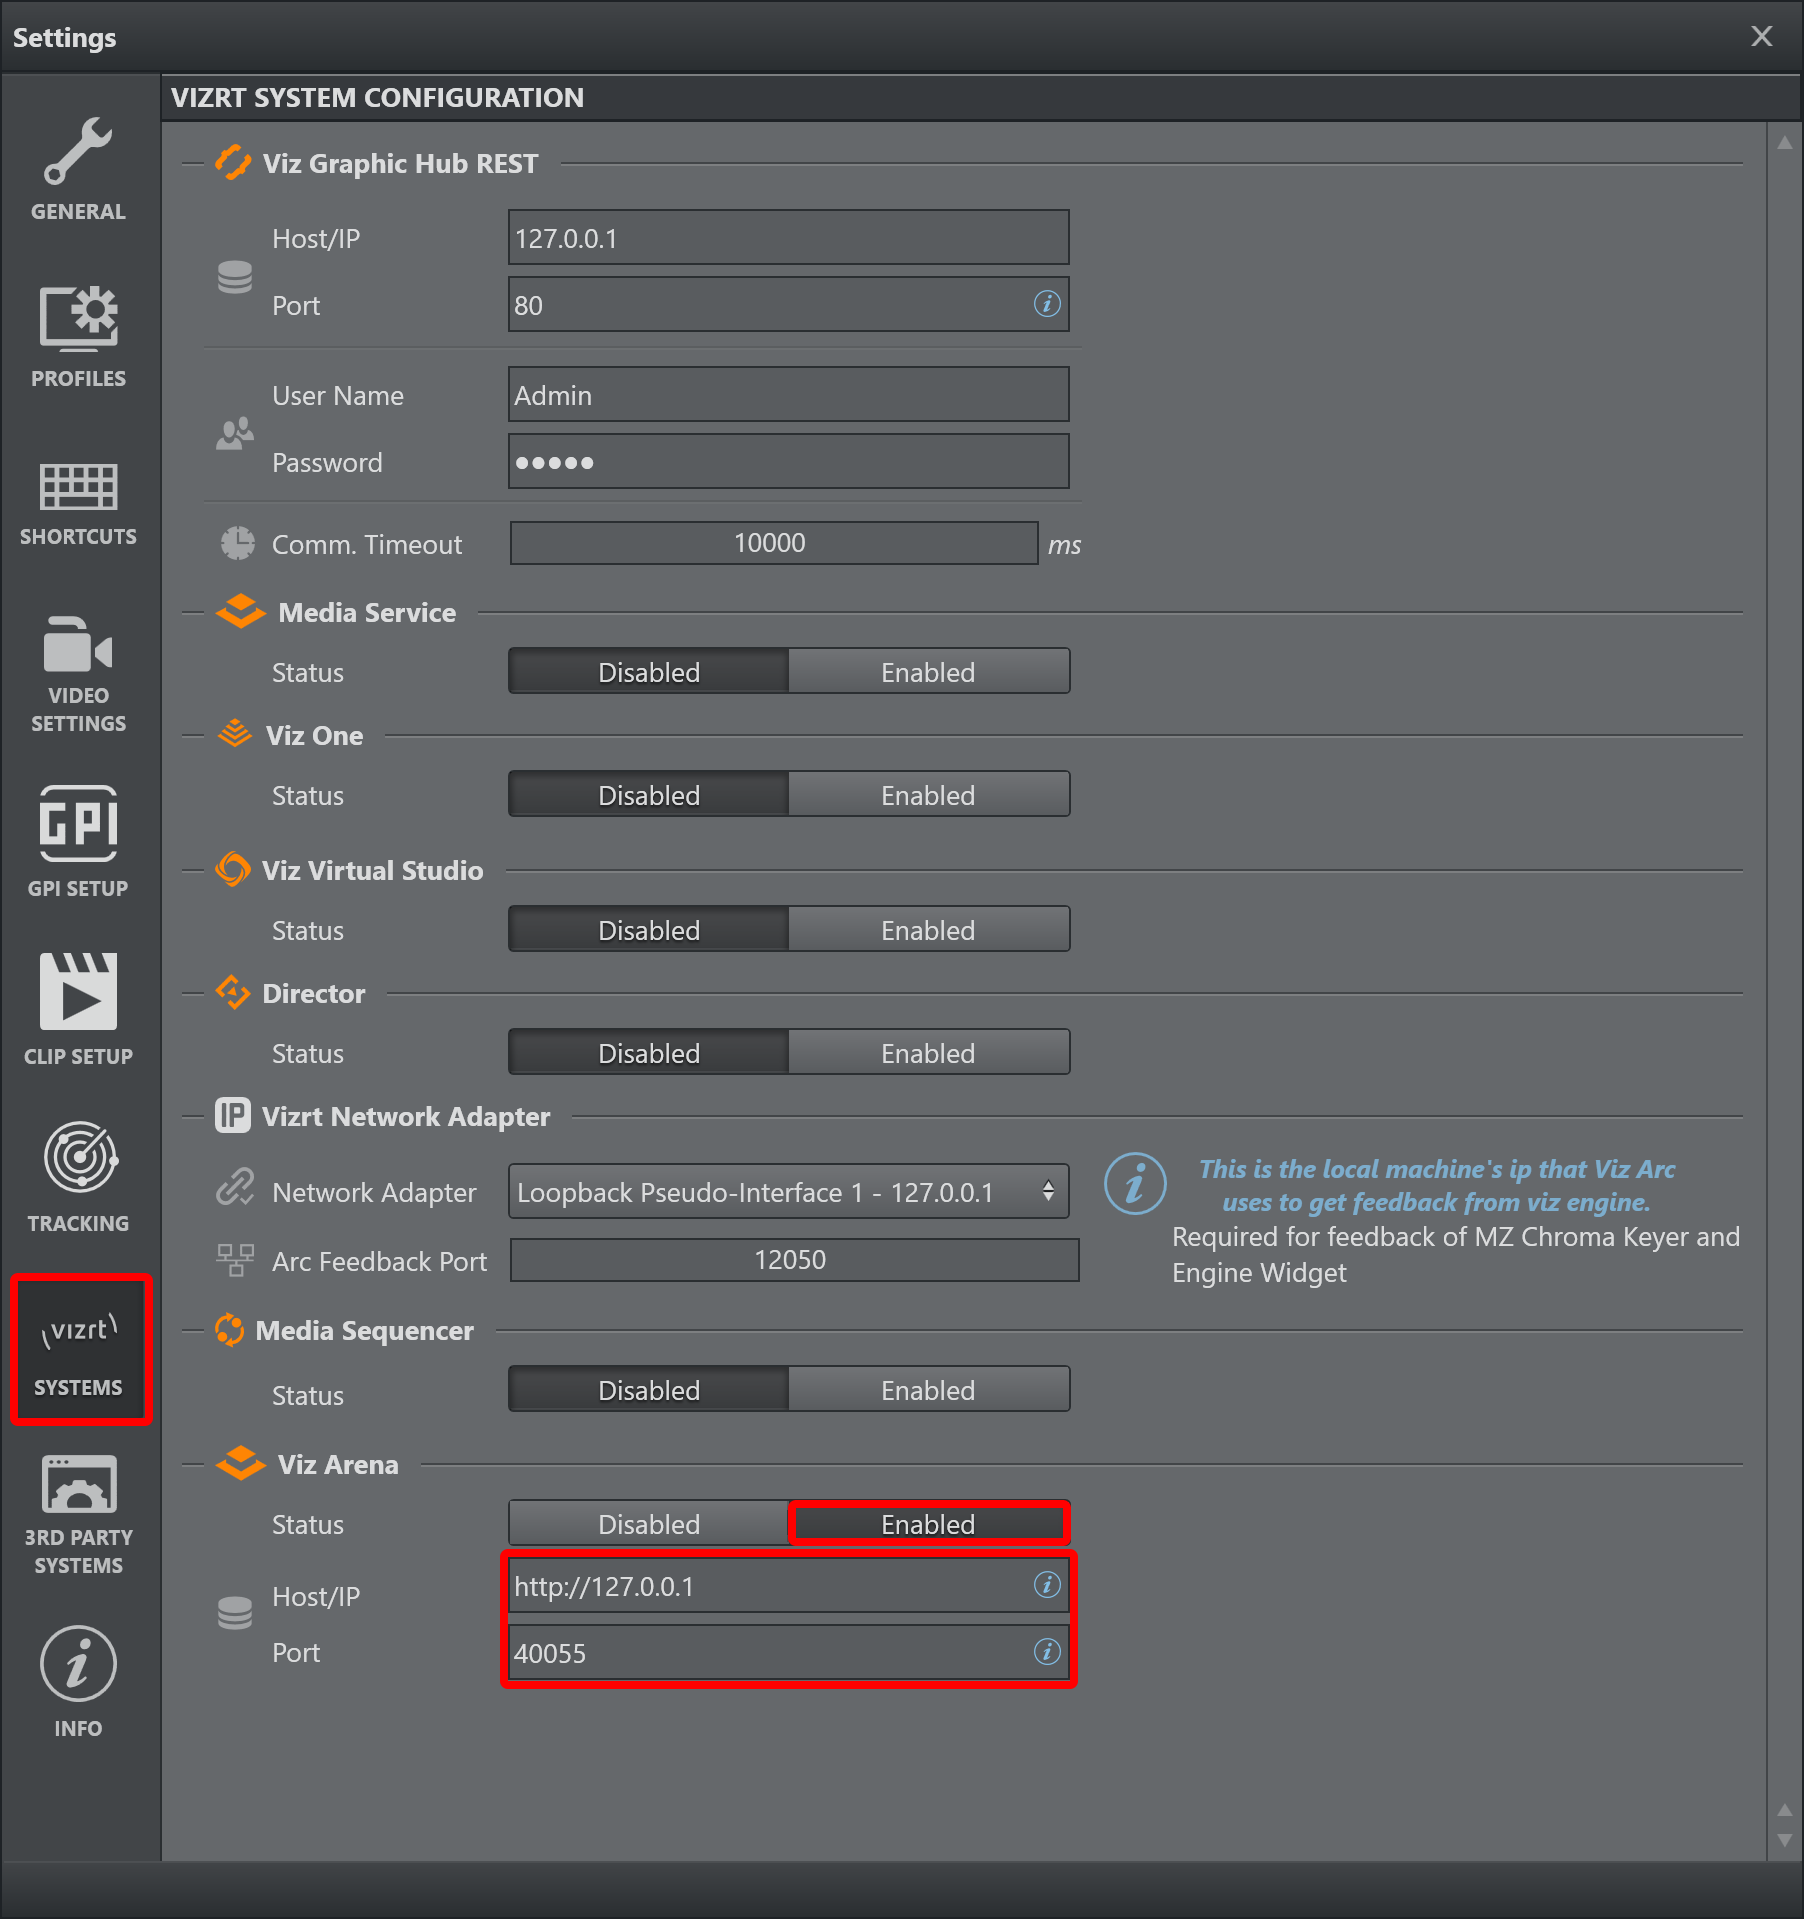
Insert the correct IP address of the workstation where Viz Arena resides and the port of the API server.
The Viz Arena status icon is located in the status bar (on the bottom right).

It turns green after a while if the IP address and port inserted are correct, otherwise it remains red.
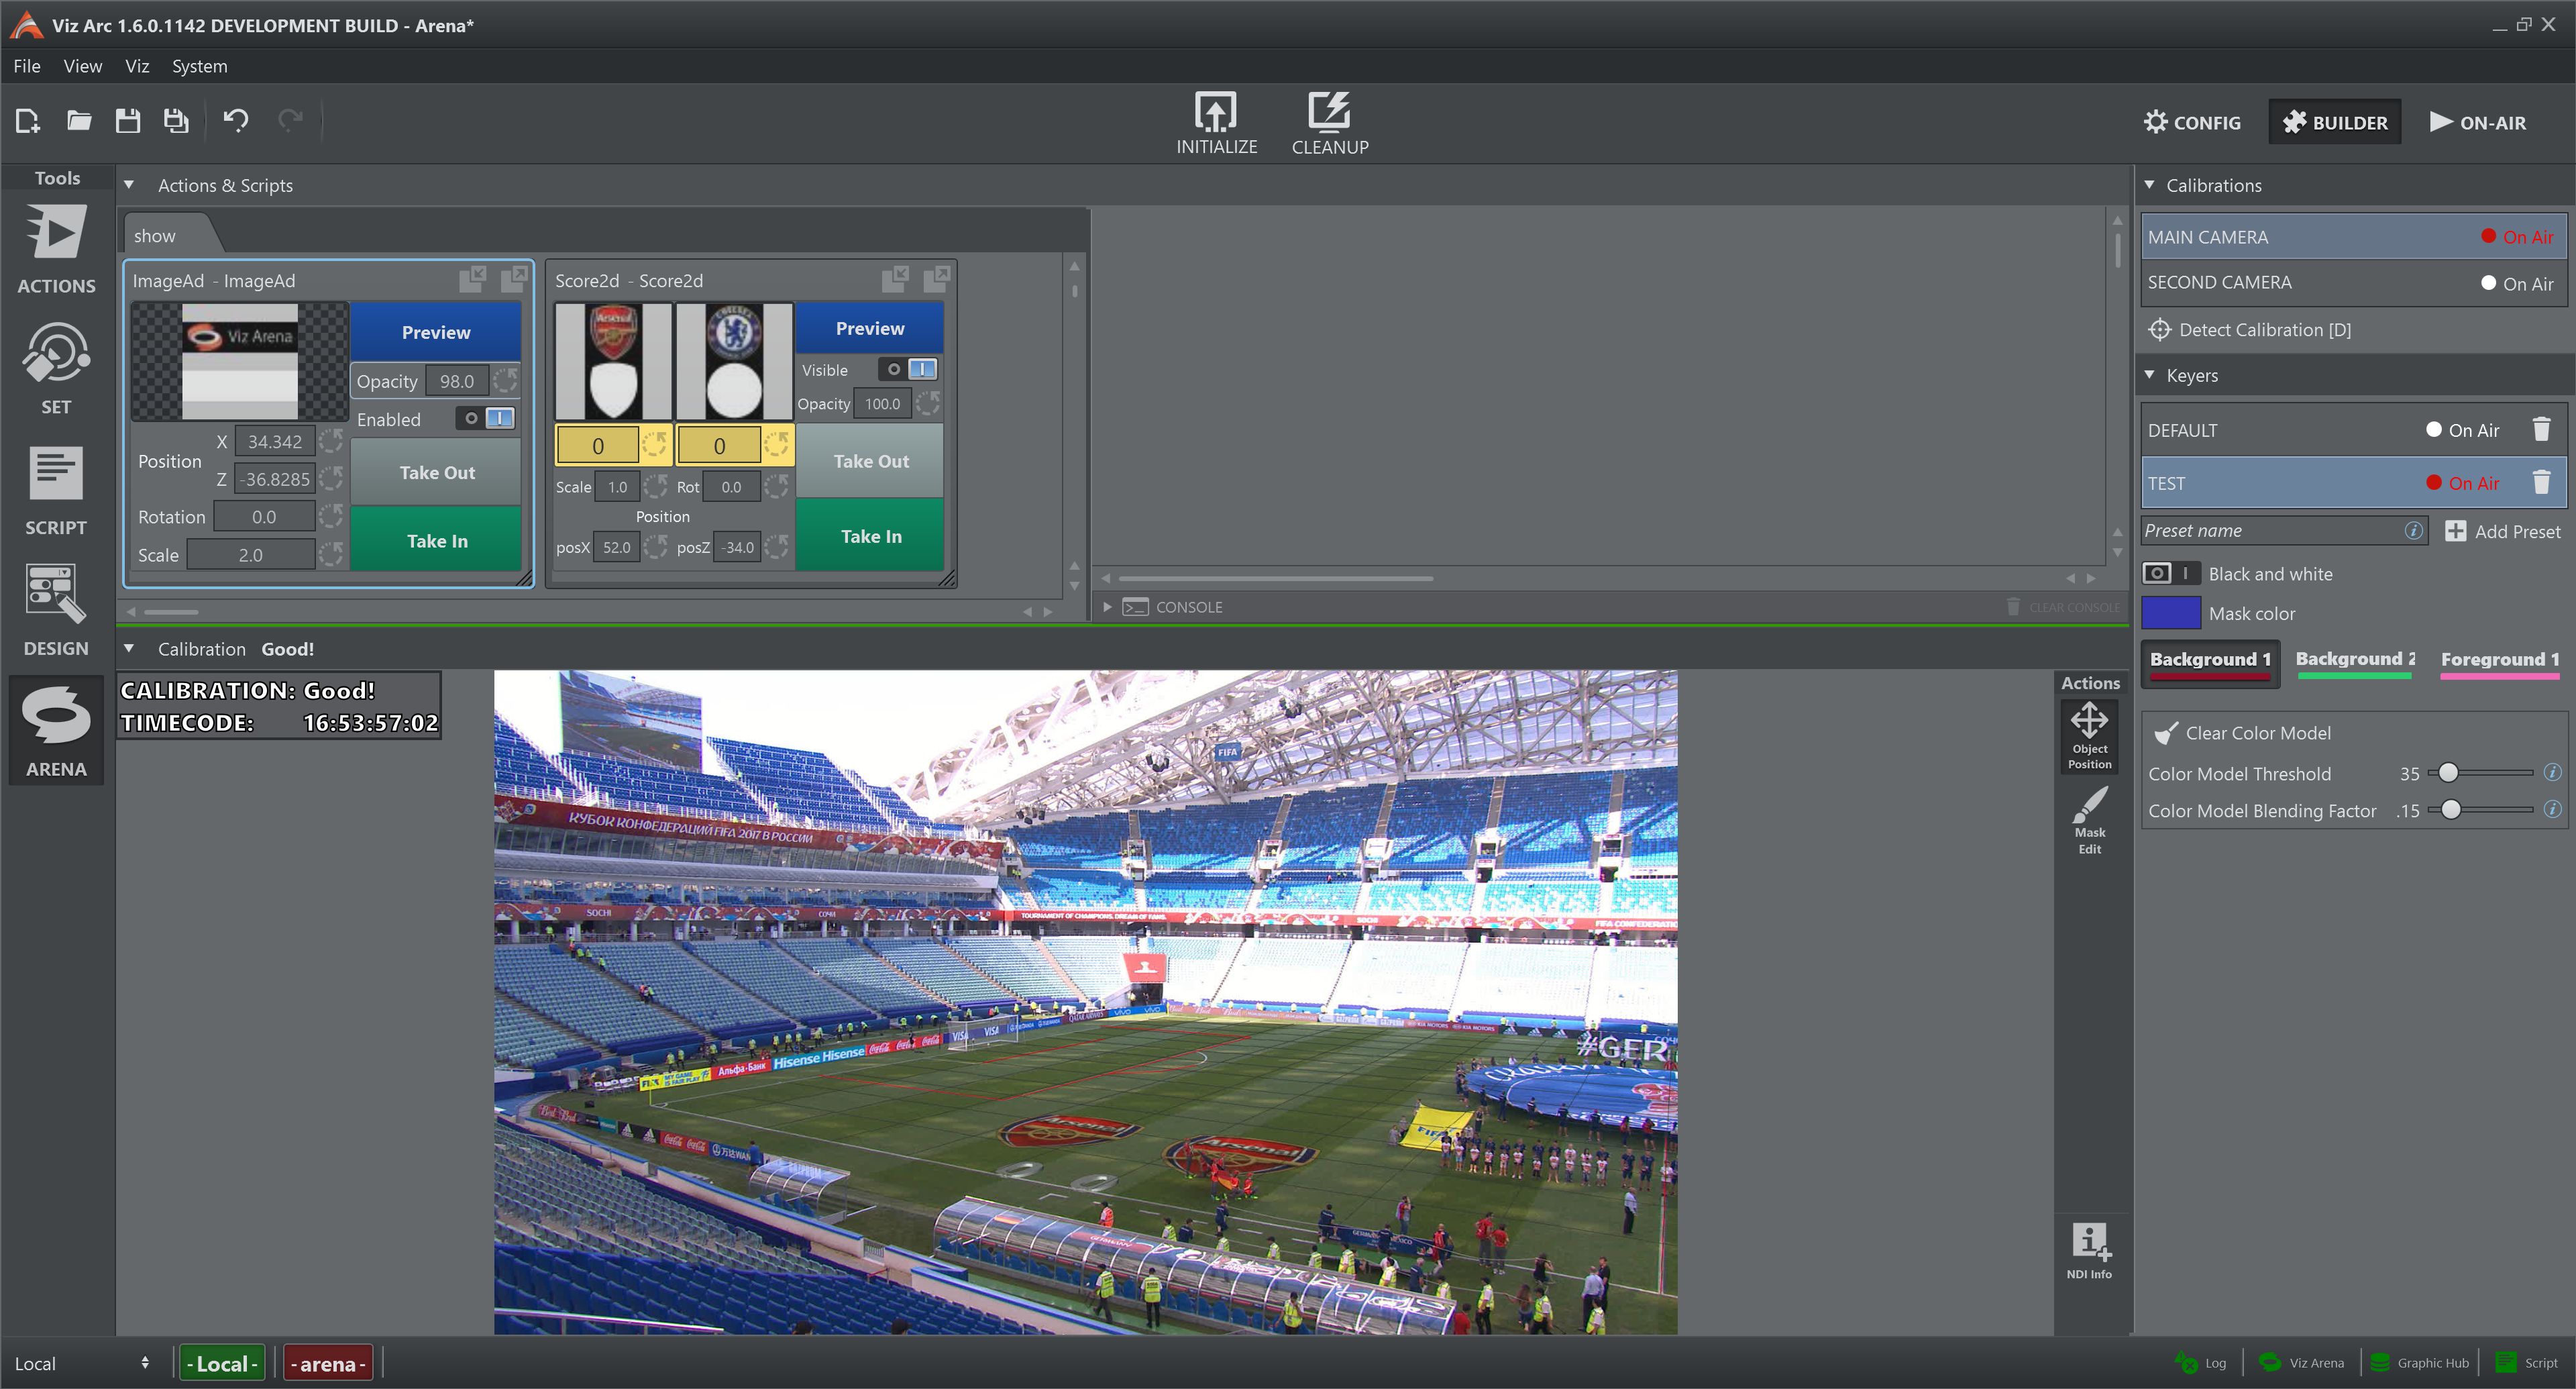
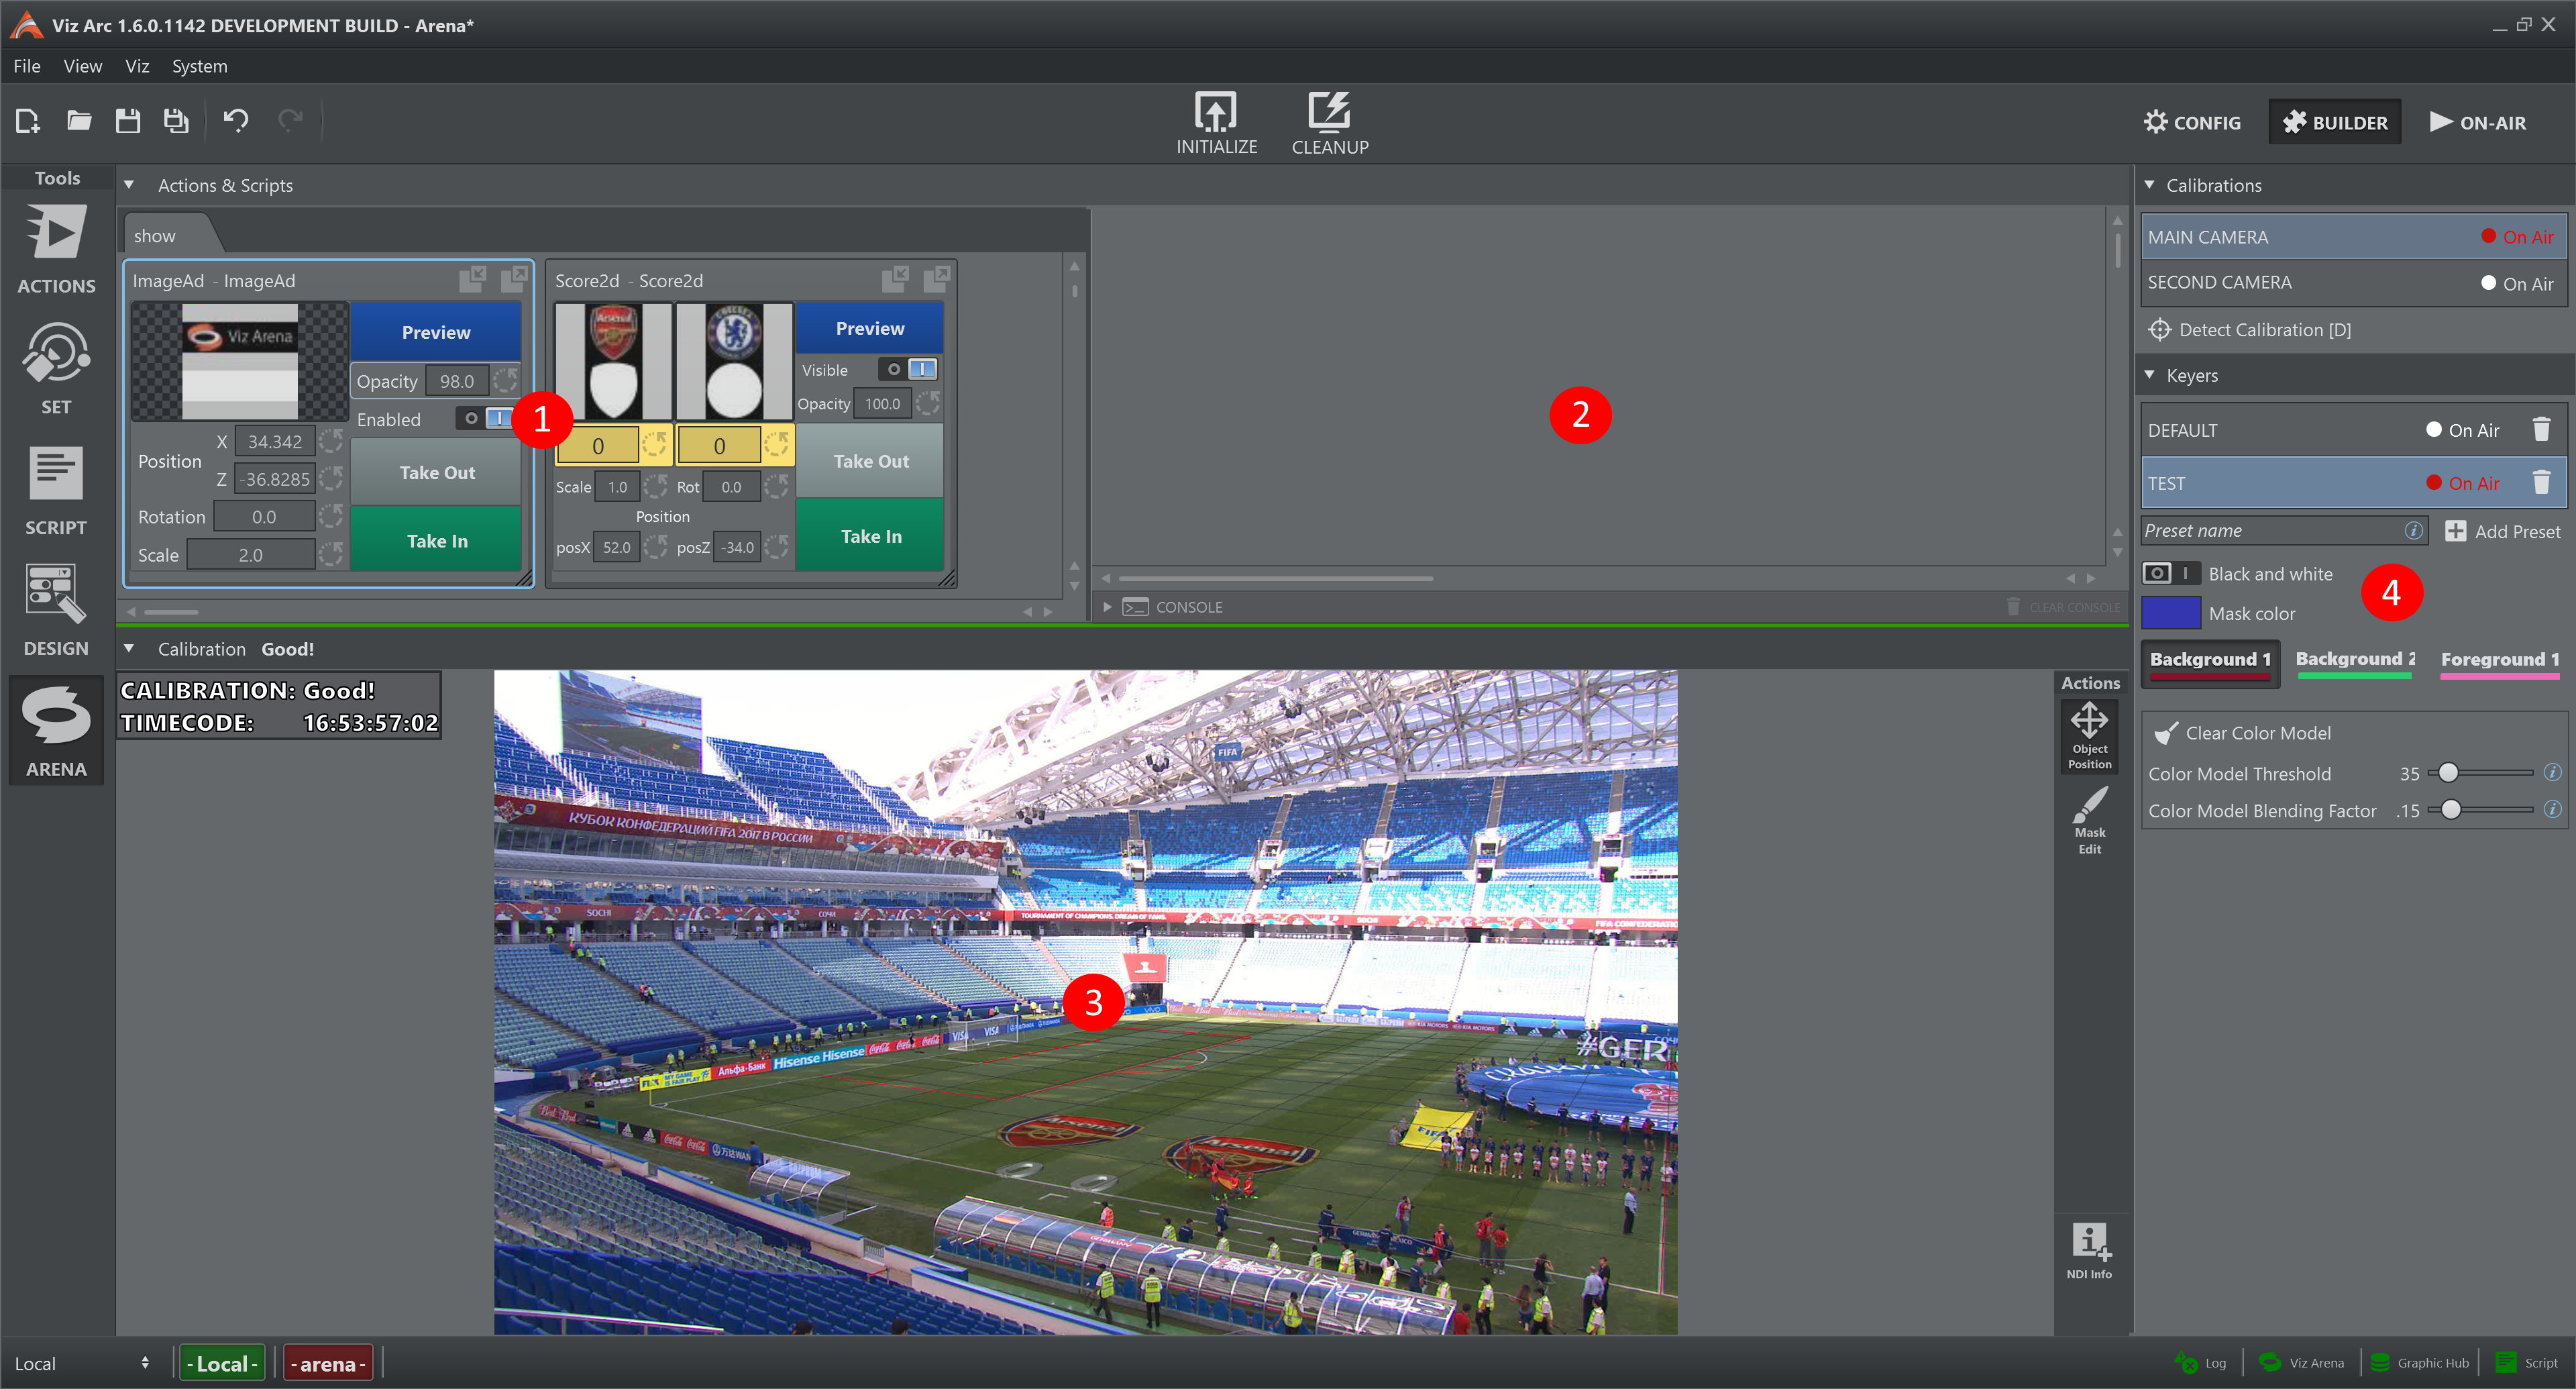
Now it is available to press the Arena button on the "Tool toolbar" (on the leftmost portion of the window), the interface looks similar to this:
Features
The Arena tab presents multiple features:
Actions panel (1), see Actions View for further information
Script panel (2), see Script View for further information
Output view panel (3)
Settings panel (4)
Output View
The Output View shows the NDI stream, both video and metadata, provided by Viz Arena. Since it is very important to see any changes of the calibration status, at the very top of the view there is line that show its current value:
Green if the calibration is good.
Red if the calibration is lost.
Actions
Object Position
This action enables to position any selected control object (in the Action Panel) on the field (see image above). As a visual aid, the cursor turns into a cross when over the output view.
Mask Edit
This action enables to adjust the color model used for calibration and by the Viz Engine for keying during a live game. Add brush strokes to improve the classification of the foreground and the background to refine the color model.
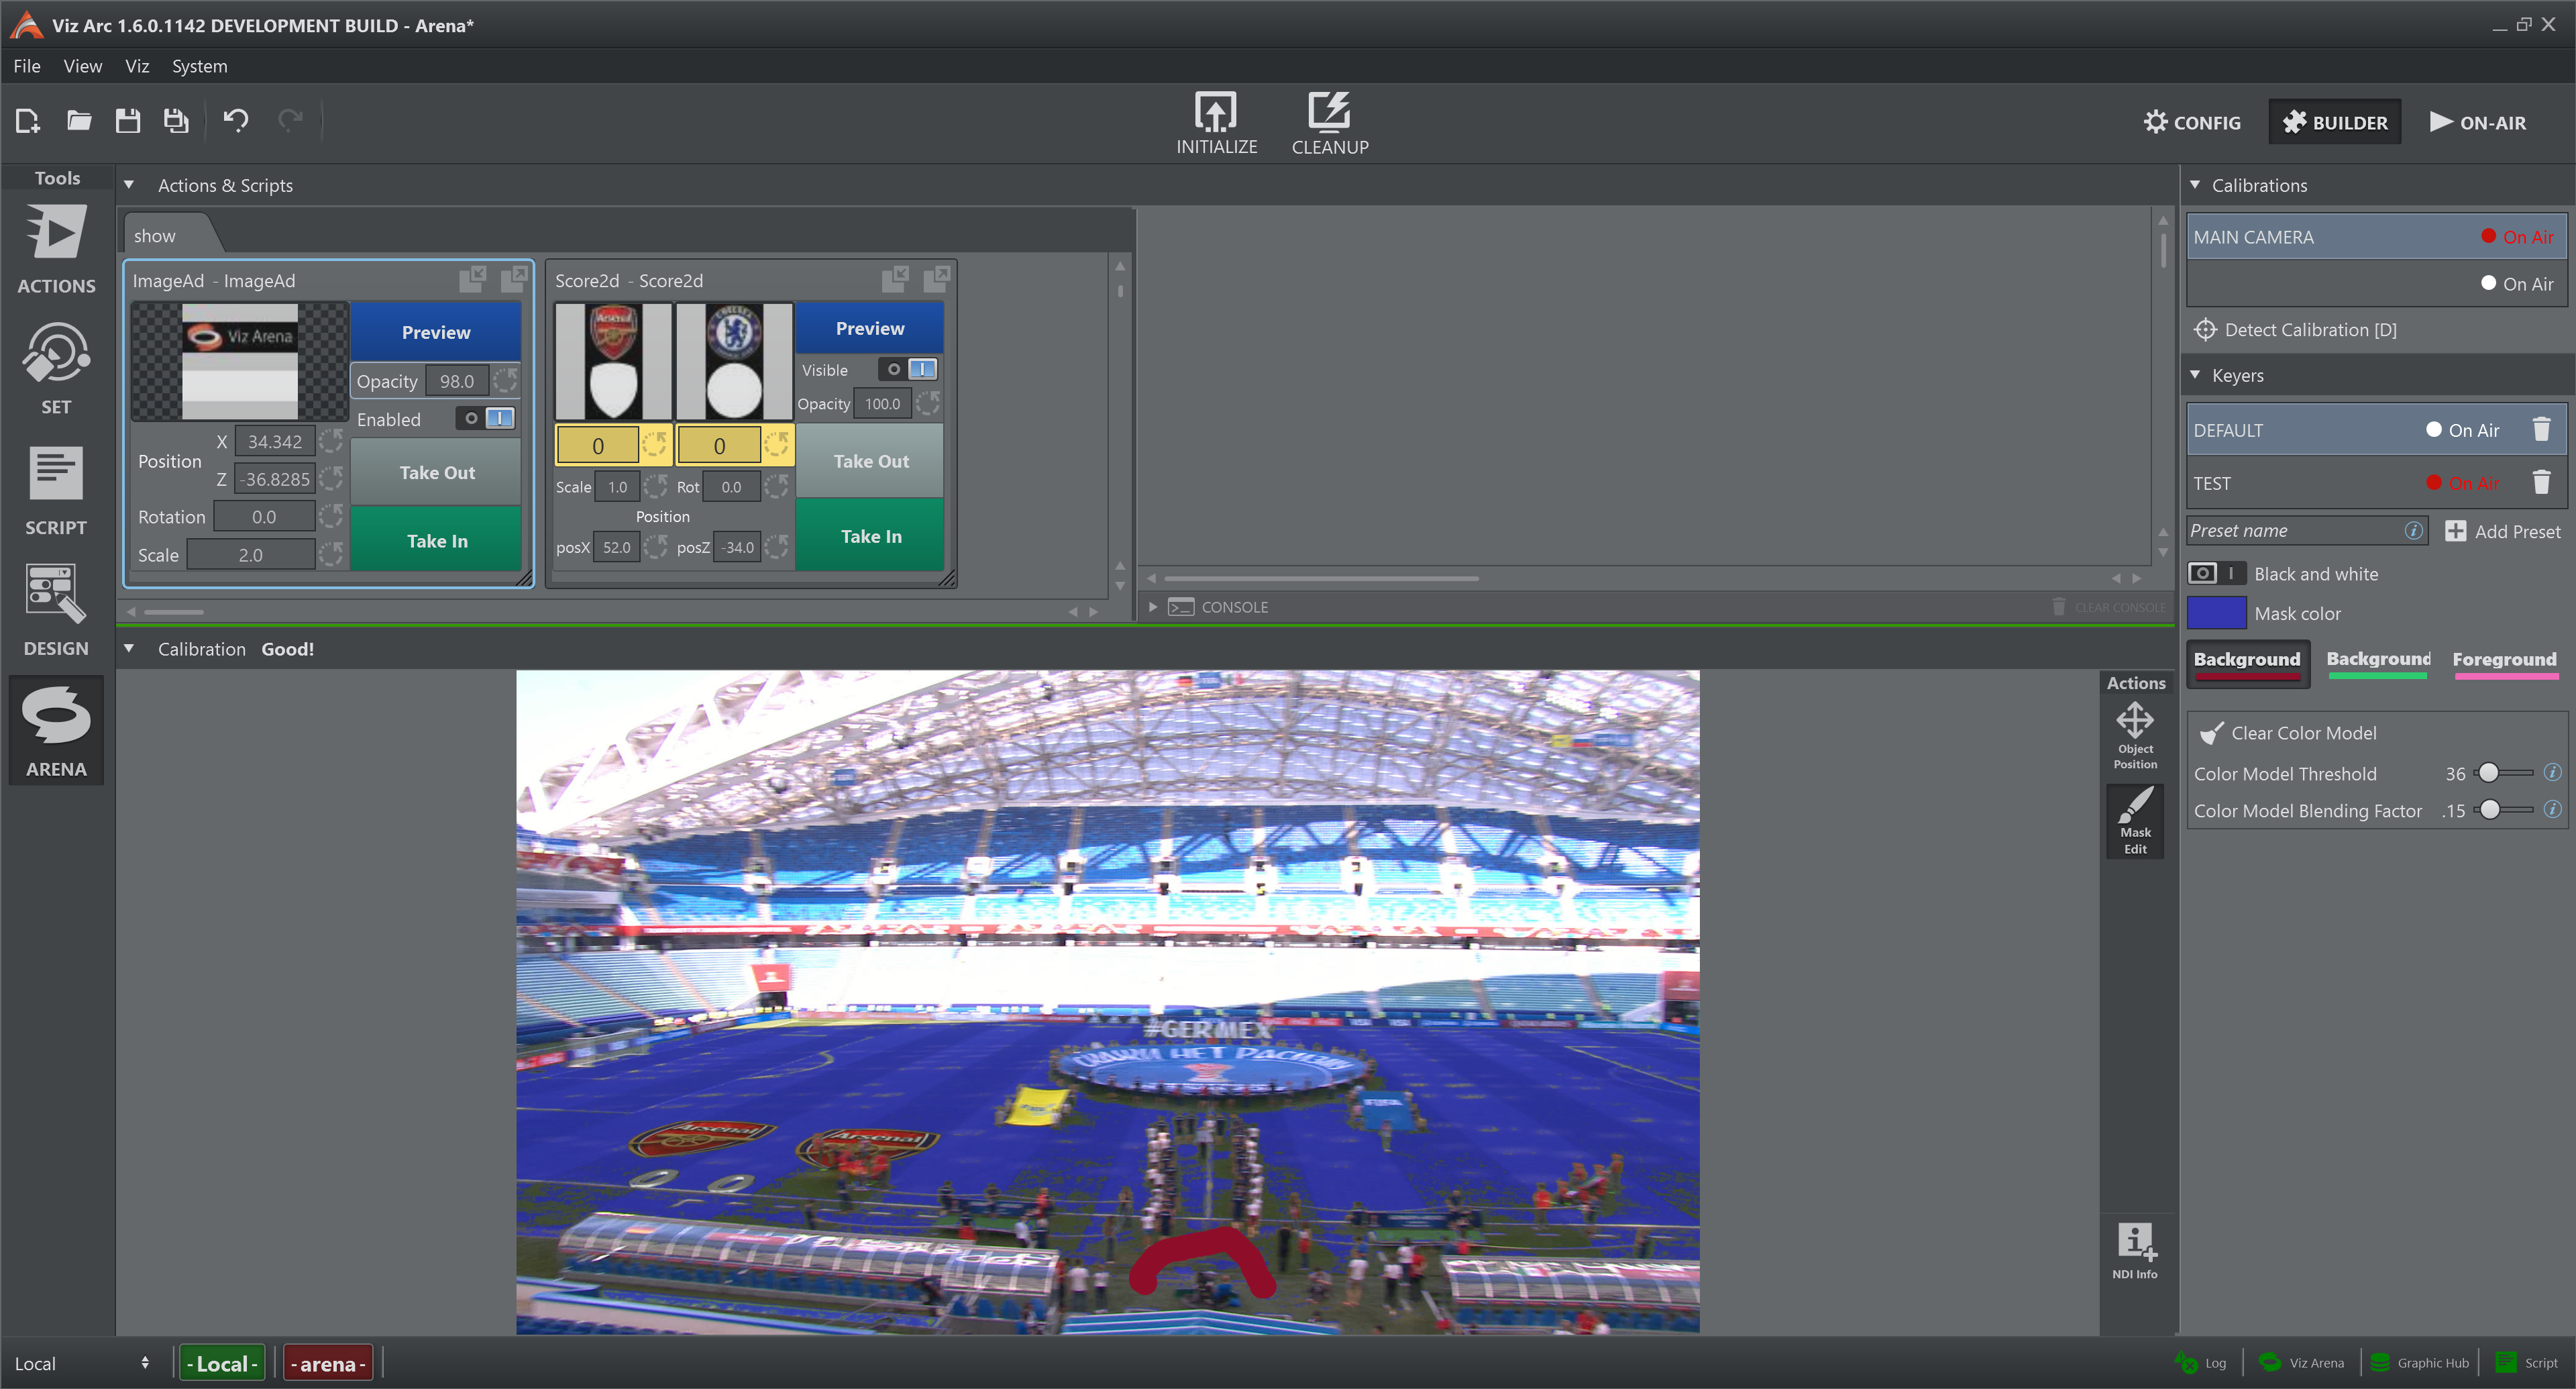
This action also turns on the visualization of the mask:
Color mask
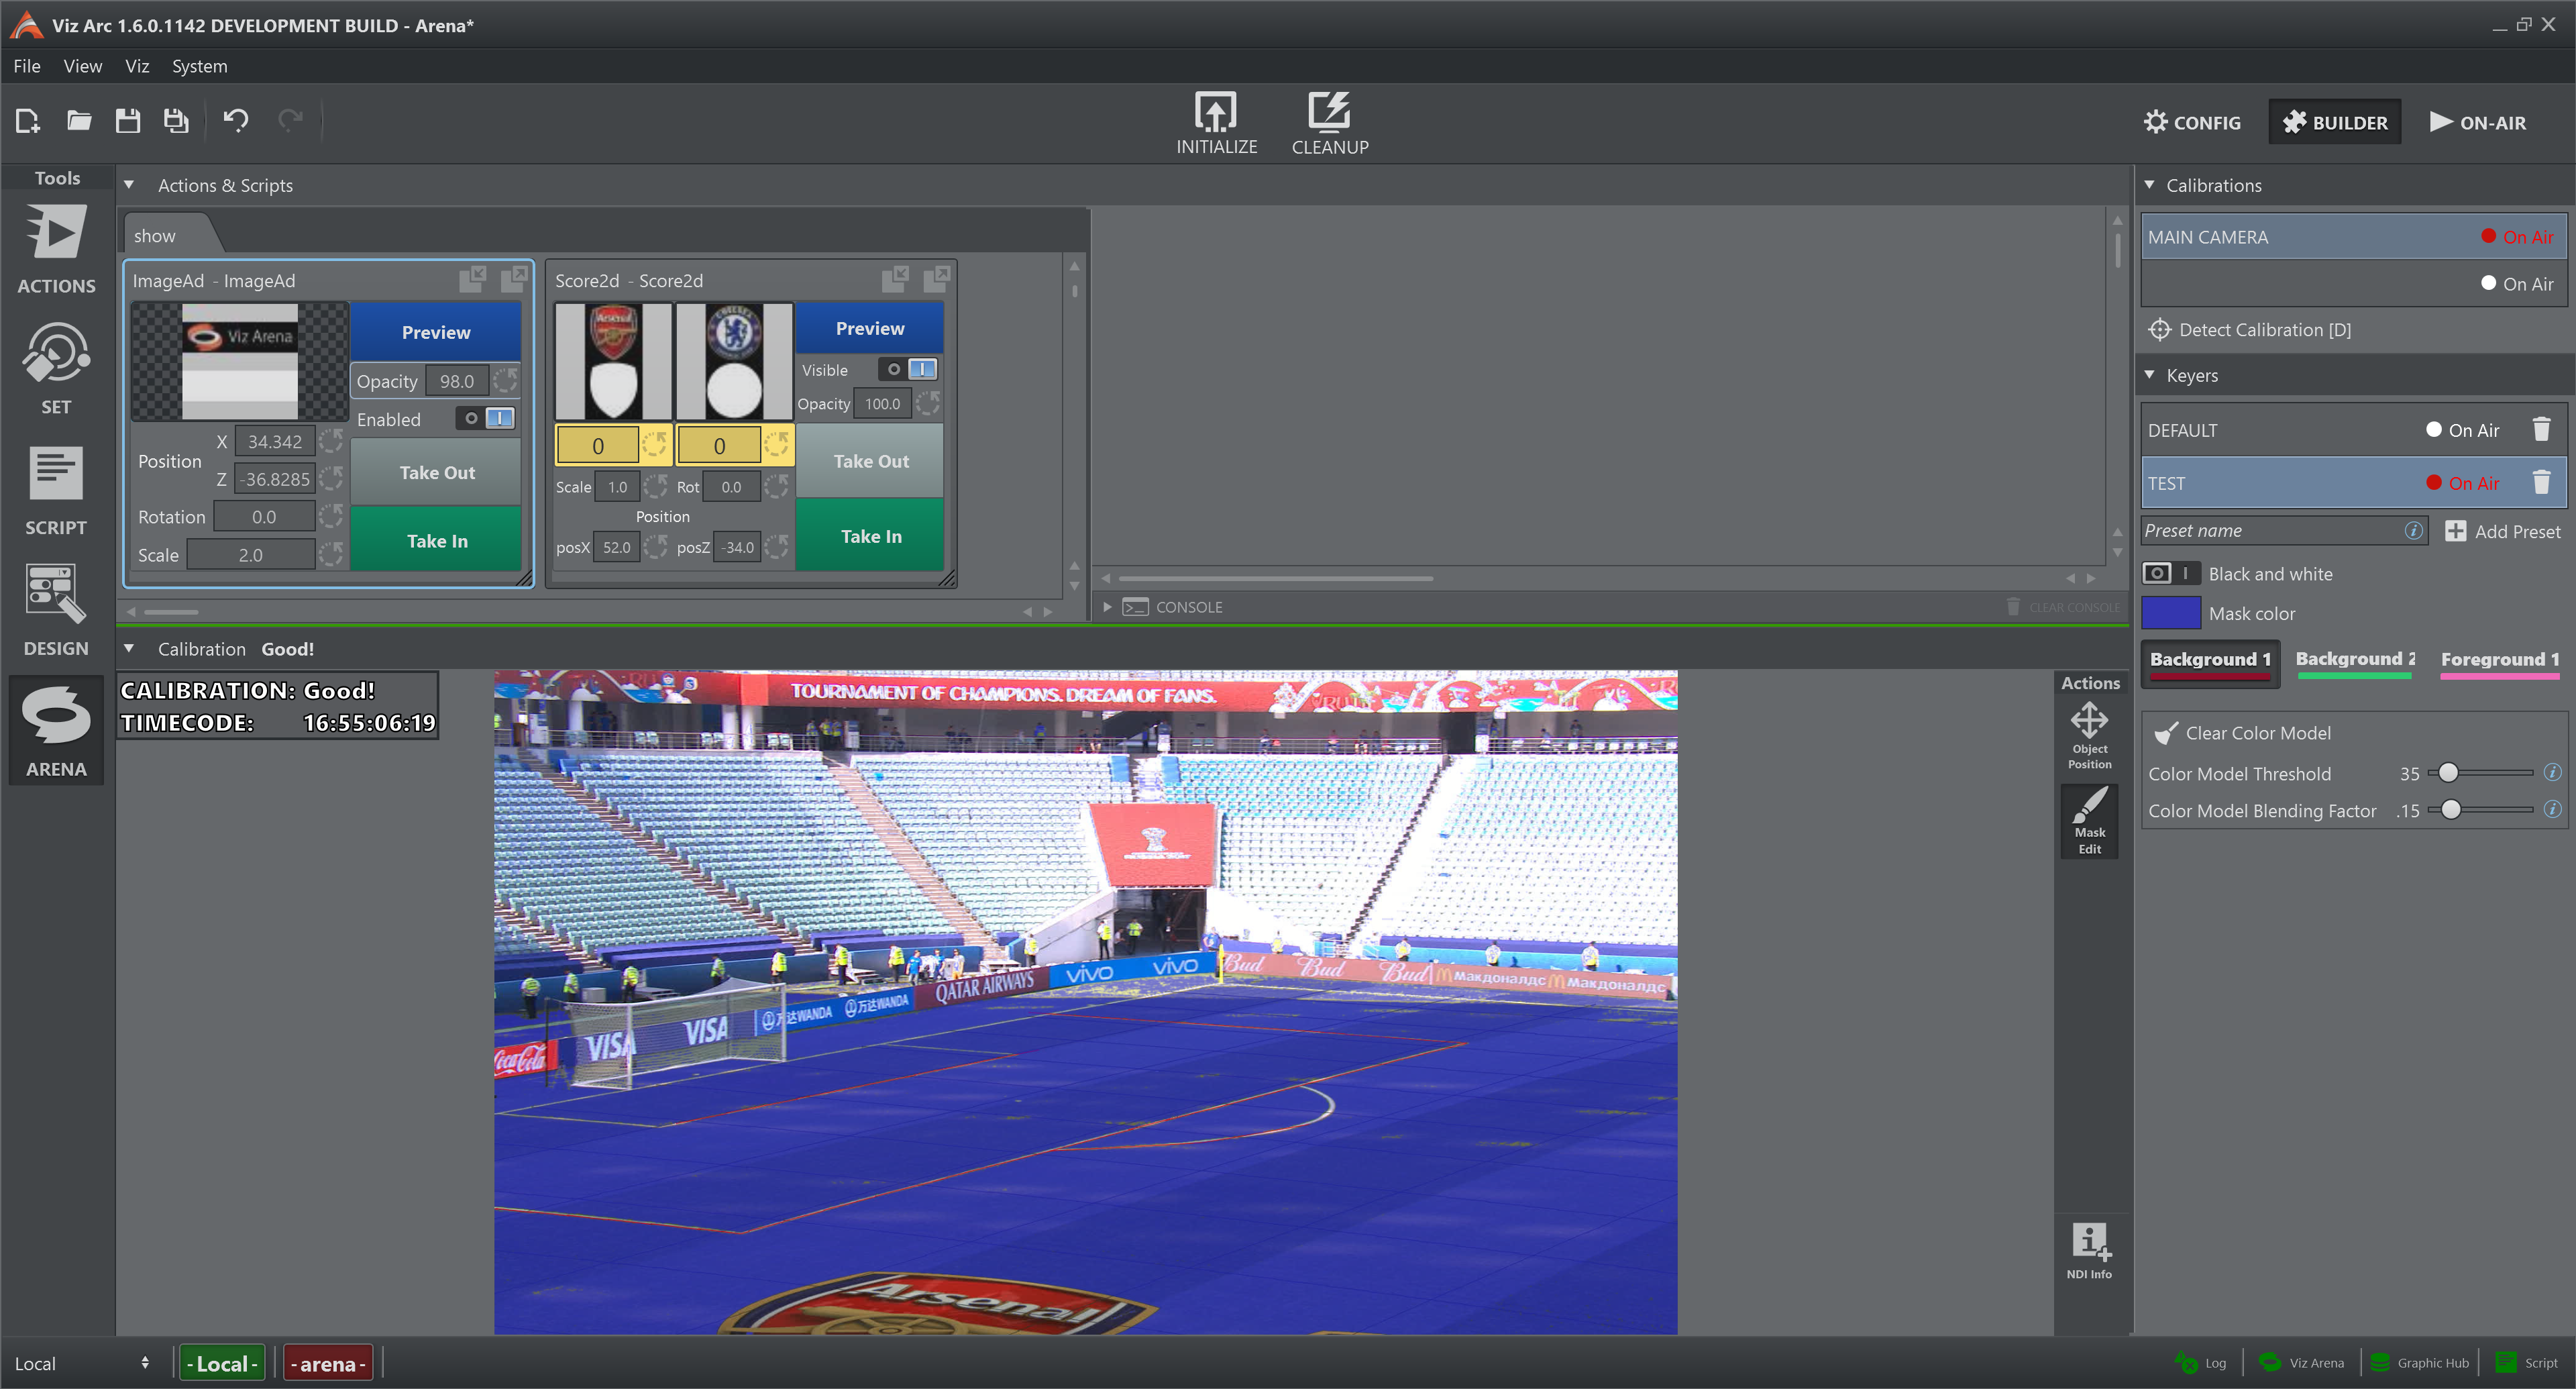
Black and white mask
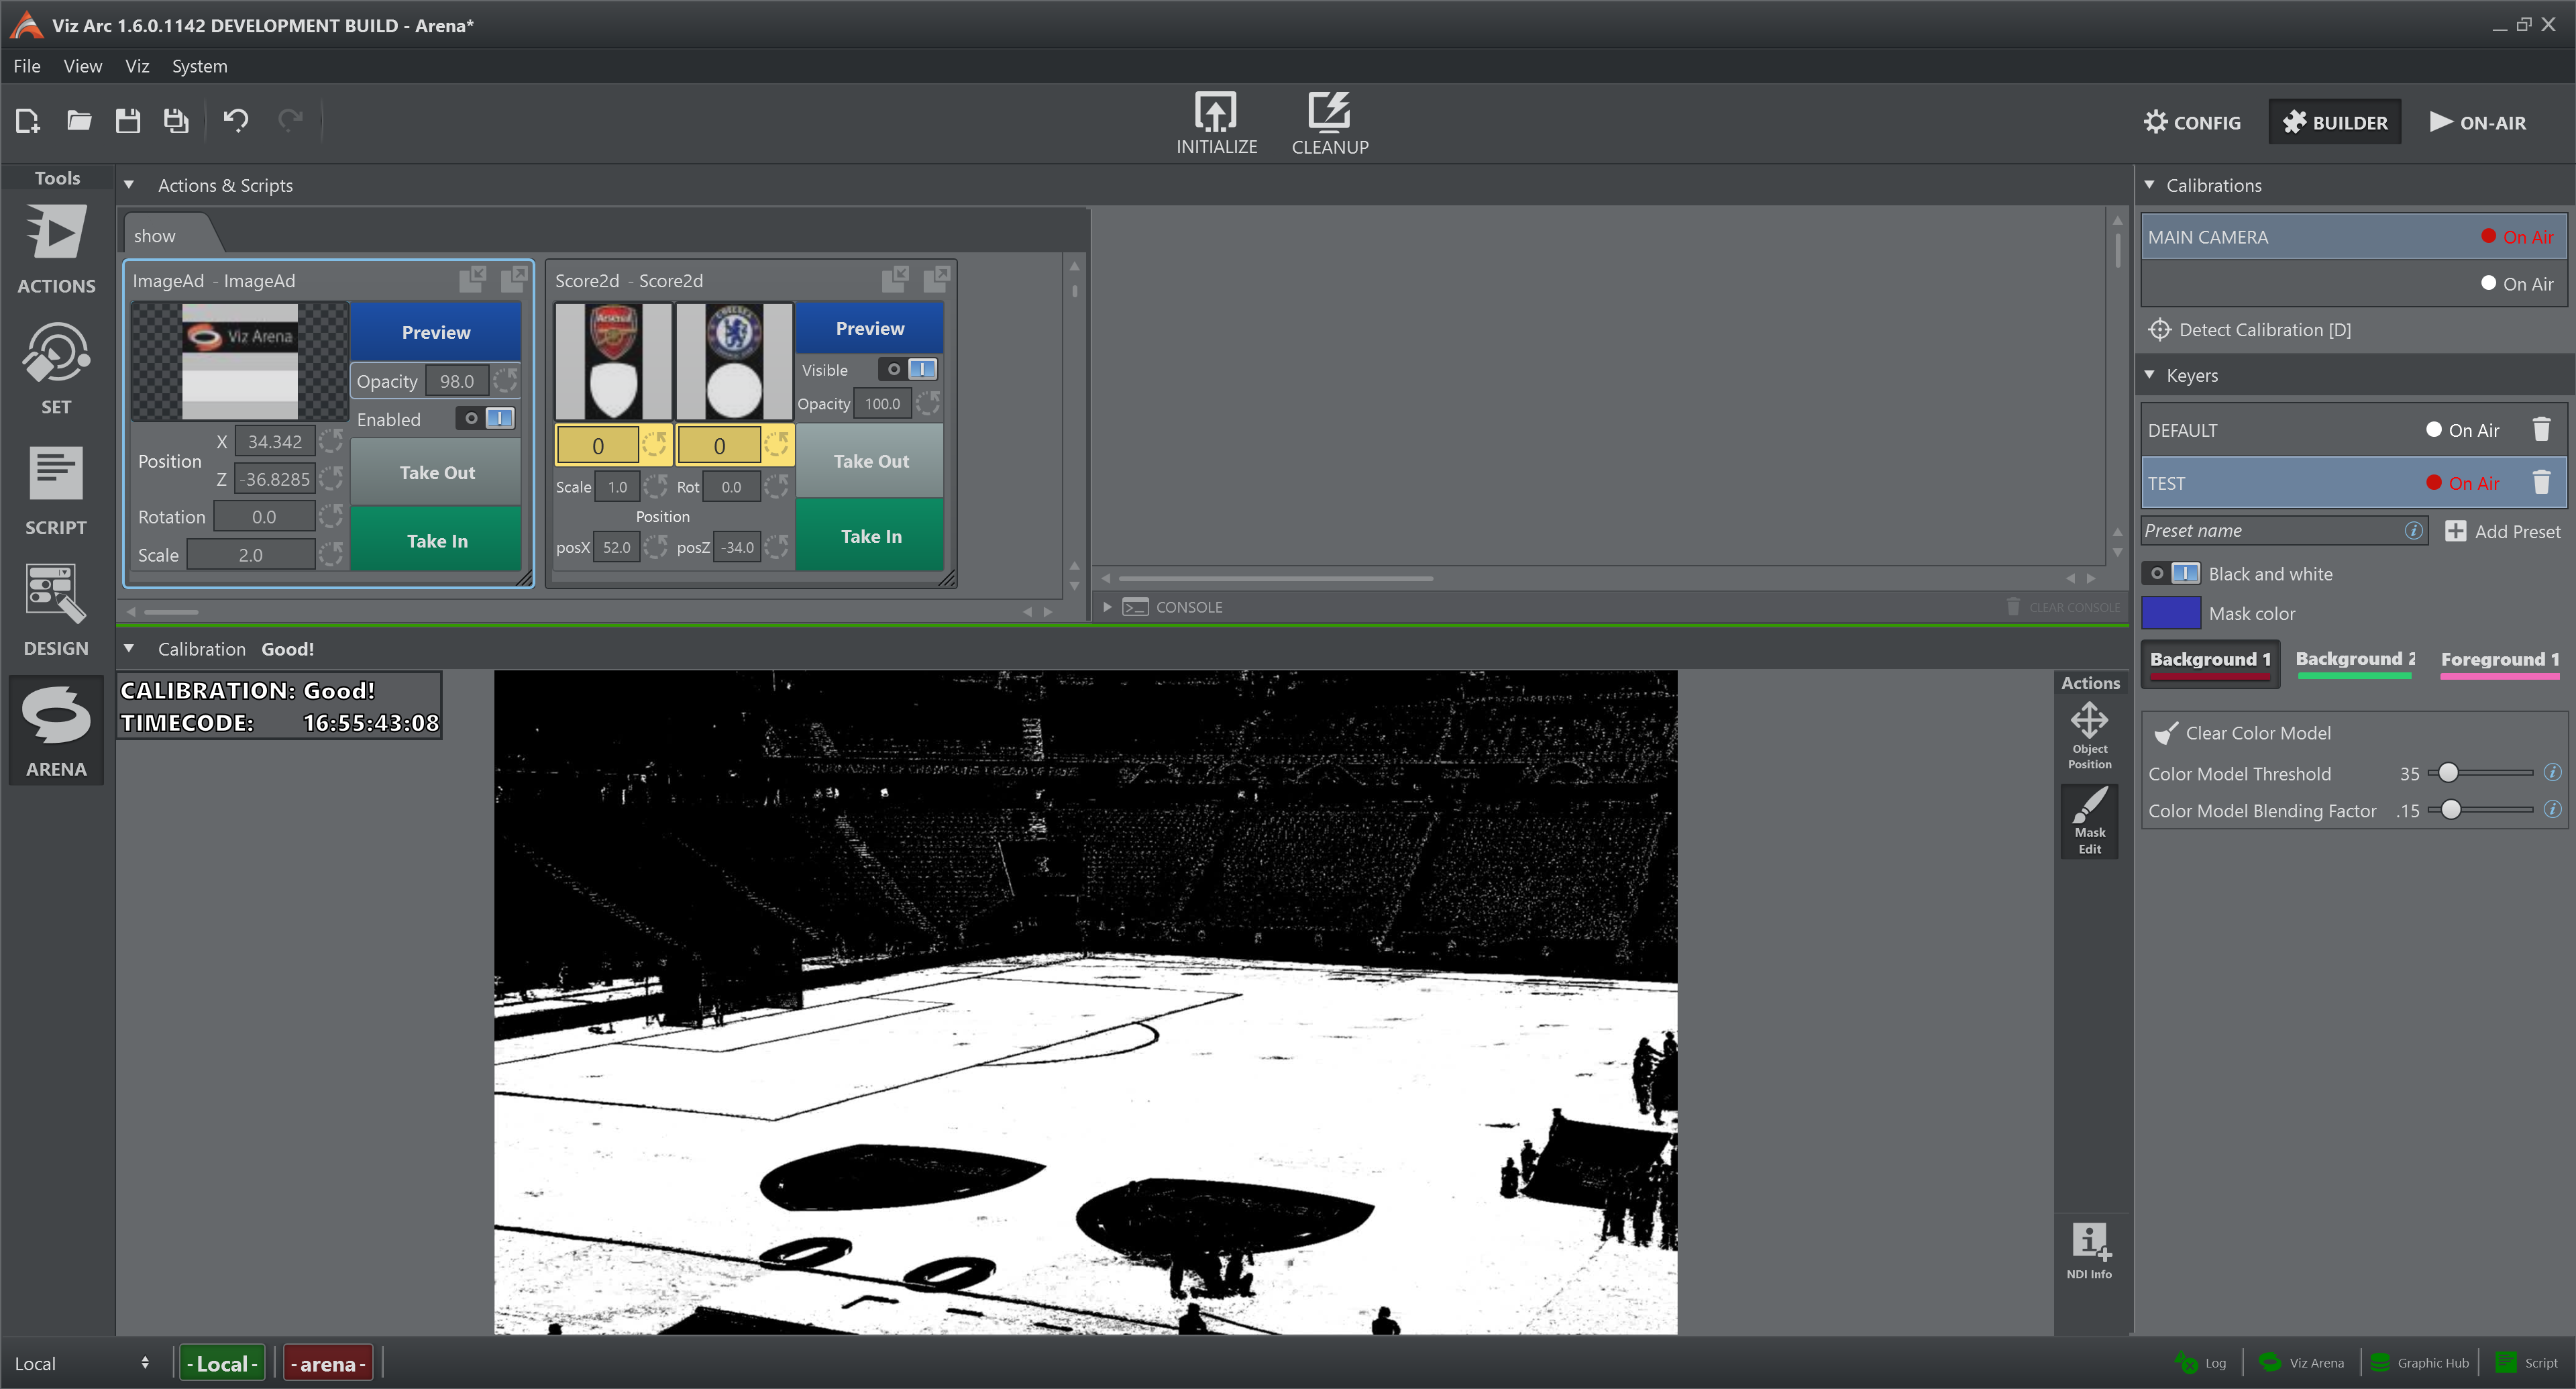
It is possible to toggle between the two modes see Settings panel > Mask > Back and White . During a live game, it is advised to regularly observe the output of the keying mask to ensure that the graphics are well rendered on Viz Engine and to provide the best possible tracking quality.
NDI Info
This button adds a new floating Info Panel to the interface.
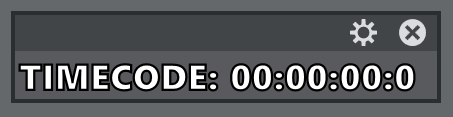
Click on the gear
 and the panel expands showing all the information that can be visualized:
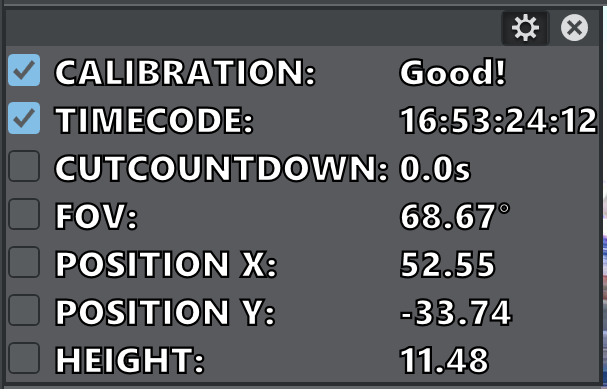
Click again on the gear to exit from configuration mode.
Click on the
 to close the panel.
Grab the header to move the panel around and place it anywhere.
There is no limit to the number of panels that can be added.
Settings Panel
Calibrations
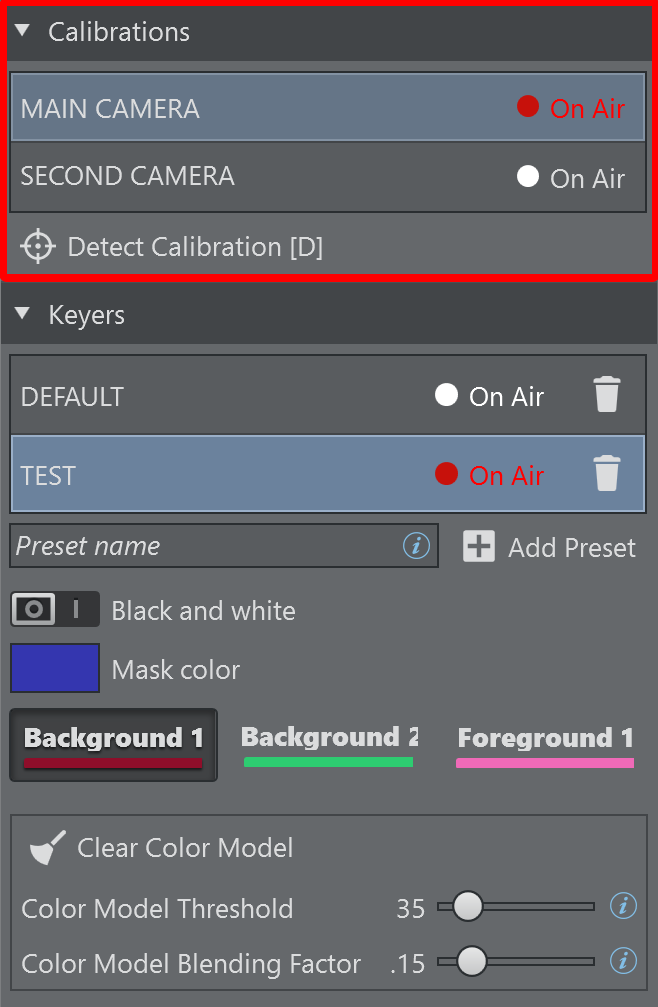
Select a Camera/Calibration for both preview and program feed by clicking on the calibration name.
Detect Calibration [D]: Detects the calibration of the current image. Click this button (or press the D button) if the tracked calibration is off from the actual field lines.
The calibration can be cleared using the keyboard shortcut BACKSPACE.
Keying Presets
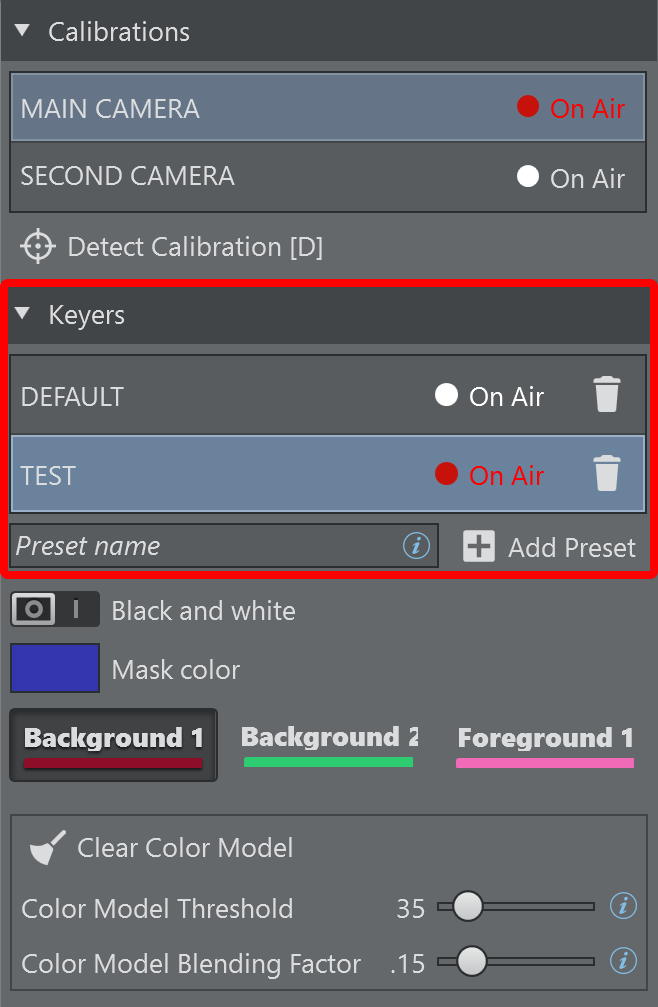
Select a preset for preview feed by clicking on the preset name.
The preset that is currently On Air is marked with a red
 label.
If the On Air preset has any local changes that have not yet been applied to the output rendering, they are marked with an orange exclamation mark
 .
.Press
 to update the output rendering.
Press
 to remove the selected preset from the list. If it is the preset On Air, the button does nothing.
Press
 to add a new empty keying preset to the list. The name is the one inserted in the text box next to the button.
Mask
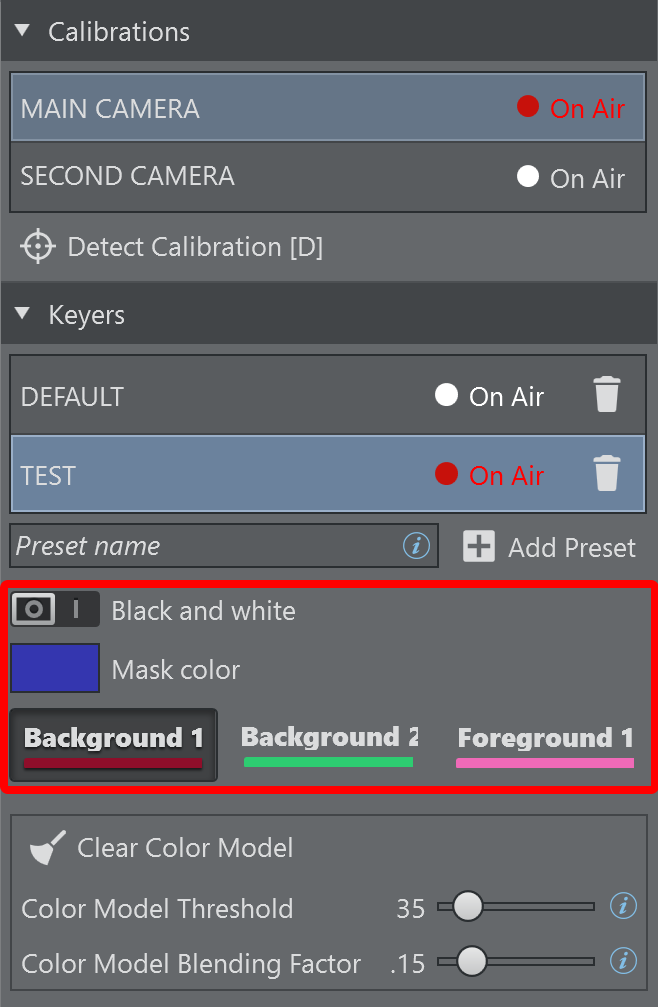
Black and White: Toggles the style of the keying mask.
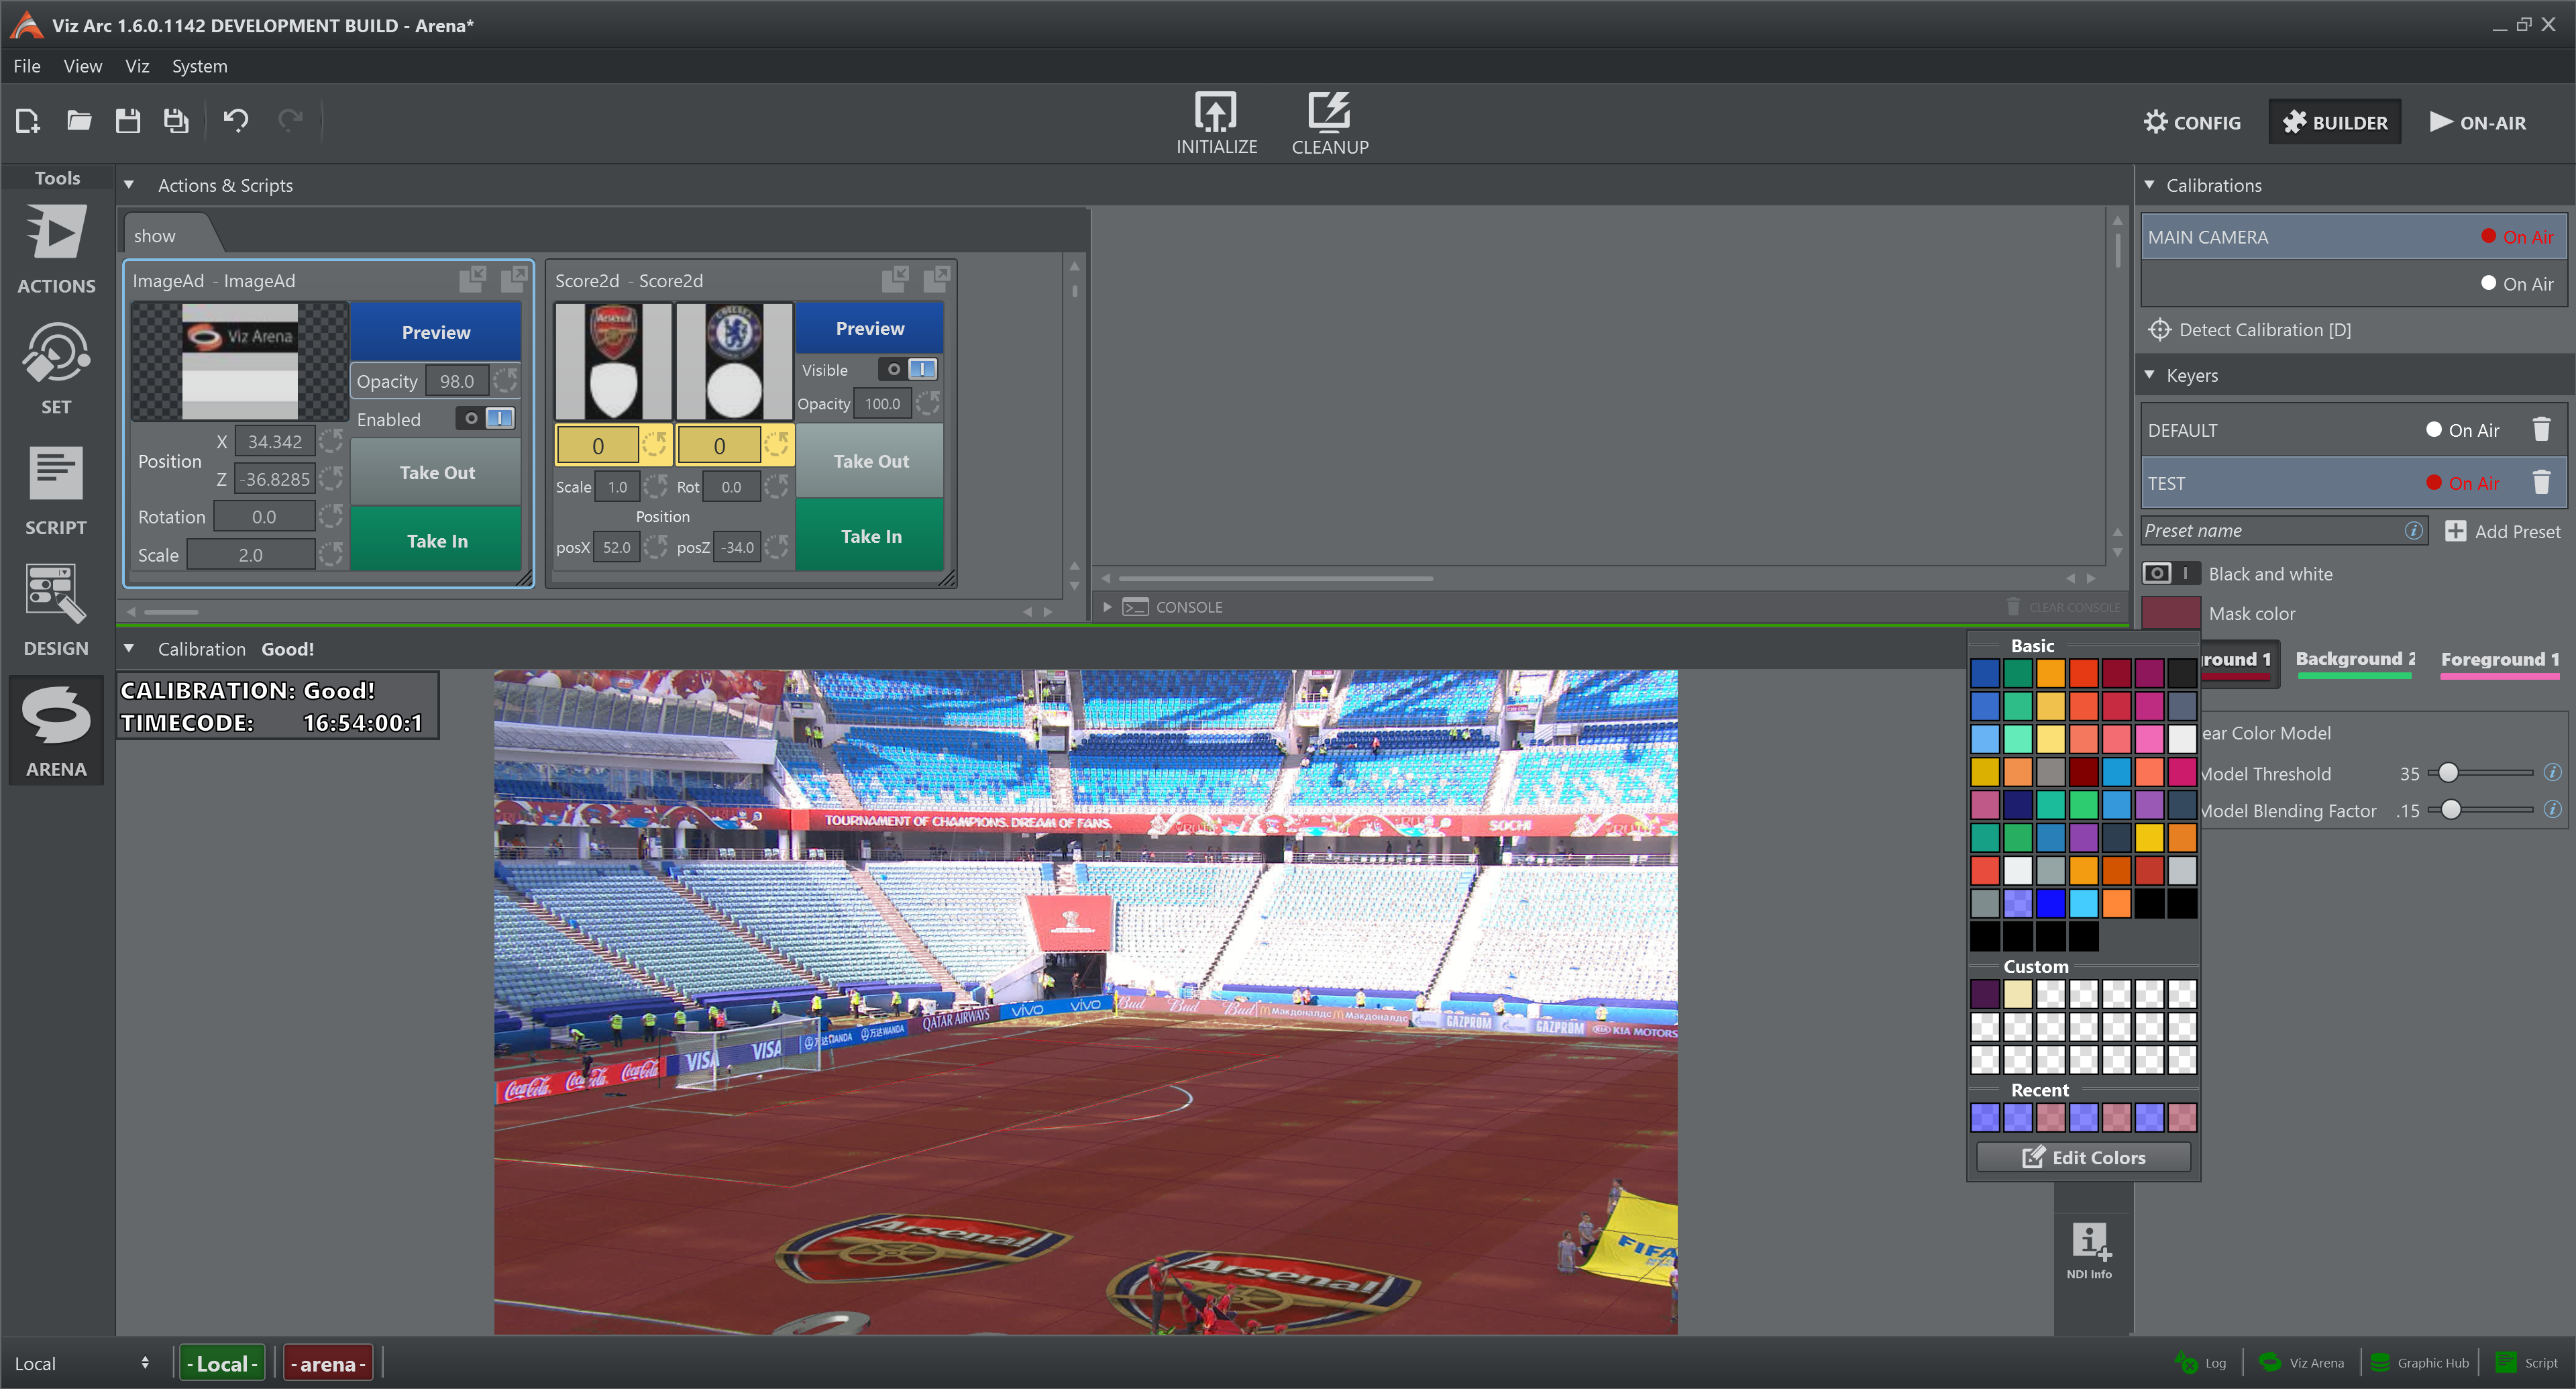
Mask Color: Selects the background keying mask color used for rendering which is most suitable for the playing field. Click on the colored rectangle and a new panel appears. Here it is possible to choose the mask color.
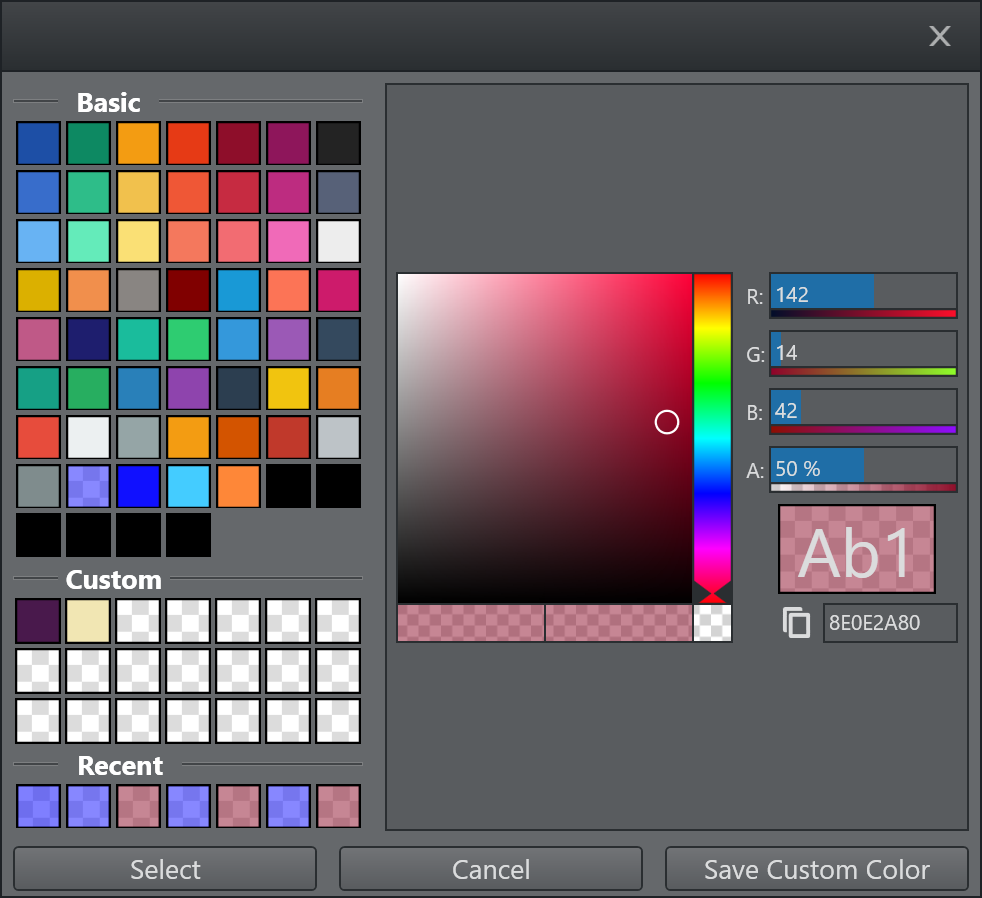
Background 1: Interacts with the background color model of the preset. Right click on the button and the color panel shows (see above), this changes the color of the stroke.
Background 2: Interacts with the background logo color model of the preset. Right click on the button and the color panel shows (see above), this changes the color of the stroke.
Foreground 1: Interacts with the foreground color model of the preset. Right click on the button and the color panel shows (see above), this changes the color of the stroke.
Controls
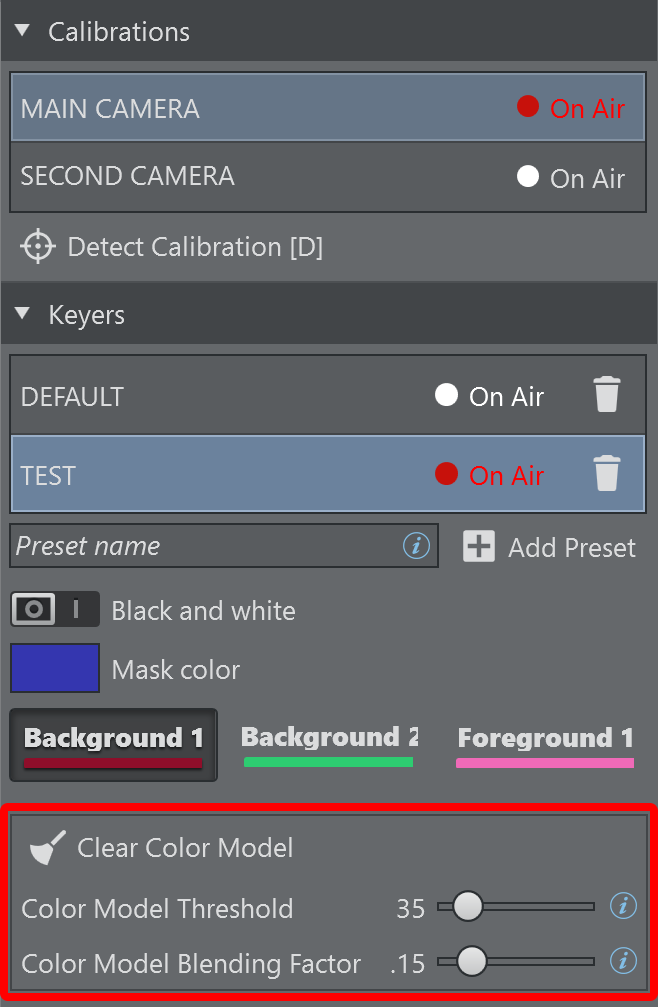
For a better understanding of each control please refer to the Viz Arena User Guide.
Going over
 with the mouse provides a brief description of the relative control.
Clear Color Model [C]: Clears the stored keying information about the current preset and starts updating the color model from scratch. Alternatively, use the shortcut C on the keyboard.
Startup
Using the command line parameter --a or --arena, it is possible to start Viz Arc directly with the Viz Arena tool visible.
Scripting Integration: Picking Positions on the Field
The Arena output view is not only a monitor, it can drive your scripts. Whenever a position is picked on the field with the Object Position action, Viz Arc converts the click into calibrated world coordinates and fires the OnArenaPosition callback, both in the main script and in template scripts:
Global.OnArenaPosition = function (screenX, screenY, worldX, worldY, worldZ) { // screenX / screenY: click position in the output view // worldX / worldY / worldZ: position on the calibrated field};This effectively turns the calibrated camera image into an input device: The operator clicks directly on the pitch, and the script decides what to do with the position.
As an example, an American Football down and distance template can place its lines by clicking on the field. A radio parameter (pickMode) selects which line a click should set (the line of scrimmage, the first down line or the field goal line) and the template pushes the new position to the Engine immediately:
// 'pickMode' is a radio parameter with the options LOS, FDL and FGGlobal.OnArenaPosition = function (screenX, screenY, worldX, worldY, worldZ) { var yard = Math.max(0, Math.min(100, Math.round(worldX - getPitchOffset()))); switch (GetParameterValue('pickMode').toString().trim()) { case 'FDL': SetParameterValue('fdlYard', yard); break; // first down line case 'FG': SetParameterValue('fgYard', yard); break; // field goal line default: SetParameterValue('losYard', yard); break; // line of scrimmage } updateGraphics(); // send the new positions to the Viz Engine};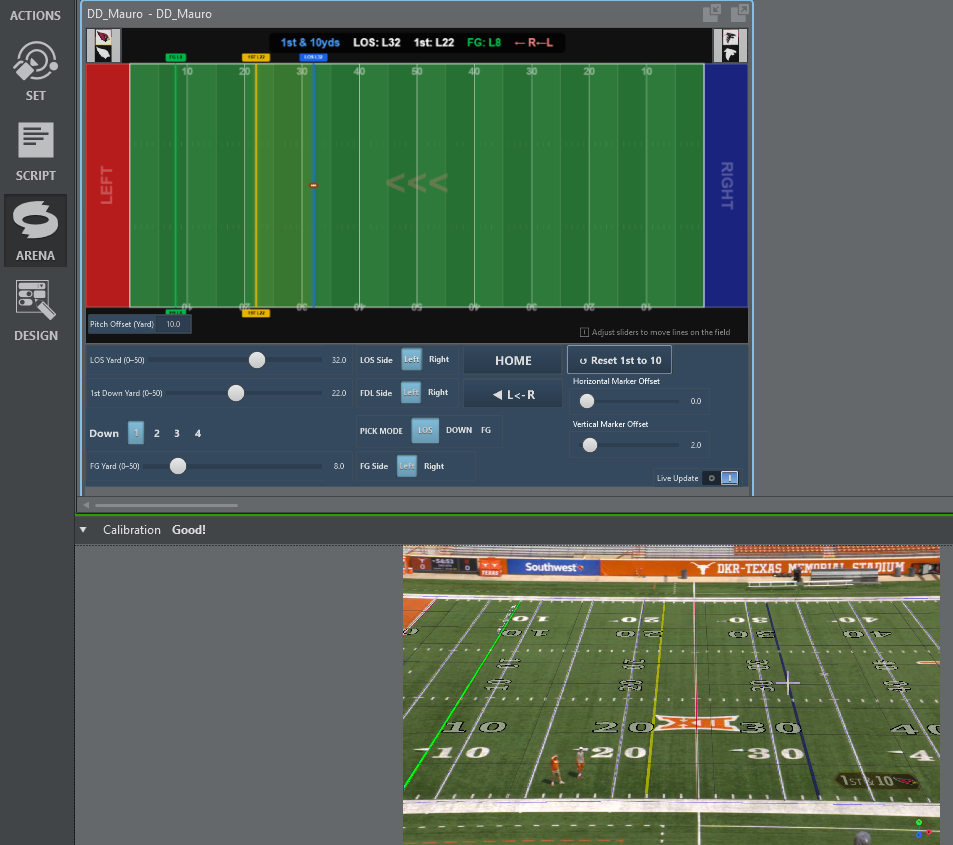
Combined with the other script callbacks, the same template can offer several ways to move a line (picking on the field, dragging it in an embedded web view, or turning a Stream Deck dial) whatever is fastest for the operator On Air.
Note: The world position is computed from the current calibration. Picking works while a valid calibration is active (the calibration bar at the top of the output view is green).
Viz Arena can also be controlled from scripts: GetArenaCameraList, SetArenaCamera, GetCurrentArenaCamera, DetectArenaCalibration, ClearArenaCalibration, ClearArenaKeyer, GetCurrentArenaTimeCode and IsArenaConnected allow automating camera, calibration and keying workflows (for example, switching the calibration together with a camera cut). See the Viz Arena section of Scripting Classes for the full reference.
Troubleshooting
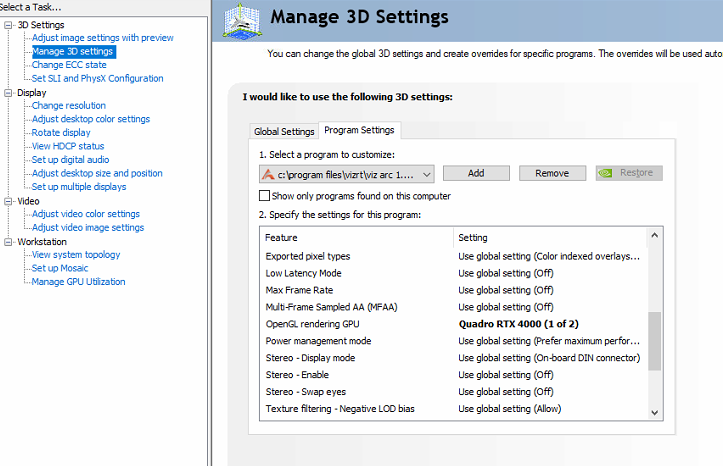
It may happen on multi-GPU machines that the output area remains black.
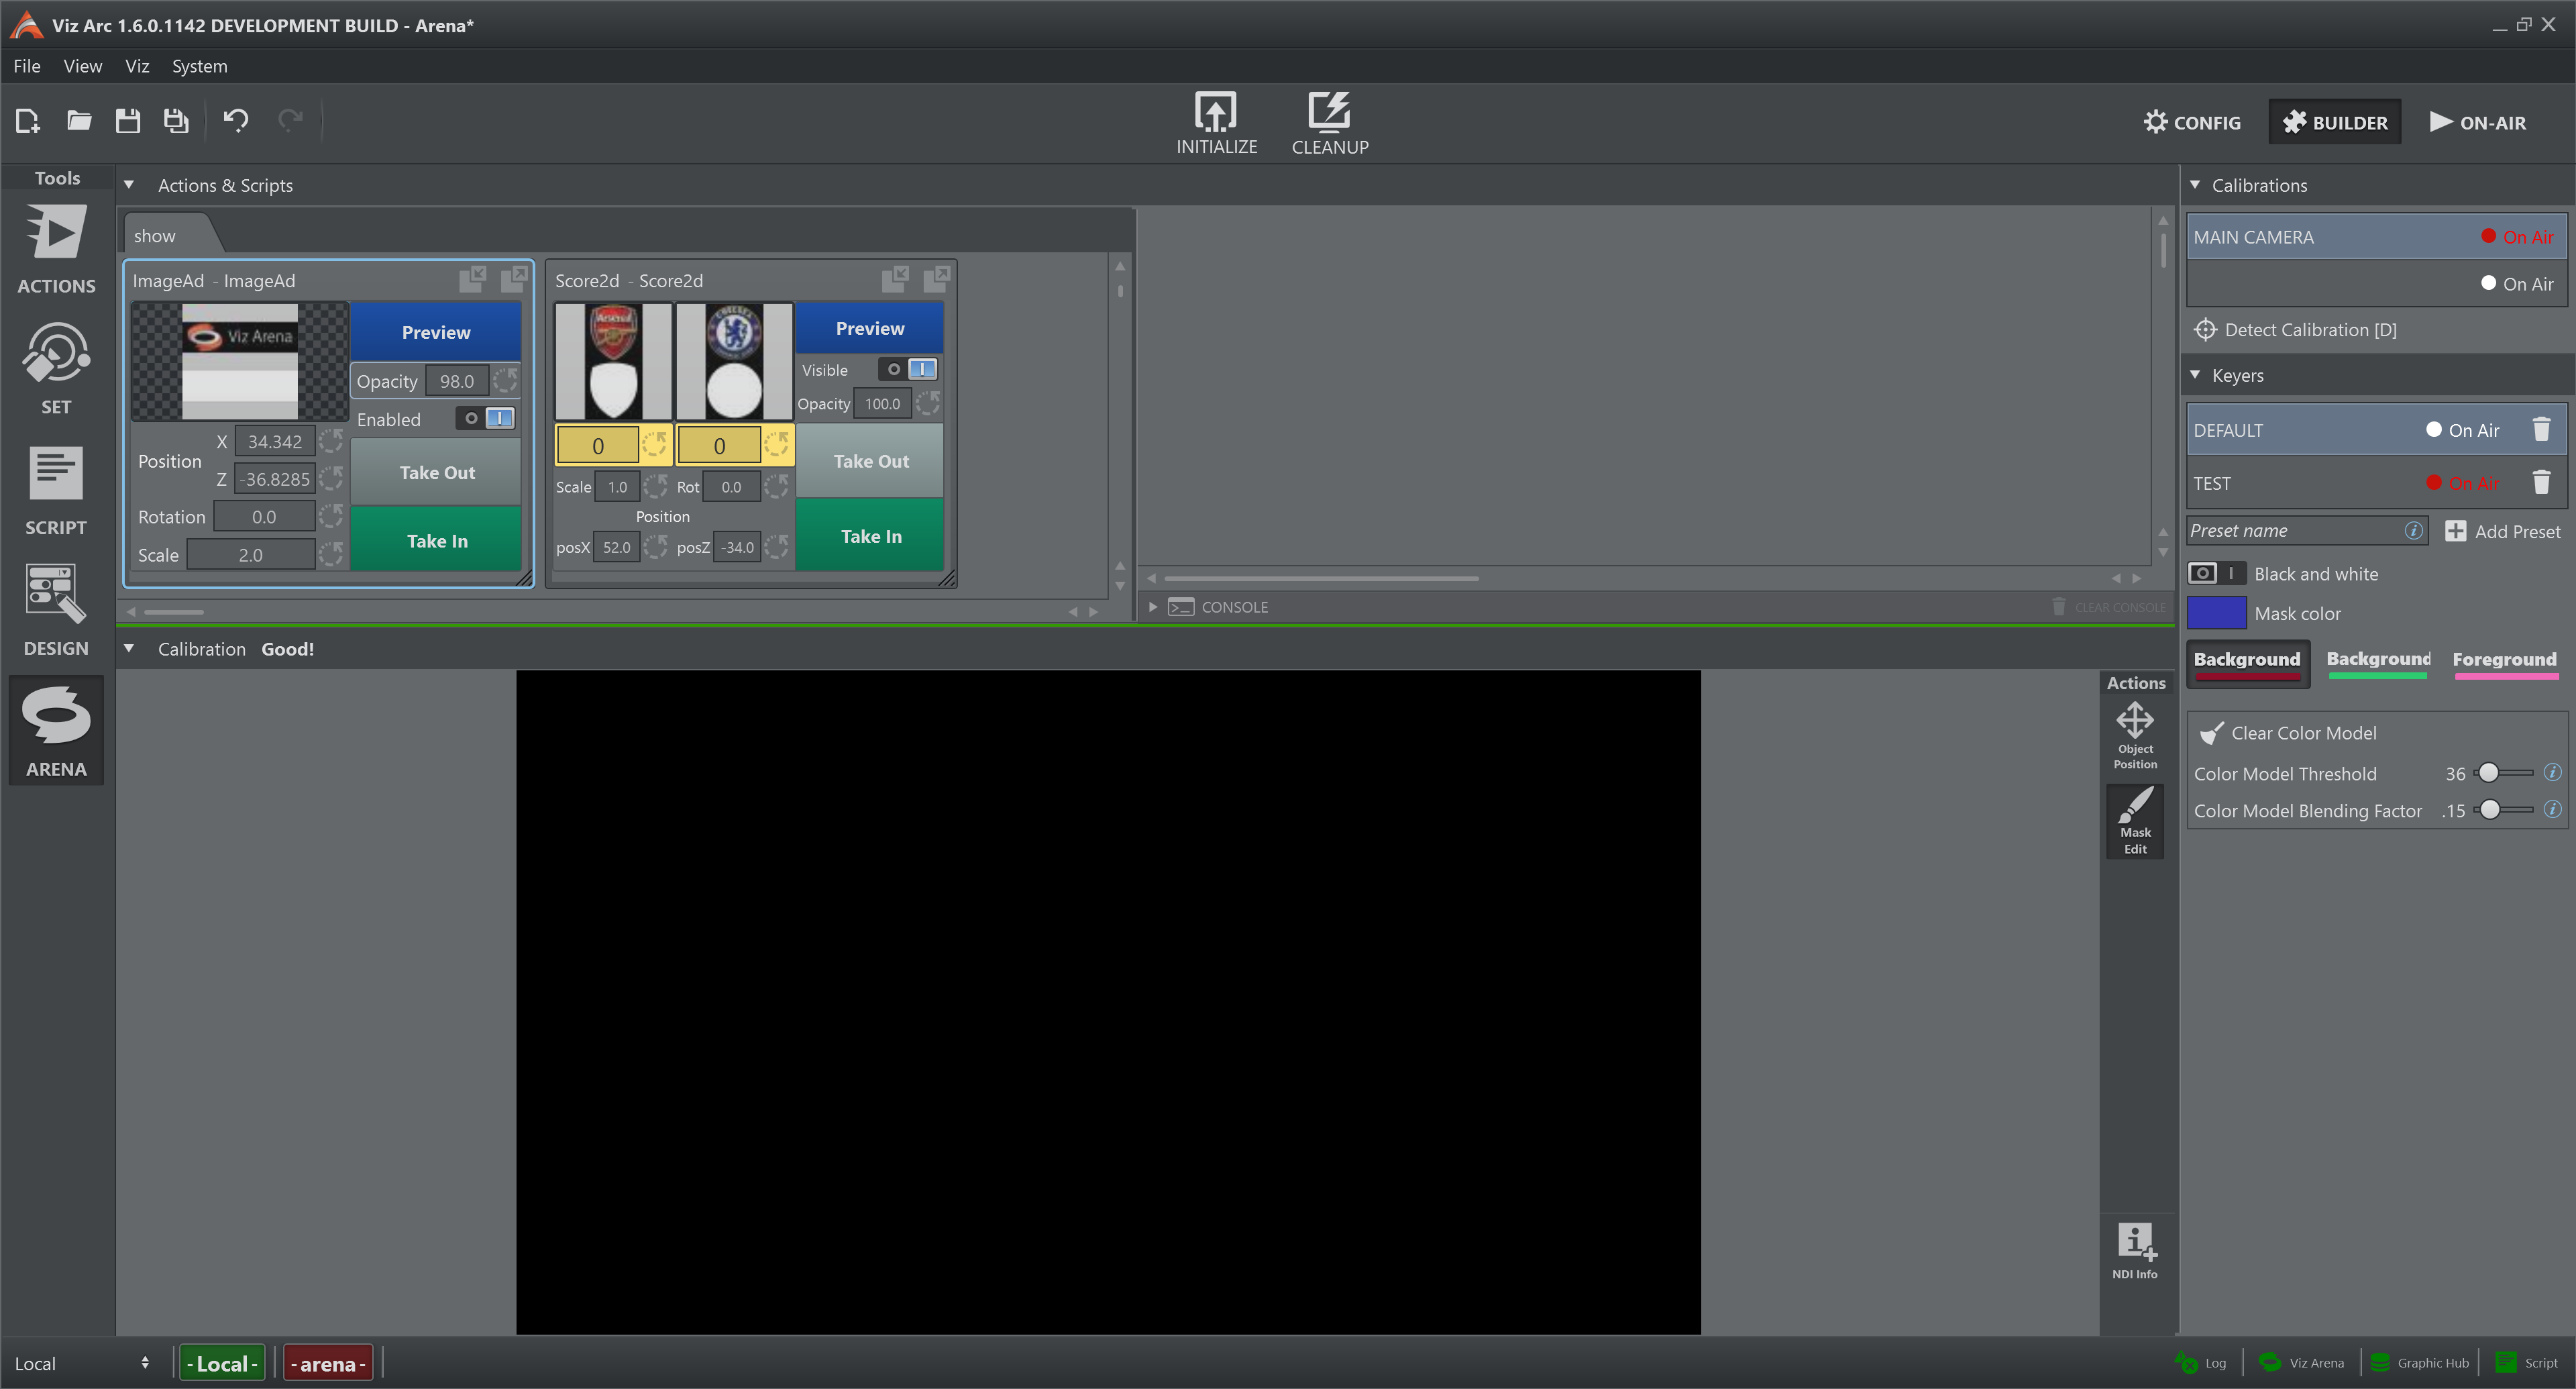
In this case, configure the OpenGL Rendering GPU for the Viz Arc executable through the NVIDIA control panel.
Make sure to select the GPU that is connected to the connected Monitor. It might be assigned by default to the most powerful GPU in the system.